The neighborhood block party was in less than three hours, and I’d completely forgotten about bringing dessert. Everyone else was promising these elaborate, multi-layer cakes with fancy decorations, and there I was with nothing but a half-empty bag of cocoa powder and a sad jar of cream cheese. Honestly, I thought I was doomed to show up empty-handed—or worse, with something store-bought that screamed last-minute panic.
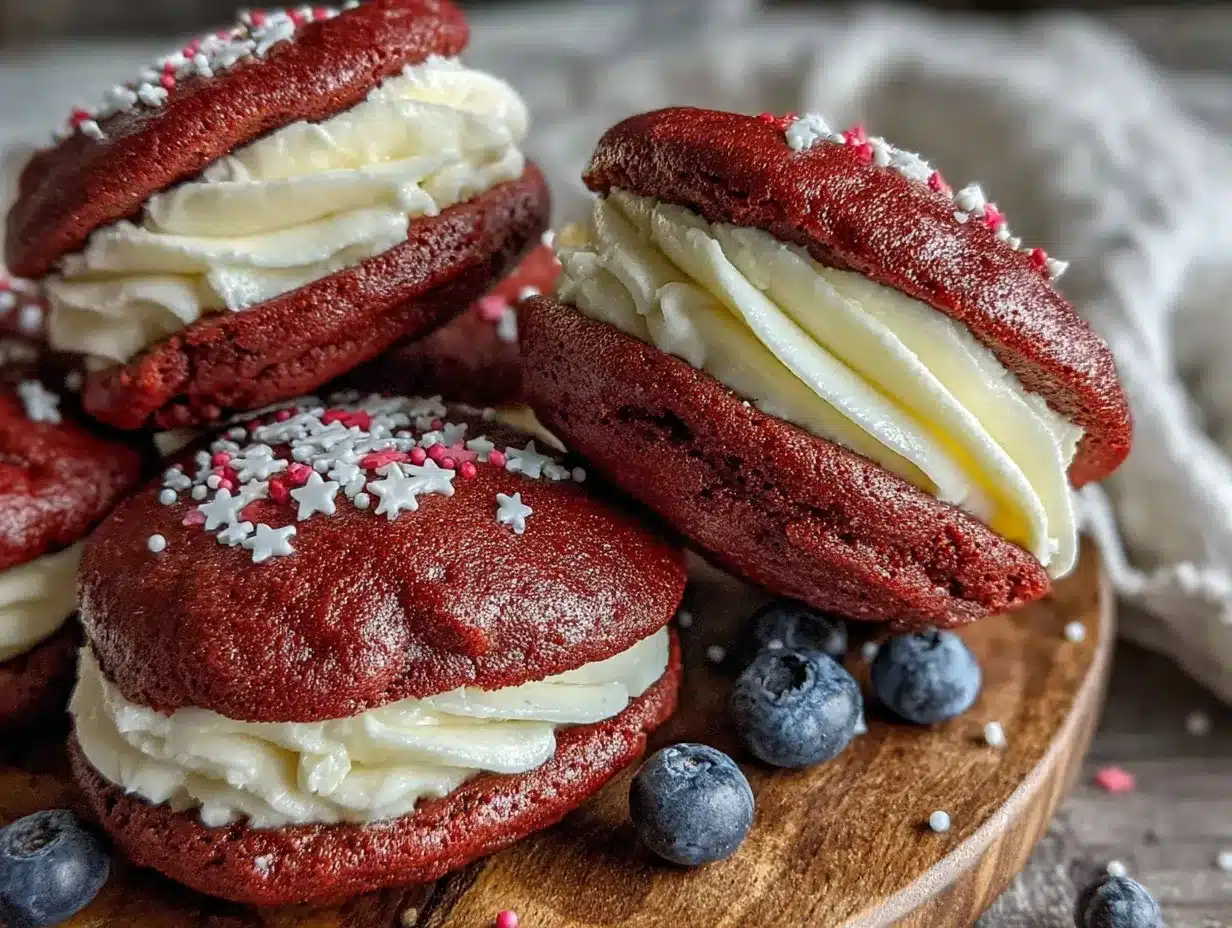
Then, amid the chaos of kids running circles and a cracked mixing bowl that slipped from my hands (because of course it did), I threw together what would become the perfect Fourth of July red velvet whoopie pies with cream cheese filling. It was kind of accidental, really. I had red food coloring, some pantry staples, and a touch of cream cheese leftover from breakfast bagels. I mean, who knew this simple combo would steal the show?
Maybe you’ve been there—scrambling at the last minute, wondering how to whip up something festive and homemade. These red velvet whoopie pies are proof you don’t need hours or fancy tools to make a memorable dessert. The rich red cake with that tangy, smooth cream cheese filling quickly became my go-to for any summer gathering. Every time I bite into one, I’m reminded of that frantic afternoon, the burst of laughter when the pies were devoured, and the relief that sometimes, the best recipes come from the wildest moments.
Why You’ll Love This Recipe
Let me tell you, these Fourth of July red velvet whoopie pies with cream cheese filling aren’t just pretty—they’re downright addictive. After testing dozens of recipes (and yes, a few “oops” batches), I landed on this one that nails the perfect balance of moist, tender cake and creamy filling. Here’s why it’s become a staple in my summer dessert lineup:
- Quick & Easy: You can mix and bake the entire batch in under an hour, perfect for last-minute celebrations or spontaneous sweet cravings.
- Simple Ingredients: No need to hunt down exotic spices or specialty items—most of what you need is probably in your pantry right now.
- Perfect for Patriotic Parties: The vibrant red velvet color screams July 4th, making these whoopie pies an instant crowd-pleaser for BBQs, picnics, or neighborhood potlucks.
- Crowd-Pleaser: Both kids and adults keep coming back for more—there’s something so comforting and nostalgic about these treats.
- Unbelievably Delicious: The cream cheese filling is smooth and tangy, balancing the rich cocoa flavor of the cakes, creating that classic red velvet magic.
What sets this recipe apart? I’ve perfected a technique that keeps the cakes soft but sturdy enough to hold the luscious filling without getting soggy. Plus, the cream cheese filling is whipped just right for a fluffy texture that spreads easily but stays put. Honestly, this isn’t just another whoopie pie recipe—it’s the best version you’ll find for your summer celebrations.
What Ingredients You Will Need
This recipe uses simple, wholesome ingredients to deliver bold flavor and satisfying texture without the fuss. Most of these are pantry staples, and if you’re missing something, I’ve got substitutions to keep you covered.
- For the Red Velvet Cakes:
- All-purpose flour (2 cups / 250g) – I recommend King Arthur for consistent texture
- Cocoa powder (2 tablespoons / 15g), unsweetened – Dutch-process works best for the classic flavor
- Baking soda (1 teaspoon) – helps with the rise
- Salt (½ teaspoon) – balances sweetness
- Unsalted butter (½ cup / 115g), softened – adds richness
- Granulated sugar (1 cup / 200g) – for sweetness and structure
- Large egg (1), room temperature – binds ingredients
- Buttermilk (¾ cup / 180ml) – tenderizes the cakes; if you don’t have buttermilk, use regular milk with 1 tablespoon vinegar or lemon juice
- Vanilla extract (1 teaspoon) – enhances flavor
- Red food coloring (2 tablespoons) – the star of the show for that festive red hue
- For the Cream Cheese Filling:
- Cream cheese (8 oz / 225g), softened – I prefer Philadelphia for smoothness
- Unsalted butter (½ cup / 115g), softened – adds creaminess and helps the filling hold shape
- Powdered sugar (2 cups / 250g) – for sweetness and smooth texture
- Vanilla extract (1 teaspoon) – flavor enhancer
Substitution tips: Use almond flour for a gluten-free version, or swap the cream cheese with dairy-free coconut cream cheese if needed. In summer, try adding fresh blueberries on top for a festive twist.
Equipment Needed
- Mixing bowls – preferably medium and large sizes for batter and filling
- Electric mixer or stand mixer – makes whipping the cream cheese filling much easier (hand mixers work fine too)
- Measuring cups and spoons – accuracy helps with consistent results
- Baking sheets – two standard 9×13-inch pans work well
- Parchment paper or silicone baking mats – prevents sticking and helps with cleanup
- Cooling racks – essential for letting cakes cool evenly and preventing sogginess
- Spoon or cookie scoop (about 2 tablespoons size) – for uniform cake rounds
If you don’t have a stand mixer, no worries; an electric hand mixer or even a sturdy whisk can get the job done, though it might take a bit more elbow grease. I’ve tested this recipe with both and the results were just fine. For budget-friendly baking, parchment paper is a must-have, especially when handling sticky batters like this one.
Preparation Method
- Preheat the oven to 350°F (175°C). Line two baking sheets with parchment paper or silicone mats. This step sets you up to bake without sticking or mess.
- Mix dry ingredients. In a medium bowl, sift together 2 cups (250g) all-purpose flour, 2 tablespoons (15g) unsweetened cocoa powder, 1 teaspoon baking soda, and ½ teaspoon salt. This ensures even distribution and a tender crumb.
- Beat butter and sugar. In a large bowl, use a mixer to cream ½ cup (115g) softened unsalted butter with 1 cup (200g) granulated sugar until light and fluffy—about 3-4 minutes. This step traps air for a soft texture.
- Add the egg. Beat in 1 large egg, room temperature, until fully incorporated. This helps bind everything together.
- Combine wet ingredients. Stir in ¾ cup (180ml) buttermilk, 1 teaspoon vanilla extract, and 2 tablespoons red food coloring. The batter will look vibrantly red and smooth.
- Fold in dry ingredients. Gradually add the flour mixture to the wet ingredients, folding gently with a spatula until just combined. Don’t overmix or the cakes might get dense.
- Portion the batter. Using a 2-tablespoon cookie scoop or spoon, drop rounded dollops about 2 inches apart on the prepared baking sheets. The batter spreads slightly but keeps shape.
- Bake for 10-12 minutes. The cakes should spring back lightly when touched and a toothpick inserted comes out clean. Watch carefully—overbaking dries them out.
- Cool completely. Transfer cakes to wire racks and let cool fully before assembling. Warm cakes will melt the filling prematurely.
- Prepare the cream cheese filling. In a clean bowl, beat 8 oz (225g) softened cream cheese with ½ cup (115g) softened unsalted butter until smooth and creamy. Gradually add 2 cups (250g) powdered sugar and 1 teaspoon vanilla extract, beating until fluffy and spreadable.
- Assemble the whoopie pies. Pair cakes of similar size. Spread or pipe about 2 tablespoons of cream cheese filling on the flat side of one cake, then sandwich with its partner. Press gently to spread filling evenly to the edges.
- Chill before serving. Refrigerate assembled pies for at least 30 minutes to let the filling set. This makes them easier to handle and enhances flavor melding.
Pro tip: If your cream cheese is too cold, the filling can be lumpy. Let it soften fully to get that perfect, smooth texture. Also, avoid overbaking the cakes—they should be tender, not dry. If you’re short on time, you can prepare the filling while the cakes bake to streamline the process.
Cooking Tips & Techniques
When making these red velvet whoopie pies, a few tricks can really make a difference in your results. First off, the cream cheese filling is best when both butter and cream cheese are softened to room temperature. I’ve learned the hard way that cold cream cheese lumps up, and no one wants that!
Another tip is to sift your cocoa powder and flour to avoid clumps, which can cause uneven texture. I used to ignore this and ended up with dense spots in the cake. Also, be gentle when folding dry ingredients into the wet. Overmixing activates gluten, which can turn these soft cakes chewy—definitely not what you want for a whoopie pie.
Timing is key. Don’t leave these cakes in the oven too long; they can dry out quickly. I usually set my timer for 10 minutes and check right at that mark. If you’re multitasking, try prepping the filling during baking to save time.
Lastly, chilling the whoopie pies before serving helps the filling firm up nicely and enhances the flavor marriage between the cake and cream cheese. You’ll find they hold together better and slice cleanly, too.
Variations & Adaptations
One of the best parts about these red velvet whoopie pies is how flexible they are. Here are a few variations I’ve tried (and loved):
- Gluten-Free Version: Swap all-purpose flour for a gluten-free blend like Bob’s Red Mill 1-to-1 baking flour. The texture stays surprisingly close to the original.
- Berry Infusion: Mix fresh raspberries into the cream cheese filling for a tangy burst. Just fold gently to avoid breaking the berries into mush.
- Vegan Adaptation: Use dairy-free cream cheese and vegan butter substitutes. Replace the egg with a flax egg (1 tablespoon ground flaxseed + 3 tablespoons water).
If you want to mix things up on cooking methods, these cakes can also be made using a whoopie pie maker or even baked as mini cupcakes. Just adjust baking time accordingly—cakes will bake faster in smaller molds.
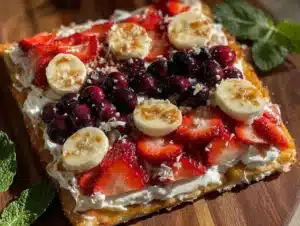
For a patriotic touch, sprinkle some edible star-shaped glitter or crushed freeze-dried strawberries on the filling before sandwiching. I once brought a batch with blueberry filling topped with white chocolate drizzle to a picnic, and it was a hit!
Serving & Storage Suggestions
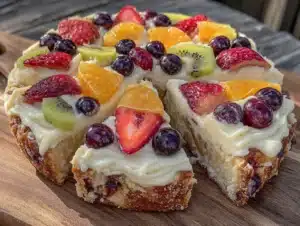
These whoopie pies are best served chilled or at room temperature, allowing the cream cheese filling to be delightfully creamy without being too firm. For a festive touch, arrange them on a platter with fresh berries or mint leaves for color contrast.
They pair beautifully with iced tea, lemonade, or a light sparkling wine if you’re celebrating with adults. For an all-American dessert table, try serving them alongside a bowl of fresh fruit salad or classic crispy garlic chicken for a savory balance.
To store, keep the whoopie pies in an airtight container in the refrigerator for up to 4 days. You can freeze them individually wrapped in plastic wrap and foil for up to 2 months. When ready to enjoy, thaw overnight in the fridge and bring to room temperature before serving.
Reheating in the microwave for about 10 seconds softens the filling if it’s too cold, but be careful not to melt it completely. Over time, the flavors meld beautifully, making these whoopie pies even more enjoyable the next day.
Nutritional Information & Benefits
Each red velvet whoopie pie with cream cheese filling contains approximately 250-300 calories, depending on the size. They provide a balance of carbs and fats, with some protein from the cream cheese and egg.
Red velvet cake’s cocoa powder offers antioxidants, while the cream cheese filling brings calcium and vitamin A. Using buttermilk adds a slight probiotic benefit and tender crumb to the cake.
This recipe can fit into most diets, but keep in mind it contains gluten, dairy, and eggs. For gluten-free or vegan options, simple substitutions keep the indulgence accessible.
From a wellness perspective, I appreciate how this recipe uses real ingredients without artificial fillers. It’s the kind of treat that feels like a special occasion indulgence, not a guilt trip.
Conclusion
If you’re looking for a festive, crowd-pleasing dessert that you can whip up without hours of prep, these red velvet whoopie pies with cream cheese filling are your answer. The rich color, soft cake, and tangy filling make them a standout at any Fourth of July celebration—or really, any time you want a sweet treat with a bit of flair.
Feel free to tweak the filling or try the variations I mentioned to make them your own. Honestly, I keep coming back to this recipe because it’s reliable, delicious, and brings a bit of joy (and last-minute rescue magic) to every party.
If you try making these, I’d love to hear how they turned out or what fun twists you added. Drop a comment below or share your photos—let’s celebrate summer with these perfect little whoopie pies together!
FAQs
Can I make these whoopie pies ahead of time?
Yes! You can bake the cakes and prepare the filling a day in advance. Assemble the pies and refrigerate them until serving for the best texture and flavor.
What if I don’t have buttermilk?
No problem! Use regular milk with 1 tablespoon of lemon juice or vinegar added. Let it sit for 5 minutes before using to mimic buttermilk’s acidity.
How do I prevent the cream cheese filling from being too runny?
Make sure the cream cheese and butter are softened but not melted. Whip the filling well, and refrigerate assembled pies for at least 30 minutes before serving to let it firm up.
Can I color the filling to make it more festive?
Absolutely! Add a few drops of gel food coloring to the cream cheese filling and whip until evenly colored. Just be careful not to add too much liquid coloring.
Are these whoopie pies freezer-friendly?
Yes. Wrap each whoopie pie tightly in plastic wrap and foil, then freeze for up to 2 months. Thaw overnight in the fridge before serving.
Pin This Recipe!

Perfect Fourth of July Red Velvet Whoopie Pies Easy Homemade Recipe

These red velvet whoopie pies feature moist, tender red velvet cakes with a smooth, tangy cream cheese filling, perfect for Fourth of July celebrations or any summer gathering.
- Prep Time: 15 minutes
- Cook Time: 12 minutes
- Total Time: 45 minutes
- Yield: 12 servings 1x
- Category: Dessert
- Cuisine: American
Ingredients
- 2 cups (250g) all-purpose flour
- 2 tablespoons (15g) unsweetened cocoa powder (Dutch-process preferred)
- 1 teaspoon baking soda
- ½ teaspoon salt
- ½ cup (115g) unsalted butter, softened
- 1 cup (200g) granulated sugar
- 1 large egg, room temperature
- ¾ cup (180ml) buttermilk (or regular milk with 1 tablespoon vinegar or lemon juice)
- 1 teaspoon vanilla extract
- 2 tablespoons red food coloring
- 8 oz (225g) cream cheese, softened
- ½ cup (115g) unsalted butter, softened (for filling)
- 2 cups (250g) powdered sugar
- 1 teaspoon vanilla extract (for filling)
Instructions
- Preheat the oven to 350°F (175°C). Line two baking sheets with parchment paper or silicone mats.
- In a medium bowl, sift together the flour, cocoa powder, baking soda, and salt.
- In a large bowl, cream the softened butter and granulated sugar with a mixer until light and fluffy, about 3-4 minutes.
- Beat in the egg until fully incorporated.
- Stir in the buttermilk, vanilla extract, and red food coloring until smooth.
- Gradually fold the dry ingredients into the wet ingredients with a spatula until just combined. Do not overmix.
- Using a 2-tablespoon cookie scoop or spoon, drop rounded dollops about 2 inches apart on the prepared baking sheets.
- Bake for 10-12 minutes until cakes spring back lightly when touched and a toothpick inserted comes out clean.
- Cool the cakes completely on wire racks before assembling.
- For the filling, beat the softened cream cheese and butter until smooth and creamy.
- Gradually add powdered sugar and vanilla extract, beating until fluffy and spreadable.
- Pair cakes of similar size and spread or pipe about 2 tablespoons of cream cheese filling on the flat side of one cake, then sandwich with its partner.
- Press gently to spread filling evenly to the edges.
- Refrigerate assembled pies for at least 30 minutes before serving to let the filling set.
Notes
Use softened cream cheese and butter for a smooth filling. Avoid overmixing the batter to keep cakes tender. Chill assembled pies for at least 30 minutes before serving to firm up the filling. Substitute almond flour for gluten-free or dairy-free cream cheese for vegan adaptations. You can prepare filling while cakes bake to save time.
Nutrition
- Serving Size: 1 whoopie pie
- Calories: 275
- Sugar: 22
- Sodium: 210
- Fat: 15
- Saturated Fat: 9
- Carbohydrates: 32
- Fiber: 1
- Protein: 4
Keywords: red velvet, whoopie pies, cream cheese filling, Fourth of July, easy dessert, summer dessert, patriotic dessert