“You’ll want to see how this turns out,” my coworker Lisa said, watching me fumble with a lumpy ball of cake crumbs and frosting. She didn’t say much more at first, just handed me a stick and a bag of candy eyeballs with a knowing smile. That was last October, right before our office Halloween party. I was trying to come up with something festive but easy—honestly, it was a mess in the kitchen, crumbs everywhere, and I forgot to buy sticks until the last minute. Lisa just laughed and showed me how to shape the cake pops, decorate them with wild colors, and add those goofy monster eyes that made everyone stop in their tracks.
What stuck with me wasn’t just the fun of making these monster eye cake pops but the way this little recipe brought the whole team together. Everyone wanted to try making their own, and the kids at the party couldn’t get enough of these quirky treats. Maybe you’ve been there, trying to find that perfect Halloween dessert that’s both spooky and simple. These cake pops have since become my go-to, mixing that playful vibe with a no-fuss method. I mean, they’re not just cute—they’re surprisingly addictive, and that’s why I keep coming back to this recipe every fall, tweaking it just a little to make it my own.
Why You’ll Love This Recipe
Honestly, after testing dozens of Halloween treats, these Perfect Monster Eye Cake Pops stand out for a bunch of reasons. I’ve made them in my own kitchen, at neighborhood potlucks, and even for last-minute school parties—they always get rave reviews. Here’s why I think you’ll love making and eating them:
- Quick & Easy: These come together in about 30 minutes, perfect for busy evenings when you don’t want to fuss.
- Simple Ingredients: No need to hunt down strange items; you probably have most of what you need right in your pantry or fridge.
- Perfect for Halloween Parties: Their playful monster eyes bring the spooky fun without the mess of complicated decorating.
- Crowd-Pleaser: Kids, adults—everyone loves biting into these moist, flavorful cake balls covered in colorful candy coating.
- Unbelievably Delicious: The moist cake base combined with creamy frosting and sweet coating is comfort food with a Halloween twist.
This recipe isn’t just another cake pop. The secret is in using a crumbly cake base mixed with just enough frosting to hold together, and the candy eyes add that whimsical touch that makes each pop feel like a tiny monster party. Plus, I swap in different colors and candy melts depending on what’s on hand, keeping it fun and flexible. Honestly, it’s the kind of recipe that makes you close your eyes and smile after the first bite—comfort food with personality, if you ask me.
What Ingredients You Will Need
This recipe uses simple, wholesome ingredients to deliver bold flavor and satisfying texture without the fuss. Most are pantry staples, but a few special touches give these monster eye cake pops their charm.
- Cake Base:
- Chocolate cake mix (or any boxed flavor you prefer) – for a moist, rich base
- Eggs – usually 2 large, room temperature
- Vegetable oil – about 1/3 cup for moisture
- Water – 1 cup to keep the cake tender
- Frosting:
- Vanilla frosting (store-bought or homemade) – about 1 cup, to bind the cake crumbs
- Coating & Decoration:
- Candy melts in vibrant colors (green, purple, orange) – about 12 ounces; Wilton brand works great for smooth melting
- Candy eyeballs – small and large sizes for variety; you can find these at craft or baking stores
- Sprinkles or edible glitter (optional) – adds extra monster flair
- Wax paper or parchment – for drying cake pops
Seasonally, I like swapping in orange or green candy melts to match Halloween themes, or even sprinkle crushed candy corn for extra crunch. If you want a gluten-free version, a boxed gluten-free cake mix works perfectly here. For a dairy-free twist, use coconut-based frosting and dairy-free candy melts—I’ve done it with great results. Picking firm, fresh candy eyes is key; avoid those that look dried out or cracked for the best effect.
Equipment Needed
- Mixing bowls – at least two, for cake batter and frosting mixing
- Baking pan – 9×13 inch works well for the cake mix
- Electric mixer or hand whisk – for mixing batter and frosting smoothly
- Baking sheet – lined with parchment or wax paper for cooling cake pops
- Microwave-safe bowl or double boiler – to melt candy melts evenly
- Cake pop sticks – about 20 to 24, available at baking supply stores or online
- Cooling rack (optional) – handy for letting pops dry without sticking
If you don’t have cake pop sticks, small wooden skewers or even sturdy lollipop sticks can work as a substitute. I once used bamboo skewers in a pinch, just trimmed the sharp ends carefully. For melting candy, a microwave is fastest, but a double boiler offers more control if you’re worried about overheating. Cleaning candy melt bowls can be sticky business; soaking immediately after use helps a lot. Budget-friendly tip: You can often find cake pop supplies at dollar stores during Halloween season.
Preparation Method

- Bake the Cake: Preheat your oven to 350°F (175°C). Prepare the cake batter according to the box instructions—usually combining cake mix, eggs, oil, and water. Pour into a greased 9×13 inch pan and bake for 30-35 minutes, or until a toothpick comes out clean. Let it cool completely on a wire rack (about 1 hour). This step is crucial; warm cake will make crumb mixing messy.
- Make the Cake Crumbs: Once cooled, crumble the cake into a large bowl using your hands or a fork. The crumbs should be fine but not powdery. If you see large chunks, break them down a bit more for smoother pops.
- Add Frosting: Add about 1 cup of vanilla frosting to the cake crumbs. Mix gently but thoroughly until the mixture holds together when pressed. Be careful not to add too much frosting, or the pops will be overly sweet and soft. If it’s too dry, add a tablespoon at a time; if too wet, a few more crumbs can balance it.
- Shape the Cake Pops: Roll the mixture into 1-inch (2.5 cm) balls using your hands. Place them on a parchment-lined baking sheet. This usually makes about 20-24 pops. Refrigerate for at least 30 minutes to firm up, which helps them stay on the sticks later.
- Melt Candy Coating: While the cake pops chill, melt your candy melts in a microwave-safe bowl. Heat in 30-second bursts, stirring between, until smooth. Avoid overheating to prevent clumps or graininess.
- Insert Sticks and Coat: Dip one end of a cake pop stick into the melted candy, then insert it about halfway into a cake ball (this acts like glue). Return pops to the fridge for 10 minutes to set. Then, hold each pop by the stick and dip completely into the melted candy, letting excess drip off. Gently tap or spin the stick to smooth the coating.
- Add Monster Eyes and Decorations: While the coating is still wet, press candy eyeballs onto the pop. Add sprinkles or edible glitter if desired. Place cake pops upright in a styrofoam block or on parchment paper to dry completely (about 30 minutes).
- Serve or Store: Once dry, your monster eye cake pops are ready to spook up any Halloween party! Keep them refrigerated if not serving immediately, wrapped loosely to prevent moisture buildup.
Pro tip: If a pop falls off the stick while dipping, just roll it again and chill before retrying. The texture of the cake-frosting mix is key to success—too crumbly or too gooey will cause falling or cracking. The first time I made these, I had a few casualties before I nailed the balance. Trust me, it’s worth the practice!
Cooking Tips & Techniques
Making Perfect Monster Eye Cake Pops is mostly straightforward, but a few tricks can keep you from frustration. First off, chilling the cake pops before and after inserting sticks is a game changer. It helps everything hold together when you dip them in candy coating. I learned that the hard way when my first batch looked like tiny monsters doing the backstroke in melted candy.
When melting your candy melts, patience is key. Use short bursts in the microwave and stir often to avoid overheating or burning. If your candy thickens too much, a drop of vegetable oil can smooth it out. Avoid stirring too aggressively, or you risk clumping.
One common mistake is adding too much frosting to the cake crumbs, which causes the pops to be too soft and fall apart. Start with less, then add more only if needed. Also, rolling the cake balls tightly makes a big difference in sturdiness and bite.
If you want your monster eyes to stay perfectly centered, press them gently but firmly into wet coating, then hold the pop still for a few seconds before setting it down. For multitasking, prepare the cake base and frosting mixture one day, then assemble and decorate the next to spread out the effort.
Trust me, once you get the rhythm of shaping, chilling, dipping, and decorating, these cake pops come together quickly and look amazing every time.
Variations & Adaptations
- Dietary Variations: Use gluten-free cake mix and dairy-free frosting for allergy-friendly monster eyes. Coconut or almond-based candy melts work well as substitutes.
- Flavor Twists: Swap vanilla frosting for cream cheese frosting for a tangy bite. Try red velvet or pumpkin spice cake mixes for seasonal flair.
- Decorating Variations: Instead of candy eyes, use mini chocolate chips or colored icing to create different monster expressions. Add edible googly eyes for extra fun.
- Cooking Method Adjustments: You can freeze the shaped cake balls before dipping to speed up the chilling process—just thaw slightly before dipping to avoid cracking.
- Personal Variation: One year, I mixed crushed Oreos into the cake crumbs for a cookies-and-cream monster eye cake pop that was a hit at a neighborhood Halloween bash. It’s all about playful creativity!
Serving & Storage Suggestions
Serve these monster eye cake pops chilled or at room temperature for the best texture. Present them standing upright in a decorated styrofoam block or inside a festive container lined with tissue paper for a spooky display. They pair nicely with creamy hot chocolate or a bright fruit punch to balance the sweetness.
Store leftover cake pops in an airtight container in the refrigerator for up to 5 days. Avoid stacking them to keep decorations intact. For longer storage, freeze pops individually wrapped in plastic wrap for up to 2 months. To enjoy, thaw in the fridge for a few hours, then bring to room temperature before serving.
The flavor of these cake pops actually improves a little after a day as the frosting and cake meld together—though honestly, that first fresh batch is hard to beat!
Nutritional Information & Benefits
Each monster eye cake pop contains approximately 150-180 calories, depending on the cake mix and frosting used. Key ingredients like eggs and milk provide protein and essential nutrients, while the candy coating adds sweetness and visual fun.
This treat is best enjoyed in moderation, especially for kids at parties. Using homemade frosting with less sugar or opting for natural candy melts can reduce sugar content slightly. For those watching gluten or dairy, easy substitutions make this recipe accessible without compromising the festive spirit.
Personally, I see these cake pops as a special seasonal treat—something to enjoy with friends and family while appreciating the fun of Halloween rather than focusing on strict nutrition.
Conclusion
The Perfect Monster Eye Cake Pops recipe is a little slice of Halloween magic that’s approachable, fun, and downright tasty. Whether you’re throwing a big party or just want a simple spooky treat at home, these cake pops hit the sweet spot between playful decoration and delicious comfort food. I love how this recipe lets me embrace creativity without stress, and I encourage you to make it your own with colors and flavors that suit your style.
Give these monster eye cake pops a shot this season—you might find yourself making them year after year, just like I do. Please share your own twists or stories in the comments; I’d love to hear how these little monsters come to life in your kitchen. Happy haunting and happy baking!
FAQs
- Can I make these cake pops ahead of time? Yes! You can prepare the cake balls a day or two in advance and store them in the fridge. Assemble and decorate closer to serving.
- What if I can’t find candy eyeballs? You can make your own using white and black icing or use mini chocolate chips for eyes instead.
- How do I keep the cake pops from falling off the sticks? Chilling the cake balls before and after inserting the sticks helps them stay secure. Also, dipping the stick in melted candy before inserting acts as glue.
- Can I use homemade cake instead of boxed mix? Absolutely! Just make sure it’s moist and not too dense so it crumbles easily for mixing with frosting.
- What’s the best way to store leftover cake pops? Keep them in an airtight container in the fridge for up to 5 days or freeze them wrapped individually for longer storage.
Pin This Recipe!
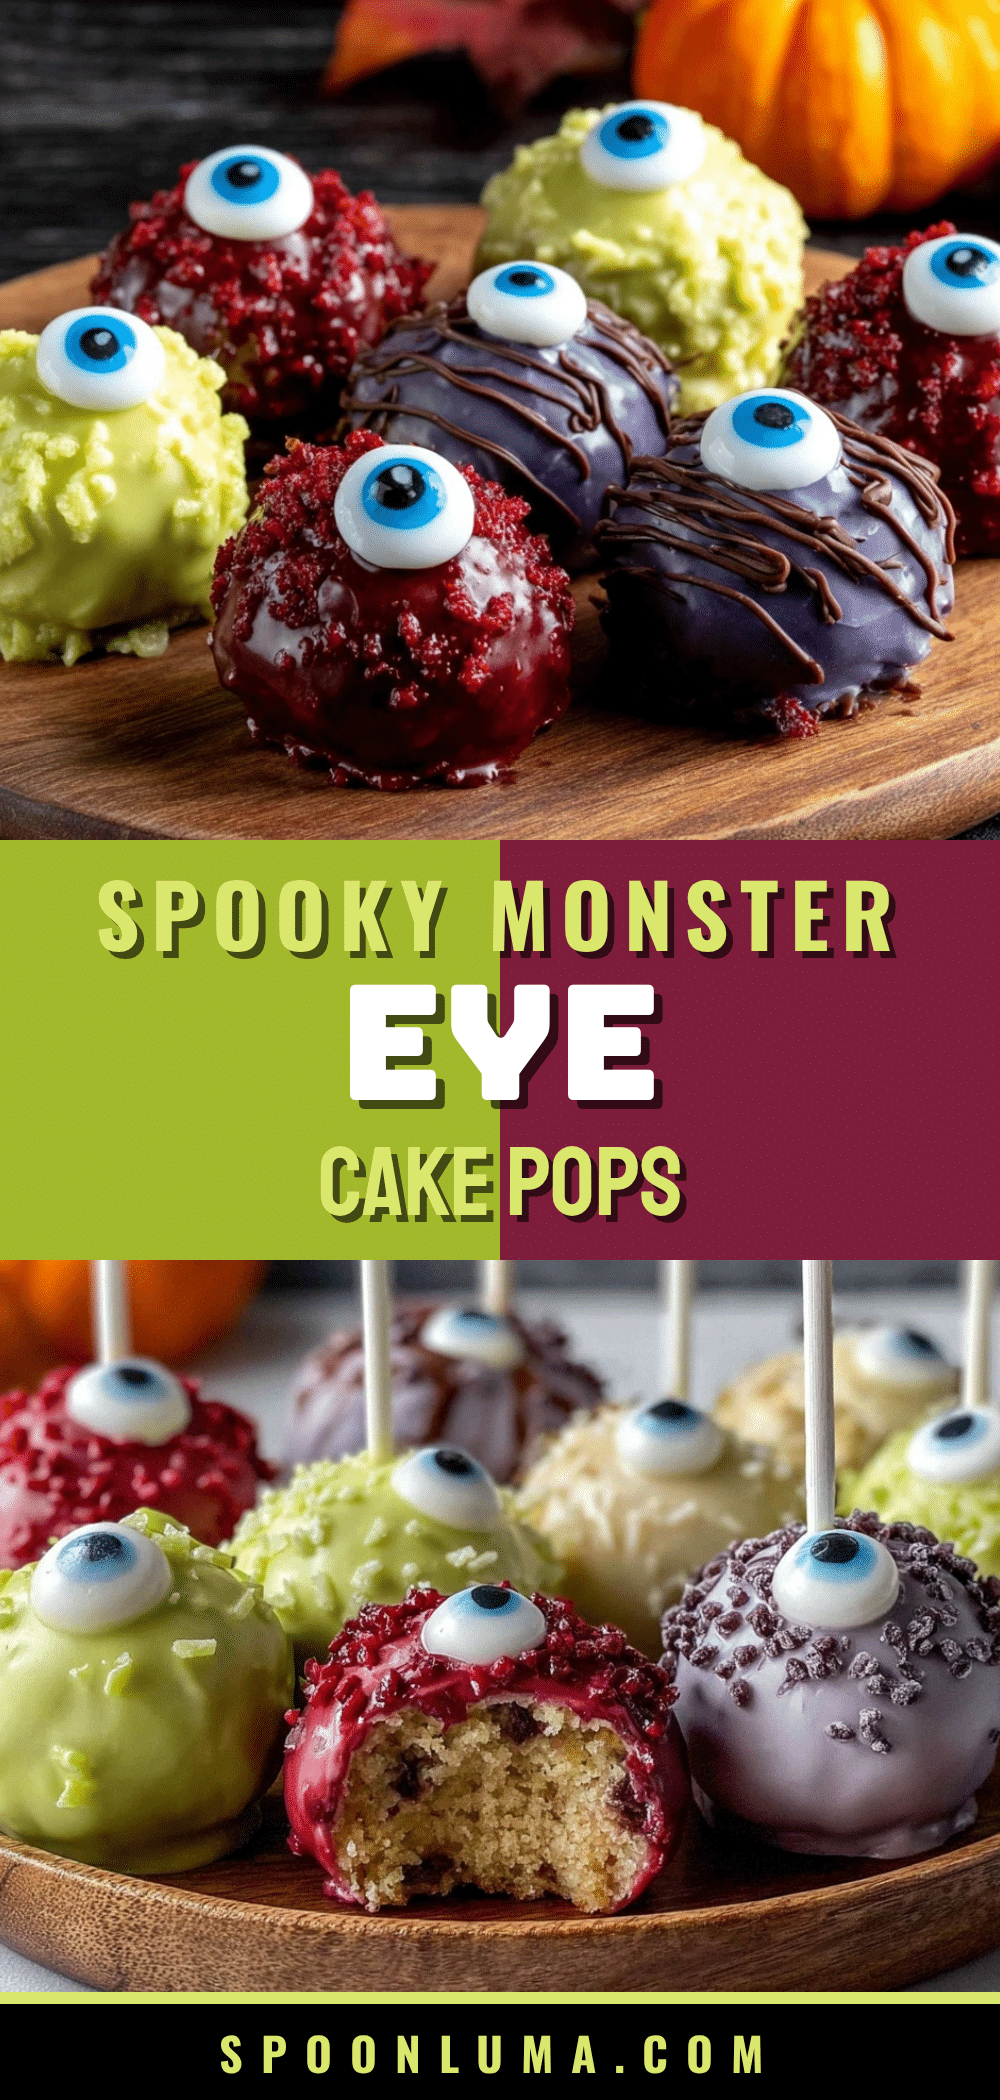
Perfect Monster Eye Cake Pops

These fun and easy Halloween-themed cake pops feature moist cake balls coated in colorful candy melts and decorated with candy eyeballs, perfect for parties and festive treats.
- Prep Time: 20 minutes
- Cook Time: 35 minutes
- Total Time: 1 hour 45 minutes
- Yield: 20-24 cake pops 1x
- Category: Dessert
- Cuisine: American
Ingredients
- 1 box chocolate cake mix (or any boxed flavor you prefer)
- 2 large eggs, room temperature
- 1/3 cup vegetable oil
- 1 cup water
- 1 cup vanilla frosting (store-bought or homemade)
- 12 ounces candy melts in vibrant colors (green, purple, orange)
- Candy eyeballs (small and large sizes)
- Sprinkles or edible glitter (optional)
- Wax paper or parchment for drying
Instructions
- Preheat oven to 350°F (175°C). Prepare cake batter according to box instructions by combining cake mix, eggs, oil, and water.
- Pour batter into a greased 9×13 inch pan and bake for 30-35 minutes or until a toothpick comes out clean. Cool completely on a wire rack (about 1 hour).
- Crumble cooled cake into a large bowl until fine but not powdery.
- Add about 1 cup vanilla frosting to cake crumbs and mix gently until mixture holds together when pressed. Adjust frosting or crumbs if too dry or wet.
- Roll mixture into 1-inch balls and place on parchment-lined baking sheet. Refrigerate at least 30 minutes to firm up.
- Melt candy melts in microwave-safe bowl in 30-second bursts, stirring until smooth.
- Dip one end of a cake pop stick into melted candy, insert halfway into cake ball, and chill 10 minutes to set.
- Dip entire cake pop into melted candy coating, letting excess drip off. Tap or spin stick to smooth coating.
- While coating is wet, press candy eyeballs onto pops and add sprinkles or edible glitter if desired.
- Place cake pops upright on parchment or styrofoam block to dry completely (about 30 minutes).
- Serve chilled or at room temperature. Store leftovers in airtight container in refrigerator up to 5 days or freeze individually wrapped up to 2 months.
Notes
Chill cake pops before and after inserting sticks to help them hold together. Use short bursts when melting candy melts and stir often to avoid overheating. If candy thickens, add a drop of vegetable oil to smooth it. Roll cake balls tightly for sturdiness. If a pop falls off the stick, roll again and chill before retrying. For gluten-free or dairy-free versions, use appropriate cake mixes, frostings, and candy melts.
Nutrition
- Serving Size: 1 cake pop
- Calories: 150180
- Sugar: 18
- Sodium: 150
- Fat: 7
- Saturated Fat: 3
- Carbohydrates: 25
- Fiber: 1
- Protein: 2
Keywords: Halloween, cake pops, monster eyes, candy coating, party treats, easy dessert, spooky treats