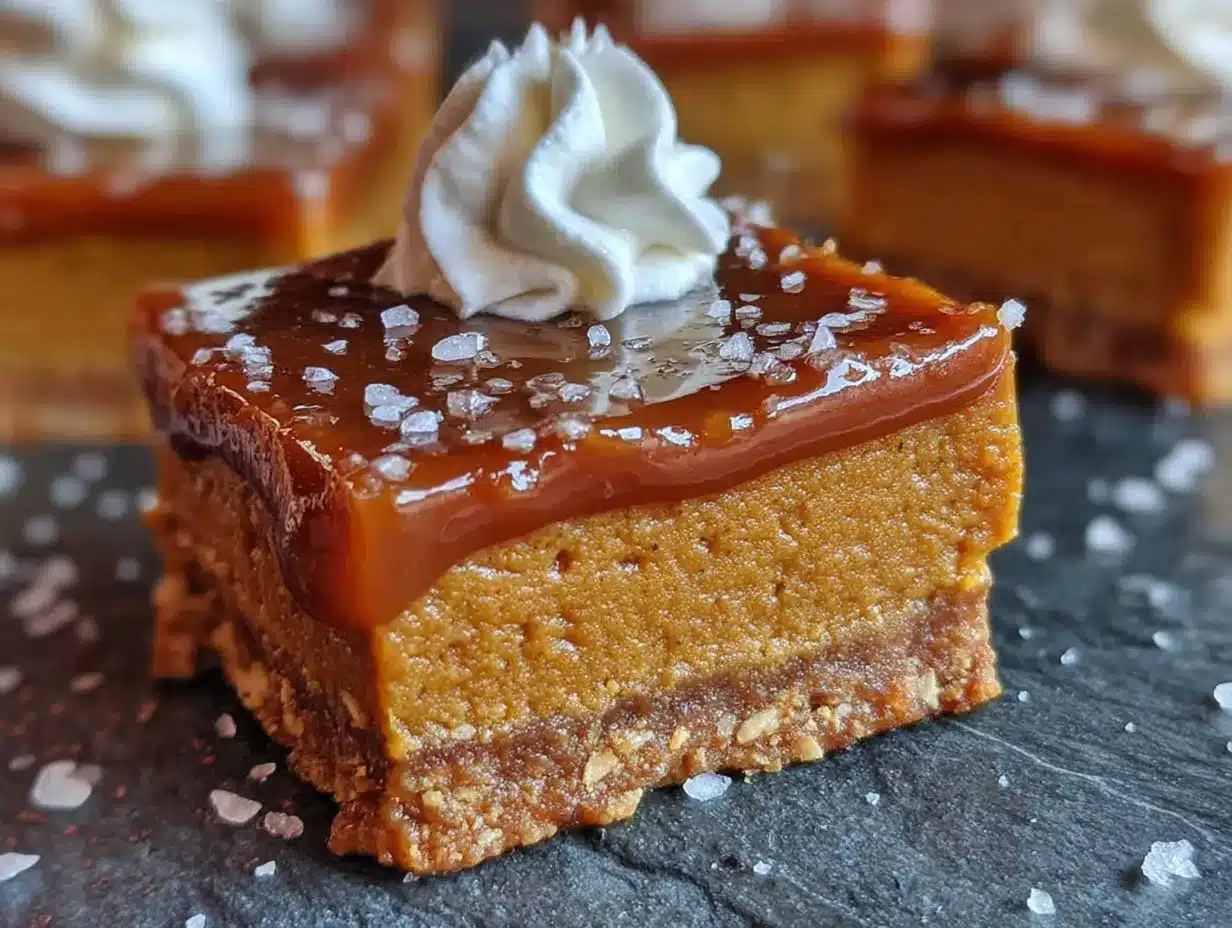
The crumbly, buttery shortbread crust gave way under the knife with a quiet snap, and I knew—before I even got to the filling—that this was going to be one of those recipes. Not the kind you tweak for years, but the kind that lands perfectly on the first try, and you just have the good sense to leave it alone. I’d been chasing a pumpkin dessert that didn’t feel like a compromise for weeks. Something that had the structural integrity of a bar, the soul of a classic pie, and a little something extra that made people stop mid-conversation to ask, “What is in this?” The salted caramel was the obvious answer, but the real trick was getting that caramel to sit right on top—not sink, not burn, not slide off into a sticky puddle. That first bite, honestly, made me laugh out loud. It was that good. The pumpkin layer was silky, not heavy, and the caramel had that deep, almost-burnt edge that cuts through the sweetness like a sharp little reminder that you’re alive. I brought a batch to a friend’s porch drop-off and got a text an hour later that just said, “I’m mad at you for how good these are.” This is that recipe. The one you’ll make for Thanksgiving, for a random Tuesday, for no reason at all except that fall is too short to waste on mediocre desserts.
Why You’ll Love This Recipe
I’ve tested this recipe five times in three different ovens, and I can tell you with total confidence—it works. Every. Single. Time. The crust stays crisp, the pumpkin filling sets without cracking, and the salted caramel stays glossy without turning into a sticky mess. There’s no blind baking, no water bath, and no complicated tempering. Just straightforward steps that deliver a dessert that looks like you spent all day on it.
- Simple Ingredients : You probably already have the pumpkin, eggs, butter, and sugar. The caramel is made from scratch but uses only four ingredients—no candy thermometer required.
- No Fuss Technique : No rolling dough, no worrying about soggy crusts. The shortbread base presses right into the pan, and the filling bakes evenly without any special equipment.
- Perfect for Entertaining : These bars slice cleanly, travel well, and look stunning on a dessert table. No one will guess they came together in under an hour of active work.
- Crowd-Pleaser : The combo of spiced pumpkin and salted caramel hits that sweet-salty note that pleases both kids and adults. I’ve watched people who “don’t like pumpkin” go back for seconds.
- Make-Ahead Friendly : These bars actually taste better the next day, after the flavors have had time to settle. Bake them a day ahead and just add the finishing salt before serving.
What makes this version different from the hundred other pumpkin bar recipes out there? It’s the texture. The crust stays shortbread-crumbly, not soggy. The filling is thick enough to hold a clean slice but still creamy on the tongue. And the caramel—well, the caramel is the kind of thing you’ll want to put on everything. I’ve caught myself drizzling leftovers over morning oatmeal, and I’m not sorry about it.
What Ingredients You Will Need
This recipe uses simple, wholesome ingredients to deliver bold flavor and satisfying texture. Most of these are pantry staples, especially if you do a lot of fall baking. I’ve included notes on what to look for and what you can swap if needed.
For the Crust
- 1 ½ cups all-purpose flour (spooned and leveled—don’t scoop straight from the bag or the crust will be dry)
- ½ cup unsalted butter, cold and cut into small cubes (I use Kerrygold for the rich flavor, but any good-quality butter works)
- ¼ cup granulated sugar
- ¼ teaspoon salt (fine sea salt is best)
For the Pumpkin Filling
- 1 can (15 oz) pure pumpkin puree (not pumpkin pie filling—Libby’s is my go-to for consistent texture)
- ¾ cup granulated sugar
- 2 large eggs, room temperature
- ¾ cup heavy cream (you can substitute half-and-half for a lighter filling, but it won’t be as rich)
- 1 teaspoon vanilla extract
- 1 ½ teaspoons pumpkin pie spice (or make your own: ½ tsp cinnamon, ¼ tsp nutmeg, ¼ tsp ginger, ⅛ tsp cloves)
- ¼ teaspoon salt
For the Salted Caramel
- ½ cup unsalted butter
- 1 cup packed brown sugar (dark brown gives a deeper flavor, light brown works too)
- ¼ cup heavy cream
- ½ teaspoon flaky sea salt (Maldon is my favorite—it melts partially into the caramel and leaves little crystals on top)
- ½ teaspoon vanilla extract
That’s it. No strange extracts, no hard-to-find spices. The caramel is the star here, and it’s so simple you’ll wonder why you ever bought the jarred stuff. If you want to go dairy-free, you can substitute the butter with a plant-based version and use coconut cream instead of heavy cream—but honestly, the texture won’t be quite as luxurious. Save that experiment for a different day and make this one the full-fat way.
Equipment Needed
You don’t need a fancy kitchen to pull these off. Here’s what you’ll actually use:
- 9×9-inch square baking pan (an 8×8 works too, but the bars will be slightly thicker and may need a few extra minutes of baking time)
- Parchment paper (non-negotiable—it makes lifting the bars out so much easier than trying to cut them in the pan)
- Food processor or pastry cutter for the crust (I use my food processor because it’s faster, but a pastry cutter and a bowl work just fine)
- Medium saucepan for the caramel (use a light-colored pan if you have one—it helps you see the color change as the caramel cooks)
- Whisk (a silicone one is great for the caramel so it doesn’t scratch your pan)
- Mixing bowls (one medium, one large)
- Measuring cups and spoons
- Rubber spatula
- Cooling rack
If you don’t have a food processor, don’t worry. The crust comes together easily by hand—just cut the cold butter into the flour mixture using a pastry cutter or even two forks. It takes a little longer, but the result is the same. And if you don’t have a 9×9 pan, you can use a disposable foil pan in a pinch—just place it on a baking sheet for stability.
Preparation Method
- Preheat your oven to 350°F (175°C). Line your 9×9 baking pan with parchment paper, leaving a 2-inch overhang on two opposite sides. This creates “handles” that let you lift the whole block of bars out later. Lightly grease the parchment with butter or cooking spray.
- Make the crust. In a food processor, combine the flour, sugar, and salt. Pulse a few times to mix. Add the cold butter cubes and pulse until the mixture looks like coarse meal with some pea-sized butter pieces still visible. Don’t overprocess—you want those little butter chunks for a flaky texture. If doing this by hand, cut the butter into the dry ingredients until you get the same crumbly texture.
- Press the crust into the pan. Dump the crumb mixture into your prepared pan and press it down firmly and evenly. I use the bottom of a measuring cup to get it really flat. The crust should be about ¼-inch thick. Bake for 15 minutes, until the edges are just starting to turn golden. Set aside to cool slightly while you make the filling.
- Make the pumpkin filling. In a large bowl, whisk together the pumpkin puree, sugar, eggs, heavy cream, vanilla, pumpkin pie spice, and salt until smooth. Don’t overwhisk—just until everything is combined and no streaks of egg remain. The mixture will be thinner than you expect, but that’s okay. It sets beautifully as it bakes.
- Pour the filling over the crust. Gently pour the pumpkin mixture over the pre-baked crust. It should spread evenly on its own, but you can tilt the pan a little to help it along. Bake for 35-40 minutes, until the edges are set and the center jiggles just slightly when you shake the pan. A knife inserted near the center should come out mostly clean. The top will look matte, not glossy.
- Cool completely. Place the pan on a wire rack and let the bars cool to room temperature. This takes about 1-2 hours. Don’t rush this step—if you add the caramel while the bars are still warm, it will soak into the pumpkin layer instead of sitting on top. Once cool, transfer the pan to the refrigerator and chill for at least 2 hours, or overnight. Chilling makes the bars firm enough to slice cleanly.
- Make the salted caramel. While the bars chill, make the caramel. In a medium saucepan over medium heat, melt the butter. Add the brown sugar and cream, whisking constantly until the sugar dissolves. Bring the mixture to a gentle boil, then reduce the heat to low and let it simmer for 3-4 minutes, whisking occasionally. It should thicken slightly and smell deeply caramelized. Remove from heat and stir in the vanilla and flaky sea salt. Let it cool for about 10 minutes—it will thicken more as it cools.
- Assemble and slice. Once the bars are fully chilled, lift them out of the pan using the parchment handles. Place on a cutting board. Pour the slightly warm caramel over the top and spread it evenly with a spatula. Sprinkle a little extra flaky sea salt on top if you’re feeling fancy. Let the caramel set for about 15 minutes, then slice into 16 squares. For the cleanest cuts, wipe your knife between each slice.
Cooking Tips & Techniques
I learned a few things the hard way so you don’t have to. First, don’t skip the chilling step before adding the caramel. I tried it once when I was impatient, and the caramel just sank right into the pumpkin filling, creating a weird soggy layer. Not a disaster, but not the beautiful glossy top you’re after.
Second, watch your caramel closely. It can go from perfect to burnt in about 30 seconds. The moment it turns a deep amber color and smells nutty and rich, pull it off the heat. If you see any dark specks forming, you’ve gone too far—start over. It’s worth the extra few minutes.
For the crust, use cold butter straight from the fridge. If the butter softens while you’re working with it, pop the crumb mixture in the freezer for 5 minutes before pressing it into the pan. This keeps the crust from spreading or getting greasy during baking.
If you’re making these for a crowd, double the recipe and use a 9×13 pan. Increase the baking time by about 10 minutes for the crust and 5-10 minutes for the filling. The bars will be slightly thinner but just as delicious.
One more thing—don’t overbake the pumpkin filling. It should still have a slight jiggle in the center when you pull it out. It will continue to set as it cools. Overbaked pumpkin filling gets grainy and cracks on top, and nobody wants that.
Variations & Adaptations
This recipe is forgiving and easy to tweak. Here are a few ways I’ve adapted it over the years:
- Gluten-Free Version : Substitute the all-purpose flour with a 1:1 gluten-free baking flour blend. I’ve tested this with King Arthur’s Measure for Measure and it works beautifully. The crust will be a little more delicate, so handle with care when slicing.
- Dairy-Free Option : Use plant-based butter in both the crust and the caramel, and swap the heavy cream for full-fat coconut cream. The texture will be slightly different—a little less rich—but the flavor is still fantastic.
- Spice It Up : Add a pinch of cayenne or chipotle powder to the caramel for a smoky, spicy kick. It sounds weird, but the heat plays beautifully with the sweet pumpkin and salty caramel. I did this on a whim one year and it was a hit at a Friendsgiving potluck.
- Nutty Crust : Replace ¼ cup of the flour with finely ground pecans or walnuts. Toast the nuts first for extra flavor. This gives the crust a subtle nuttiness that pairs perfectly with the pumpkin.
- Chocolate Drizzle : Melt ¼ cup of dark chocolate chips with a teaspoon of coconut oil and drizzle it over the caramel before the bars set. The chocolate-pumpkin-caramel combo is dangerously good.
I’ve also tried this recipe with a gingersnap crust instead of shortbread, and honestly, it was incredible. Just crush 1 ½ cups of gingersnap cookies and mix with 4 tablespoons of melted butter, then press into the pan. No baking required for the crust—just pour the filling right on top.
Serving & Storage Suggestions
These bars are best served chilled or at room temperature. I like them straight from the fridge on a warm fall afternoon—the caramel gets a little firm and chewy, and the pumpkin filling stays creamy. If you prefer a softer texture, let them sit on the counter for 15 minutes before serving.
For presentation, I dust the tops with a little extra flaky sea salt and sometimes add a few candied pecans or a dollop of whipped cream. They look gorgeous on a cake stand next to a pot of hot coffee or apple cider. If you’re serving them at a party, cut them into 16 small squares—they’re rich enough that a little goes a long way.
Storage is easy. Keep the bars in an airtight container in the refrigerator for up to 5 days. The caramel will soften slightly over time, but the flavor actually deepens. I’ve also frozen them successfully—wrap individual bars in plastic wrap, then place them in a freezer bag. They’ll keep for up to 3 months. Thaw overnight in the fridge before serving.
If you’re reheating, don’t use the microwave—it will melt the caramel into a puddle. Instead, let them come to room temperature on the counter, or warm them in a 300°F oven for about 5 minutes. This keeps the crust crisp and the caramel intact.
These bars pair beautifully with a scoop of vanilla ice cream or a drizzle of extra caramel sauce. I’ve also served them alongside a slice of brown butter banana zucchini bread for a full fall dessert spread, and it was a hit.
Nutritional Information & Benefits
Each bar (based on 16 servings) contains approximately:
- Calories: 285
- Fat: 16g
- Carbohydrates: 34g
- Protein: 3g
- Fiber: 1g
- Sugar: 24g
Pumpkin is packed with vitamin A (from beta-carotene), fiber, and antioxidants. It’s also lower in calories than many other dessert bases, which means you can enjoy these bars without the guilt. The butter and cream add richness, but they also provide healthy fats that help your body absorb the fat-soluble vitamins in the pumpkin.
If you’re watching your sugar intake, you can reduce the sugar in the pumpkin filling to ½ cup without affecting the texture too much. The caramel, unfortunately, needs the full amount for proper consistency—but you can use less on top if you prefer.
These bars are not gluten-free in their standard form, but as mentioned, a simple flour swap makes them accessible. They do contain dairy and eggs, so they’re not vegan-friendly without substitutions.
Conclusion
These salted caramel pumpkin pie bars are the kind of dessert that makes people slow down. They take a bite, pause, and then look at the bar like it just told them a secret. The combination of buttery shortbread, silky spiced pumpkin, and that glossy, salty-sweet caramel is exactly what fall baking should be—comforting, impressive, and deeply satisfying.
I’ve made these for Thanksgiving, for casual weeknight cravings, and for a neighbor who needed a pick-me-up, and every single time, they’ve disappeared faster than I expected. They’re forgiving enough for a beginner baker and elegant enough for a holiday table. And honestly, they’re just fun to make. There’s something deeply satisfying about watching that caramel bubble up in the pan and knowing you made it yourself.
I’d love to hear how these turn out for you. Did you add a twist? Did they disappear as fast as mine do? Drop a comment below and let me know—and if you’re looking for another easy fall dessert, don’t miss my healthy zucchini bread with Greek yogurt for a lighter option that still hits the spot. Happy baking!
Frequently Asked Questions
Can I use store-bought caramel sauce instead of making my own?
You can, but the texture will be different. Homemade caramel thickens as it cools and stays put on top of the bars. Store-bought sauce is thinner and will likely soak into the pumpkin layer. If you’re in a pinch, look for a thick, high-quality caramel sauce and let it cool completely before spreading it on the chilled bars.
How do I know when the pumpkin filling is done baking?
The edges should be set and the center should jiggle slightly when you shake the pan. A knife inserted near the center should come out mostly clean, with just a little moisture. Don’t wait for the center to be completely firm—it will set as it cools.
Can I make these bars ahead of time?
Absolutely. In fact, they taste better the next day. Bake the bars, chill them, and add the caramel just before serving. If you add the caramel too early, it may soften the top layer of the pumpkin filling. I usually bake them a day ahead, then make the caramel and assemble a few hours before serving.
Why did my crust turn out soggy?
This usually happens if the crust wasn’t baked long enough before adding the filling, or if the filling was poured on while the crust was still hot. Make sure the crust is fully baked (golden at the edges) and cooled slightly before adding the pumpkin mixture. Also, don’t skip the parchment paper—it helps the crust bake evenly.
Can I freeze these bars with the caramel on top?
Yes, but the caramel may become a little grainy after thawing. For best results, freeze the bars without the caramel, then make fresh caramel when you’re ready to serve. If you do freeze them with caramel, wrap each bar individually in plastic wrap and thaw in the fridge overnight. The texture won’t be perfect, but the flavor will still be great.
Pin This Recipe!
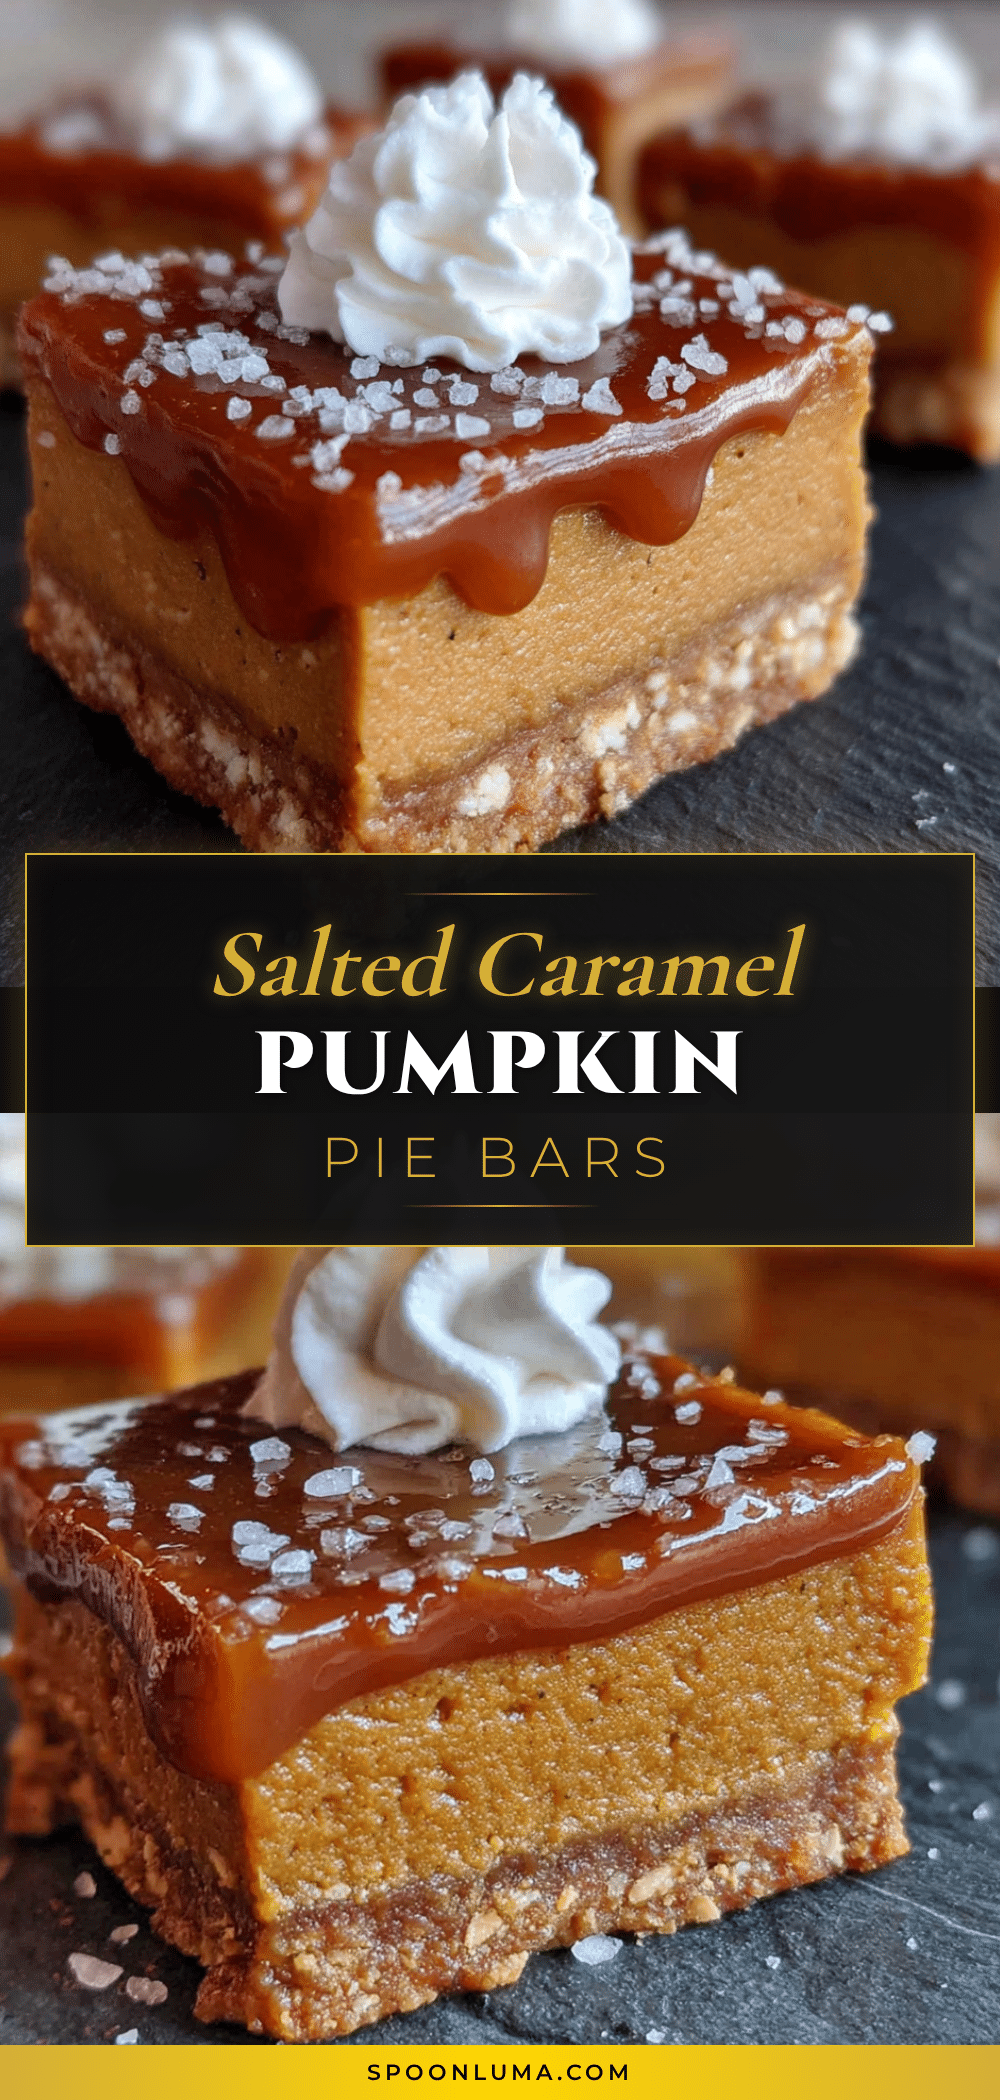
Salted Caramel Pumpkin Pie Bars: Easy Fall Dessert
These salted caramel pumpkin pie bars feature a buttery shortbread crust, silky spiced pumpkin filling, and glossy salted caramel topping. They are easy to make, slice cleanly, and are perfect for fall entertaining.
- Prep Time: 15 minutes
- Cook Time: 50 minutes
- Total Time: 1 hour 5 minutes
- Yield: 16 servings 1x
- Category: Dessert
- Cuisine: American
Ingredients
- 1 ½ cups all-purpose flour
- ½ cup unsalted butter, cold and cut into small cubes
- ¼ cup granulated sugar
- ¼ teaspoon fine sea salt
- 1 can (15 oz) pure pumpkin puree
- ¾ cup granulated sugar
- 2 large eggs, room temperature
- ¾ cup heavy cream
- 1 teaspoon vanilla extract
- 1 ½ teaspoons pumpkin pie spice
- ¼ teaspoon salt
- ½ cup unsalted butter
- 1 cup packed brown sugar
- ¼ cup heavy cream
- ½ teaspoon flaky sea salt
- ½ teaspoon vanilla extract
Instructions
- Preheat your oven to 350°F (175°C). Line your 9×9 baking pan with parchment paper, leaving a 2-inch overhang on two opposite sides. Lightly grease the parchment with butter or cooking spray.
- Make the crust: In a food processor, combine the flour, sugar, and salt. Pulse a few times to mix. Add the cold butter cubes and pulse until the mixture looks like coarse meal with some pea-sized butter pieces still visible. If doing by hand, cut the butter into the dry ingredients until crumbly.
- Press the crust into the pan: Dump the crumb mixture into the prepared pan and press it down firmly and evenly. Bake for 15 minutes, until the edges are just starting to turn golden. Set aside to cool slightly.
- Make the pumpkin filling: In a large bowl, whisk together the pumpkin puree, sugar, eggs, heavy cream, vanilla, pumpkin pie spice, and salt until smooth.
- Pour the filling over the crust: Gently pour the pumpkin mixture over the pre-baked crust. Bake for 35-40 minutes, until the edges are set and the center jiggles just slightly when you shake the pan. A knife inserted near the center should come out mostly clean.
- Cool completely: Place the pan on a wire rack and let the bars cool to room temperature (1-2 hours). Then transfer to the refrigerator and chill for at least 2 hours, or overnight.
- Make the salted caramel: In a medium saucepan over medium heat, melt the butter. Add the brown sugar and cream, whisking constantly until the sugar dissolves. Bring to a gentle boil, then reduce heat to low and simmer for 3-4 minutes, whisking occasionally. Remove from heat and stir in the vanilla and flaky sea salt. Let cool for about 10 minutes.
- Assemble and slice: Once the bars are fully chilled, lift them out of the pan using the parchment handles. Pour the slightly warm caramel over the top and spread evenly. Let the caramel set for about 15 minutes, then slice into 16 squares. Wipe your knife between each slice for clean cuts.
Notes
Don’t skip the chilling step before adding the caramel, or it will sink into the filling. Watch the caramel closely to avoid burning. Use cold butter for the crust. For a crowd, double the recipe and use a 9×13 pan, increasing baking time by about 10 minutes for the crust and 5-10 minutes for the filling.
Nutrition
- Serving Size: 1 bar
- Calories: 285
- Sugar: 24
- Sodium: 180
- Fat: 16
- Saturated Fat: 10
- Carbohydrates: 34
- Fiber: 1
- Protein: 3
Keywords: pumpkin bars, salted caramel, fall dessert, pumpkin pie bars, easy dessert, Thanksgiving dessert


