My neighbor, a retired pastry chef named Diane, did not trust brown butter in a fruit tart. “Too risky,” she said, shaking her head when I mentioned my plan. “It overpowers the fruit. You lose the delicacy.” I respected Diane—she could make a pâte sucrée that crumbled like a whispered secret—so her doubt stuck with me. But I had this bag of Mission figs from the farmer’s market, all jammy purple and ready to burst, and a stick of butter I’d let go a shade too far on purpose the week before. The smell of that nutty, toasty butter had haunted me. So I made the tart anyway, half-convinced I was about to prove her right.
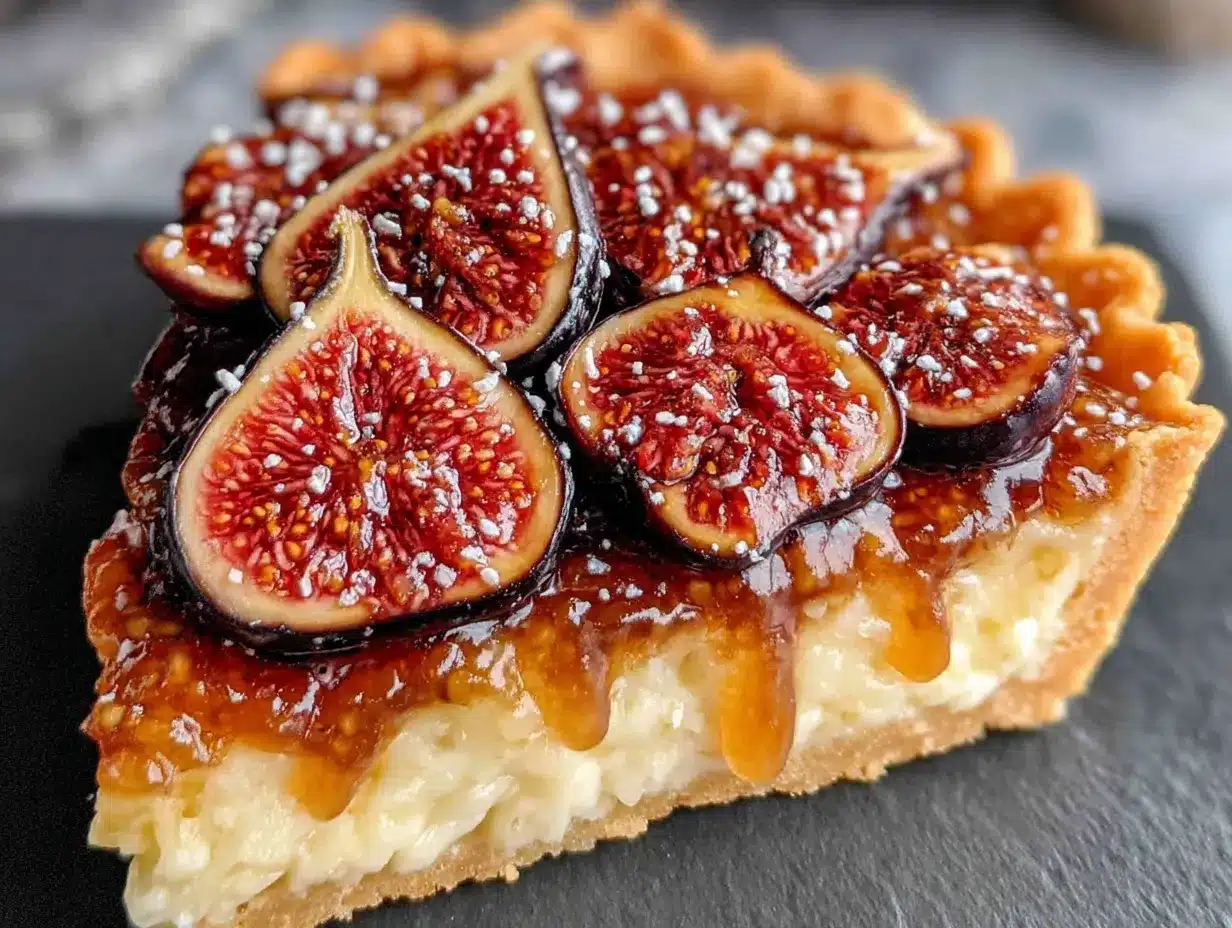
The first bite? Honestly, I held my breath. The crust was shattery, the honey filling set like a soft caramel, and the figs had roasted down into these sweet, concentrated pockets. But the brown butter? It didn’t shout. It hummed underneath, a warm, toasty bass note that made the honey taste deeper and the figs taste richer. I brought a slice to Diane’s door the next morning. She took one bite, closed her eyes, and said, “Okay. You were right.” That moment—the quiet victory of a skeptic converted—is exactly what this Perfect Brown Butter Fig and Honey Tart tastes like. It’s the dessert that makes people reconsider what they thought they knew.
Why You’ll Love This Recipe
This isn’t just another fruit tart. It’s the one you’ll reach for when you want something that feels fancy but comes together without a stand mixer or a pastry degree. I’ve tested this recipe six times to get the balance right—enough brown butter to add depth, not enough to bully the figs. The result is a dessert that’s both rustic and refined, the kind of thing you’d serve at a dinner party and watch everyone go quiet for a second before they start asking for the recipe.
- Simple Ingredients, Big Flavor: You only need a handful of pantry staples—butter, flour, honey, eggs, and fresh figs. No obscure extracts or specialty sugars.
- No Fussy Pastry Skills Needed: The crust is a simple press-in tart dough. No rolling, no chilling for hours, no fear of overworking gluten.
- Perfect for Late Summer & Early Fall: Figs are at their peak from August through October, making this the ideal transitional dessert when you’re not quite ready for pumpkin spice but craving something cozy.
- Make-Ahead Friendly: You can blind-bake the crust a day ahead and assemble the filling the morning of. The finished tart actually tastes better after a few hours in the fridge.
- Crowd-Pleasing Elegance: It looks like you spent hours, but the active prep time is under 30 minutes. This is my go-to when I need to impress without stress.
What Ingredients You Will Need
This recipe relies on a few key players, each doing important work. The brown butter is the backbone, the honey brings floral sweetness, and the figs? They’re the showstoppers. Here’s what you’ll need and why each ingredient matters.
For the Crust:
- 1 ¼ cups all-purpose flour (160g) — Spoon and level it. Packed flour makes a tough crust.
- ½ cup unsalted butter, cold and cubed (113g) — Cold butter is non-negotiable for a flaky, tender crust. I use Kerrygold for its higher butterfat content.
- ¼ cup powdered sugar (30g) — Dissolves faster than granulated, giving a smoother texture.
- ¼ teaspoon salt — Balances the sweetness. I prefer fine sea salt here.
- 1 large egg yolk — Adds richness and helps bind the dough without making it tough.
- 1 tablespoon ice water — Only if needed. The dough should just hold together when pinched.
For the Brown Butter:
- ½ cup unsalted butter (113g) — You’ll brown this whole stick, then use part of it in the filling and brush the rest on the figs. Waste not, want not.
For the Honey Filling:
- ¾ cup honey (255g) — Use a mild, floral honey like orange blossom or wildflower. Avoid strong buckwheat honey—it’ll compete with the figs.
- 3 large eggs — Room temperature. Cold eggs can seize the brown butter.
- ¼ cup brown butter (from the batch you made) — This is where the magic happens. It adds a nutty, almost caramelized flavor.
- 1 teaspoon vanilla extract — Pure, not imitation. It rounds out the honey’s floral notes.
- ¼ teaspoon salt — Don’t skip it. Salt makes honey taste more honey-like.
For the Topping:
- 8-10 fresh figs, halved lengthwise — Look for figs that are plump, soft to the touch, and fragrant. Black Mission figs are my favorite here—they’re intensely sweet and hold their shape during baking. Brown Turkey figs work too, but they’re a bit milder.
- Remaining brown butter (about 2 tablespoons) — Brushed on the figs before baking for extra depth.
- Flaky sea salt (like Maldon) — A light sprinkle right before serving. It cuts the sweetness and makes everything pop.
Equipment Needed
You don’t need a fully stocked pastry kitchen for this tart, but a few specific tools make the process smoother. Here’s what I use and what you can substitute if needed.
- 9-inch tart pan with removable bottom — This is crucial for clean slices. I prefer a fluted metal pan for even browning. If you only have a standard pie dish, it’ll work, but the crust-to-filling ratio will be off.
- Light-colored skillet or saucepan — A stainless steel or light-colored nonstick pan helps you see the butter change color as it browns. Dark pans make it hard to judge when it’s done.
- Parchment paper and pie weights — For blind baking the crust. Dried beans or rice work perfectly as cheap substitutes.
- Pastry blender or food processor — For cutting butter into flour. I use a pastry blender because it gives me more control, but a food processor with short pulses works in a pinch.
- Microplane or fine grater — If you’re adding lemon zest or nutmeg to the filling (both optional but lovely).
Preparation Method
Let’s walk through this step by step. I’ve included timing estimates and sensory cues so you know exactly what to look for at each stage. Trust your eyes and nose more than the clock.
Step 1: Brown the Butter (10 minutes)
Cut the stick of butter into even pieces and place them in a light-colored skillet over medium heat. Swirl the pan occasionally as the butter melts. It’ll start to foam and crackle—that’s the water content evaporating. After about 5-7 minutes, the foam will subside and you’ll see tiny brown specks forming at the bottom of the pan. The butter will smell nutty and toasty, like toasted hazelnuts. Immediately remove it from the heat and pour it into a heatproof bowl, including all those brown bits. Let it cool to room temperature while you make the crust.
Step 2: Make the Crust (15 minutes + 20 minutes chill)
In a large bowl, whisk together the flour, powdered sugar, and salt. Add the cold, cubed butter. Using a pastry blender or your fingertips, work the butter into the flour until the mixture looks like coarse meal with some pea-sized butter pieces remaining. Add the egg yolk and stir with a fork until the dough starts to clump. If it feels dry, add the ice water one teaspoon at a time. The dough should hold together when pressed between your fingers—not crumbly, not sticky.
Press the dough evenly into the bottom and up the sides of your tart pan. Use the bottom of a measuring cup to smooth it out. Prick the bottom all over with a fork (this prevents puffing). Freeze the crust for 20 minutes while you preheat your oven to 375°F (190°C).
Step 3: Blind Bake the Crust (20 minutes)
Line the frozen crust with parchment paper and fill with pie weights or dried beans. Bake for 15 minutes, then remove the parchment and weights and bake for another 5 minutes, until the bottom looks dry and lightly golden. Set the crust aside to cool slightly. Leave the oven on.
Step 4: Make the Honey Filling (5 minutes)
In a medium bowl, whisk together the honey, eggs, cooled brown butter (the ¼ cup portion), vanilla extract, and salt. Whisk until smooth and well combined. The mixture will be thin and glossy, like a loose caramel. Don’t over-whisk—you don’t want to incorporate too much air.
Step 5: Assemble the Tart (5 minutes)
Pour the honey filling into the pre-baked crust. It should come about three-quarters of the way up the sides. Arrange the fig halves cut-side up on top of the filling, nestling them in gently. They’ll sink slightly—that’s okay. Brush the fig tops with the remaining brown butter (about 2 tablespoons).
Step 6: Bake the Tart (35-40 minutes)
Place the tart on a baking sheet (to catch any drips) and bake at 375°F (190°C) for 35-40 minutes. The filling should be set around the edges but still have a slight jiggle in the center when you gently shake the pan. The figs will be soft and jammy, and the crust will be deep golden brown. If the crust edges are browning too quickly, tent them with foil strips halfway through.
Step 7: Cool and Serve (1 hour minimum)
Let the tart cool completely in the pan on a wire rack. The filling will continue to set as it cools. Once cool, carefully remove the tart from the pan by pushing up the removable bottom. Sprinkle with flaky sea salt just before serving. Serve at room temperature or slightly warm.
Cooking Tips & Techniques
I’ve made this tart enough times to know where things can go sideways. Here are the lessons I learned the hard way so you don’t have to.
Don’t Rush the Brown Butter: The first time I made this, I cranked the heat to speed things up. The butter went from melted to burnt in about 30 seconds. Low and slow is the way. Watch for the milk solids to turn amber, not dark brown. If you see black specks, you’ve gone too far—start over.
Chill the Crust, Don’t Skip It: The freezer time isn’t optional. It firms up the butter so the crust holds its shape during blind baking. I once skipped this step and the sides slid down into a lopsided mess. Learn from my impatience.
Use Room Temperature Eggs: Cold eggs can cause the brown butter to seize up when you whisk them together, creating a grainy filling. Let your eggs sit on the counter for 30 minutes before you start, or place them in a bowl of warm water for 5 minutes.
Check for Doneness with a Jiggle: Overbaking is the most common mistake with honey tarts. The filling will continue to set as it cools, so pull it out when the center still wobbles slightly. Think of it like a cheesecake—you want that creamy, almost custard-like texture.
Let It Cool Completely: I know it’s tempting to cut into a warm tart, but the filling needs time to firm up. If you slice it too soon, you’ll end up with a runny mess. Patience pays off here.
Variations & Adaptations
This recipe is forgiving and adaptable. Here are a few ways to make it your own, based on what I’ve tried in my own kitchen.
Gluten-Free Version: Swap the all-purpose flour with a 1:1 gluten-free baking flour blend (I like Bob’s Red Mill). The crust will be slightly more crumbly, so handle it gently when pressing it into the pan.
Dairy-Free Adaptation: Use a high-quality vegan butter stick (like Miyoko’s) for both the crust and the brown butter. The flavor will be slightly different—less nutty—but still delicious. Just note that vegan butter browns faster, so watch it carefully.
Seasonal Fruit Swap: When figs aren’t in season, try this with sliced pears, plums, or even thinly sliced apples. The honey filling pairs beautifully with any stone fruit or firm autumn fruit. I’ve made a version with roasted Bosc pears and a pinch of cinnamon that was absolutely stunning.
Add a Spice Note: If you want to lean into the fall vibes, add ¼ teaspoon of cardamom or a tiny pinch of nutmeg to the honey filling. It adds warmth without overwhelming the figs.
Honey Substitution: If you’re out of honey, maple syrup works in a pinch. The flavor will be more woodsy and less floral, but it’s still lovely. Just reduce the amount to ⅔ cup since maple syrup is thinner than honey.
Serving & Storage Suggestions
This tart is at its best when served at room temperature. The honey filling softens slightly, the crust stays crisp, and the figs taste like little jewels of jammy sweetness. A dollop of lightly sweetened whipped cream or a scoop of vanilla bean ice cream is never a bad idea—it cuts the richness beautifully.
For a more elegant presentation, dust the tart with a light snowfall of powdered sugar and add a few fresh fig slices on top. A drizzle of warm honey right before serving also makes for a stunning finish.
Storage: Cover the tart loosely with plastic wrap or foil and store it in the refrigerator for up to 3 days. The crust will soften slightly over time, but the flavor actually deepens—the honey and brown butter meld together into something even more complex. Let slices come to room temperature before serving for the best texture.
Freezing: You can freeze the fully baked and cooled tart for up to 2 months. Wrap it tightly in plastic wrap, then foil. Thaw overnight in the refrigerator and bring to room temperature before serving. I don’t recommend freezing the tart after it’s been sliced—the exposed filling tends to dry out.
Nutritional Information & Benefits
One slice of this tart (based on 8 servings) contains approximately 380 calories, 18g fat, 52g carbohydrates, 5g protein, and 2g fiber. It’s not a health food, but it’s made with real, whole ingredients—no preservatives, no artificial flavors, nothing you can’t pronounce.
Figs are a surprising source of fiber and potassium, and honey contains antioxidants and has natural antibacterial properties. The brown butter adds a dose of vitamin A from the dairy. Is it a superfood? No. But it’s a dessert that feels nourishing in the way that food made with care always does. One slice satisfies that sweet craving completely—I’ve never wanted a second.
If you’re watching your sugar intake, this tart is naturally sweetened with honey, which has a lower glycemic index than refined sugar. That said, it’s still a treat. Enjoy it mindfully, with a cup of strong coffee or a glass of dessert wine, and savor every bite.
Conclusion
This Perfect Brown Butter Fig and Honey Tart is the kind of recipe that makes you feel like you’ve discovered a secret. It looks like it belongs in a French patisserie window, but it comes together in your own kitchen with ingredients you can find at any grocery store. The brown butter adds a warmth that’s hard to describe—it’s not caramel, not toffee, but something in between that makes everything taste more grown-up and more comforting at the same time.
I love this tart because it taught me to trust my instincts over expert opinions. My neighbor Diane was wrong about brown butter overpowering figs, and I’m so glad I tested that theory for myself. Now it’s your turn. Make this tart for a dinner party, a quiet Sunday afternoon, or just because figs are in season and you deserve something beautiful. When you take that first bite and the crust shatters, the honey filling melts, and the fig bursts with sweetness, you’ll understand exactly why I kept baking until I got it right.
I’d love to hear how yours turns out. Leave a comment below with your variations, questions, or just a note about who you shared it with. And if you loved this recipe, don’t miss my cozy brown butter banana zucchini bread for another way to use that nutty, golden butter—it’s just as forgiving and even easier to throw together on a busy morning. Happy baking, friends.
Frequently Asked Questions
Can I use dried figs instead of fresh?
You can, but the texture and flavor will be different. Dried figs are much denser and sweeter, so you’ll want to rehydrate them in hot water or a splash of honey for 10 minutes before using. The final tart will be chewier and more intensely sweet—still good, just not the same as fresh.
Why did my crust shrink during baking?
Shrinking happens when the dough is overworked or not chilled enough. The gluten develops and then contracts in the oven. Make sure you’re handling the dough as little as possible, and don’t skip the freezer step. Also, make sure your pie weights are heavy enough to hold the sides in place.
Can I make this tart ahead of time?
Absolutely. You can blind-bake the crust up to 2 days ahead and store it at room temperature, tightly wrapped. The fully baked tart keeps well in the fridge for up to 3 days. Just bring it to room temperature before serving for the best texture and flavor.
My honey filling didn’t set. What went wrong?
This usually happens for one of two reasons: the tart was underbaked, or the honey-to-egg ratio was off. Make sure you’re using large eggs and measuring the honey accurately. If the center still jiggles after 40 minutes, give it another 5 minutes in the oven. The filling should be set around the edges but still slightly wobbly in the center.
Can I use a different type of honey?
Yes, but choose wisely. Mild, floral honeys like orange blossom, clover, or wildflower work best. Strong, dark honeys like buckwheat or manuka can overpower the figs and make the filling taste slightly bitter. If all you have is a robust honey, use a little less and balance it with a splash of lemon juice.
Pin This Recipe!
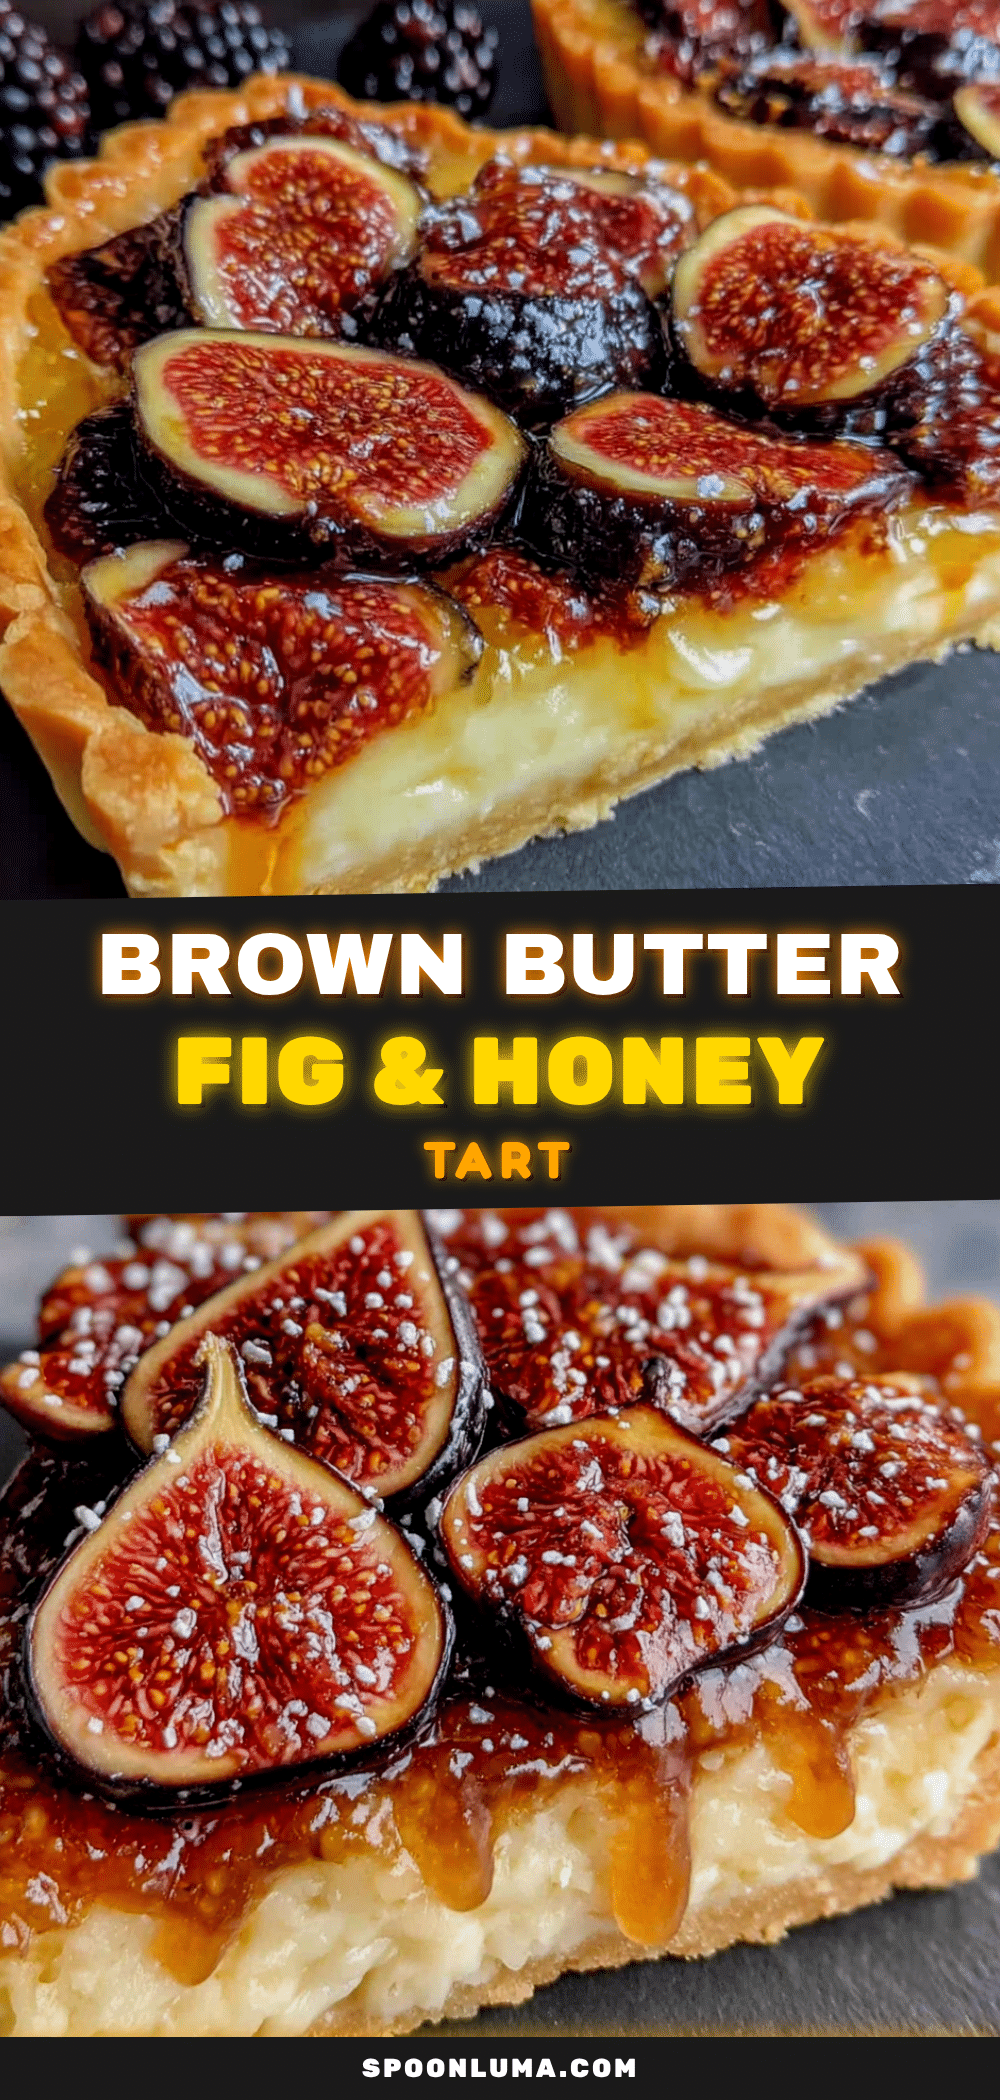
Perfect Brown Butter Fig and Honey Tart
This elegant tart features a nutty brown butter crust, a silky honey filling, and jammy roasted figs. It’s a showstopping dessert that’s surprisingly simple to make, with a flavor that deepens over time.
- Prep Time: 30 minutes
- Cook Time: 40 minutes
- Total Time: 1 hour 10 minutes (plus cooling)
- Yield: 8 servings 1x
- Category: Dessert
- Cuisine: American
Ingredients
- 1 ¼ cups all-purpose flour (160g)
- ½ cup unsalted butter, cold and cubed (113g)
- ¼ cup powdered sugar (30g)
- ¼ teaspoon fine sea salt
- 1 large egg yolk
- 1 tablespoon ice water (only if needed)
- ½ cup unsalted butter (113g) for browning
- ¾ cup mild floral honey (255g), like orange blossom or wildflower
- 3 large eggs, room temperature
- ¼ cup brown butter (from the batch made)
- 1 teaspoon pure vanilla extract
- ¼ teaspoon salt
- 8–10 fresh Mission figs, halved lengthwise
- Remaining brown butter (about 2 tablespoons) for brushing figs
- Flaky sea salt (like Maldon) for finishing
Instructions
- Brown the butter: Cut ½ cup unsalted butter into even pieces and place in a light-colored skillet over medium heat. Swirl occasionally as butter melts. After 5-7 minutes, foam will subside and brown specks will form; butter will smell nutty. Immediately remove from heat and pour into a heatproof bowl, including brown bits. Cool to room temperature.
- Make the crust: In a large bowl, whisk together flour, powdered sugar, and salt. Add cold cubed butter. Using a pastry blender or fingertips, work butter into flour until mixture resembles coarse meal with some pea-sized butter pieces. Add egg yolk and stir with a fork until dough starts to clump. Add ice water 1 teaspoon at a time if dry. Press dough evenly into bottom and up sides of a 9-inch tart pan with removable bottom. Prick bottom with fork. Freeze for 20 minutes while preheating oven to…
- Blind bake the crust: Line frozen crust with parchment paper and fill with pie weights or dried beans. Bake for 15 minutes, then remove parchment and weights and bake for another 5 minutes until bottom is dry and lightly golden. Set aside to cool slightly. Keep oven on.
- Make the honey filling: In a medium bowl, whisk together honey, room temperature eggs, ¼ cup cooled brown butter, vanilla extract, and salt until smooth and well combined. Do not over-whisk.
- Assemble the tart: Pour honey filling into pre-baked crust (about three-quarters full). Arrange fig halves cut-side up on top, nestling them in gently. Brush fig tops with remaining brown butter (about 2 tablespoons).
- Bake the tart: Place tart on a baking sheet and bake at 375°F (190°C) for 35-40 minutes. Filling should be set around edges with slight jiggle in center. Figs will be soft and jammy; crust deep golden brown. Tent edges with foil if browning too quickly.
- Cool and serve: Let tart cool completely in pan on a wire rack (at least 1 hour). Carefully remove from pan. Sprinkle with flaky sea salt just before serving. Serve at room temperature or slightly warm.
Notes
Don’t rush the brown butter; low and slow is key. Chill the crust thoroughly to prevent shrinking. Use room temperature eggs to avoid seizing the brown butter. Check for doneness with a jiggle—the center should still wobble slightly. Let the tart cool completely before slicing for clean pieces. For a gluten-free version, use a 1:1 gluten-free flour blend. For dairy-free, use vegan butter (like Miyoko’s). Store covered in the refrigerator for up to 3 days; bring to room temperature before serving. Freeze fully baked and cooled tart for up to 2 months.
Nutrition
- Serving Size: 1 slice (1/8 of tart
- Calories: 380
- Sugar: 38
- Sodium: 180
- Fat: 18
- Saturated Fat: 10
- Carbohydrates: 52
- Fiber: 2
- Protein: 5
Keywords: brown butter, fig tart, honey tart, fruit tart, easy dessert, elegant dessert, summer dessert, fall dessert, fig recipe, honey recipe


