I want pumpkin pie right now, but I don’t want to turn on the oven. That’s the entire thought that started this recipe—no deep memory of my grandmother’s kitchen, no childhood story about the first time I tasted pumpkin spice. Just a very specific craving hitting at 3 PM on a warm October afternoon when my kitchen already felt like a sauna. I had a can of pumpkin puree in the pantry, a block of cream cheese softening on the counter, and absolutely zero motivation to deal with a finicky pie crust that might shrink or crack. So I stood there for a minute, staring at the fridge, and thought: what if I just… didn’t bake it?
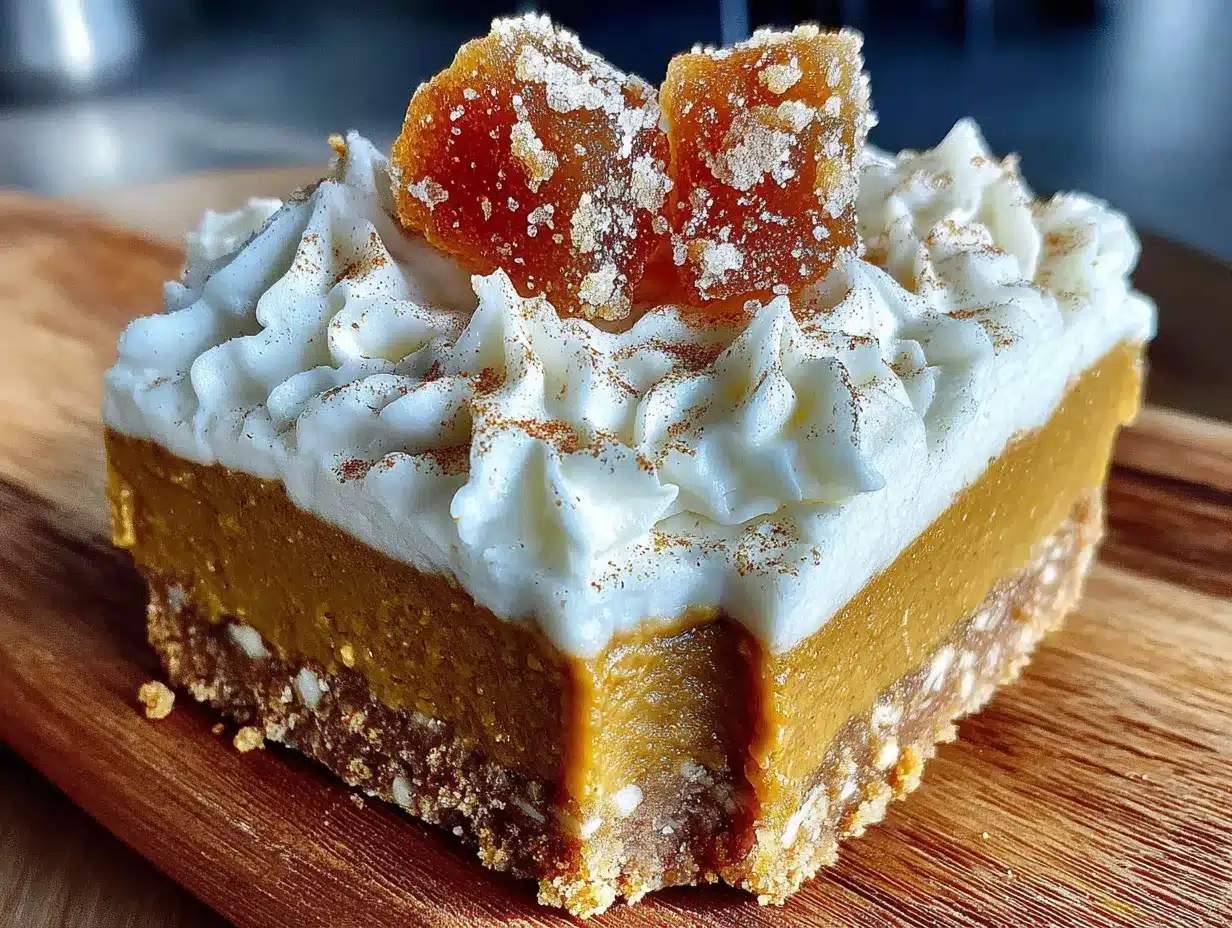
That kind of lazy honesty is how these No-Bake Pumpkin Pie Icebox Bars were born. No oven required. No rolling out dough. No waiting for a crust to blind-bake and cool before you can even think about the filling. Just a buttery, spiced cookie crust, a silky no-bake pumpkin cheesecake layer, and a cloud of whipped cream on top that makes every bite feel like a little celebration. They set up in the fridge instead of the oven, which means your house stays cool and you get to eat dessert faster. Honestly, that feels like a win any day of the week.
I’ve made these bars three times since that first experiment, tweaking the spice blend and the cream cheese ratio until the texture hit that perfect spot between firm and luscious. They slice cleanly, they hold their shape, and they taste like everything you love about pumpkin pie—just without the stress. If you’re looking for a fall dessert that actually delivers on flavor without making you sweat, this is the one. Trust me on this one.
Why You’ll Love This Recipe
I’ve tested a lot of pumpkin desserts over the years, and these bars earn their spot at the top of my list for a few solid reasons. Let me break it down for you.
- No Oven Required: Your kitchen stays cool, your energy bill stays low, and you don’t have to hover over a pie wondering if the filling is set. The fridge does all the work.
- Simple Ingredients: You probably already have most of this in your pantry. No weird specialty items, no hunting down obscure spices at three different stores.
- Perfect for Fall Gatherings: These bars travel well, slice neatly, and look gorgeous on a dessert table. Thanksgiving, Friendsgiving, potlucks, or just a cozy Tuesday night—they fit right in.
- Crowd-Pleaser: I’ve watched pumpkin skeptics go back for seconds. The cream cheese layer mellows out the pumpkin flavor in a way that even non-pumpkin people seem to love.
- Unbelievably Delicious: The texture is what gets everyone. It’s creamy but firm, rich but not heavy, and the spiced crust adds just the right amount of crunch.
What makes this recipe different from all the other pumpkin bars out there? It’s the technique. I use a combination of cold cream cheese and stabilized whipped cream that gives you that perfect sliceable texture without gelatin or baking. No weird jiggly layers, no crumbly mess. Just a clean, beautiful bar that tastes like you spent hours on it—when really, it came together in about 20 minutes of active work. That’s the kind of dessert I want in my life, and I think you will too.
These bars are the kind of dessert that makes you close your eyes after the first bite. It’s comfort food reimagined—faster, easier, but with the same soul-soothing satisfaction that only pumpkin and warm spices can deliver. Perfect for impressing guests without stress, or turning a simple fall evening into something memorable.
What Ingredients You Will Need
This recipe uses simple, wholesome ingredients to deliver that bold pumpkin flavor and creamy texture without any fuss. Most of these are pantry staples, especially if you do any fall baking at all.
For the Crust
- Graham cracker crumbs – 2 cups (about 16 full sheets, crushed). You can buy pre-crushed crumbs or pulse whole crackers in a food processor. I prefer the texture of homemade crumbs, but store-bought works fine in a pinch.
- Granulated sugar – ¼ cup. Just enough to sweeten the crust without making it candy-like.
- Unsalted butter – ½ cup (1 stick), melted. Use good quality butter here—it makes a difference in flavor. I like Kerrygold for the richness.
- Ground cinnamon – 1 teaspoon. This warms up the crust and ties it to the pumpkin filling.
- Pinch of salt – Just a small pinch to balance the sweetness.
For the Pumpkin Filling
- Cream cheese – 8 ounces (one block), softened to room temperature. Full-fat is best for that creamy, sliceable texture. Low-fat will work but the bars won’t be as firm.
- Pumpkin puree – 1 cup (not pumpkin pie filling). Make sure you grab the 100% pure pumpkin puree. Libby’s is my go-to brand for consistent texture and flavor.
- Powdered sugar – ½ cup. This dissolves smoothly into the filling without any graininess.
- Heavy whipping cream – 1 cup, cold. This gets whipped and folded in to lighten the filling. Don’t substitute with half-and-half or milk—you need the fat content for structure.
- Pumpkin pie spice – 2 teaspoons. If you don’t have a pre-mixed blend, use 1 teaspoon cinnamon, ½ teaspoon ginger, ¼ teaspoon nutmeg, and ¼ teaspoon cloves.
- Vanilla extract – 1 teaspoon. Pure vanilla, not imitation, for the best flavor.
For the Topping
- Heavy whipping cream – 1 cup, cold.
- Powdered sugar – 2 tablespoons.
- Vanilla extract – ½ teaspoon.
- Optional garnish – A sprinkle of cinnamon, a few chopped pecans, or some candied ginger on top.
That’s it. Ten core ingredients, most of which you probably already have if you’ve made any fall dessert before. The cream cheese and heavy cream do the heavy lifting here, creating that rich, mousse-like texture that makes these bars so addictive. If you’re looking for a dairy-free option, I’ve had good results using dairy-free cream cheese and full-fat coconut cream instead of heavy cream—just know the texture will be slightly softer.
Equipment Needed
You don’t need a fancy kitchen to pull these off. Here’s what you’ll actually use:
- 9×9-inch baking pan – Glass or metal both work. If you use metal, line it well with parchment paper so the bars release cleanly.
- Parchment paper – This is non-negotiable for easy removal. Let the edges hang over the sides of the pan so you can lift the whole block out.
- Electric hand mixer or stand mixer – You need this for whipping the cream and beating the cream cheese until smooth. A whisk by hand would take forever and you’d end up with tired arms.
- Mixing bowls – Two medium bowls and one large bowl should cover everything.
- Measuring cups and spoons – Standard set, nothing fancy.
- Spatula – For pressing the crust evenly into the pan and folding the whipped cream into the filling.
- Food processor or zip-top bag – For crushing the graham crackers. A rolling pin over a bag works great if you don’t own a food processor.
If you don’t have a 9×9 pan, an 8×8 pan will work—your bars will just be slightly thicker. A 9×13 pan will make thinner bars that set faster, so reduce the chill time by about an hour. I’ve made these in a disposable foil pan before for a potluck, and they turned out perfectly fine. Don’t overthink the equipment.
Preparation Method
Take your time with each step. Rushing is the only way to mess these up. Here’s how I do it:
Step 1: Make the Crust
Crush your graham crackers into fine crumbs. If using a food processor, pulse until you have a uniform sand-like texture. If using a bag and rolling pin, make sure there are no big chunks left. Pour the crumbs into a medium bowl, add the sugar, cinnamon, and salt, and stir to combine. Pour in the melted butter and mix with a fork until every crumb is moistened. The mixture should hold together when you squeeze a handful—if it falls apart, add another tablespoon of melted butter.
Press the mixture firmly into your parchment-lined 9×9 pan. Use the bottom of a measuring cup or a flat glass to really pack it down. Even pressure here means a crust that won’t crumble when you cut the bars later. Pop the pan in the fridge while you make the filling.
Step 2: Whip the Cream
Pour 1 cup of cold heavy cream into a large mixing bowl. Using your electric mixer, beat on medium-high speed until soft peaks form—this takes about 2-3 minutes. Add 2 tablespoons of powdered sugar and ½ teaspoon vanilla, then continue beating until stiff peaks form. The cream should hold its shape when you lift the beaters. Set this bowl in the fridge while you prepare the cream cheese mixture.
Step 3: Make the Pumpkin Filling
In another large bowl, beat the softened cream cheese with the electric mixer until smooth and fluffy—about 2 minutes. Scrape down the sides of the bowl with your spatula. Add the pumpkin puree, powdered sugar, pumpkin pie spice, and vanilla extract. Beat on medium speed until everything is fully combined and smooth. The mixture should look thick and uniform, with no streaks of cream cheese remaining.
Here’s the important part: take your whipped cream out of the fridge. Add about one-third of it to the pumpkin mixture. Fold it in gently with your spatula—don’t stir, don’t beat, just fold. This lightens the mixture so the rest of the cream incorporates smoothly. Once that first third is mostly combined, add the remaining whipped cream and fold until no white streaks remain. The final filling should be light, airy, and a beautiful pale orange color.
Step 4: Assemble the Bars
Take your crust out of the fridge. Spoon the pumpkin filling on top and spread it evenly with your spatula. Don’t press too hard—you don’t want to disturb the crust. Just smooth it out gently until it reaches the edges. Cover the pan with plastic wrap or aluminum foil and refrigerate for at least 6 hours, but overnight is better. The bars need that time to set up properly. If you try to cut them too early, you’ll end up with a delicious but messy situation.
Step 5: Make the Whipped Cream Topping
About an hour before you’re ready to serve, make the topping. Whip the remaining 1 cup of heavy cream, 2 tablespoons of powdered sugar, and ½ teaspoon vanilla until stiff peaks form. Spread this over the chilled filling, or pipe it on using a piping bag fitted with a star tip for a fancier look. Return the pan to the fridge for at least 30 minutes to let the topping firm up slightly.
Step 6: Slice and Serve
Lift the entire block of bars out of the pan using the parchment paper overhang. Place it on a cutting board. Use a sharp knife to slice into 9 or 16 squares, depending on how generous you want your portions. Wipe the knife clean between cuts for the neatest edges. Serve cold, straight from the fridge.
Cooking Tips & Techniques
I’ve made these bars enough times to know exactly where things can go wrong. Here’s what I’ve learned the hard way so you don’t have to.
Don’t skip softening the cream cheese. I know it’s tempting to use it straight from the fridge, but cold cream cheese will leave you with lumpy filling. Leave it on the counter for about 30 minutes before you start. If you forget, microwave it in 10-second bursts until it’s soft but not warm.
Whip your cream to stiff peaks. Soft peaks won’t give you enough structure, and your bars might end up too soft to slice. When you lift the beaters, the cream should stand up in a point that doesn’t flop over. Under-whipped cream is the number one reason these bars don’t set properly.
Fold, don’t stir. When you combine the whipped cream with the pumpkin mixture, use a gentle folding motion. Stirring vigorously will deflate all that air you just whipped in, and you’ll end up with a dense, heavy filling. Be patient here—it takes about 20 folds to get it right.
Chill overnight if you can. Six hours is the minimum, but overnight gives the flavors time to meld and the texture time to firm up perfectly. I’ve cut these at the 5-hour mark and regretted it. The bars were still delicious, just messy. Trust the chill time.
Use room temperature pumpkin puree. Cold pumpkin straight from the can can seize up the cream cheese mixture. Let it sit out while the cream cheese softens, and everything will come together much more smoothly.
I once forgot to add the pumpkin pie spice entirely and didn’t realize until I tasted the filling. I just stirred it in at the end—it worked fine, but the spice didn’t distribute as evenly. Learn from my mistake and add it when the recipe says to.
Variations & Adaptations
One of the best things about this recipe is how flexible it is. Here are some ways I’ve adapted it for different occasions and dietary needs.
Gluten-Free Version: Use gluten-free graham crackers or crushed gluten-free ginger snaps for the crust. I’ve used both and honestly prefer the ginger snap version—it adds an extra layer of warm spice that pairs beautifully with the pumpkin.
Vegan Option: Substitute the cream cheese with a high-quality vegan cream cheese (Miyoko’s or Violife work best) and use full-fat coconut cream instead of heavy whipping cream. The texture will be slightly softer, so plan to chill for a full 24 hours before slicing.
Pumpkin Chocolate Swirl: Melt ¼ cup of semi-sweet chocolate chips and drizzle it over the filling before chilling. Use a knife to gently swirl it into the top layer. The chocolate and pumpkin combination is unexpectedly amazing—think pumpkin spice meets chocolate mousse.
Bourbon Pumpkin Bars: Add 1 tablespoon of bourbon to the pumpkin filling along with the vanilla. The warmth of the bourbon deepens the spice flavors and adds a grown-up twist that’s perfect for holiday dinners.
Individual Servings: Instead of a single pan, use 8-ounce mason jars or small dessert cups. Layer the crust, filling, and topping in each jar for a grab-and-go dessert that’s perfect for picnics or packed lunches. Just reduce the chill time to 4 hours since smaller portions set faster.
I tried a maple version once, swapping 2 tablespoons of the powdered sugar for maple syrup. The flavor was incredible, but the bars were slightly softer because of the extra liquid. If you try this, add an extra hour of chill time.
Serving & Storage Suggestions
These bars are best served cold, straight from the fridge. The texture is perfect at that temperature—firm enough to hold its shape, creamy enough to melt on your tongue. If you let them sit out for more than 15 minutes, they’ll start to soften, so keep them chilled until you’re ready to serve.
For presentation, I like to garnish each bar with a light dusting of cinnamon and a few toasted pecans. It adds visual appeal and a little crunch. If you’re feeling fancy, a drizzle of caramel sauce over the top takes these to another level entirely.
These pair beautifully with a hot cup of coffee, a spiced chai latte, or even a glass of cold apple cider. For a full fall dessert spread, I’ve served them alongside my cozy brown butter banana zucchini bread with cinnamon streusel topping and they disappeared fast.
Storage: Keep the bars covered in the refrigerator for up to 5 days. The texture actually improves after the first day as the flavors continue to meld. Just make sure they’re tightly covered so they don’t pick up any fridge odors.
Freezing: These freeze beautifully. Wrap the entire block (or individual bars) tightly in plastic wrap, then in aluminum foil. Freeze for up to 3 months. To thaw, transfer to the refrigerator overnight. Don’t thaw at room temperature—the texture gets weepy. I’ve pulled these out for unexpected guests more times than I can count, and no one has ever guessed they were frozen.
One note on reheating: don’t. These are meant to be served cold. If you want a warm pumpkin dessert, you’re better off making a classic pumpkin pie or a baked pumpkin custard.
Nutritional Information & Benefits
Here’s the estimated nutritional breakdown for one bar (based on 9 servings):
- Calories: 385
- Fat: 28g
- Carbohydrates: 32g
- Protein: 5g
- Fiber: 2g
- Sugar: 22g
These numbers will vary based on your specific ingredients and portion sizes. If you cut 16 smaller bars instead of 9, you’re looking at about 215 calories per serving.
Pumpkin puree is packed with vitamin A, fiber, and antioxidants. It’s one of those ingredients that makes dessert feel slightly virtuous, even when it’s surrounded by cream cheese and butter. The cream cheese adds calcium and protein, while the heavy cream provides healthy fats that help keep you satisfied.
If you’re watching your sugar intake, you can reduce the powdered sugar in the filling to ¼ cup without sacrificing too much texture. The bars won’t be as sweet, but the pumpkin and spice flavors will shine through more clearly. For a lower-carb option, use a sugar substitute like monk fruit sweetener in both the crust and the filling—just know the texture might be slightly different.
These bars contain dairy and gluten (unless modified), so they’re not suitable for those with allergies to either. The vegan and gluten-free variations I mentioned earlier are your best bet for accommodating dietary restrictions.
Conclusion
These No-Bake Pumpkin Pie Icebox Bars are the kind of recipe that makes you wonder why you ever bothered with traditional pumpkin pie. No oven, no stress, no complicated pastry techniques—just a ridiculously delicious dessert that comes together in minutes and tastes like you spent all day in the kitchen. The creamy pumpkin filling, the buttery spiced crust, the cloud of whipped cream on top—every bite is pure fall comfort.
I love this recipe because it’s forgiving. You can tweak the spices, swap the crust, or make it dairy-free, and it still works. It’s the dessert equivalent of a warm blanket on a cool autumn evening—simple, comforting, and exactly what you need.
Now I want to hear from you. Have you tried these bars? Did you add your own twist? Drop a comment below and tell me about it. I read every single one, and I love seeing how you make these recipes your own. And if you’re looking for more easy fall desserts, check out my full collection of recipes for more seasonal inspiration. Happy no-baking, friends!
Frequently Asked Questions
Can I use pumpkin pie filling instead of pumpkin puree?
No, don’t do that. Pumpkin pie filling already has sugar and spices added, which will throw off the sweetness and texture of these bars. Stick with 100% pure pumpkin puree for the best results. If you accidentally buy pie filling, you can still use it—just reduce the powdered sugar by half and skip the pumpkin pie spice.
How long do these bars need to chill?
At least 6 hours, but overnight is strongly recommended. The filling needs time to firm up so you can slice clean bars. If you’re in a hurry, you can speed things up by placing the pan in the freezer for 2-3 hours instead of the fridge—just check on it after 2 hours to make sure it’s not freezing solid.
Can I make these bars ahead of time?
Absolutely. These are actually better when made a day ahead. The flavors meld and deepen overnight, and the texture sets up perfectly. You can make the entire dessert up to 2 days in advance, just wait to add the whipped cream topping until the day you’re serving. Store the assembled bars covered in the fridge.
Why did my filling turn out runny?
This usually happens for one of three reasons: your cream cheese wasn’t softened properly, your whipped cream wasn’t whipped to stiff peaks, or you didn’t chill the bars long enough. Make sure your cream cheese is at room temperature, whip that cream until it holds its shape firmly, and give the bars the full overnight chill. If you’ve done all three and still have issues, check that your pumpkin puree isn’t too watery—some brands have higher water content than others.
Can I use a different crust?
Definitely. Ginger snaps, vanilla wafers, shortbread cookies, or even crushed pretzels all work beautifully. Just keep the butter-to-crumb ratio the same—about ½ cup melted butter for every 2 cups of crumbs. I’ve made a version with crushed Biscoff cookies that was absolutely incredible, if you want something with a little more spice and caramel flavor.
Pin This Recipe!
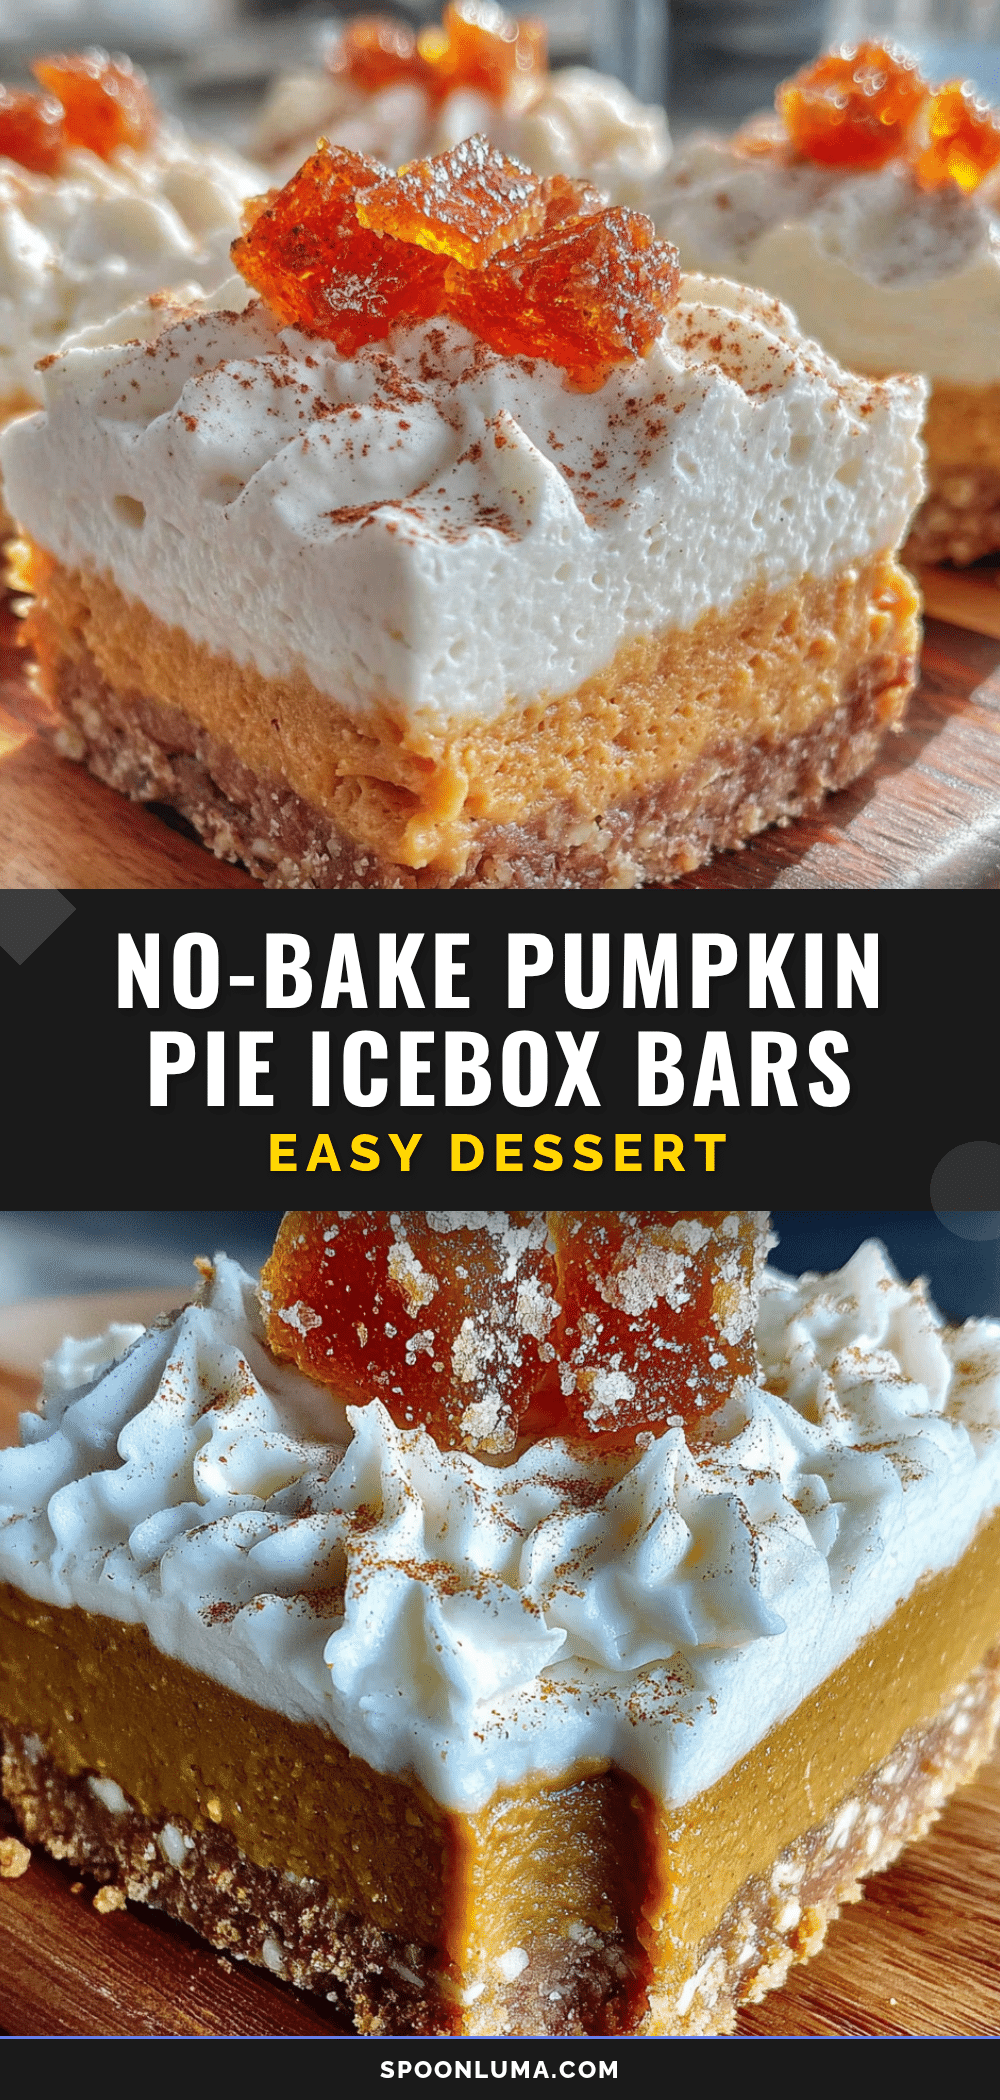
Easy No-Bake Pumpkin Pie Icebox Bars: Best Fall Dessert
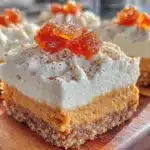
These no-bake pumpkin pie icebox bars feature a buttery spiced cookie crust, a silky no-bake pumpkin cheesecake layer, and a cloud of whipped cream on top. No oven required, just a fridge, making them the perfect easy fall dessert.
- Prep Time: 20 minutes
- Cook Time: 0 minutes
- Total Time: 6 hours 20 minutes (includes chilling)
- Yield: 9 servings 1x
- Category: Dessert
- Cuisine: American
Ingredients
- 2 cups graham cracker crumbs (about 16 full sheets, crushed)
- 1/4 cup granulated sugar
- 1/2 cup unsalted butter, melted
- 1 teaspoon ground cinnamon
- Pinch of salt
- 8 ounces cream cheese, softened to room temperature
- 1 cup pumpkin puree (not pumpkin pie filling)
- 1/2 cup powdered sugar
- 1 cup heavy whipping cream, cold
- 2 teaspoons pumpkin pie spice
- 1 teaspoon vanilla extract
- 1 cup heavy whipping cream, cold (for topping)
- 2 tablespoons powdered sugar (for topping)
- 1/2 teaspoon vanilla extract (for topping)
- Optional garnish: cinnamon, chopped pecans, candied ginger
Instructions
- Crush graham crackers into fine crumbs. In a medium bowl, combine crumbs, sugar, cinnamon, and salt. Pour in melted butter and mix until every crumb is moistened. Press firmly into a parchment-lined 9×9-inch pan. Refrigerate while making filling.
- In a large bowl, beat 1 cup cold heavy cream with an electric mixer on medium-high until soft peaks form (2-3 minutes). Add 2 tablespoons powdered sugar and 1/2 teaspoon vanilla, then beat until stiff peaks form. Refrigerate.
- In another large bowl, beat softened cream cheese until smooth and fluffy (about 2 minutes). Add pumpkin puree, 1/2 cup powdered sugar, pumpkin pie spice, and 1 teaspoon vanilla. Beat until fully combined and smooth.
- Fold one-third of the whipped cream into the pumpkin mixture gently. Add remaining whipped cream and fold until no white streaks remain. The filling should be light and airy.
- Remove crust from fridge. Spoon pumpkin filling on top and spread evenly. Cover with plastic wrap and refrigerate at least 6 hours, preferably overnight.
- About an hour before serving, make topping: whip 1 cup cold heavy cream, 2 tablespoons powdered sugar, and 1/2 teaspoon vanilla until stiff peaks form. Spread or pipe over chilled filling. Refrigerate at least 30 minutes.
- Lift bars out of pan using parchment overhang. Slice into 9 or 16 squares with a sharp knife, wiping clean between cuts. Serve cold.
Notes
Chill overnight for best texture. Use full-fat cream cheese for firm bars. Whip cream to stiff peaks for proper structure. Fold gently to avoid deflating. For gluten-free, use gluten-free graham crackers or ginger snaps. For vegan, use vegan cream cheese and coconut cream.
Nutrition
- Serving Size: 1 bar (based on 9 se
- Calories: 385
- Sugar: 22
- Sodium: 280
- Fat: 28
- Saturated Fat: 16
- Carbohydrates: 32
- Fiber: 2
- Protein: 5
Keywords: no-bake pumpkin pie, pumpkin bars, icebox bars, fall dessert, easy pumpkin dessert, no-bake dessert, pumpkin cheesecake bars