Pulling a baking sheet out of the oven with the handle of a wooden spoon still wedged against it because I forgot a pot holder—that’s where this cookie cake started. My kitchen was a wreck. Flour dusted the counters, a bag of candy corn had tipped over, and somewhere under a sticky measuring cup was the invitation for my niece’s Halloween party that I’d promised to bring dessert for. I had forty minutes and a vague memory of a spiderweb design I’d seen on Pinterest three years ago. No fancy templates. No time for a second batch. Just a single giant chocolate chip cookie and a tube of icing I prayed wouldn’t crack. Honestly, it looked like a mess going into the oven. But when it came out and I dragged that butter knife through the white frosting to make those webbed lines, something clicked. It wasn’t perfect—it was better. It looked like a real spiderweb, the kind you find in the corner of a shed on a foggy October morning. That accidental, lopsided beauty became the whole point. This spiderweb Halloween cookie cake isn’t about flawless piping. It’s about the moment you pull that knife through and watch it turn into magic. And yeah, I brought it to the party. It was gone before I got a slice.
Why You’ll Love This Recipe
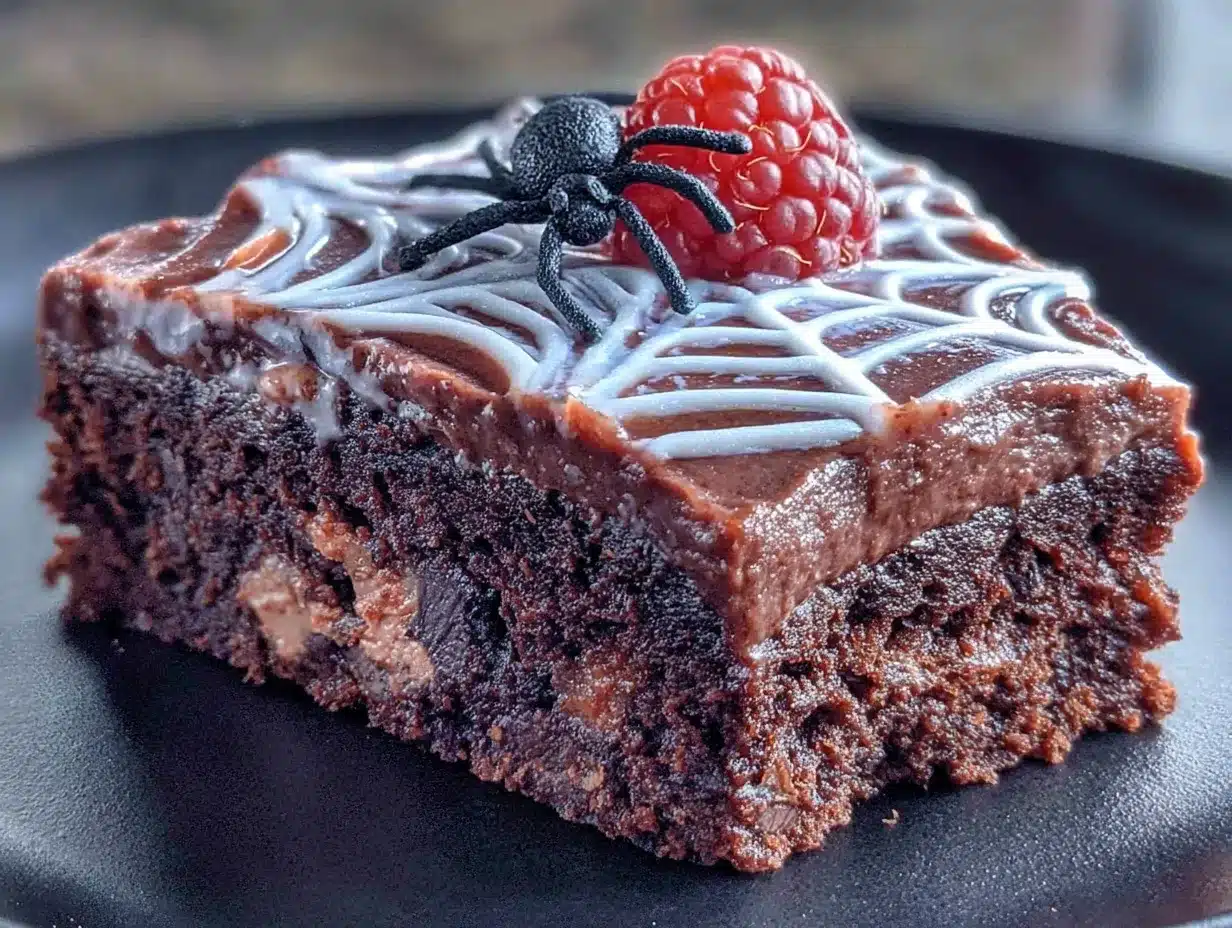
Let’s be real—Halloween desserts are usually either adorable or delicious. Rarely both. This spiderweb Halloween cookie cake manages to be the life of the party without making you cry over a piping bag. Here is why it works:
- Quick & Easy: From mixing bowl to decorated cake in under an hour. No chilling dough. No complicated steps.
- Simple Ingredients: Butter, sugar, flour, eggs—stuff you probably already have. The only specialty item is black gel icing, and that’s a dollar at the grocery store.
- Perfect for Halloween Parties: This thing is a showstopper. Kids love the web design. Adults love that it’s an actual cookie they can eat without a fork.
- Crowd-Pleaser: I’ve brought this to three different gatherings now, and every single time, someone asks for the recipe. It’s the kind of dessert that disappears fast.
- Unbelievably Delicious: The edges get crispy, the middle stays soft and chewy, and that chocolate-icing combo hits every note. It’s comfort food dressed up for a spooky night.
What makes this version different from the other spiderweb cakes out there? Two things. First, the cookie base is thick—almost an inch tall—so it feels substantial, not like a flattened sugar cookie. Second, the decorating method is foolproof. You don’t need a steady hand or artistic talent. You literally drag a toothpick through circles of icing. That’s it. No stress. No do-overs. This recipe is the one you make when you want to impress people but also want to enjoy the party yourself.
What Ingredients You Will Need
This spiderweb Halloween cookie cake uses pantry staples to build something that tastes way more complicated than it is. The ingredients are straightforward, but a few small choices make a big difference.
For the Cookie Cake Base
- Unsalted butter, softened (1 cup / 2 sticks) – I use Land O’Lakes for consistent results. Softened means room temperature, not melted. You want it pliable but still cool to the touch.
- Granulated sugar (3/4 cup / 150g) – White sugar gives that classic cookie sweetness and helps the edges crisp up.
- Light brown sugar, packed (3/4 cup / 150g) – This is the secret to a chewy center. The molasses in brown sugar keeps the middle soft while the edges get golden.
- Large eggs (2, room temperature) – Cold eggs can seize the butter mixture. Let them sit on the counter for 15 minutes if you forgot.
- Vanilla extract (2 teaspoons) – Pure vanilla is better, but imitation works fine. I’ve used both.
- All-purpose flour (2 1/4 cups / 280g) – Spoon and level it. Scooping directly from the bag packs in too much flour and makes the cookie cake dry.
- Baking soda (1 teaspoon) – Make sure it’s fresh. Old baking soda won’t give you that nice lift.
- Salt (1/2 teaspoon) – Balances the sweetness. Don’t skip it.
- Semi-sweet chocolate chips (2 cups / 340g) – I prefer Ghirardelli for their melt quality, but any brand works. You can also use milk chocolate if you want it sweeter.
For the Spiderweb Decoration
- Powdered sugar (1 cup / 120g) – For the white icing base. Sift it if it’s lumpy.
- Milk or heavy cream (2-3 tablespoons) – Start with 2 tablespoons and add more until the icing is thick but pipeable. Heavy cream makes it richer.
- Vanilla extract (1/2 teaspoon) – Adds flavor to the icing.
- Black gel icing (1 tube) – Found in the baking aisle. Wilton brand is reliable. Do not use liquid food coloring—it will bleed into the white icing.
- Optional: Candy spiders or sprinkles – For extra creepy factor. I’ve used little plastic spiders from the party store (remove before eating) and black sugar sprinkles.
Equipment Needed
You don’t need a professional bakery setup for this spiderweb Halloween cookie cake. Here’s what I used:
- 12-inch round pizza pan or baking sheet – A pizza pan works perfectly because the edges are low. If you only have a rimmed baking sheet, flip it over and use the flat bottom. I learned that trick after my first cookie cake puffed over the edge.
- Electric hand mixer or stand mixer – A hand mixer is fine. I’ve made this with a whisk and a sore arm, but the mixer saves time.
- Parchment paper – Absolutely essential. Without it, the cookie cake will stick. Cut a circle slightly larger than your pan.
- Spatula – For spreading the dough. A rubber spatula works best.
- Toothpick or wooden skewer – For dragging the spiderweb design. A toothpick gives thinner lines; a skewer makes bolder ones.
- Piping bag or zip-top bag – For the white icing. A zip-top bag with a tiny corner snipped off works great. No need for fancy tips.
- Cooling rack – Let the cookie cake cool completely before decorating. Warm cookie + icing = melted mess. Trust me.
Preparation Method
This is where the magic happens. Follow these steps, and you’ll have a spiderweb Halloween cookie cake that looks like you spent hours on it (even though you didn’t).
- Preheat the oven to 350°F (175°C). Line your 12-inch round pan with parchment paper. If you’re using a baking sheet, cut the parchment to fit the flat surface. Lightly grease the parchment with butter or non-stick spray.
- Cream the butter and sugars. In a large bowl, beat the softened butter, granulated sugar, and brown sugar together on medium speed until light and fluffy—about 3 minutes. You’ll see the color change from pale yellow to almost ivory. Scrape down the sides of the bowl halfway through.
- Add the eggs and vanilla. Crack the eggs into the butter mixture one at a time, beating well after each. Add the vanilla. The mixture should look smooth and glossy. If it looks curdled, your eggs were too cold—don’t panic, it will still bake fine.
- Mix the dry ingredients. In a separate bowl, whisk together the flour, baking soda, and salt. Add this to the wet mixture in two additions, mixing on low speed until just combined. Overmixing develops gluten and makes the cookie cake tough. Stop when you no longer see streaks of flour.
- Fold in the chocolate chips. Use a spatula to stir in the chocolate chips by hand. Make sure they’re evenly distributed. The dough will be thick and slightly sticky—that’s normal.
- Spread the dough in the pan. Scoop the dough onto the center of the prepared pan. Use your spatula (or lightly greased hands) to press it into an even circle about 1/2-inch thick. Leave a little room around the edge—it will spread as it bakes. I like to make the edges slightly thicker than the center for that bakery-style look.
- Bake for 20-25 minutes. Start checking at 20 minutes. The edges should be golden brown and the center should look set but still soft. A toothpick inserted in the center should come out with a few moist crumbs—not wet batter. The cookie cake will continue to firm up as it cools.
- Cool completely on the pan. This is the hardest part. Let the cookie cake sit on the pan for 10 minutes, then transfer it (still on the parchment) to a cooling rack. Wait until it’s completely room temperature before decorating. If you rush this step, the icing will slide right off.
- Make the white icing. In a small bowl, whisk together the powdered sugar, 2 tablespoons of milk or cream, and vanilla. Add more liquid 1 teaspoon at a time until the icing is thick but flows slowly off the spoon. It should be thick enough to hold its shape when piped.
- Pipe the white icing circles. Spoon the white icing into a piping bag or zip-top bag. Snip a tiny corner (about 1/8-inch). Pipe a small circle in the center of the cookie cake. Then pipe concentric circles around it, spacing them about 1 inch apart. Don’t worry about perfect circles—the web effect hides imperfections.
- Create the spiderweb. This is the fun part. Take a toothpick or wooden skewer and start from the center. Gently drag it through the white icing circles outward toward the edge. Wipe the toothpick clean after each line. Repeat this every inch or so around the circle, like spokes on a wheel. The icing will pull into a web pattern. If the lines don’t connect cleanly, don’t stress—it adds to the spooky vibe.
- Add the black icing details. Use the black gel icing to pipe a small spider in the center of the web or along one of the lines. You can also pipe tiny dots along the web for a more intricate look. If you have candy spiders, place them now while the icing is still wet.
- Let the icing set. Allow the decorated cookie cake to sit for at least 30 minutes before slicing. This gives the icing time to firm up so it doesn’t smear when you cut it.
Cooking Tips & Techniques
I’ve made this spiderweb Halloween cookie cake about seven times now, and I’ve messed up in almost every way possible. Here’s what I learned so you don’t have to repeat my mistakes.
Don’t overbake it. The first time I made this, I left it in the oven for 28 minutes because I wanted the edges extra crispy. The result? A cookie cake that was hard to cut and dry in the middle. Pull it out when the center still looks slightly underdone. It will continue baking from residual heat as it cools.
Chill the dough if it’s too sticky. Sometimes, especially on humid days, the dough gets annoyingly sticky. Pop it in the fridge for 15 minutes before spreading it in the pan. It makes handling much easier and helps the cookie cake hold its shape better.
Use a toothpick, not a knife. I tried using a butter knife to drag the web design once. The lines were too thick and the icing blobbed together. A toothpick gives you thin, delicate lines that look more like a real spiderweb. Plus, you can control the depth better.
Work quickly with the icing. The white icing starts to set after a few minutes. Once you pipe the circles, drag the toothpick through them immediately. If you wait too long, the icing forms a skin and won’t pull into clean lines.
Multitask strategically. While the cookie cake is baking, make the white icing and set up your decorating station. Have the toothpick, black gel icing, and any sprinkles ready. Once the cake cools, you want to decorate in one smooth flow without running around looking for supplies.
Variations & Adaptations
One of the best things about this spiderweb Halloween cookie cake is how easy it is to tweak. Here are a few ways I’ve changed it up:
- Gluten-Free Version: Swap the all-purpose flour for a 1:1 gluten-free baking flour (I like King Arthur Measure for Measure). Add 1/4 teaspoon of xanthan gum if your blend doesn’t already include it. The texture will be slightly more tender, but the web design works exactly the same.
- Dairy-Free Option: Use vegan butter (I’ve used Earth Balance) and dairy-free chocolate chips. For the icing, substitute the milk with oat or almond milk. The flavor is a little less rich, but still delicious.
- Flavor Twist: Add 1 teaspoon of cinnamon and 1/4 teaspoon of cayenne pepper to the dry ingredients for a Mexican hot chocolate vibe. The warmth of the spices pairs perfectly with the semi-sweet chocolate and makes the cookie cake feel even more festive.
- Different Decorating Colors: Instead of white and black, try orange icing with black web lines for a more traditional Halloween look. You can also use purple or green gel icing for the spider. I did a neon green spider once, and it looked like something from a haunted house.
- Mini Cookie Cakes: Divide the dough into 4 smaller circles on a baking sheet and bake for 12-15 minutes. Decorate each one individually. They’re perfect for party favors or kids’ lunchboxes.
Serving & Storage Suggestions
This spiderweb Halloween cookie cake is best served at room temperature. The texture is ideal—crispy edges, soft center—when it hasn’t been refrigerated. If you’ve stored it in the fridge, let it sit on the counter for about 20 minutes before serving.
For presentation, place the cookie cake on a black or orange platter to make the web design pop. I like to surround it with a few candy corn or mini pumpkins for extra Halloween flair. If you’re serving it at a party, slice it into wedges like a pizza. Each piece should have a bit of the spiderweb design on top.
Pair it with a cold glass of milk, a scoop of vanilla ice cream, or—if you’re feeling indulgent—a drizzle of warm caramel sauce. The combination of chocolate, caramel, and that soft cookie texture is next-level comfort food.
Storage: Keep the cookie cake in an airtight container at room temperature for up to 3 days. Do not stack slices on top of each other unless you layer parchment paper between them—the icing will stick and smear. If you need to store it longer, wrap it tightly in plastic wrap and freeze for up to 2 months. Thaw at room temperature before serving. The icing may lose a bit of its crispness after freezing, but the flavor stays great.
Flavors actually improve after a day. The chocolate chips settle into the dough, and the cookie becomes more uniform in texture. I’ve snuck a slice the morning after baking, and it was just as good as fresh.
Nutritional Information & Benefits
Let’s be honest—this spiderweb Halloween cookie cake is a treat, not a health food. But here’s what you’re looking at per slice (assuming 12 servings):
| Nutrient | Amount per Slice |
|---|---|
| Calories | ~380 |
| Total Fat | 18g |
| Saturated Fat | 10g |
| Carbohydrates | 52g |
| Sugar | 34g |
| Protein | 5g |
| Fiber | 2g |
On the bright side, dark chocolate contains antioxidants and a small amount of iron. The butter provides vitamin A, and the eggs add protein. If you use dark chocolate chips (60% cacao or higher), you’ll get more flavonoids—compounds linked to heart health. But again, this is a dessert. Enjoy it for what it is: a delicious, fun, once-in-a-while indulgence.
For those with dietary restrictions, the gluten-free and dairy-free variations above work well. Just note that the nutritional values will shift depending on the substitutions.
Conclusion
This spiderweb Halloween cookie cake is the dessert you bring when you want to impress without stress. It looks like you spent hours piping intricate designs, but really, you just dragged a toothpick through some icing. That’s the kind of magic I can get behind.
I love this recipe because it captures everything Halloween should be—a little spooky, a lot of fun, and absolutely delicious. It’s the cookie cake that makes kids gasp and adults reach for seconds. And honestly, it’s the kind of recipe that makes you feel like a baking genius even when you’re covered in flour and running late.
So go ahead—make this for your Halloween party, your kid’s classroom, or just because you want a giant cookie shaped like a spiderweb. Customize it with your favorite colors or add a few candy spiders for extra creep factor. If you try it, leave a comment below and tell me how it turned out. Did your web come out perfect? Did you add your own twist? I’d love to hear about it.
Happy Halloween, and happy baking!
Frequently Asked Questions
Can I make this spiderweb Halloween cookie cake ahead of time?
Yes! You can bake the cookie cake up to 2 days in advance. Store it undecorated in an airtight container at room temperature. Decorate it the day you plan to serve it for the best-looking web design. The icing sets best on a freshly cooled cookie cake.
My white icing is too runny. What do I do?
Add more powdered sugar, 1 tablespoon at a time, until the icing thickens. If it’s too thick, add milk a few drops at a time. The ideal consistency is thick enough to hold its shape when piped but soft enough to drag into web lines. If you accidentally make it too thick, just add a tiny splash of milk to loosen it up.
Can I use a different chocolate chip flavor?
Absolutely. Milk chocolate chips make the cookie cake sweeter and creamier. Dark chocolate chips give it a richer, more sophisticated flavor. White chocolate chips work too, but they’re very sweet—consider reducing the sugar in the dough by 2 tablespoons if you go that route.
How do I get the spiderweb design to look perfect?
Don’t aim for perfection—that’s the secret. The beauty of a spiderweb is its irregularity. If your circles are wobbly or the lines don’t connect perfectly, it actually looks more authentic. Just make sure you drag the toothpick through the icing while it’s still wet. If the icing starts to set, pipe fresh circles and try again. You can always wipe the old icing off and start over.
Can I freeze the decorated cookie cake?
Technically yes, but the icing may lose some of its definition. For best results, freeze the undecorated cookie cake for up to 2 months. Thaw it at room temperature, then decorate it fresh. If you’ve already decorated it, freeze it in a single layer on a baking sheet, then wrap it tightly in plastic wrap and foil. Thaw in the refrigerator overnight and let it come to room temperature before serving.
Pin This Recipe!
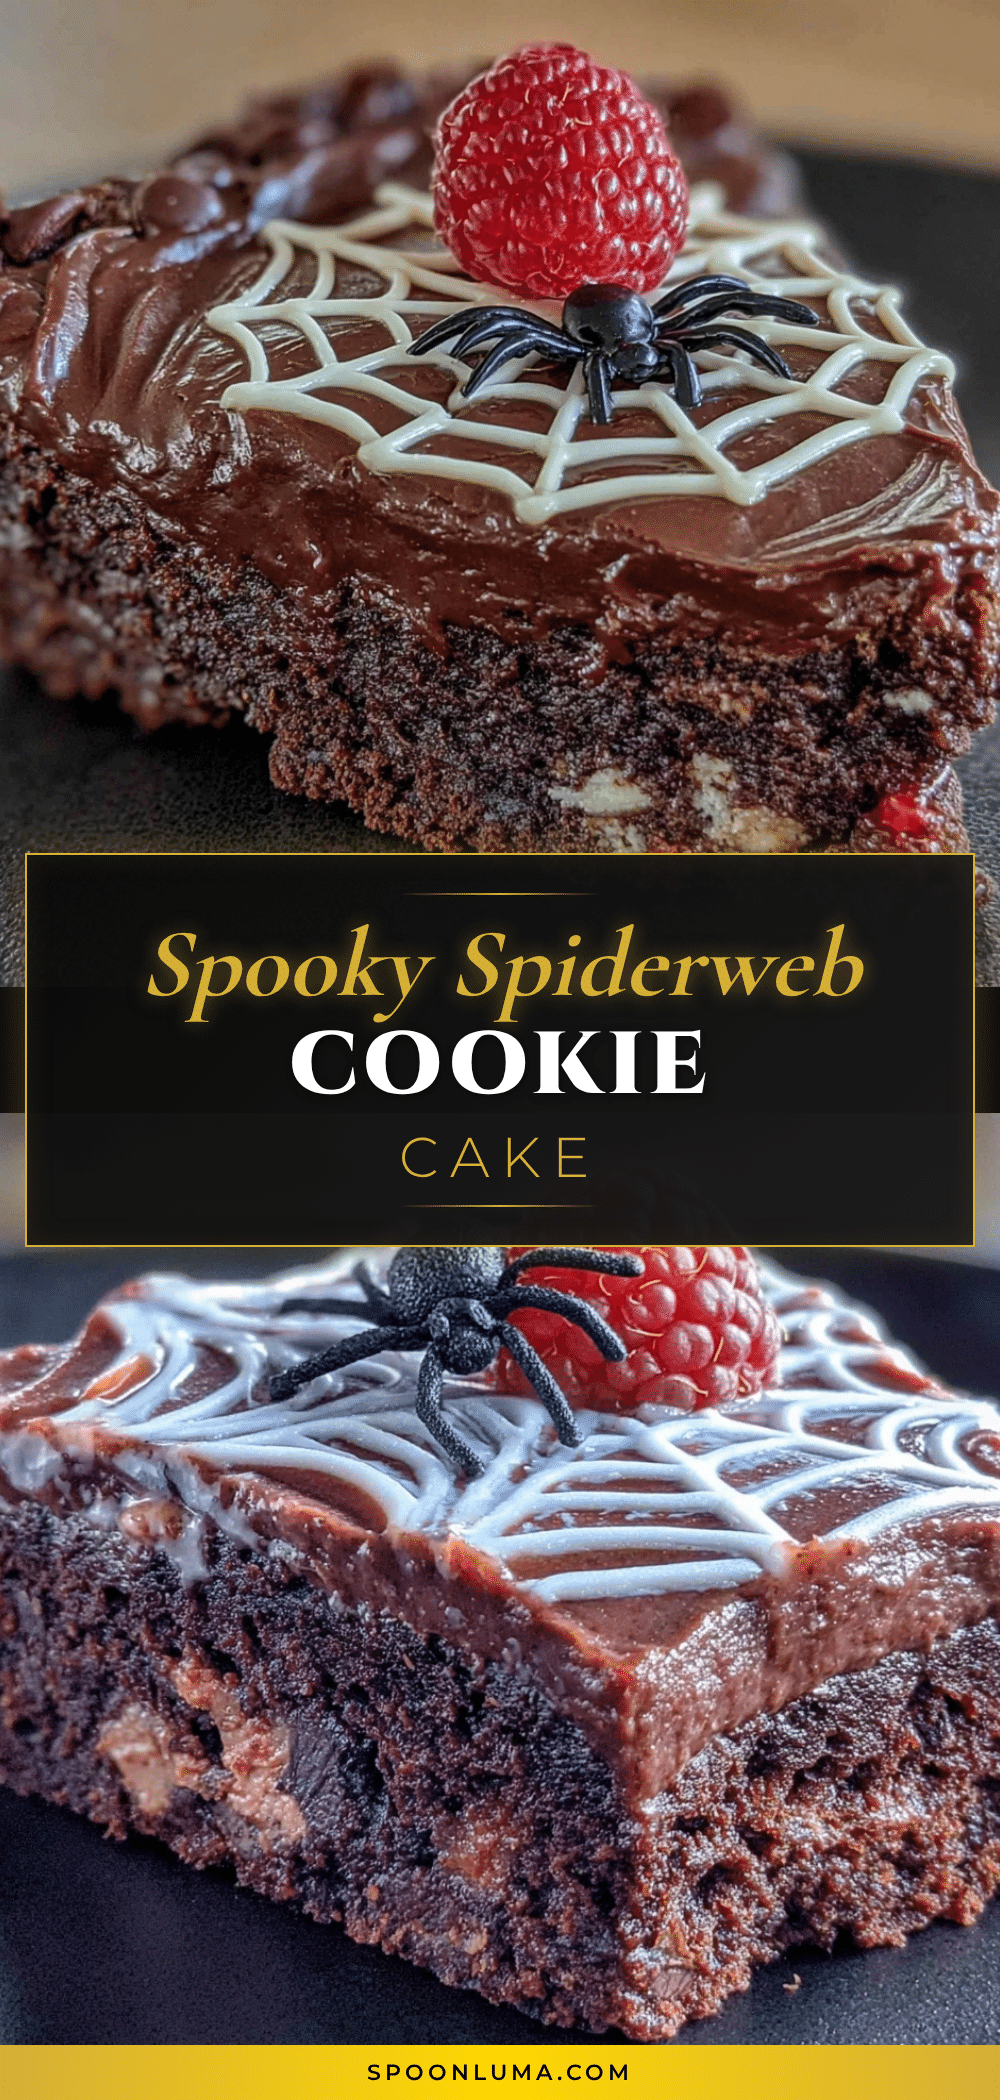
Best Spiderweb Halloween Cookie Cake Recipe (Easy & Perfect!)
A giant chocolate chip cookie cake decorated with a spiderweb design using white icing and black gel. It’s quick, easy, and perfect for Halloween parties.
- Prep Time: 15 minutes
- Cook Time: 25 minutes
- Total Time: 40 minutes
- Yield: 12 servings 1x
- Category: Dessert
- Cuisine: American
Ingredients
- 1 cup (2 sticks) unsalted butter, softened
- 3/4 cup (150g) granulated sugar
- 3/4 cup (150g) light brown sugar, packed
- 2 large eggs, room temperature
- 2 teaspoons vanilla extract
- 2 1/4 cups (280g) all-purpose flour
- 1 teaspoon baking soda
- 1/2 teaspoon salt
- 2 cups (340g) semi-sweet chocolate chips
- 1 cup (120g) powdered sugar
- 2–3 tablespoons milk or heavy cream
- 1/2 teaspoon vanilla extract (for icing)
- 1 tube black gel icing
Instructions
- Preheat the oven to 350°F (175°C). Line a 12-inch round pan with parchment paper and lightly grease.
- In a large bowl, beat the softened butter, granulated sugar, and brown sugar together on medium speed until light and fluffy, about 3 minutes.
- Add the eggs one at a time, beating well after each, then add the vanilla. Mix until smooth and glossy.
- In a separate bowl, whisk together the flour, baking soda, and salt. Add to the wet mixture in two additions, mixing on low until just combined.
- Fold in the chocolate chips with a spatula until evenly distributed.
- Spread the dough evenly in the prepared pan, pressing into a circle about 1/2-inch thick, making edges slightly thicker.
- Bake for 20-25 minutes, until edges are golden and center is set but soft. Cool completely on the pan.
- For the icing: whisk together powdered sugar, 2 tablespoons milk or cream, and 1/2 teaspoon vanilla. Add more liquid until thick but pipeable.
- Pipe concentric circles of white icing on the cooled cookie cake, starting from the center and spacing about 1 inch apart.
- Using a toothpick, drag from the center outward through the circles to create a web pattern. Wipe the toothpick clean after each line.
- Pipe a small spider or dots with black gel icing. Add candy spiders if desired.
- Let the icing set for at least 30 minutes before slicing.
Notes
Don’t overbake; the center should look slightly underdone. Chill the dough if too sticky. Work quickly with the icing once piped. For gluten-free, use a 1:1 gluten-free flour blend. For dairy-free, use vegan butter and dairy-free chocolate chips.
Nutrition
- Serving Size: 1 slice
- Calories: 380
- Sugar: 34
- Fat: 18
- Saturated Fat: 10
- Carbohydrates: 52
- Fiber: 2
- Protein: 5
Keywords: Halloween cookie cake, spiderweb cookie cake, chocolate chip cookie cake, Halloween dessert, easy Halloween recipe