I want a brownie that tastes like a candy cane kissed a latte and they decided to get married in my kitchen. Right now. And I have everything except the willpower to stop myself from eating them all before they cool. That’s the honest truth. These Decadent Peppermint Mocha Fudge Bars happened because I was standing in my pantry at 9 p.m., staring at a bag of semi-sweet chocolate chips and a half-empty tin of cocoa powder, and I just refused to make another regular brownie. Not tonight.
I had a leftover peppermint candy cane from some holiday project I swore I’d finish, and a shot of cold brew concentrate sitting in the fridge. It felt less like a recipe and more like a dare. So I grabbed a bowl, melted some butter, and told myself if it flopped, at least I’d have chocolate. But it didn’t flop. It did the opposite. These bars came out so fudgy and rich that I actually texted my sister a photo at 10:15 p.m. with the caption, “I think I just accidentally made the best thing ever.”
The peppermint crinkle on top is just enough to feel festive without being aggressive, and the coffee flavor doesn’t shout—it just deepens everything. Honestly, I’ve made these three times since that first night, and each time I tweak something tiny. But the core? That’s locked in. This is the kind of recipe you keep in your back pocket for when you need to bring something to a gathering and you want people to ask for the recipe before they’ve even finished chewing.
Why You’ll Love This Recipe
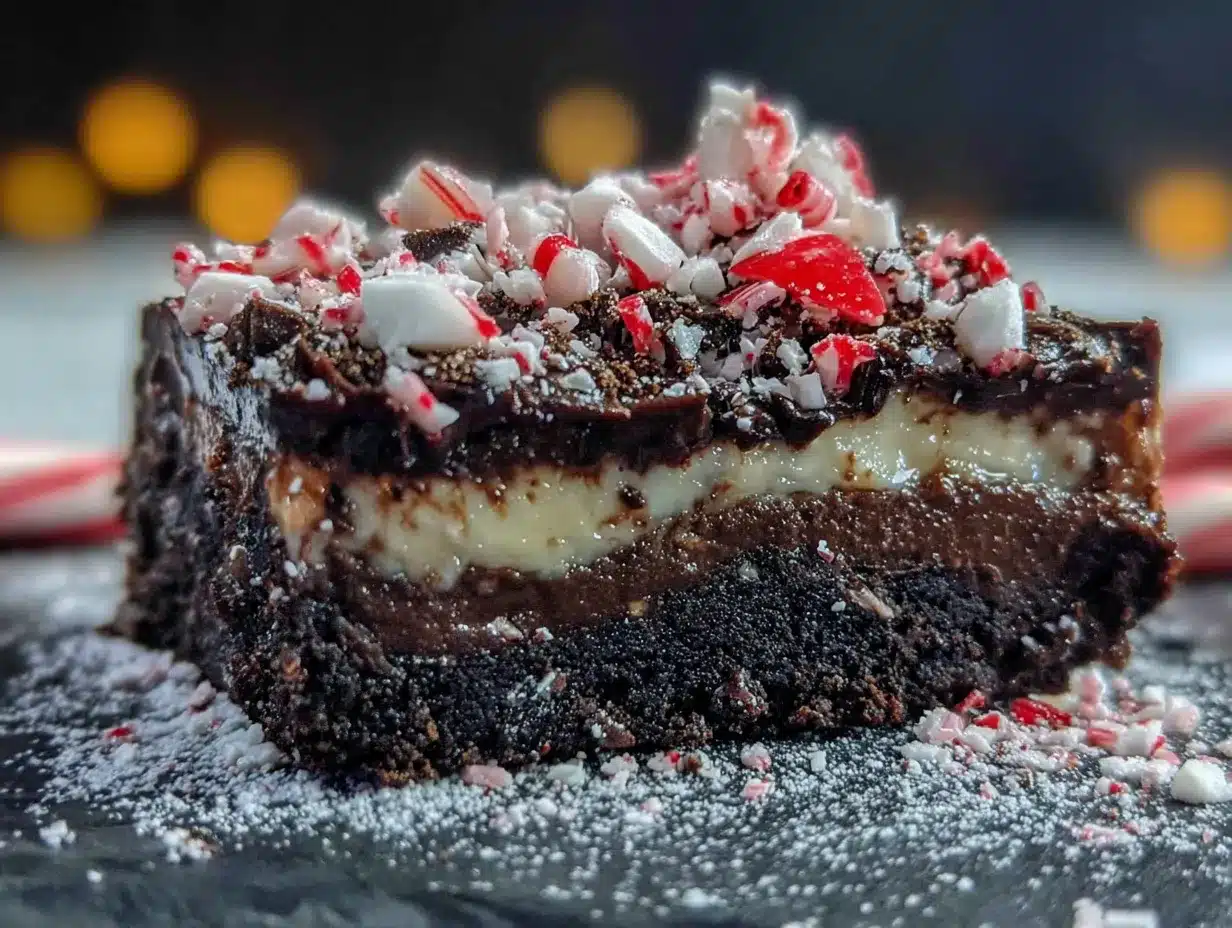
These aren’t just another brownie bar. They’re the result of a few very specific decisions I made after testing this concept more times than I’m willing to admit. You get a dense, fudgy texture that holds its shape when sliced, a balanced mocha flavor that doesn’t taste artificial, and a peppermint topping that adds crunch and color without overwhelming the chocolate. Here’s what makes them worth your time:
- Quick & Easy: From start to finish, you’re looking at about 45 minutes. Most of that is baking time. The actual hands-on work is maybe 15 minutes.
- Simple Ingredients: Butter, sugar, eggs, flour, cocoa powder, chocolate chips, instant coffee or espresso powder, and a candy cane. That’s it. No weird extracts you’ll never use again.
- Perfect for the Holidays: These bars look stunning on a cookie tray, they travel well, and they’re a guaranteed hit at any December gathering. But honestly? I make them in March too. No judgment.
- Crowd-Pleaser: Kids love the peppermint crunch. Adults love the coffee undertone. Everyone loves the fudge factor.
- Unbelievably Delicious: The texture is what gets me every time. It’s dense but not gummy, rich but not greasy. That perfect brownie chew that makes you close your eyes after the first bite.
What sets this apart from every other peppermint brownie recipe out there is the way the coffee interacts with the chocolate. I’m not using a tablespoon of instant granules and calling it a day. I dissolve it in warm butter first, which unlocks a deeper, more rounded flavor. And the peppermint? It goes on top, not inside the batter. That way the candy stays crunchy and the mint stays bright. It’s a small structural choice that makes a huge difference.
What Ingredients You Will Need
This recipe leans on pantry staples with a couple of festive additions. The ingredient list is short, but every component plays a role in building that signature fudgy texture and layered flavor. Let’s break it down.
For the Fudge Bar Base
- 1/2 cup (113g) unsalted butter — I use salted butter in a pinch and just skip the flaky salt at the end. But unsalted gives you more control.
- 1 cup (200g) granulated sugar — White sugar keeps the texture light enough while still being dense. Brown sugar would make them too moist and almost cake-like.
- 2 large eggs — Room temperature eggs incorporate more evenly. If you forgot to set them out, place them in a bowl of warm water for 5 minutes.
- 1 teaspoon vanilla extract — Pure vanilla, not imitation. It matters here because the flavor is simple and every note stands out.
- 1/2 cup (60g) all-purpose flour — Spoon and level it. Scooping directly from the bag packs in too much flour and gives you dry bars.
- 1/3 cup (40g) unsweetened cocoa powder — I prefer Dutch-process for its smoother, darker flavor, but natural cocoa works too. Just know the color will be slightly lighter.
- 1 tablespoon instant espresso powder — This is the secret weapon. It doesn’t make the bars taste like coffee. It makes the chocolate taste more like chocolate. (I’ve used instant coffee granules in a pinch, but espresso powder dissolves more cleanly.)
- 1/4 teaspoon salt — Don’t skip it. Salt balances sweetness and deepens the cocoa.
- 1 cup (175g) semi-sweet chocolate chips — Fold these in at the end. They create pockets of melted chocolate throughout the bars.
For the Peppermint Topping
- 1/2 cup (85g) white chocolate chips — Use a brand you trust for melting. White chocolate can seize easily, so go slow.
- 1 teaspoon coconut oil or vegetable shortening — This stabilizes the white chocolate and gives it a glossy finish.
- 1/4 cup crushed peppermint candy canes — About 4 standard candy canes. Crush them in a sealed bag with a rolling pin. Don’t pulverize them into dust—you want some texture.
- Optional: Flaky sea salt — A tiny sprinkle on top before the chocolate sets. It cuts the sweetness and makes the whole thing taste more sophisticated than it has any right to be.
Equipment Needed
You don’t need a fancy kitchen for these bars, but having the right tools makes the process smoother. Here’s what you’ll want on hand:
- 8×8-inch baking pan — Glass, metal, or ceramic all work. Just avoid nonstick pans that are too dark, as they can over-brown the edges.
- Parchment paper — Non-negotiable. You need the overhang to lift the entire block of fudge bars out cleanly for slicing.
- Mixing bowls — One large, one small. Glass or stainless steel is fine.
- Whisk — For combining the wet ingredients. A wooden spoon works too, but a whisk gets the eggs incorporated faster.
- Rubber spatula — For folding in the chocolate chips and scraping every last bit of batter into the pan.
- Rolling pin or meat mallet — For crushing the candy canes. A heavy-bottomed skillet also works if you’re careful.
- Ziploc bag — Place the candy canes inside, seal it, and go to town. Less mess than a cutting board.
- Small microwave-safe bowl — For melting the white chocolate topping. You can use a double boiler if you prefer, but the microwave is faster and just as reliable if you go in 15-second bursts.
If you don’t have an 8×8 pan, a 9×9 will work. Just reduce the baking time by about 3-4 minutes and check for doneness early. A standard loaf pan is too deep and will give you undercooked centers.
Preparation Method
Let’s walk through this step by step. I’ve included visual cues and timing notes so you know exactly what to look for at each stage.
- Preheat and prep the pan. Set your oven to 350°F (175°C). Line your 8×8 pan with parchment paper, leaving a 2-inch overhang on two opposite sides. This creates handles for lifting the bars out later. Lightly grease the parchment with butter or nonstick spray.
- Melt the butter and dissolve the espresso. In a large microwave-safe bowl, melt the 1/2 cup (113g) unsalted butter in 30-second bursts until fully liquid. Stir in 1 tablespoon of instant espresso powder until it dissolves completely. The butter will look slightly darker and smell intensely aromatic. Let it cool for 2 minutes—you don’t want it hot enough to scramble the eggs.
- Add the sugar and vanilla. Whisk in 1 cup (200g) granulated sugar and 1 teaspoon vanilla extract. The mixture will look grainy and that’s fine. Whisk vigorously for about 30 seconds to start dissolving the sugar. This step helps create that crackly top crust later.
- Incorporate the eggs. Add the 2 large eggs one at a time, whisking well after each addition. The batter will become thick, glossy, and slightly lighter in color. It should fall off the whisk in a smooth ribbon. If it looks curdled or separated, your butter was too hot—don’t panic, just whisk in a tablespoon of flour to bring it back together.
- Fold in the dry ingredients. Sift or whisk together 1/2 cup (60g) all-purpose flour, 1/3 cup (40g) unsweetened cocoa powder, and 1/4 teaspoon salt in a separate small bowl. Add this to the wet mixture and fold gently with a rubber spatula. Stop as soon as you no longer see streaks of flour. Overmixing develops gluten and makes the bars tough.
- Add the chocolate chips. Fold in 1 cup (175g) semi-sweet chocolate chips. Reserve about 2 tablespoons to sprinkle on top before baking if you want visible chocolate pools on the surface. This is optional but pretty.
- Bake. Pour the batter into the prepared pan and spread it evenly with the spatula. It will be thick—that’s normal. Bake at 350°F (175°C) for 22-26 minutes. The edges should look set and slightly pulling away from the parchment, but the center should still look slightly underdone. A toothpick inserted near the center should come out with a few moist crumbs, not wet batter. If it comes out clean, you’ve overbaked them.
- Cool completely. Place the pan on a wire rack and let the bars cool for at least 30 minutes at room temperature. Then transfer the pan to the refrigerator and chill for another 30 minutes. This step is crucial. Warm bars will crumble when you try to slice them. Cold bars cut cleanly.
- Make the peppermint topping. While the bars chill, place 1/2 cup (85g) white chocolate chips and 1 teaspoon coconut oil in a small microwave-safe bowl. Microwave in 15-second intervals, stirring between each, until smooth and fully melted. This usually takes about 45 seconds total. Do not overheat or the white chocolate will seize into a grainy paste.
- Top and garnish. Using the parchment overhang, lift the entire block of fudge bars out of the pan and place it on a cutting board. Drizzle or spread the melted white chocolate over the top. Immediately sprinkle with 1/4 cup crushed peppermint candy canes and a pinch of flaky sea salt if using. Let the topping set at room temperature for about 15 minutes, or speed it up in the fridge for 10 minutes.
- Slice and serve. Use a sharp chef’s knife to cut the block into 16 squares. Wipe the blade clean between cuts for the neatest edges. For extra clean slices, dip the knife in hot water, dry it, then cut. Repeat for each slice.
Cooking Tips & Techniques
I’ve made enough mistakes in my kitchen to fill a small notebook, and these fudge bars have taught me a few hard lessons. Here’s what I wish I’d known from the start.
Don’t skip the chill step. I know you want to eat them immediately. I get it. But slicing warm fudge bars is like trying to cut a cloud with a butter knife. The texture is too soft, the chocolate chips will smear, and the peppermint topping will slide right off. Thirty minutes in the fridge transforms them from messy to perfect. Trust the process.
Watch your oven like a hawk. Every oven runs differently. My friend’s oven bakes these in exactly 24 minutes. Mine does it in 22. The difference between fudgy perfection and dry disappointment is literally two minutes. Start checking at the 20-minute mark. The edges should be set, but the center should still jiggle slightly when you shake the pan.
Crush candy canes strategically. You want a mix of fine powder and small chunks. The powder sticks to the white chocolate and creates a pretty pink tint, while the chunks provide that satisfying crunch. If you crush them too fine, you lose the texture. Too coarse, and they fall off when you bite into the bar. I put the candy canes in a Ziploc bag and give them about 10 firm whacks with a rolling pin, then check the size and go from there.
Toast your espresso powder. This is a pro tip I picked up from a pastry chef friend. Before dissolving the espresso powder in the butter, toast it in a dry skillet over medium heat for about 30 seconds, shaking constantly. It deepens the flavor dramatically and removes any raw, bitter edge. Just don’t walk away—it burns fast.
Use a hot knife for clean cuts. Run your knife under hot water, dry it with a towel, then slice. Repeat for each cut. It’s an extra step, but the difference between ragged edges and clean, bakery-style squares is night and day.
Variations & Adaptations
One of the best things about this recipe is how adaptable it is. Here are a few variations I’ve tested and loved.
Dark Chocolate Peppermint Bars: Swap the semi-sweet chocolate chips for dark chocolate (60-70% cacao) and use dark cocoa powder instead of regular. The bitterness balances the sweet white chocolate topping beautifully. This version is my personal favorite for adult gatherings.
Gluten-Free Version: Replace the all-purpose flour with a 1:1 gluten-free baking flour blend. I’ve tested this with Bob’s Red Mill and King Arthur Measure for Measure, and both work perfectly. Do not use almond flour or coconut flour—they’ll change the texture entirely.
Mocha Latte Twist: Increase the espresso powder to 1 1/2 tablespoons and add 1/4 cup of warm brewed coffee along with the butter. Reduce the flour by 1 tablespoon to compensate for the extra liquid. The result is a softer, almost truffle-like bar with a pronounced coffee flavor. This pairs incredibly well with the cozy brown butter banana zucchini bread I make for fall mornings.
White Chocolate Peppermint Bars: Skip the semi-sweet chips entirely and use white chocolate chips in the batter. The bars will be much sweeter and paler in color, but the peppermint flavor becomes the star. This version is a hit with kids who find dark chocolate too intense.
Nutty Crunch Addition: Fold in 1/2 cup of toasted chopped pecans or walnuts along with the chocolate chips. The nuts add a savory counterpoint to the sweet peppermint topping. I’ve also tried it with crushed pretzels for a salty-sweet vibe that works surprisingly well.
Serving & Storage Suggestions
These bars are forgiving when it comes to serving and storage, but a few small choices make a big difference in how they taste and hold up over time.
Serving temperature: I prefer them chilled or at cool room temperature. If they’re too warm, the white chocolate topping gets sticky and the bars lose their structure. Take them out of the fridge about 15 minutes before serving if you want a softer texture, or serve them straight from the fridge for a denser, fudge-like bite.
Presentation ideas: Arrange the bars on a white platter to make the red peppermint pieces pop. Dust with a light sprinkle of powdered sugar for a snowy effect. If you’re gifting them, stack 4 bars in a clear cellophane bag and tie with red and white twine. They look professional with almost no effort.
Storage: Place the bars in an airtight container, layered between sheets of parchment paper. They’ll stay fresh at room temperature for up to 4 days, but I strongly recommend refrigerating them after day 2. The white chocolate topping can soften and bloom in warm environments.
Freezing: These freeze beautifully. Wrap individual bars tightly in plastic wrap, then place them in a freezer-safe bag or container. They’ll keep for up to 3 months. Thaw in the refrigerator overnight or at room temperature for about 30 minutes. Do not microwave to thaw—it ruins the texture.
Flavor development: Here’s something interesting. The coffee flavor actually deepens after a day or two in the fridge. If you make these a day ahead, the mocha notes become more pronounced and the peppermint mellows slightly. They’re good fresh, but they’re even better on day two.
Nutritional Information & Benefits
Let’s be real—these are a treat, not a health food. But knowing what’s in them helps you enjoy them mindfully. Here’s an approximate breakdown per bar (based on 16 servings):
- Calories: 215
- Total Fat: 12g
- Saturated Fat: 7g
- Carbohydrates: 27g
- Sugar: 21g
- Protein: 3g
- Fiber: 1g
- Sodium: 85mg
Health highlights: Dark chocolate contains flavonoids that support heart health in moderation. Cocoa powder is rich in antioxidants. The espresso powder provides a small caffeine boost that can enhance focus. Peppermint has been traditionally used to aid digestion. Obviously, none of this means you should eat the whole pan, but it’s nice to know there’s a little something beneficial in every bite.
Dietary considerations: This recipe contains dairy, eggs, and gluten. For a dairy-free version, use vegan butter and dairy-free chocolate chips. For an egg-free version, substitute each egg with a flax egg (1 tablespoon ground flaxseed mixed with 3 tablespoons water, rested for 5 minutes). The texture will be slightly denser but still delicious.
Allergen note: Peppermint candy canes are often processed in facilities that also handle nuts. If you have severe allergies, check the packaging or use certified allergen-free candy canes.
Conclusion
These Decadent Peppermint Mocha Fudge Bars are the kind of recipe that makes you look like you spent hours in the kitchen when really, you just followed a smart, simple method. The fudgy texture, the mocha depth, the cool crunch of peppermint on top—it all comes together in a way that feels both festive and effortless. I’ve brought these to holiday parties, cookie swaps, and quiet nights in, and they’ve never let me down.
What I love most about this recipe is how customizable it is without losing its soul. You can swap the chocolate, adjust the coffee, add nuts, or go full white chocolate, and the bars still deliver that same satisfying chew and flavor punch. If you make them your own, I’d genuinely love to hear about it. Drop a comment below with your twist, or tag me in your photos. And if you’re in the mood for another holiday favorite, don’t miss my perfect red velvet whoopie pies for another showstopper that travels well.
Go make these. Your kitchen is about to smell incredible.
Frequently Asked Questions
Can I use regular coffee instead of espresso powder?
Yes, but the flavor will be milder. Use 1 tablespoon of instant coffee granules dissolved in the melted butter. If you use brewed coffee, reduce the butter by 2 tablespoons to keep the batter from becoming too wet.
Why did my white chocolate topping seize up?
White chocolate is sensitive to heat and moisture. If even a drop of water gets into the bowl, it can seize into a grainy, clumpy mess. Always use a completely dry bowl and utensils. If it does seize, stir in a teaspoon of warm coconut oil or heavy cream to bring it back.
Can I make these bars vegan?
Absolutely. Use vegan butter, dairy-free chocolate chips, and a flax egg (1 tablespoon ground flaxseed + 3 tablespoons water per egg). The texture will be slightly less fudgy but still very good. Just be sure to check that your candy canes are vegan—some brands use bone char in the sugar processing.
How do I get clean, sharp slices?
Chill the bars for at least 30 minutes before slicing. Use a sharp chef’s knife and wipe it clean between each cut. For the cleanest edges, dip the knife in hot water, dry it, then slice. Repeat for every cut.
Can I double this recipe?
Yes. Double all ingredients and bake in a 9×13-inch pan. Increase the baking time to 30-35 minutes, checking for doneness at the 28-minute mark. The bars will be slightly thinner but just as fudgy.
Pin This Recipe!

Decadent Peppermint Mocha Fudge Bars: Easy Holiday Treat

These Decadent Peppermint Mocha Fudge Bars are dense, fudgy, and rich with a balanced mocha flavor and a crunchy peppermint topping. Perfect for holiday gatherings or any time you crave a chocolate fix.
- Prep Time: 15 minutes
- Cook Time: 22-26 minutes
- Total Time: 45 minutes
- Yield: 16 servings 1x
- Category: Dessert
- Cuisine: American
Ingredients
- 1/2 cup (113g) unsalted butter
- 1 cup (200g) granulated sugar
- 2 large eggs, room temperature
- 1 teaspoon vanilla extract
- 1/2 cup (60g) all-purpose flour
- 1/3 cup (40g) unsweetened cocoa powder (Dutch-process preferred)
- 1 tablespoon instant espresso powder
- 1/4 teaspoon salt
- 1 cup (175g) semi-sweet chocolate chips
- 1/2 cup (85g) white chocolate chips
- 1 teaspoon coconut oil or vegetable shortening
- 1/4 cup crushed peppermint candy canes (about 4 standard candy canes)
- Optional: flaky sea salt
Instructions
- Preheat oven to 350°F (175°C). Line an 8×8-inch baking pan with parchment paper, leaving a 2-inch overhang on two opposite sides. Lightly grease the parchment.
- In a large microwave-safe bowl, melt the butter in 30-second bursts. Stir in the instant espresso powder until dissolved. Let cool for 2 minutes.
- Whisk in the sugar and vanilla extract until well combined, about 30 seconds.
- Add the eggs one at a time, whisking well after each addition until the batter is thick and glossy.
- In a separate bowl, whisk together the flour, cocoa powder, and salt. Fold into the wet mixture with a rubber spatula until just combined.
- Fold in the semi-sweet chocolate chips. Reserve about 2 tablespoons to sprinkle on top if desired.
- Pour the batter into the prepared pan and spread evenly. Bake for 22-26 minutes, until the edges are set and a toothpick inserted near the center comes out with moist crumbs.
- Cool the pan on a wire rack for 30 minutes, then refrigerate for 30 minutes until firm.
- For the topping, place white chocolate chips and coconut oil in a small microwave-safe bowl. Microwave in 15-second intervals, stirring between each, until smooth.
- Lift the fudge block out of the pan using the parchment overhang. Drizzle or spread the melted white chocolate over the top. Immediately sprinkle with crushed peppermint candy canes and flaky sea salt if using. Let set for 15 minutes at room temperature or 10 minutes in the fridge.
- Slice into 16 squares using a sharp knife, wiping the blade clean between cuts.
Notes
Don’t skip the chill step—it makes slicing much easier. For clean cuts, use a hot knife. The coffee flavor deepens after a day in the fridge. For a gluten-free version, use a 1:1 gluten-free flour blend.
Nutrition
- Serving Size: 1 bar
- Calories: 215
- Sugar: 21
- Sodium: 85
- Fat: 12
- Saturated Fat: 7
- Carbohydrates: 27
- Fiber: 1
- Protein: 3
Keywords: peppermint mocha fudge bars, holiday brownies, fudgy brownies, peppermint chocolate bars, easy holiday dessert


