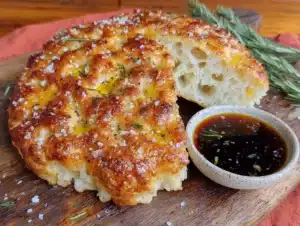
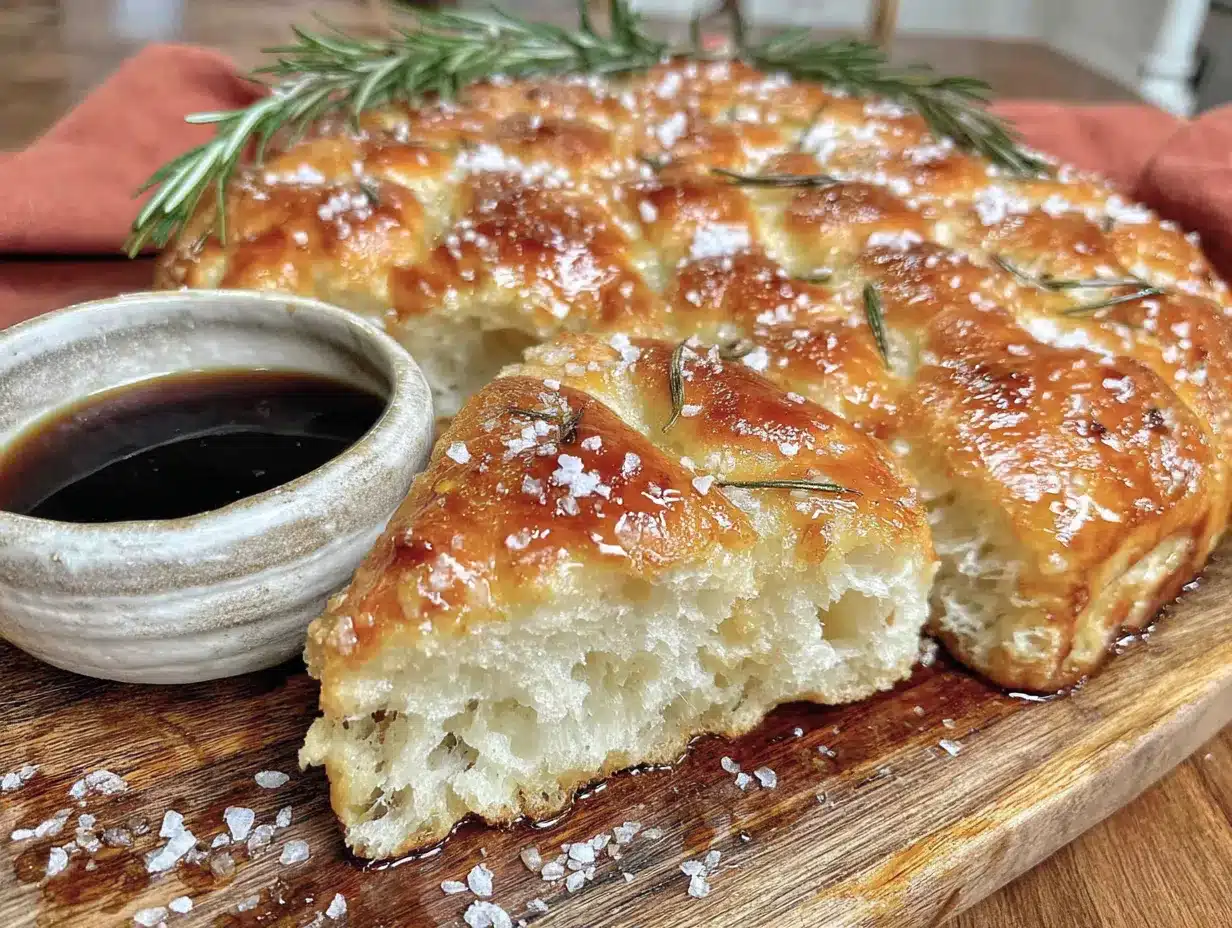
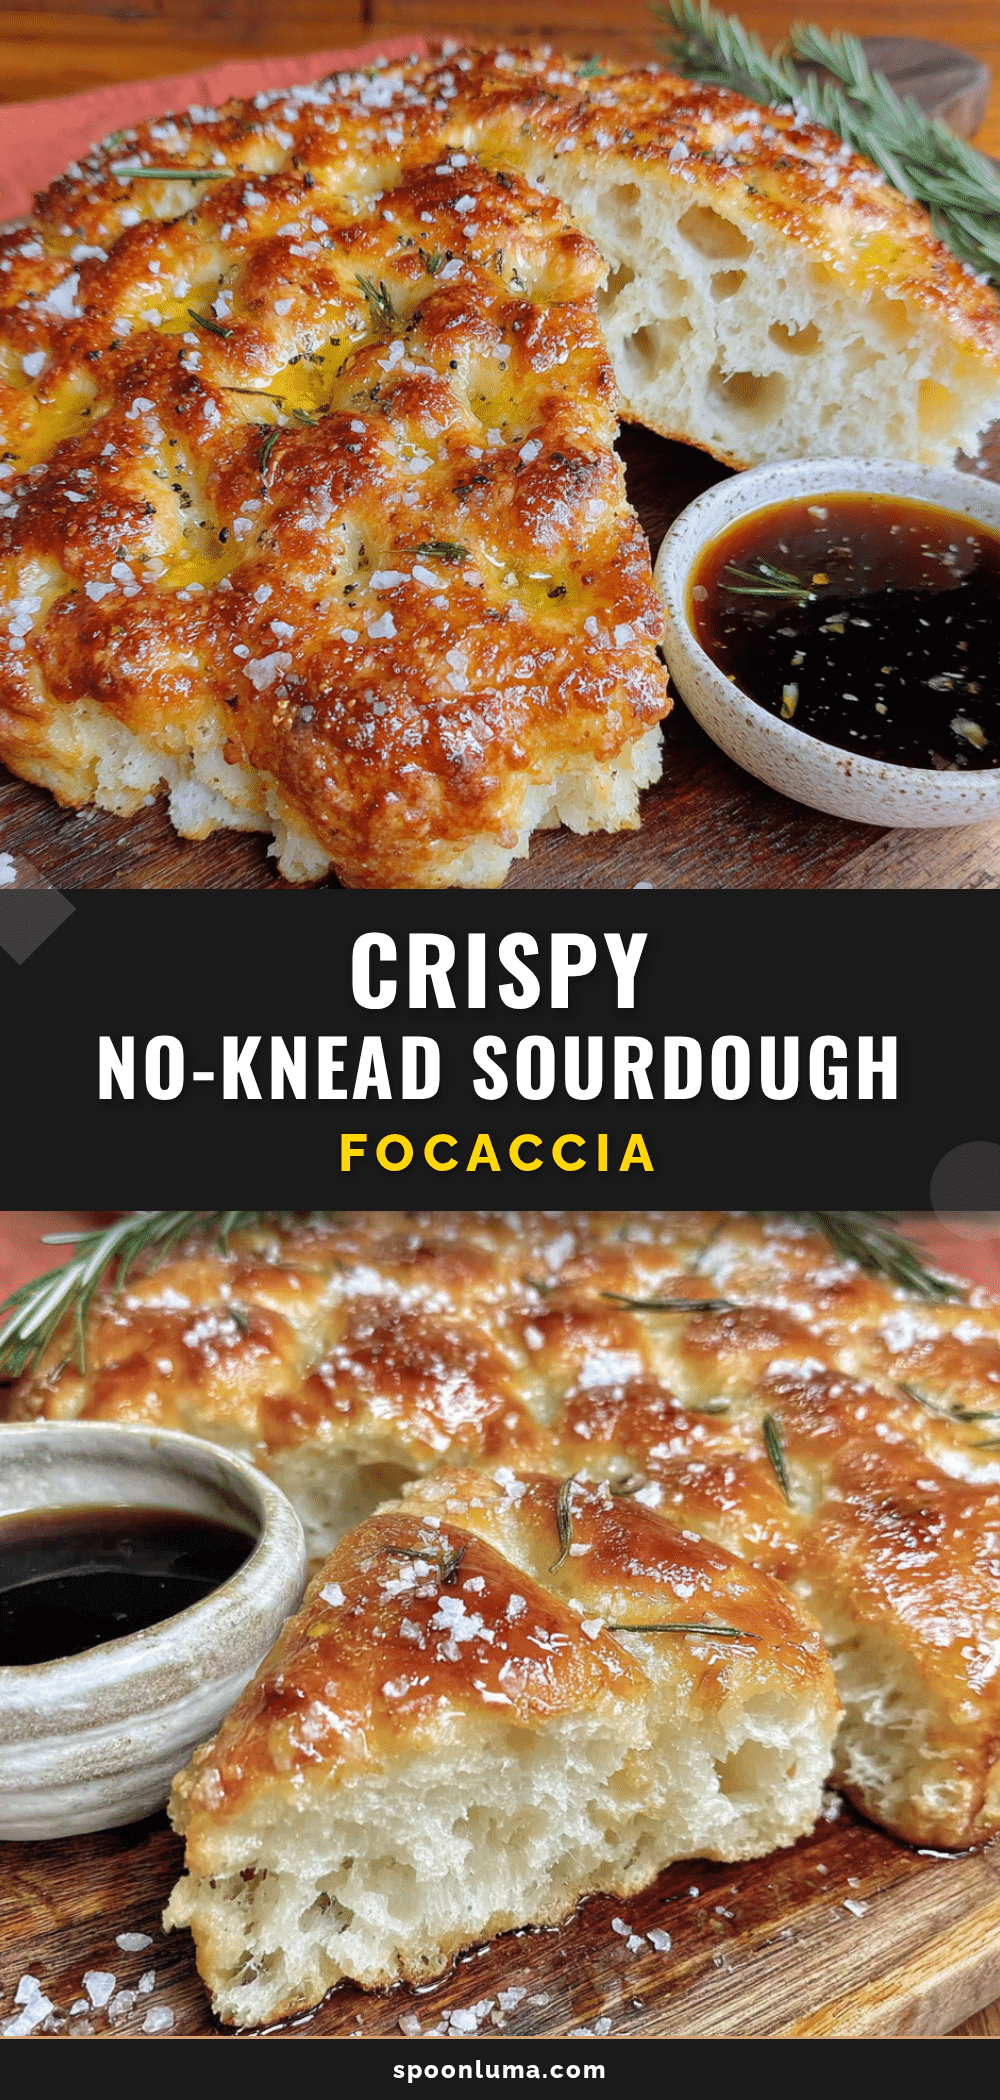
Third batch in two days and I finally stopped peeking through the oven window every thirty seconds. That first crackle when you pull the pan out—that hiss of olive oil meeting hot metal—it never gets old. The bottom should be golden and shattery, the top dimpled and bronzed, and the crumb should have those irregular, almost reckless air pockets that tell you the dough actually lived a little. This focaccia isn’t polite. It doesn’t slice into neat little squares without leaving a trail of crispy crumbs on your cutting board. And honestly? That’s exactly why I couldn’t stop making it.
I had a jar of sourdough discard taking up fridge space and that nagging feeling that I should do something useful with it. Not another pancake. Not another cracker. Something that actually felt like bread. Something that would make that discard feel less like a chore and more like a secret weapon. The problem with most discard recipes is they treat it like a flavor add-in rather than the star. This one lets it do the work—the tang, the lift, that chewy-yet-airy texture that commercial yeast alone never quite delivers.
The no-knead part isn’t just convenience. It’s strategy. You’re letting time develop the gluten network instead of your arms. And the result is a crust that shatters when you bite into it, a crumb that soaks up olive oil like it was made for it, and a flavor that tastes like you spent all day in the kitchen when you really just mixed flour, water, salt, oil, and discard in a bowl and walked away. That’s the kind of recipe I can get behind. That’s the kind of bread that makes people ask for the recipe before you’ve even finished eating.
Why You’ll Love This Recipe
This isn’t just another focaccia recipe—it’s the one that finally uses up that jar of sourdough discard sitting in your fridge while delivering a crust that actually crunches. I’ve tested this at least eight times over the past few weeks, tweaking hydration levels and baking temperatures until that bottom layer turned golden and brittle without drying out the interior. The result is a bread that feels both rustic and refined, like something from a fancy bakery that you can actually pull off on a Tuesday afternoon.
- No Kneading Required : You literally mix everything in one bowl, wait, and bake. That’s it. No stand mixer, no arm workout, no flour-dusted countertop disaster.
- Uses Up Sourdough Discard : Finally, a way to use that discard that actually tastes intentional. The natural tang complements the olive oil and salt beautifully.
- Just 5 Ingredients : Flour, water, sourdough discard, olive oil, salt. You probably have all of them right now.
- That Crispy Bottom : The secret is a generous layer of olive oil in the pan and a hot oven. The bottom gets shatteringly crisp while the top stays soft and dimpled.
- Minimal Active Time : About 10 minutes of hands-on work. The rest is just waiting (and occasionally peeking at it through the oven window).
What sets this apart from other focaccia recipes is the discard. It adds a subtle sourness that balances the richness of the olive oil, and it helps create a more complex crumb structure. Commercial yeast gives you consistent, predictable bubbles. Discard gives you character—irregular pockets, a chewy texture, and a flavor that keeps you coming back for just one more piece. I’ve tried versions with active starter and versions with discard, and honestly, the discard version wins every time. It’s less fussy, more forgiving, and the flavor is deeper.
This is the kind of bread that makes a simple dinner feel special. Serve it alongside a bowl of soup, tear it apart for a cheese board, or just eat it warm with a generous drizzle of olive oil and flaky salt. It’s comfort food that doesn’t require a lot of effort, and honestly, that’s the best kind.
What Ingredients You Will Need
This recipe uses simple, pantry-friendly ingredients to deliver a focaccia with a crackling crust and airy, chewy crumb. The sourdough discard does the heavy lifting here, providing both flavor and structure without any commercial yeast.
- Bread flour (3 cups / 375g) – Bread flour gives this focaccia its signature chewy texture and helps develop that open crumb structure. All-purpose flour works in a pinch, but the crumb will be slightly less airy. I prefer King Arthur Bread Flour for consistent results.
- Water (1 1/4 cups / 300ml, lukewarm) – Lukewarm water helps the fermentation process along. Too hot and you’ll kill the good bacteria in your discard; too cold and the fermentation will be sluggish. Aim for bathwater temperature—around 90-100°F.
- Sourdough discard (1 cup / 240g, unfed, straight from the fridge) – This is the star of the show. Use unfed discard directly from the fridge—no need to bring it to room temperature or feed it first. The discard adds tang and helps with the rise, even without commercial yeast.
- Extra-virgin olive oil (1/4 cup / 60ml, plus more for the pan and topping) – Don’t skimp here. A generous amount of olive oil is what gives focaccia its crispy bottom and rich flavor. Use a good-quality extra-virgin olive oil—it makes a noticeable difference. I like California Olive Ranch for everyday baking.
- Fine sea salt (1 1/2 teaspoons / 9g, plus flaky salt for topping) – Salt is crucial for flavor and also helps strengthen the gluten structure. Fine sea salt dissolves more evenly than kosher salt in this hydration level. Save the flaky salt (like Maldon) for finishing—it adds that satisfying crunch on top.
Optional additions : Fresh rosemary, flaky sea salt, cherry tomatoes, olives, or caramelized onions. This dough is incredibly forgiving and takes well to toppings. Just press them gently into the dough before the final proof.
Equipment Needed
- 9×13-inch baking pan – A metal pan works best for heat conduction and getting that crispy bottom. Glass or ceramic pans will work but may not produce as crisp a crust. I use a half-sheet pan (about 13×18 inches) for a thinner, crispier focaccia, but a 9×13 gives you a thicker, softer version.
- Large mixing bowl – Any bowl large enough to hold the dough as it rises. Glass, ceramic, or stainless steel all work fine.
- Plastic wrap or a damp kitchen towel – To cover the dough during its long rise. Plastic wrap creates a better seal, but a damp towel works if you don’t have plastic wrap on hand.
- Digital kitchen scale – Not strictly necessary, but weighing your ingredients ensures consistent results. Flour measurement by volume can vary wildly, and this recipe is worth getting right.
- Bench scraper or spatula – Helpful for folding the dough during the first rise and for transferring it to the pan.
- Oven thermometer – Oven temperatures can be notoriously inaccurate. An oven thermometer ensures your oven is actually at 450°F, which is critical for that crispy bottom.
Budget-friendly tip : If you don’t have a 9×13 pan, a cast-iron skillet works beautifully. The sides are higher, so the focaccia will be thicker, but the crust will be even crispier. Just reduce the baking time by 5-10 minutes and keep an eye on it.
Preparation Method
Step 1: Mix the Dough (5 minutes)
In a large mixing bowl, combine the bread flour and fine sea salt. Whisk them together to distribute the salt evenly. Add the lukewarm water, sourdough discard, and 2 tablespoons of the olive oil. Stir with a spatula or your hand until a shaggy, sticky dough forms. It will look rough and uneven—that’s exactly what you want. Don’t overmix at this stage; just make sure all the flour is hydrated. Cover the bowl with plastic wrap and let it rest for 30 minutes. This autolyse step gives the flour time to absorb the water and start developing gluten naturally.
Step 2: First Rise with Stretch and Folds (2-3 hours)
After the 30-minute rest, uncover the dough. It will feel softer and more cohesive already. Wet your hands slightly to prevent sticking, then grab one corner of the dough, stretch it up, and fold it over the center. Rotate the bowl a quarter turn and repeat. Do this 4-6 times total, until the dough feels tighter and more elastic. Cover the bowl again and let it rest for 30 minutes. Repeat this stretch-and-fold process 3 more times, for a total of 4 sets over about 2 hours. You’ll notice the dough becoming smoother and more pillowy with each fold. After the final fold, cover the bowl and let the dough rise at room temperature for another 1-2 hours, until it has nearly doubled in size and is bubbly and jiggly. If your kitchen is cold, this could take closer to 3 hours. Be patient—the bubbles are your friend.
Step 3: Cold Ferment (Optional but Recommended, 8-24 hours)
For the best flavor and texture, cover the bowl tightly with plastic wrap and refrigerate the dough for 8-24 hours. This cold fermentation allows the sourdough discard to develop more complex flavors while the gluten continues to relax. The dough will be much easier to handle when cold. If you’re short on time, you can skip this step and proceed directly to the pan, but the flavor won’t be as deep.
Step 4: Prepare the Pan and Second Rise (1.5-2 hours)
Generously coat your 9×13-inch baking pan with 2-3 tablespoons of olive oil. Don’t be shy—the oil is what gives focaccia its crispy bottom. Turn the cold dough out into the oiled pan. It will look shaggy and uneven again. Gently coax it toward the edges of the pan using your fingertips. If it resists, let it rest for 10-15 minutes and try again. The dough will eventually relax and fill the pan. Cover the pan with plastic wrap and let it rise at room temperature for 1.5-2 hours, until the dough is puffy and has nearly doubled in height. It should feel airy and full of life when you gently press it.
Step 5: Dimple and Top (5 minutes)
About 30 minutes before baking, preheat your oven to 450°F (230°C) with a rack in the middle position. Once the dough has finished its second rise, drizzle another tablespoon of olive oil over the top. Dip your fingertips in the oil and press them straight down into the dough, creating deep dimples all the way to the bottom of the pan. Don’t be gentle here—you want those wells to hold the oil and create the classic focaccia texture. If you’re adding toppings like fresh rosemary, cherry tomatoes, or olives, press them gently into the dimples now. Sprinkle generously with flaky sea salt.
Step 6: Bake (20-25 minutes)
Place the pan in the preheated oven and bake for 20-25 minutes, until the top is deep golden brown and the bottom is crisp and releases easily from the pan. Rotate the pan halfway through for even browning. The focaccia should sound hollow when you tap the bottom. If the top is browning too quickly but the bottom isn’t crisp yet, tent loosely with foil for the last 5 minutes.
Step 7: Cool and Serve (10 minutes)
Remove the focaccia from the oven and let it cool in the pan for 5 minutes. Then transfer it to a wire rack to cool for another 5-10 minutes. This brief cooling period allows the crust to set and stay crisp. Serve warm or at room temperature. The leftovers (if there are any) are fantastic the next day, toasted or reheated in a hot oven.
Cooking Tips & Techniques
Don’t skip the stretch and folds. I learned this the hard way. The first time I made this, I mixed the dough, covered it, and just let it sit for 8 hours without any folds. The result was a flat, dense focaccia with none of those beautiful air pockets. The stretch and folds are what build the gluten network that traps the gas bubbles from fermentation. It only takes a few minutes per set, and it makes all the difference.
Use enough oil in the pan. This is non-negotiable. The oil isn’t just for flavor—it’s what fries the bottom of the dough as it bakes, creating that shatteringly crisp crust. If you skimp on the oil, you’ll end up with a pale, soft bottom that’s more like bread than focaccia. I use about 3 tablespoons in the pan and another tablespoon drizzled on top before baking. It sounds like a lot, but it’s worth it.
Let the dough tell you when it’s ready. Fermentation times are guidelines, not rules. Your kitchen temperature, the activity of your discard, and the humidity all affect how quickly the dough rises. Instead of watching the clock, watch the dough. It should be puffy, bubbly, and nearly doubled in size before you bake it. If it’s not there yet, give it more time. Rushing the rise is the most common mistake I see.
Preheat your pan for extra crispiness. If you have a metal baking pan, place it in the oven while it preheats. Then carefully add the oil and the risen dough to the hot pan. The sizzle you hear means the bottom starts cooking immediately, resulting in an even crispier crust. Just be careful not to burn yourself.
Use a serrated knife to cut. A sharp serrated knife will cut through the crispy crust without squishing the airy crumb. A regular chef’s knife will crush those beautiful bubbles. If you want clean slices, let the focaccia cool completely before cutting.
Variations & Adaptations
Herb and Garlic Focaccia : Add 2 teaspoons of dried rosemary or thyme to the flour mixture before mixing. After dimpling, press fresh rosemary sprigs and thinly sliced garlic cloves into the wells. The garlic roasts and sweetens in the oven, while the rosemary adds an aromatic punch.
Tomato and Olive Focaccia : After dimpling, press halved cherry tomatoes and pitted Kalamata olives into the dough. The tomatoes burst and concentrate in the oven, creating little pockets of jammy sweetness. The olives add a briny contrast. This version pairs beautifully with the tangy sourdough discard.
Everything Bagel Focaccia : Before baking, brush the top with a beaten egg white and sprinkle generously with everything bagel seasoning (sesame seeds, poppy seeds, dried garlic, dried onion, and salt). The egg white helps the seasoning stick and gives the top a beautiful shine. This version is dangerously snackable.
Gluten-Free Adaptation : Substitute the bread flour with a high-quality gluten-free all-purpose flour blend that contains xanthan gum. The dough will be wetter and more batter-like, so skip the stretch and folds and just let it rise in the pan. The texture will be more cakey than chewy, but the flavor will still be delicious.
Whole Wheat Version : Replace up to half of the bread flour with whole wheat flour. The dough will be less airy and the crumb denser, but the nutty flavor of whole wheat pairs beautifully with the sourdough tang. You may need to add an extra tablespoon or two of water, as whole wheat flour absorbs more liquid.
Serving & Storage Suggestions
This focaccia is best served warm, within an hour of baking. The contrast between the crispy bottom and the soft, airy interior is at its peak when it’s fresh from the oven. I like to serve it as an appetizer with a bowl of good olive oil and balsamic vinegar for dipping, or alongside a hearty soup or salad for a complete meal. It’s also fantastic split in half and used for sandwiches—the crispy crust holds up beautifully to moist fillings.
Storage : Store leftover focaccia in an airtight container at room temperature for up to 2 days. Do not refrigerate—the cold will dry it out and make the crust rubbery. If you need to store it longer, freeze it.
Freezing : Wrap the cooled focaccia tightly in plastic wrap, then in aluminum foil, and freeze for up to 3 months. To reheat, unwrap and place directly on the oven rack at 350°F for 10-15 minutes, until heated through and the crust is crisp again. You can also slice and toast individual pieces.
Reheating : The best way to revive day-old focaccia is in a hot oven. Place it on a baking sheet at 400°F for 5-7 minutes. The microwave will make it soggy—avoid it unless you’re in a desperate hurry. If you have an air fryer, that works beautifully too: 350°F for 3-4 minutes brings back the crispiness.
Flavor Development : Interestingly, the flavor of this focaccia actually improves after a day. The sourdough tang deepens and mellows, and the olive oil flavor becomes more pronounced. I often make it a day ahead for parties, then reheat it just before serving.
Nutritional Information & Benefits
Per serving (1/8 of the recipe): Approximately 220 calories, 8g fat (1g saturated), 32g carbohydrates, 2g fiber, 6g protein, 380mg sodium.
This focaccia is made with simple, whole-food ingredients. The sourdough fermentation process breaks down some of the phytic acid in the flour, making the nutrients more bioavailable and potentially easier to digest than bread made with commercial yeast. The olive oil provides heart-healthy monounsaturated fats and antioxidants. While this is not a low-calorie food, it’s a wholesome, satisfying bread that can be part of a balanced diet.
Dietary considerations : This recipe is dairy-free, egg-free, and vegan. For a gluten-free version, see the variations section. The sodium content is moderate, and you can reduce it by using less flaky salt on top.
Frequently Asked Questions
Can I use active sourdough starter instead of discard?
Yes, you can. If using active starter, reduce the water slightly (about 2 tablespoons) since the starter is already hydrated. The rise time may be shorter since active starter is more vigorous. The flavor will be milder, with less of that tangy sourdough character.
Why is my focaccia dense and not airy?
This usually happens for one of three reasons: the dough didn’t ferment long enough, the discard was too weak or inactive, or you skipped the stretch and folds. Make sure your discard is at least a few days old and has some bubbly activity. Give the dough enough time to rise—it should be visibly puffy and jiggly before baking.
Can I make this without a kitchen scale?
You can, but I strongly recommend using one for consistent results. Flour measurement by volume can vary by 20-30% depending on how you scoop. If you must use cups, fluff the flour first, then spoon it into the measuring cup and level it off. Don’t scoop directly from the bag.
How do I get a crispier bottom crust?
Use a metal pan, preheat it in the oven before adding the dough, and be generous with the olive oil. You can also bake the focaccia directly on the bottom oven rack for the last 5 minutes to give the bottom extra heat. If the bottom is still pale, pop it out of the pan and bake it directly on the oven rack for 2-3 minutes.
Can I add cheese to this focaccia?
Absolutely. Sprinkle shredded Parmesan or crumbled feta over the top after dimpling, before baking. For a richer version, dot the surface with small cubes of fresh mozzarella. The cheese will melt and brown in the oven, creating delicious crispy bits. Just keep an eye on it to prevent burning.
Conclusion
This crispy no-knead sourdough discard focaccia is the kind of recipe that makes you feel like a bread wizard without any of the usual fuss. It uses up that discard you’ve been meaning to do something with, requires almost zero active effort, and delivers a crust that actually crackles when you tear into it. The tang from the discard, the richness of the olive oil, the irregular air pockets—it all comes together in something that tastes far more complicated than it is.
What I love most about this recipe is how forgiving it is. You can rush the rise a little, use a different pan, add whatever toppings you have on hand, and it still turns out delicious. It’s the kind of bread that makes you look forward to having discard in the fridge again. I hope you give it a try and make it your own—whether that means loading it with rosemary and garlic, going full everything bagel mode, or keeping it simple with just salt and oil. Let me know in the comments how yours turns out, and feel free to share your favorite topping combinations. Happy baking!
Pin This Recipe!
Crispy No-Knead Sourdough Discard Focaccia

This easy 5-ingredient focaccia uses sourdough discard to create a shatteringly crisp crust and airy, chewy crumb with minimal effort. Perfect for using up that jar of discard in your fridge.
- Prep Time: 10 minutes
- Cook Time: 25 minutes
- Total Time: 3 hours 35 minutes (plus optional 8-24 hour cold ferment)
- Yield: 8 servings 1x
- Category: Bread
- Cuisine: Italian
Ingredients
- 3 cups (375g) bread flour
- 1 1/4 cups (300ml) lukewarm water
- 1 cup (240g) sourdough discard, unfed, straight from the fridge
- 1/4 cup (60ml) extra-virgin olive oil, plus more for the pan and topping
- 1 1/2 teaspoons (9g) fine sea salt
- Flaky sea salt for topping (optional)
Instructions
- Mix the Dough: In a large mixing bowl, whisk together bread flour and fine sea salt. Add lukewarm water, sourdough discard, and 2 tablespoons of olive oil. Stir until a shaggy, sticky dough forms. Cover with plastic wrap and let rest for 30 minutes.
- First Rise with Stretch and Folds: After 30 minutes, wet your hands and perform 4-6 stretch and folds on the dough. Cover and rest for 30 minutes. Repeat this process 3 more times (total of 4 sets over about 2 hours). After the final fold, let the dough rise at room temperature for 1-2 hours until nearly doubled in size and bubbly.
- Cold Ferment (Optional): Cover the bowl tightly and refrigerate for 8-24 hours for deeper flavor. If short on time, skip this step.
- Prepare the Pan and Second Rise: Generously coat a 9×13-inch baking pan with 2-3 tablespoons of olive oil. Turn the cold dough into the pan and gently coax it toward the edges. Cover and let rise at room temperature for 1.5-2 hours until puffy and nearly doubled in height.
- Dimple and Top: Preheat oven to 450°F (230°C). Drizzle another tablespoon of olive oil over the dough. Dip your fingertips in the oil and press deep dimples into the dough. Add optional toppings (rosemary, tomatoes, olives) and sprinkle with flaky sea salt.
- Bake: Bake for 20-25 minutes until deep golden brown and the bottom is crisp. Rotate the pan halfway through. If top browns too quickly, tent with foil for the last 5 minutes.
- Cool and Serve: Let cool in the pan for 5 minutes, then transfer to a wire rack for another 5-10 minutes. Serve warm or at room temperature.
Notes
Don’t skip the stretch and folds—they build the gluten network for airy pockets. Use enough olive oil in the pan for a crispy bottom. Let the dough tell you when it’s ready rather than strictly following times. For extra crispiness, preheat the pan in the oven before adding the dough. Store leftovers at room temperature for up to 2 days; do not refrigerate. Freeze for up to 3 months.
Nutrition
- Serving Size: 1/8 of recipe
- Calories: 220
- Sodium: 380
- Fat: 8
- Saturated Fat: 1
- Carbohydrates: 32
- Fiber: 2
- Protein: 6
Keywords: sourdough discard, focaccia, no-knead bread, crispy focaccia, easy bread recipe, 5-ingredient bread, sourdough bread