The grill next door had been going since noon. Smoke curled over the fence, carrying the smell of charred meat and lighter fluid. My phone buzzed with texts about what time to show up, who was bringing the potato salad, and whether anyone remembered to buy ice. It was July 3rd, and the whole neighborhood was gearing up for the big day. But honestly? I was hiding in my kitchen, pulling a glass bowl out of the cabinet and ignoring the chaos. All I wanted was this trifle.
It’s funny how some desserts just *fit* a moment. This one feels like summer in a bowl—cool, creamy, and packed with berries that taste like they were picked that morning. No oven required. No sweating over a hot stove. Just layers of simple things coming together to look like you actually tried. (Which, between us, is the best kind of recipe to have on hand.)
I started making this years ago for a block party, back when I thought I needed something complicated to impress people. I showed up with a store-bought pie and felt like a fraud. The next year, I brought this trifle, and someone asked for the recipe before I even set it down. That’s when I learned that people don’t care about fancy—they care about *delicious*. And this is that.
So here it is. The trifle that’s been my go-to for every barbecue, picnic, and fireworks show since. It’s the dessert that lets you enjoy the party instead of stressing in the kitchen.
Why You’ll Love This Recipe
Let’s be real—I’ve tested more versions of this than I care to admit. I tried different cakes, different fillings, even different bowl shapes (don’t ask). What I landed on is the one that works every single time. No fuss, no fails, just layers of red, white, and blue that actually taste as good as they look.
- No-Bake & Stress-Free: You don’t even turn on the oven. This comes together in about 20 minutes of active work, then chills in the fridge while you get ready for the party.
- Simple Ingredients: A store-bought angel food cake, instant pudding, and fresh berries. That’s it. No special trips to a gourmet market.
- Perfect for the 4th of July: It’s red, white, and blue without any artificial colors. The berries do all the work naturally.
- Always a Crowd-Pleaser: I’ve brought this to cookouts, potlucks, and family reunions. It disappears fast. Kids love the layers, adults love the taste.
- Unbelievably Light & Refreshing: After a heavy BBQ meal, this is exactly what you want. It’s cool, creamy, and not too sweet. The berries cut through the richness of the pudding perfectly.
What makes this different from every other berry dessert out there? It’s the texture combo. The soft cake soaks up just enough of the pudding to get tender without turning mushy. The berries stay bright and juicy. And that whipped cream on top? It’s the cherry on top—except it’s berry season.
This isn’t just another trifle. It’s the one that makes people close their eyes after the first bite. It’s comfort food for summer, reimagined as something easy enough for a weekday but pretty enough for a holiday.
What Ingredients You Will Need
This recipe uses simple, everyday ingredients that come together to create something that feels way more special than the sum of its parts. Here’s what you’ll need to grab from the store.
- 1 store-bought angel food cake (about 10-12 ounces) — I usually get the one from the bakery section, not the boxed kind. It’s softer and holds up better in the layers. If you want to go the extra mile, you could make your own, but honestly? No one will know the difference.
- 2 packages (3.4 ounces each) instant vanilla pudding mix — Jell-O brand is my go-to for consistent texture. Don’t use cook-and-serve; it won’t set the same way.
- 3 cups cold whole milk — Whole milk gives the pudding that rich, creamy texture that makes this dessert. You can use 2% in a pinch, but don’t go lower than that or the pudding will be too thin.
- 2 cups heavy whipping cream — For the whipped cream layer. I know you can use Cool Whip, but homemade whipped cream is so much better. It’s lighter, fluffier, and doesn’t have that weird aftertaste.
- 3 tablespoons powdered sugar — Just enough to sweeten the cream without making it cloying.
- 1 teaspoon vanilla extract — Pure vanilla, not imitation. It makes a difference in the whipped cream.
- 2 cups fresh strawberries, hulled and sliced — Look for berries that are deep red all the way through. If they have white shoulders, they were picked too early and won’t be as sweet.
- 2 cups fresh blueberries — Small, firm berries are best. They should be dusty blue, not shiny (shiny means they’re underripe).
- 1 cup fresh raspberries — These add a nice pop of color and a little tartness that balances the sweetness. Handle them gently—they bruise easily.
For the garnish (optional but highly recommended):
- Fresh mint sprigs — Adds a pop of green that makes the red and blue stand out even more.
- Extra berries — A few whole strawberries and a handful of blueberries for the top layer.
A note on substitutions: If you’re feeding a crowd with dietary restrictions, you can swap the whole milk for oat milk (barista blend works best) and use a dairy-free vanilla pudding mix. For a gluten-free option, make sure your angel food cake is certified gluten-free (some brands use wheat starch). And if strawberries aren’t in season, frozen and thawed berries work in a pinch—just drain them well so they don’t water down the pudding.
Equipment Needed
You don’t need a fancy kitchen to pull this off. Here’s what you’ll need:
- A large glass trifle bowl (3-4 quart capacity) — The clear sides are what make this dessert so stunning. If you don’t have a trifle bowl, a large glass mixing bowl or even a straight-sided casserole dish will work. I’ve used a punch bowl before in a pinch, and it looked great.
- Electric hand mixer or stand mixer — For whipping the cream. You can do it by hand with a whisk, but your arm will thank you for using a mixer. I’ve done both, and the mixer wins every time.
- Medium mixing bowl — For making the pudding.
- Large mixing bowl — For whipping the cream.
- Whisk — For mixing the pudding. A silicone whisk is nice because it won’t scratch your bowls.
- Sharp knife and cutting board — For hulling and slicing the strawberries.
- Measuring cups and spoons — For the milk, sugar, and vanilla.
- Rubber spatula — For folding the whipped cream and scraping every last bit out of the bowl.
- Serrated knife — For cutting the angel food cake into cubes. A regular knife will squish it.
Budget-friendly tip: Don’t own a trifle bowl? Thrift stores always have them for a few dollars. Or just use a clear plastic punch bowl from the party supply store—it’s lightweight and disposable, perfect for taking to a cookout.
Preparation Method
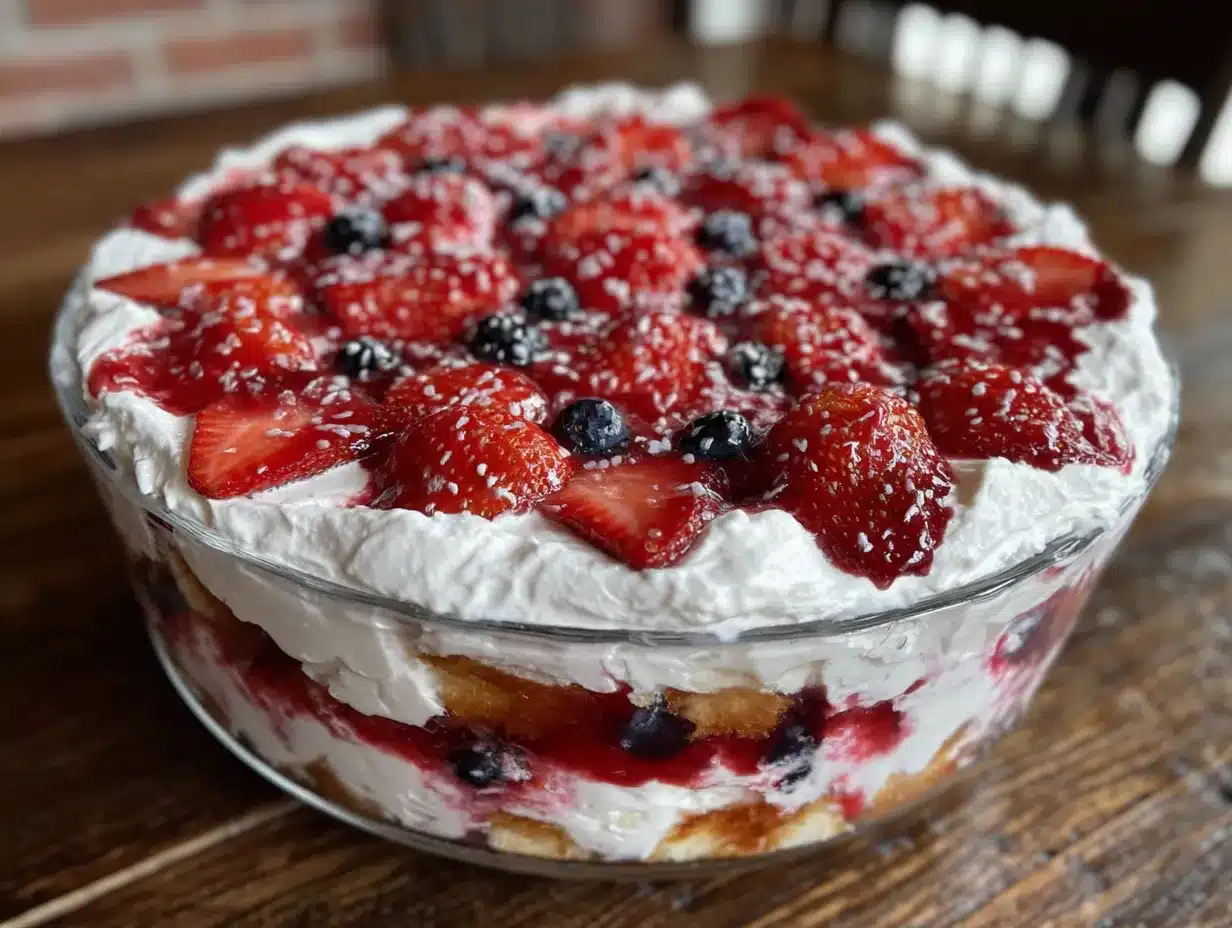
This comes together in layers, literally. Take your time with each step, and you’ll end up with a dessert that looks like it belongs on a magazine cover.
- Make the pudding: In a medium mixing bowl, whisk together the two packages of instant vanilla pudding mix with 3 cups of cold whole milk. Whisk for about 2 minutes until it starts to thicken. It will be loose at first, then suddenly it’ll firm up. Let it sit for 5 minutes to fully set. (Don’t rush this—if the pudding isn’t set, your layers will run together.)
- Whip the cream: In a large mixing bowl, pour in 2 cups of heavy whipping cream. Add 3 tablespoons of powdered sugar and 1 teaspoon of vanilla extract. Beat with an electric mixer on medium-high speed until soft peaks form. This takes about 3-4 minutes. You’re looking for peaks that hold their shape but still look soft and billowy. Stop before it turns into butter—trust me, I’ve made that mistake before and it’s not pretty.
- Fold the cream into the pudding: Take about a third of the whipped cream and gently fold it into the set pudding with a rubber spatula. This lightens the pudding so it’s not so dense. Then fold in the remaining whipped cream until just combined. You want streaks of white and creamy yellow—don’t overmix or it’ll deflate.
- Prep the cake: Take the angel food cake and slice it into 1-inch cubes using a serrated knife. You should get about 6-7 cups of cubes. Don’t worry if they’re not perfect—they’re going to get covered in cream anyway. Set them aside on a plate.
- Prep the berries: Rinse the blueberries and raspberries and pat them dry with paper towels. Hull the strawberries and slice them into even pieces, about ¼-inch thick. Keep the berries separate for now—you’ll layer them in a specific order for the best visual effect.
- Start layering: Place your trifle bowl on a flat surface. Spoon about a cup of the pudding-cream mixture into the bottom of the bowl and spread it evenly. This creates a base that the cake will stick to.
- First layer of cake: Arrange about a third of the angel food cake cubes over the cream base. Press them down gently so they absorb some of the cream. Don’t pack them too tightly—you want some space for the berries to peek through.
- First berry layer: Scatter about a third of the sliced strawberries over the cake cubes, followed by a third of the blueberries. Try to distribute them evenly so every spoonful gets a mix of colors.
- Second cream layer: Spoon about a third of the remaining pudding-cream mixture over the berries. Spread it gently with the spatula, being careful not to disturb the berries underneath. It doesn’t have to be perfect—just cover the berries.
- Repeat the layers: Add another third of the cake cubes, then another third of the strawberries and blueberries. Follow with another third of the cream mixture. You should have three layers total when you’re done.
- Top with raspberries and cream: For the final layer, arrange the remaining cake cubes, then the last of the strawberries and blueberries. Spoon the remaining cream mixture over the top and spread it smooth. Now, arrange the raspberries in a pattern on top—I like to make a star shape or just scatter them evenly for a rustic look. Add a few whole strawberries (halved) and extra blueberries around the edges.
- Chill: Cover the trifle loosely with plastic wrap and refrigerate for at least 4 hours, but overnight is better. This is the magic step—the cake soaks up the cream and everything melds together. Don’t skip it, or you’ll end up with a dry, crumbly dessert.
- Garnish and serve: Just before serving, tuck a few fresh mint sprigs into the top layer for color. Scoop into bowls, making sure each serving gets a little bit of every layer.
Cooking Tips & Techniques
I’ve made this trifle more times than I can count, and I’ve learned a few things the hard way. Here’s what I wish someone had told me.
Don’t skip the chill time. I know, I know—you’re hungry and the party starts in an hour. But if you serve this too soon, the cake cubes will be dry and the layers won’t hold together. Four hours is the minimum, but overnight is where the magic happens. The cake absorbs the cream and turns into this soft, almost custard-like texture that’s incredible.
Pat your berries dry. This seems like a small thing, but wet berries will water down your cream and make the whole thing soupy. After rinsing, spread them out on a paper towel-lined plate and let them air dry for 10 minutes. Pat them gently with another towel before using.
Use a serrated knife for the cake. Angel food cake is delicate. If you use a straight blade, it’ll squish the cake into a sad, flat mess. A serrated knife saws through it cleanly, keeping those airy pockets intact. I learned this after ruining half a cake on my first try.
Make extra whipped cream. I always make a little more than I need. You can use it to dollop on top of each serving, or just eat it with a spoon while you’re cleaning up (no judgment). If you’re taking this to a party, having extra cream in a separate bowl lets people add more if they want.
Layer with intention. For the best visual, place the berries against the sides of the bowl as you layer. Use the back of a spoon to press them gently against the glass. This way, when you serve it, everyone sees those beautiful red and blue stripes through the white cream.
Timing is everything. If you’re making this for a party, assemble it the night before. Then all you have to do the day of is add the garnish and walk out the door. It’s one less thing to stress about, and trust me, you’ll thank yourself when everyone else is running around frantically.
Variations & Adaptations
One of the best things about this trifle is how easy it is to change up. Here are some ways I’ve adapted it over the years.
Berry Swap: Not a fan of strawberries? Use blackberries instead. They’re in season at the same time and add a deeper, earthier flavor. Or try sliced peaches in July for a different take on red, white, and blue (peaches count as orange, but close enough).
Dairy-Free Version: Use a dairy-free vanilla pudding mix (check the label—some are accidentally vegan) and swap the whole milk for full-fat oat milk or coconut milk. For the whipped cream, use a can of coconut cream (chilled overnight) whipped with powdered sugar. It’s not exactly the same, but it’s still delicious.
Gluten-Free Option: Most angel food cakes contain wheat flour, but there are gluten-free versions available at specialty stores. You can also use gluten-free vanilla cake or even gluten-free pound cake cut into cubes. Just make sure it’s light and airy enough to soak up the cream.
Chocolate Lover’s Twist: Swap the vanilla pudding for chocolate pudding and use chocolate angel food cake if you can find it. Top with chocolate shavings instead of mint. It’s a completely different dessert, but still red, white, and blue.
Individual Servings: Instead of one big bowl, layer the trifle in small mason jars or clear plastic cups. This is perfect for parties where people are standing around. Plus, they look adorable tied with a red, white, and blue ribbon.
Boozy Adult Version: Brush the cake cubes with a little limoncello or berry liqueur before layering. It adds a grown-up kick that pairs beautifully with the berries. Just go easy—you want the cake to be moist, not soggy.
Serving & Storage Suggestions
This trifle is best served cold, straight from the fridge. I like to let it sit out for about 10 minutes before serving—it takes the chill off just enough so the flavors really come through.
Presentation: Use a large serving spoon or a ladle to scoop out portions, making sure each serving gets a bit of every layer. If you layered it well in a clear bowl, the stripes will be visible and beautiful. Top each serving with an extra dollop of whipped cream and a mint sprig if you’re feeling fancy.
What to serve with it: This trifle is rich enough to stand on its own, but it pairs beautifully with a simple shortbread cookie or a scoop of vanilla ice cream. For drinks, iced tea or lemonade are perfect—or a crisp white wine like a Sauvignon Blanc if you’re serving adults.
Storage: Cover the trifle bowl tightly with plastic wrap and store in the refrigerator for up to 3 days. The texture will change over time—the cake will get softer and the berries will release more juice—but it’s still delicious. Don’t freeze it, though. The cream will separate and turn grainy when thawed.
Reheating: This is a cold dessert, so no reheating needed. Just take it out of the fridge, let it sit for a few minutes, and serve. If you’ve stored it for a day or two, give it a gentle stir before serving to redistribute the juices.
Flavor Development: Honestly, this trifle tastes *better* on day two. The flavors meld together, the cake gets perfectly soft, and the berries release just enough juice to flavor the cream. If you can resist eating it all on day one, you’re in for a treat.
Nutritional Information & Benefits
Here’s the thing—this is a dessert, so it’s not health food. But it does have some redeeming qualities. Berries are packed with antioxidants, vitamin C, and fiber. The angel food cake is lower in fat than most cakes (it’s made with egg whites and no butter). And the cream, well… it’s cream. But everything in moderation, right?
Estimated Nutritional Values (per serving, based on 12 servings):
- Calories: 320
- Fat: 18g
- Saturated Fat: 11g
- Carbohydrates: 38g
- Sugar: 26g
- Fiber: 3g
- Protein: 5g
Dietary Considerations: This recipe is vegetarian. It contains dairy (milk, cream) and gluten (angel food cake). For a gluten-free version, use a certified gluten-free cake. For a dairy-free version, see the variations section above. It’s naturally nut-free, which is great for parties where allergies are a concern.
Health Benefits: Strawberries are loaded with vitamin C (more than oranges by weight). Blueberries are famous for their brain-boosting antioxidants. Raspberries are high in fiber. So while you’re enjoying a sweet treat, you’re also getting a dose of real, whole food. That counts for something.
Personal Perspective: I’m not one to count calories at a BBQ. But I do like knowing that I’m eating real ingredients—berries, cream, cake—not artificial colors or preservatives. This trifle feels honest. It’s indulgent without being heavy, and that’s exactly what I want on a hot July day.
Conclusion
This trifle has become my signature summer dessert, and I think it’s about to become yours too. It’s the kind of recipe that makes you look like a hero without making you work like one. No oven, no stress, no complicated techniques—just beautiful layers of flavor that taste like the Fourth of July in a bowl.
I love that you can make it your own. Swap the berries, change the cake, add a little booze—it’s forgiving and flexible. And honestly? That’s the best kind of recipe to have in your back pocket. The one that works every time, no matter what.
So go ahead. Grab a bag of berries, a box of pudding, and that angel food cake from the bakery. Layer it up, stick it in the fridge, and forget about it until it’s time to impress everyone. And when someone asks for the recipe (they will), just smile and say it’s your secret.
I’d love to hear how yours turns out. Did you add a twist? Did the kids help you layer it? Drop a comment below and let me know. And if you’re looking for more easy summer desserts, check out my cast iron s’mores dip or these no-bake Rice Krispie treat stars. Both are perfect for your holiday spread.
Happy Fourth of July, friends. Now go make something delicious.
Frequently Asked Questions
Can I make this trifle a day ahead?
Absolutely. In fact, I recommend it. Making it the night before gives the cake time to soak up the cream and the flavors to meld together. Just cover it tightly and refrigerate. Add the fresh mint garnish right before serving.
Can I use frozen berries instead of fresh?
You can, but you’ll need to thaw and drain them first. Frozen berries release a lot of liquid as they thaw, which can make the cream watery. Thaw them in a colander set over a bowl, then pat them dry with paper towels. Fresh berries are better for texture and presentation, but frozen work in a pinch.
How do I keep the trifle from getting soggy?
The key is not over-soaking the cake. Angel food cake is porous, so it absorbs liquid quickly. That’s actually what you want—but you want it to absorb the cream, not the berry juice. Patting your berries dry before layering helps prevent excess liquid from pooling at the bottom.
Can I use Cool Whip instead of homemade whipped cream?
Yes, you can. Use about 3 cups of thawed Cool Whip. Fold it into the pudding the same way you would homemade whipped cream. The texture will be slightly different (Cool Whip is more stable), but it’s a fine shortcut. I personally prefer homemade for the flavor, but I won’t judge.
What’s the best way to clean a trifle bowl after serving?
Fill the bowl with warm water and a drop of dish soap right after serving. Let it soak for 15 minutes—the cream and berry residue will slide right off. Use a soft sponge to avoid scratching the glass. If there are stubborn bits, a little baking soda on the sponge works wonders.
Pin This Recipe!
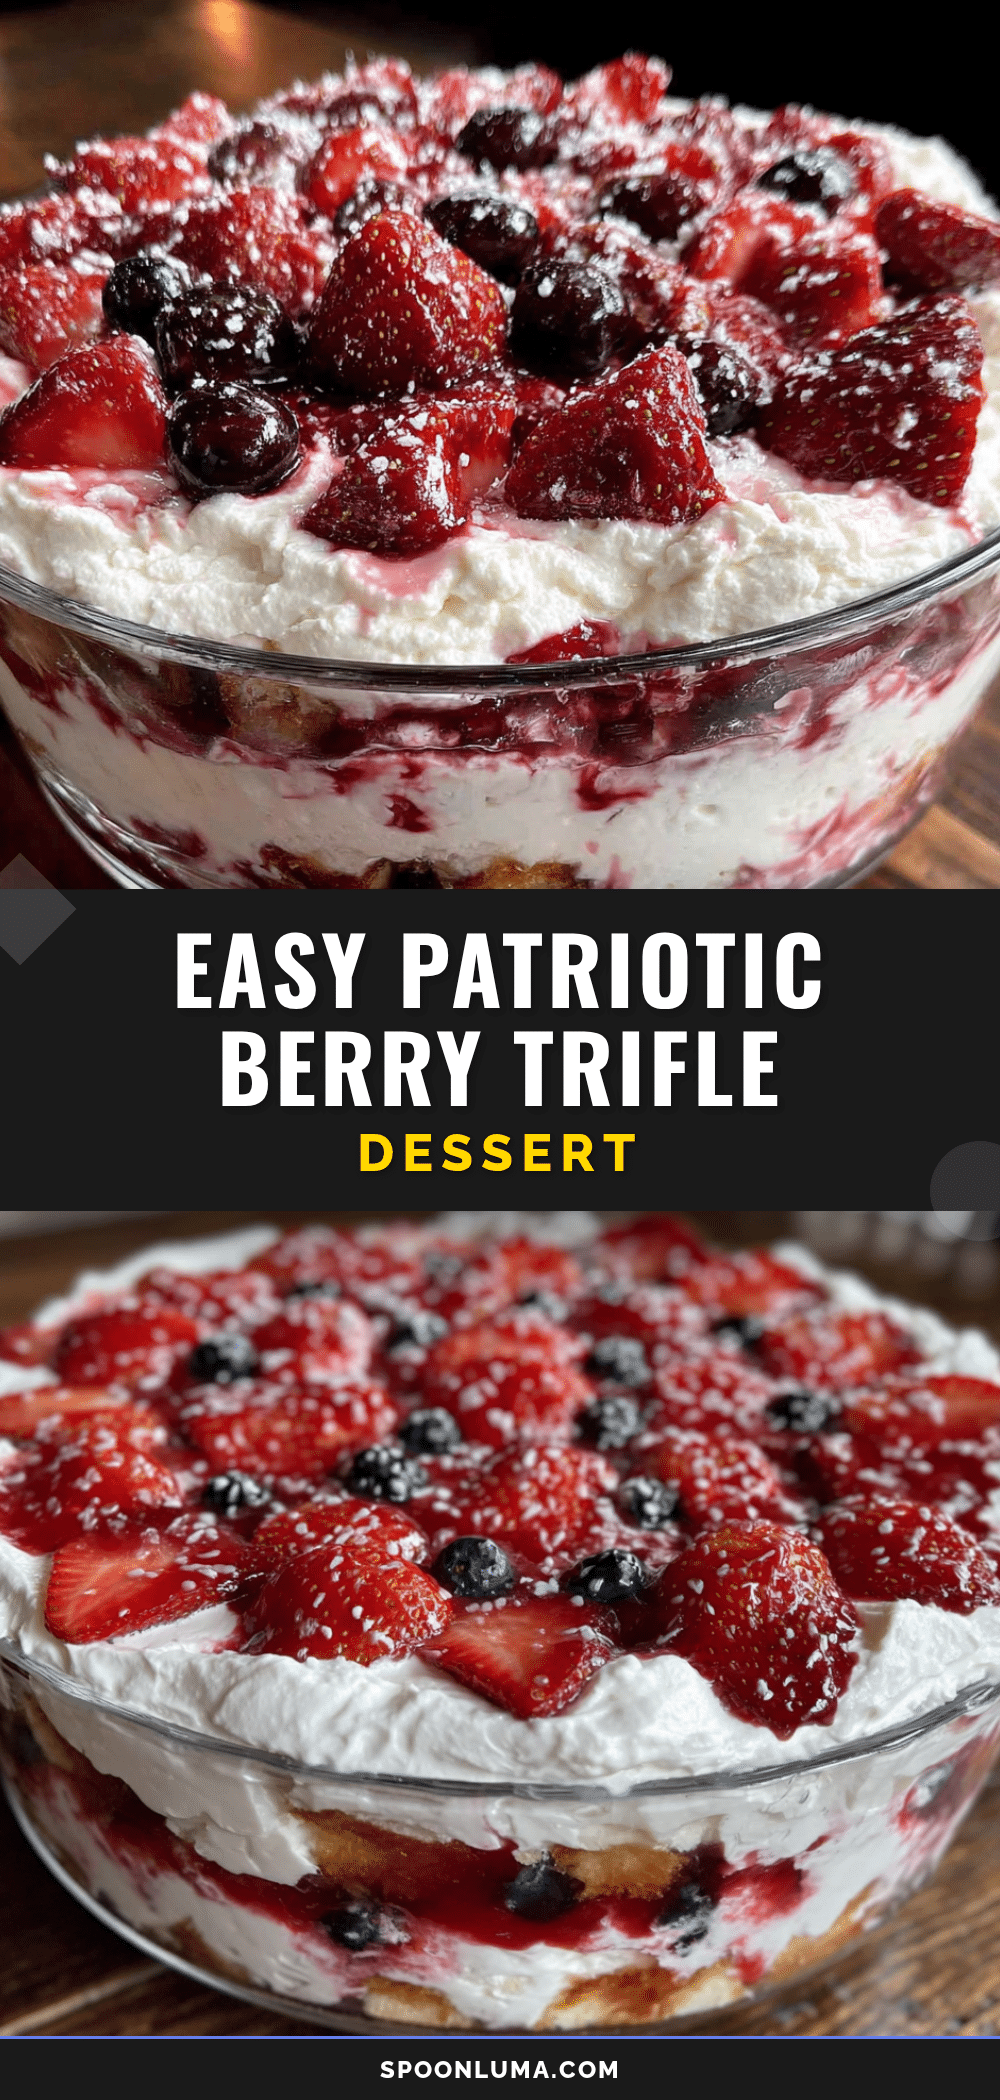
Easy Red White and Blue Berry Trifle: Best 4th of July Dessert
A no-bake, stress-free dessert perfect for summer celebrations. Layers of angel food cake, creamy vanilla pudding, fresh berries, and homemade whipped cream create a stunning red, white, and blue treat that’s always a crowd-pleaser.
- Prep Time: 20 minutes
- Cook Time: 0 minutes
- Total Time: 4 hours 20 minutes (includes chilling time)
- Yield: 12 servings 1x
- Category: Dessert
- Cuisine: American
Ingredients
- 1 store-bought angel food cake (about 10–12 ounces)
- 2 packages (3.4 ounces each) instant vanilla pudding mix
- 3 cups cold whole milk
- 2 cups heavy whipping cream
- 3 tablespoons powdered sugar
- 1 teaspoon vanilla extract
- 2 cups fresh strawberries, hulled and sliced
- 2 cups fresh blueberries
- 1 cup fresh raspberries
- Fresh mint sprigs for garnish (optional)
- Extra berries for garnish (optional)
Instructions
- Make the pudding: In a medium mixing bowl, whisk together the two packages of instant vanilla pudding mix with 3 cups of cold whole milk. Whisk for about 2 minutes until it starts to thicken. Let it sit for 5 minutes to fully set.
- Whip the cream: In a large mixing bowl, pour in 2 cups of heavy whipping cream. Add 3 tablespoons of powdered sugar and 1 teaspoon of vanilla extract. Beat with an electric mixer on medium-high speed until soft peaks form, about 3-4 minutes.
- Fold the cream into the pudding: Take about a third of the whipped cream and gently fold it into the set pudding with a rubber spatula. Then fold in the remaining whipped cream until just combined.
- Prep the cake: Slice the angel food cake into 1-inch cubes using a serrated knife. You should get about 6-7 cups of cubes.
- Prep the berries: Rinse the blueberries and raspberries and pat them dry. Hull the strawberries and slice them into even pieces, about ¼-inch thick.
- Start layering: Spoon about a cup of the pudding-cream mixture into the bottom of a large glass trifle bowl and spread it evenly.
- First layer of cake: Arrange about a third of the angel food cake cubes over the cream base. Press them down gently.
- First berry layer: Scatter about a third of the sliced strawberries over the cake cubes, followed by a third of the blueberries.
- Second cream layer: Spoon about a third of the remaining pudding-cream mixture over the berries. Spread it gently.
- Repeat the layers: Add another third of the cake cubes, then another third of the strawberries and blueberries. Follow with another third of the cream mixture.
- Top with raspberries and cream: Arrange the remaining cake cubes, then the last of the strawberries and blueberries. Spoon the remaining cream mixture over the top and spread it smooth. Arrange the raspberries in a pattern on top. Add a few whole strawberries (halved) and extra blueberries around the edges.
- Chill: Cover the trifle loosely with plastic wrap and refrigerate for at least 4 hours, but overnight is better.
- Garnish and serve: Just before serving, tuck a few fresh mint sprigs into the top layer for color. Scoop into bowls, making sure each serving gets a little bit of every layer.
Notes
Don’t skip the chill time—4 hours minimum, overnight is best. Pat berries dry to prevent watery cream. Use a serrated knife for the cake to avoid squishing it. Make extra whipped cream for serving. For best visual, press berries against the sides of the bowl while layering.
Nutrition
- Serving Size: 1 serving
- Calories: 320
- Sugar: 26
- Fat: 18
- Saturated Fat: 11
- Carbohydrates: 38
- Fiber: 3
- Protein: 5
Keywords: 4th of July dessert, berry trifle, no-bake dessert, red white and blue dessert, summer dessert, angel food cake trifle, patriotic dessert