Third time this week I found myself staring into the fridge at a block of cream cheese that needed using up, and honestly, I wasn’t mad about it. The first batch of these no-bake berry cheesecake jars came together on a Tuesday night when the idea of turning on the oven felt like a personal insult. By Thursday morning, I was already tweaking the ratio of lemon zest to vanilla, and by Friday—well, let’s just say my neighbors started texting me for the recipe before I’d even washed the jars.
There’s something about the way the crushed graham cracker layer settles against the glass, that sudden pop of tart berry compote cutting through the creamy filling. It’s not complicated—it’s actually almost embarrassingly simple—but that first bite always makes me pause. The cold, silky texture, the way the fruit seeps into the crust just enough to soften it without making it soggy. I kept pulling the jars back out of the fridge just to check if the layers had set properly, which is code for sneaking spoonfuls when no one was looking.
What finally made me stop tweaking was the texture—that perfect balance between sturdy enough to hold its shape and soft enough to melt on your tongue. These easy no-bake berry cheesecake jars don’t need a water bath, a springform pan, or any of the fuss that usually comes with cheesecake. They just need a few minutes of your time and a little patience while they chill. I think that’s why they stuck around in my rotation.
Why You’ll Love This Recipe
I’ve tested this recipe about seven times now (and eaten all the evidence), so I can tell you with confidence that these cheesecake jars deliver exactly what they promise. Here’s what makes them worth every spoonful:
- Quick & Easy : Ten minutes of active prep, and you’re done. No baking, no complicated steps, no hovering over a mixer wondering if you’ve over-beaten the cream cheese. This is the kind of dessert you can throw together while dinner is cooking.
- Simple Ingredients : Cream cheese, heavy cream, powdered sugar, vanilla, lemon, graham crackers, butter, and frozen berries. That’s it. You probably have most of these in your kitchen right now, which is exactly how I ended up making them on a random Tuesday.
- Perfect for Entertaining : Individual servings mean no slicing, no mess, and no fighting over the last piece. They look gorgeous in little mason jars or glass cups, which makes them ideal for parties, potlucks, or impressing guests without breaking a sweat.
- Crowd-Pleaser : I’ve served these to kids who usually push their dessert around the plate and adults who claim they don’t have a sweet tooth. Every single jar came back empty. The tangy cream cheese filling paired with sweet berry compote hits that universal sweet spot.
- Unbelievably Delicious : Let’s be real—no-bake desserts sometimes sacrifice texture for convenience. Not these. The filling is luxuriously creamy, the crust stays crunchy, and the berries burst with flavor. It tastes like you spent hours on it, which is our little secret.
What sets this recipe apart from the dozens of no-bake cheesecake recipes out there is the technique. Instead of just mixing cream cheese with whipped cream and hoping for the best, I stabilize the filling with a specific ratio of cream cheese to heavy cream that gives you that sliceable-but-melting texture. The berry compote gets a splash of lemon juice and a touch of vanilla, which brightens the whole thing without making it tart. It’s not just another version—it’s the one I keep coming back to.
This is the kind of dessert that makes you close your eyes after the first bite. It’s comfort food without the oven, indulgence without the stress, and honestly? It’s the best 10-minute dessert I’ve ever made.
What Ingredients You Will Need
This recipe keeps things simple, which is exactly what you want when you’re not in the mood for a complicated grocery run. Every ingredient has a job, and none of them are fussy. Here’s what you’ll need to grab:
For the Berry Compote
- 2 cups frozen mixed berries (I use a blend of strawberries, blueberries, raspberries, and blackberries—the variety gives the compote a more complex flavor than just one type of berry)
- ¼ cup granulated sugar (adjust based on how sweet your berries are; if they’re really tart, add another tablespoon)
- 1 tablespoon lemon juice (freshly squeezed is best—bottled stuff has a weird metallic taste that can mess with the fruit)
- 1 teaspoon vanilla extract (adds warmth and depth to the berry flavor)
- 1 tablespoon cornstarch mixed with 2 tablespoons cold water (this slurry thickens the compote so it doesn’t make the cheesecake layer watery)
For the Graham Cracker Crust
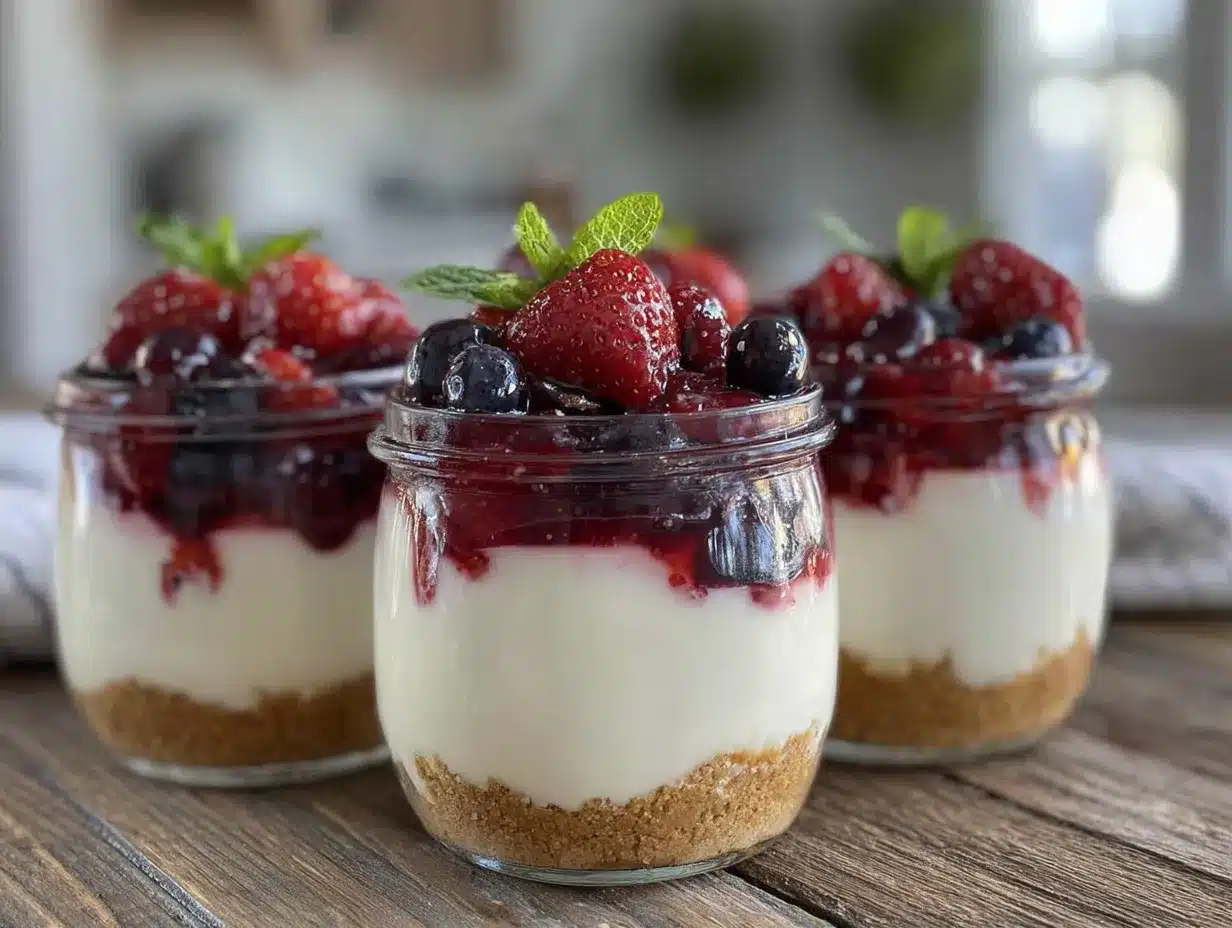
- 1 ½ cups graham cracker crumbs (about 12 full sheets, crushed finely—you can pulse them in a food processor or smash them in a zip-top bag with a rolling pin, which is oddly satisfying)
- 5 tablespoons unsalted butter, melted (use salted butter if that’s what you have, just reduce the salt in the filling slightly)
- 2 tablespoons granulated sugar (adds a little sweetness and helps the crust hold together better)
- Pinch of salt (balances the sweetness and makes the crust taste more like, well, crust)
For the Cheesecake Filling
- 16 ounces cream cheese, softened to room temperature (I recommend Philadelphia for the smoothest texture—generic brands sometimes have a grainier consistency that doesn’t whip up as nicely)
- 1 cup heavy cream, cold (the cold cream whips up fluffier and gives the filling that light, mousse-like texture)
- ½ cup powdered sugar (dissolves more easily than granulated sugar, which means no gritty texture in the filling)
- 1 teaspoon vanilla extract (use pure vanilla extract if you can—it makes a noticeable difference in the final flavor)
- 1 tablespoon lemon zest (this is optional but highly recommended—it cuts through the richness and makes the cheesecake taste brighter)
Optional Toppings
- Fresh berries (for garnish—they make the jars look extra pretty)
- Mint sprigs (adds a pop of green and a fresh flavor contrast)
- Whipped cream (because more cream never hurt anyone)
- White chocolate shavings (if you want to get fancy)
Ingredient substitution notes: If you need a gluten-free option, use gluten-free graham crackers or crushed gluten-free cookies. For a dairy-free version, substitute the cream cheese and heavy cream with dairy-free alternatives—just be aware that the texture will be slightly softer. You can also swap the frozen berries for fresh ones if they’re in season; just reduce the cooking time slightly since fresh berries release less liquid.
I’ve found that using a mix of berries gives the compote a more interesting flavor profile than using just one type. The raspberries break down into a jammy consistency while the blueberries stay mostly whole, creating that perfect textural contrast. If you only have one type of berry on hand, that works too—just know the flavor will be simpler.
Equipment Needed
You don’t need a fancy kitchen setup for these easy no-bake berry cheesecake jars, which is honestly my favorite part. Here’s what you’ll need:
- 6-8 small jars or glasses (mason jars work great, but any 6-8 ounce glass or even small bowls will do—I’ve used everything from Weck jars to repurposed jam jars)
- Medium saucepan (for cooking the berry compote—use a non-reactive pan like stainless steel or enameled cast iron to avoid any metallic taste)
- Electric hand mixer or stand mixer (you can whisk by hand if you’re feeling ambitious, but the cream cheese and heavy cream need some serious whipping to get that fluffy texture)
- Mixing bowls (one medium for the crust, one large for the filling)
- Measuring cups and spoons (precision matters here, especially with the cornstarch slurry)
- Zester or fine grater (for the lemon zest—a microplane is ideal)
- Rubber spatula (for scraping every last bit of filling into the jars, because wasting cheesecake is a crime)
- Zip-top bag or food processor (for crushing the graham crackers—the bag-and-rolling-pin method is oddly therapeutic)
Budget-friendly tip: If you don’t have a food processor, the zip-top bag method works perfectly. Just make sure to seal the bag completely before you start smashing—I learned that one the hard way when graham cracker dust ended up all over my kitchen floor. Also, you don’t need fancy jars. Any small glass container will work. I’ve even used small plastic cups for picnics, and they turned out just fine.
Preparation Method
This is the part where everything comes together. The whole process takes about 10 minutes of active work, plus at least 4 hours of chilling time. Trust me on the chilling—it’s non-negotiable if you want that perfect sliceable texture.
Step 1: Make the Berry Compote
Add the frozen mixed berries, granulated sugar, and lemon juice to a medium saucepan. Cook over medium heat, stirring occasionally, until the berries start to break down and release their juices—about 5-7 minutes. The mixture should be bubbling gently, not boiling aggressively.
In a small bowl, whisk together the cornstarch and cold water until smooth. Pour this slurry into the berry mixture while stirring constantly. Continue cooking for another 1-2 minutes, until the compote thickens to a jam-like consistency. It should coat the back of a spoon without running off too quickly.
Remove the pan from the heat and stir in the vanilla extract. Let the compote cool completely before assembling the jars. You can speed this up by spreading it on a plate and popping it in the fridge for 15 minutes. Pro tip: Don’t skip the cooling step—warm compote will melt the cheesecake filling and turn everything into a sad, soupy mess.
Step 2: Prepare the Graham Cracker Crust
In a medium bowl, combine the graham cracker crumbs, granulated sugar, and salt. Pour the melted butter over the mixture and stir with a fork until all the crumbs are evenly moistened. The texture should resemble wet sand—if it looks dry, add another tablespoon of melted butter.
Divide the crust mixture evenly among your jars. I use about 2 tablespoons per jar, but you can adjust based on how thick you want the crust layer. Press the crumbs down firmly using the back of a small spoon or the bottom of a shot glass. The key here is compression—you want the crust to hold together when you eat it, not crumble into the filling. Set the jars aside while you make the filling.
Step 3: Whip Up the Cheesecake Filling
In a large mixing bowl (or the bowl of a stand mixer fitted with the paddle attachment), beat the softened cream cheese on medium speed until it’s completely smooth and free of lumps—about 2 minutes. Scrape down the sides and bottom of the bowl with a rubber spatula halfway through. Important: If your cream cheese isn’t fully softened, you’ll end up with lumpy filling, and there’s no fixing that after the fact.
Add the powdered sugar, vanilla extract, and lemon zest (if using). Beat on medium speed until everything is well combined and smooth—about 1 minute. Again, scrape down the bowl to make sure everything is incorporated.
In a separate bowl (or using a clean bowl with the whisk attachment), whip the cold heavy cream on medium-high speed until stiff peaks form. This takes about 2-3 minutes with an electric mixer. You’ll know it’s ready when you lift the beaters and the cream holds its shape without drooping. Don’t over-whip—if the cream starts to look grainy or separates, you’ve gone too far and need to start over.
Gently fold the whipped cream into the cream cheese mixture using a rubber spatula. Start from the bottom and fold upward in a circular motion, rotating the bowl as you go. Be gentle—you want to keep as much air in the mixture as possible. Fold until no white streaks remain. The final texture should be light, fluffy, and smooth.
Step 4: Assemble the Jars
Now comes the fun part. Spoon or pipe the cheesecake filling into the jars, layering it over the crust. I use about ¼ cup of filling per jar, but you can adjust based on the size of your jars. Smooth the tops with the back of a spoon or a small offset spatula.
Add a layer of the cooled berry compote on top of the cheesecake filling—about 1-2 tablespoons per jar. You can swirl it in with a knife for a marbled effect, or leave it as a distinct layer. I usually do a combination of both, depending on my mood.
If you’re feeling extra decadent, you can repeat the layers: another layer of cheesecake filling, another layer of compote. Just make sure you leave enough room at the top of the jar for any garnishes.
Step 5: Chill and Set
Cover each jar with a lid or plastic wrap and refrigerate for at least 4 hours, but preferably overnight. The chilling time is crucial—it allows the filling to firm up and the flavors to meld together. If you try to eat them too soon, the filling will be too soft and the layers won’t hold their shape.
I know it’s hard to wait, but trust me on this. The difference between a 2-hour chill and a 4-hour chill is night and day. The texture goes from mousse-like to perfectly sliceable, and the berry flavor seeps into the cheesecake layer just enough to make every bite interesting.
Cooking Tips & Techniques
After making these jars more times than I care to admit, I’ve collected a few hard-earned lessons that’ll save you from my mistakes.
Room temperature cream cheese is non-negotiable. I know, I know—every recipe says this, but I’ve tested it both ways and the difference is dramatic. Cold cream cheese creates lumps that no amount of beating will fix. Take it out of the fridge at least 30 minutes before you start, or if you’re impatient like me, cut it into small cubes and microwave it for 10-second intervals until it’s soft but not warm.
Don’t skip the lemon zest. The first time I made these, I forgot to add it, and the filling tasted flat. The lemon zest adds a brightness that cuts through the richness of the cream cheese and makes the whole thing taste more complex. It’s a small detail that makes a big difference.
Crush the graham crackers finely. If you leave big chunks, the crust won’t hold together properly and you’ll end up with crumbly layers that fall apart when you try to eat them. Pulse them in a food processor until they’re the texture of sand, or smash them in a bag until no large pieces remain.
Let the compote cool completely. I learned this one the hard way when I assembled a batch of jars with warm compote and ended up with a melted, pink-tinged cheesecake layer that looked more like a smoothie than a dessert. If you’re in a rush, spread the compote on a plate and pop it in the freezer for 10 minutes.
Pipe the filling for cleaner layers. If you have a piping bag (or even a zip-top bag with the corner snipped off), use it to pipe the cheesecake filling into the jars. This gives you more control over the layers and keeps the sides of the jars clean. If you’re not worried about presentation, spooning it in works just fine.
Plan your timing. These jars need at least 4 hours to set, so make them in the morning if you want them for dessert, or the night before if you’re planning ahead. They actually taste better the next day, so don’t stress about making them too far in advance.
Variations & Adaptations
One of the best things about this recipe is how easy it is to adapt. Here are some variations I’ve tried and loved:
Dairy-Free Version: Substitute the cream cheese with a high-quality dairy-free cream cheese (I like Kite Hill or Miyoko’s) and use coconut cream instead of heavy cream. The texture will be slightly softer, but the flavor is still amazing. Just make sure the dairy-free cream cheese is softened before you whip it.
Gluten-Free Version: Use gluten-free graham crackers or crushed gluten-free cookies for the crust. I’ve also used crushed gluten-free vanilla wafers, which add a nice sweetness. If you can’t find gluten-free graham crackers, almond flour mixed with melted butter and a little sugar makes an excellent crust.
Seasonal Fruit Swaps: In the summer, use fresh peaches or nectarines instead of berries—just cook them down with a little sugar and lemon juice until they’re soft and jammy. In the fall, try sautéed apples with cinnamon and brown sugar. The possibilities are endless, and each season brings its own flavor profile.
Chocolate Lover’s Version: Add 2 tablespoons of cocoa powder to the cheesecake filling and use chocolate wafer cookies for the crust. Top with chocolate shavings and fresh raspberries for a decadent twist that’s almost too pretty to eat.
Lemon-Blueberry Version: Increase the lemon zest to 2 tablespoons and add 1 tablespoon of lemon juice to the filling. Use only blueberries for the compote. The bright, citrusy flavor pairs perfectly with the sweet blueberries, and the combination is incredibly refreshing.
Keto-Friendly Version: Use a sugar substitute like monk fruit or erythritol in both the filling and the compote. For the crust, use crushed almonds mixed with melted butter and a sugar substitute. The texture will be slightly different, but the flavor is still satisfying.
I once made a batch with mango and passion fruit compote for a summer party, and they disappeared faster than the traditional berry version. Don’t be afraid to experiment—the basic formula is forgiving enough to handle all kinds of creative twists.
Serving & Storage Suggestions
These cheesecake jars are best served cold, straight from the fridge. The texture is perfectly creamy and firm, and the flavors are at their peak after at least 4 hours of chilling.
Presentation tips: Before serving, top each jar with a dollop of whipped cream, a few fresh berries, and a mint sprig. If you want to get fancy, add a drizzle of berry compote on top and a few white chocolate shavings. The contrast between the dark berries and the white cream makes for a stunning presentation that looks like it came from a fancy bakery.
What to serve with them: These jars are rich enough to stand on their own, but they pair beautifully with a cup of coffee or a glass of dessert wine. For a summer party, serve them alongside fresh fruit skewers or a light angel food cake. They also make a great ending to a heavy meal—the lightness of the filling is refreshing without being too heavy.
Storage instructions: Store the jars in the refrigerator, covered, for up to 5 days. The crust will soften slightly over time, but the filling will stay creamy and delicious. Do not freeze these jars—the texture of the cream cheese filling changes when frozen and thawed, becoming grainy and watery.
Reheating note: These are no-bake desserts, so there’s no reheating involved. If you’ve stored them for a few days and want to refresh the texture, let them sit at room temperature for 10-15 minutes before serving. This takes the chill off and makes the filling slightly softer and more luscious.
Flavor development: The flavors actually improve after a day in the fridge. The berry compote seeps into the cheesecake layer just enough to create a subtle swirl of flavor, and the vanilla and lemon notes become more pronounced. If you can resist eating them right away, they’re even better on day two.
Nutritional Information & Benefits
While these cheesecake jars are definitely a treat, they do offer some surprising nutritional benefits. Here’s the breakdown for one jar (based on 6 servings):
| Nutrient | Amount Per Serving |
|---|---|
| Calories | 380 |
| Total Fat | 28g |
| Saturated Fat | 17g |
| Cholesterol | 85mg |
| Sodium | 280mg |
| Total Carbohydrates | 30g |
| Dietary Fiber | 2g |
| Sugars | 20g |
| Protein | 5g |
Health benefits to note: The berries in the compote are packed with antioxidants, particularly anthocyanins, which have been linked to heart health and reduced inflammation. The cream cheese provides a good amount of calcium and protein, while the lemon zest adds a dose of vitamin C. If you use Greek yogurt in place of some of the cream cheese (up to half), you’ll boost the protein content and reduce the fat without sacrificing too much creaminess.
Dietary considerations: This recipe contains dairy and gluten (from the graham crackers). For a gluten-free version, use gluten-free graham crackers. For a dairy-free version, substitute with plant-based alternatives as mentioned in the variations section. The recipe is naturally nut-free, though you’ll want to check your specific ingredients if you’re serving someone with allergies.
My personal take: I don’t believe in demonizing desserts, and I think these jars fit perfectly into a balanced diet. They’re indulgent enough to satisfy a sweet craving, but the portion control of individual jars means you’re less likely to overdo it. Plus, the berries add a touch of nutritional value that you just don’t get from a store-bought cheesecake.
Conclusion
These easy no-bake berry cheesecake jars have become my go-to dessert for pretty much every occasion. They’re quick enough for a random Tuesday night craving, fancy enough for a dinner party, and versatile enough to adapt to whatever fruit is in season. The creamy filling, the crunchy crust, the burst of berry flavor—every element works together to create something that feels special without requiring any real effort.
What I love most about this recipe is how forgiving it is. You can swap the berries, adjust the sweetness, change up the crust, and it still turns out amazing. It’s the kind of recipe that makes you feel like a genius in the kitchen, even though all you really did was mix a few things together and let the fridge do the work.
I’d love to hear how these turn out for you. Did you try a different fruit combination? Add a swirl of caramel? Top them with something unexpected? Drop a comment below and let me know—I’m always looking for new ideas to test out. And if you’re a visual learner, I’ve got a step-by-step video on my Instagram that shows exactly how to layer these jars for the prettiest presentation.
Go ahead, give them a try. Your taste buds (and your guests) will thank you.
Frequently Asked Questions
Can I use fresh berries instead of frozen for the compote?
Absolutely! Fresh berries work perfectly, though you might need to adjust the cooking time slightly since fresh berries release less liquid than frozen ones. Cook them for about 3-4 minutes instead of 5-7, and keep an eye on the consistency. If the compote seems too thick, add a tablespoon of water.
How long do these cheesecake jars last in the fridge?
These jars will stay fresh for up to 5 days when stored covered in the refrigerator. The crust will soften a bit over time, but the filling remains creamy and delicious. I actually think they taste even better on day two, after the flavors have had time to meld together.
Can I make these cheesecake jars vegan?
Yes! Use a high-quality dairy-free cream cheese (like Kite Hill or Miyoko’s) and substitute the heavy cream with full-fat coconut cream. The texture will be slightly softer, but the flavor is still fantastic. Just make sure to chill them for the full 4 hours (or overnight) to give them time to set properly.
Why did my cheesecake filling turn out lumpy?
Lumpy filling is almost always caused by cold cream cheese. Make sure your cream cheese is fully softened to room temperature before you start. If you’re in a rush, cut it into small cubes and microwave it for 10-second intervals until it’s soft but not warm. Also, make sure to beat it until it’s completely smooth before adding any other ingredients.
Can I freeze these no-bake cheesecake jars?
I don’t recommend freezing these jars. The cream cheese filling tends to become grainy and watery when frozen and thawed, and the crust loses its crunch. If you need to make them ahead of time, they’ll keep perfectly in the fridge for up to 5 days, so there’s really no need to freeze them.
Pin This Recipe!
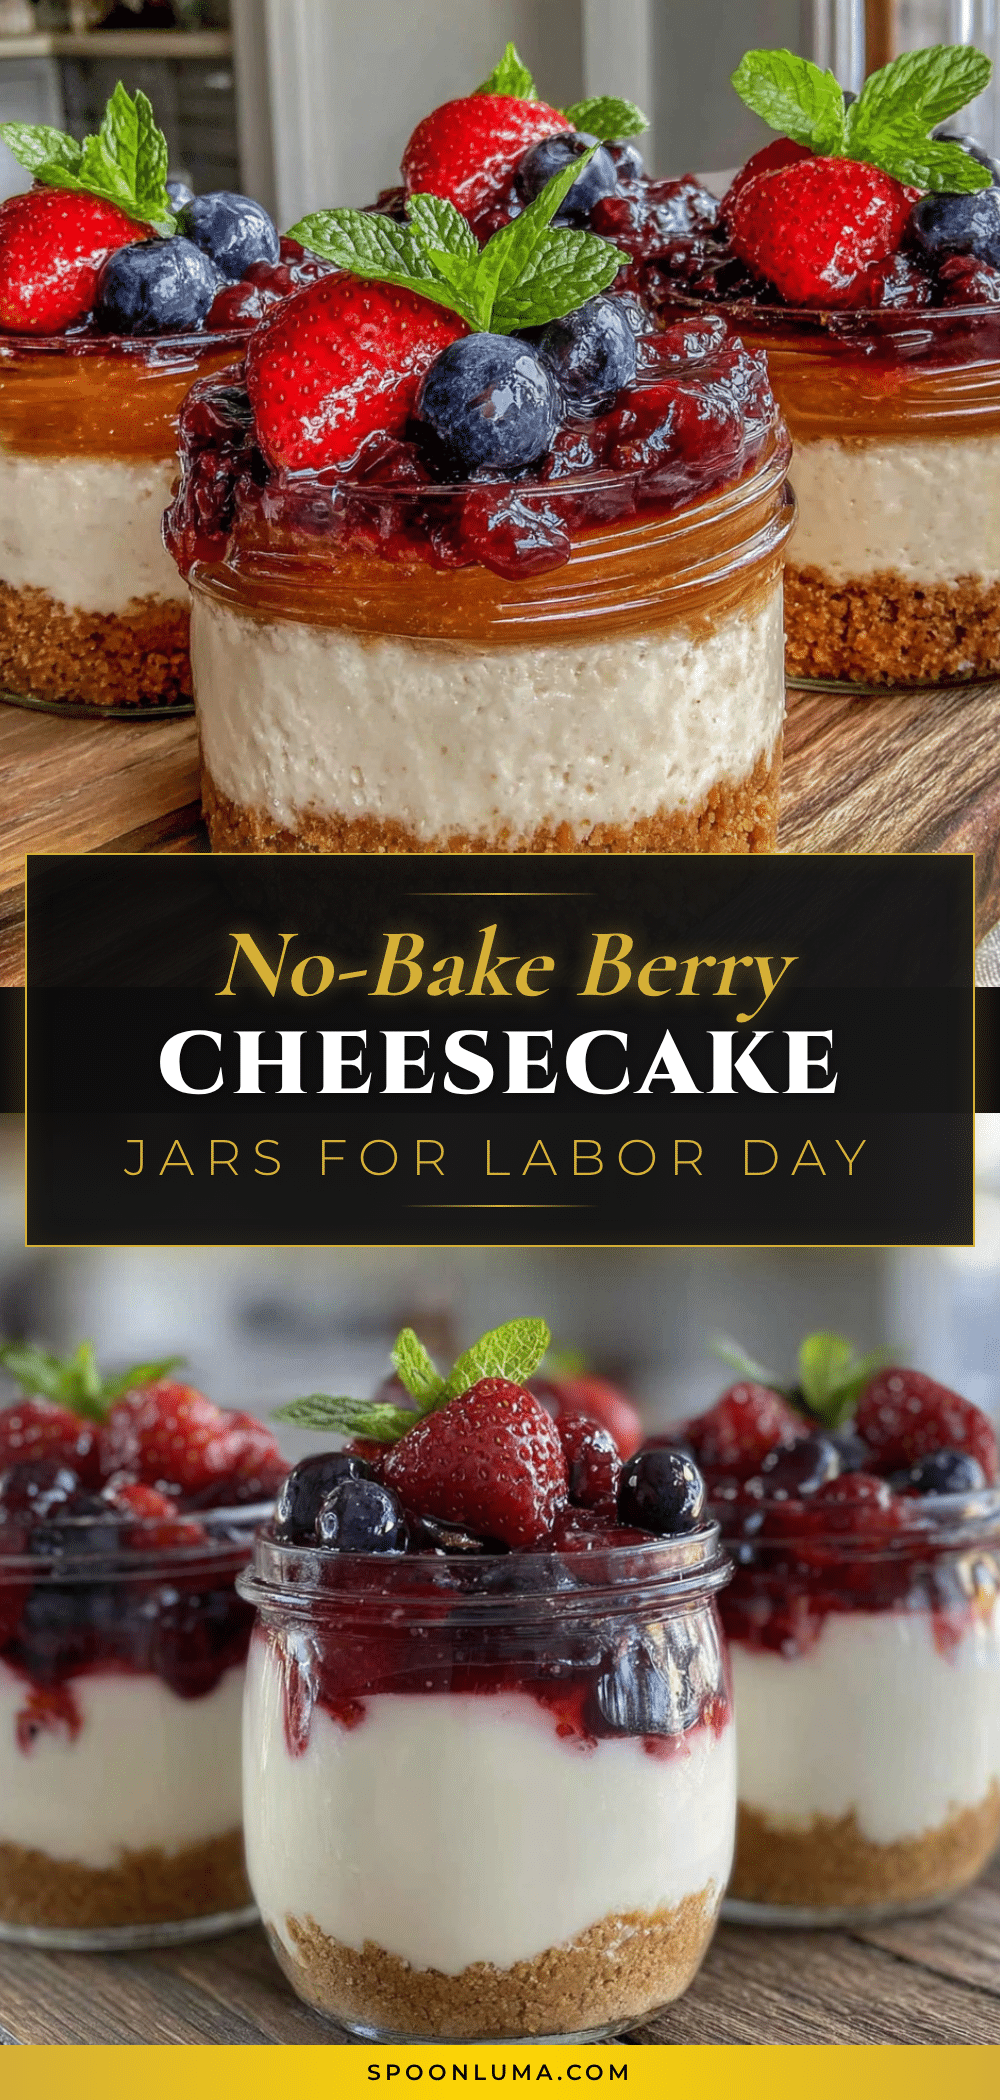
Easy No-Bake Berry Cheesecake Jars: Best 10-Minute Dessert
These easy no-bake berry cheesecake jars are the perfect 10-minute dessert. With a creamy cheesecake filling, crunchy graham cracker crust, and a tart berry compote, they’re quick, simple, and absolutely delicious.
- Prep Time: 10 minutes
- Cook Time: 10 minutes
- Total Time: 4 hours 20 minutes (includes chilling time)
- Yield: 6-8 servings 1x
- Category: Dessert
- Cuisine: American
Ingredients
- 2 cups frozen mixed berries (strawberries, blueberries, raspberries, blackberries)
- ¼ cup granulated sugar
- 1 tablespoon lemon juice (freshly squeezed)
- 1 teaspoon vanilla extract
- 1 tablespoon cornstarch mixed with 2 tablespoons cold water
- 1 ½ cups graham cracker crumbs (about 12 full sheets)
- 5 tablespoons unsalted butter, melted
- 2 tablespoons granulated sugar
- Pinch of salt
- 16 ounces cream cheese, softened to room temperature
- 1 cup heavy cream, cold
- ½ cup powdered sugar
- 1 teaspoon vanilla extract
- 1 tablespoon lemon zest (optional)
- Fresh berries (for garnish, optional)
- Mint sprigs (for garnish, optional)
- Whipped cream (for garnish, optional)
- White chocolate shavings (for garnish, optional)
Instructions
- Make the berry compote: Add frozen mixed berries, granulated sugar, and lemon juice to a medium saucepan. Cook over medium heat, stirring occasionally, until berries break down and release juices (5-7 minutes). In a small bowl, whisk together cornstarch and cold water until smooth. Pour slurry into berry mixture while stirring constantly. Cook for 1-2 minutes until thickened. Remove from heat and stir in vanilla extract. Let cool completely.
- Prepare the graham cracker crust: In a medium bowl, combine graham cracker crumbs, granulated sugar, and salt. Pour melted butter over mixture and stir with a fork until all crumbs are evenly moistened (texture should resemble wet sand). Divide crust mixture evenly among 6-8 jars (about 2 tablespoons per jar). Press crumbs down firmly using the back of a small spoon or the bottom of a shot glass.
- Whip up the cheesecake filling: In a large mixing bowl, beat softened cream cheese on medium speed until completely smooth (about 2 minutes). Scrape down sides and bottom of bowl. Add powdered sugar, vanilla extract, and lemon zest (if using). Beat on medium speed until well combined and smooth (about 1 minute). In a separate bowl, whip cold heavy cream on medium-high speed until stiff peaks form (2-3 minutes). Gently fold whipped cream into cream cheese mixture using a rubber spatula until no w…
- Assemble the jars: Spoon or pipe cheesecake filling into jars over the crust (about ¼ cup per jar). Smooth tops. Add a layer of cooled berry compote on top (1-2 tablespoons per jar). Optionally, repeat layers. Leave room at top for garnishes.
- Chill and set: Cover each jar with a lid or plastic wrap and refrigerate for at least 4 hours, preferably overnight. The filling will firm up and flavors will meld together.
- Serve: Before serving, top each jar with whipped cream, fresh berries, and a mint sprig if desired.
Notes
Room temperature cream cheese is non-negotiable for a smooth filling. Let compote cool completely before assembling to prevent melting the cheesecake layer. For best texture, chill for at least 4 hours or overnight. The flavors improve after a day in the fridge. Store covered in the refrigerator for up to 5 days. Do not freeze.
Nutrition
- Serving Size: 1 jar
- Calories: 380
- Sugar: 20
- Sodium: 280
- Fat: 28
- Saturated Fat: 17
- Carbohydrates: 30
- Fiber: 2
- Protein: 5
Keywords: no-bake cheesecake, berry cheesecake, easy dessert, 10-minute dessert, cheesecake jars, individual desserts, no-bake dessert


