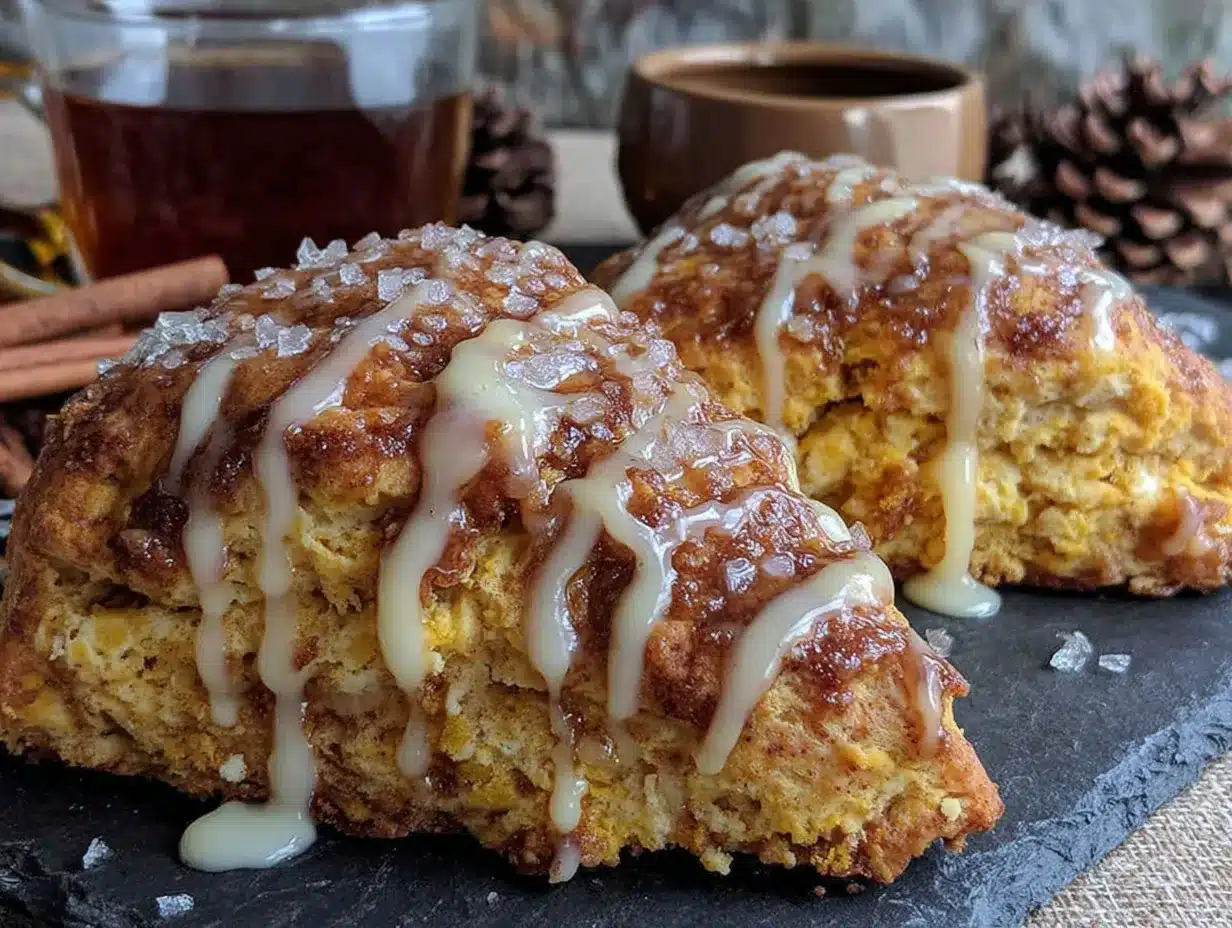
The faintly craggy, golden-brown dome with a single, deliberate crack running down its center—that’s what I was after. Not a perfect, smooth bakery scone, but one that looked like it meant business, like it had something to prove. Everything else about the morning—the cold kitchen floor, the dog watching me from his bed, the quiet hum of the fridge—was just background noise. The scone was the point.
I’d been chasing this particular texture for weeks. A scone that crumbles just enough when you break it, but holds together when you bite. The kind where the edges are crisp and the inside is so tender it almost feels like a mistake, like you got away with something. And honestly, pumpkin is the perfect vehicle for that obsession. It brings moisture without heaviness, and a warmth that makes the whole house smell like you’ve been baking for hours, even if you just walked into the kitchen ten minutes ago.
This recipe for Perfect Pumpkin Scones with Maple Glaze isn’t one I found in a book or watched on a video. It came from a series of happy accidents and stubborn tweaks, the kind of recipe you only get when you’re willing to waste a few batches. The maple glaze isn’t just a topping—it’s the reason these scones disappear so fast. It seeps into the cracks, pools in the crevices, and turns every bite into a moment.
I think that’s why this recipe stuck. It’s not flashy or complicated. It just works, and it makes you feel like you know what you’re doing in the kitchen. Trust me on that.
Why You’ll Love This Recipe
I’ve tested this recipe more times than I care to admit, and I can tell you with confidence—these are the scones you’ll come back to. They’re not dry, not dense, and definitely not boring. Here’s why they work:
- Quick & Easy: From start to finish, you’re looking at about 30 minutes of active work. No stand mixer required, no complicated folds. Just a bowl, a pastry cutter, and your hands.
- Simple Ingredients: Everything is a pantry staple or easily found at any grocery store. No hunting down specialty flours or obscure spices. You probably have most of it right now.
- Perfect for Fall Mornings: These scones were made for crisp air, hot coffee, and a quiet house. They’re also fantastic for Thanksgiving brunch or a cozy weekend treat.
- Crowd-Pleaser: I’ve brought these to gatherings and watched people go back for seconds (and thirds). The maple glaze is the secret weapon—it’s not too sweet, just enough to make you smile.
- Unbelievably Delicious: The texture is what gets you. A crisp exterior gives way to a soft, almost fluffy interior. And the pumpkin flavor is present without being overwhelming—it’s balanced by warm spices and that rich maple finish.
What makes this recipe different from the dozens of pumpkin scone recipes out there? It’s the technique. I use cold butter (obviously), but I also add a splash of heavy cream and a touch of Greek yogurt to keep the inside tender. The maple glaze is cooked just briefly to deepen the flavor, so it tastes like real maple, not sugar water. This isn’t just another version—it’s the one I’d make for someone I wanted to impress without breaking a sweat.
Honestly, this recipe is comfort food reimagined. It’s the kind that makes you close your eyes after the first bite, even if you’re just standing in your kitchen in your pajamas.
What Ingredients You Will Need
This recipe uses simple, wholesome ingredients to deliver that signature scone texture and warm pumpkin flavor. Most of these are pantry staples, so you can probably whip up a batch without a special trip to the store.
- All-Purpose Flour: 2 cups (240g). Provides structure. I prefer King Arthur Flour for consistent results, but any brand works. Spoon and level your flour—don’t scoop directly from the bag.
- Granulated Sugar: 1/3 cup (66g). Adds just enough sweetness to balance the pumpkin and spices.
- Baking Powder: 1 tablespoon (14g). Make sure it’s fresh—this is what gives the scones their lift.
- Pumpkin Pie Spice: 1 ½ teaspoons. You can use store-bought or make your own with cinnamon, nutmeg, ginger, and cloves. I like the blend from McCormick.
- Ground Cinnamon: ½ teaspoon. Adds warmth and depth.
- Salt: ½ teaspoon. Don’t skip it—it balances the sweetness and enhances the pumpkin flavor.
- Unsalted Butter: 6 tablespoons (85g), cold and cut into small cubes. This is non-negotiable. Cold butter creates steam pockets in the oven, giving you those flaky layers.
- Pumpkin Purée: ½ cup (120g). Not pumpkin pie filling—make sure it’s 100% pumpkin purée. I use Libby’s, but any brand works. Pat it with a paper towel to remove excess moisture if it looks watery.
- Heavy Cream: ¼ cup (60ml). Adds richness and tenderness. You can substitute half-and-half, but the texture won’t be quite as soft.
- Greek Yogurt: 2 tablespoons (30g). Plain, full-fat preferred. This is my secret ingredient for keeping the inside moist without making the dough sticky. For a similar approach, you might enjoy my Healthy Zucchini Bread with Greek Yogurt—it uses the same trick for moisture.
- Vanilla Extract: 1 teaspoon. Pure vanilla, not imitation, if you can swing it.
- Egg: 1 large, room temperature. Helps bind the dough and adds richness.
For the Maple Glaze:
- Powdered Sugar: 1 cup (120g). Sifted to avoid lumps.
- Pure Maple Syrup: 2 tablespoons (30ml). Grade A dark amber is my favorite for a stronger maple flavor. Don’t use pancake syrup—it’s not the same.
- Heavy Cream: 1-2 tablespoons (15-30ml). Adjust for consistency. You want a thick but pourable glaze that sets on the scones.
- Pinch of Salt: Optional, but it really makes the maple flavor pop.
Equipment Needed
You don’t need a lot of fancy gear for these scones. Here’s what I use:
- Large Mixing Bowl: For combining dry ingredients and cutting in the butter.
- Pastry Cutter or Two Forks: A pastry cutter makes quick work of cutting butter into flour. If you don’t have one, two forks or even your fingertips work—just work fast so the butter stays cold.
- Baking Sheet: A standard half-sheet pan lined with parchment paper. I’ve used the same Nordic Ware sheet for years—it distributes heat evenly and never warps.
- Parchment Paper: Non-negotiable for easy cleanup and preventing sticking.
- Bench Scraper or Sharp Knife: For cutting the dough into wedges. A bench scraper is ideal because it cuts cleanly without squishing the edges.
- Measuring Cups and Spoons: Accurate measurements matter in baking. Use the spoon-and-level method for flour.
- Whisk: For mixing the glaze until smooth.
- Cooling Rack: Lets air circulate under the scones so they don’t get soggy after glazing.
If you don’t have a pastry cutter, don’t sweat it. I’ve used my hands for years—just rub the butter into the flour until it looks like coarse meal. The key is speed. Warm hands can melt the butter, so work quickly and chill the dough if needed.
Preparation Method
This method is designed to be forgiving, even if you’re new to scone-making. Follow these steps, and you’ll get perfect results every time.
- Preheat and Prep: Preheat your oven to 400°F (200°C). Line a baking sheet with parchment paper and set aside.
- Mix Dry Ingredients: In a large bowl, whisk together 2 cups all-purpose flour, 1/3 cup granulated sugar, 1 tablespoon baking powder, 1 ½ teaspoons pumpkin pie spice, ½ teaspoon cinnamon, and ½ teaspoon salt. Make sure the baking powder is evenly distributed—lumps can cause uneven rising.
- Cut in the Butter: Add the cold, cubed butter to the flour mixture. Use a pastry cutter or your fingertips to work the butter into the flour until the mixture resembles coarse sand with a few pea-sized butter pieces remaining. This takes about 2-3 minutes. Don’t overdo it—those little butter bits are what create flaky layers.
- Combine Wet Ingredients: In a separate small bowl, whisk together ½ cup pumpkin purée, ¼ cup heavy cream, 2 tablespoons Greek yogurt, 1 teaspoon vanilla extract, and 1 egg. Whisk until smooth and uniform.
- Form the Dough: Make a well in the center of the dry ingredients. Pour the wet mixture into the well. Use a rubber spatula or your hands to gently fold everything together until just combined. The dough will look shaggy and slightly sticky—that’s exactly what you want. Do not overmix, or the scones will be tough.
- Shape and Cut: Turn the dough out onto a lightly floured surface. Gently bring it together into a rough ball, then pat it into a ¾-inch thick circle, about 8 inches in diameter. Use a bench scraper or sharp knife to cut the circle into 8 equal wedges, like a pizza. For clean edges, press straight down—don’t saw back and forth.
- Chill (Optional but Recommended): Place the wedges on the prepared baking sheet, spacing them about 2 inches apart. Pop the sheet in the freezer for 10-15 minutes while the oven finishes preheating. This solidifies the butter and helps the scones hold their shape and rise tall.
- Bake: Bake for 15-18 minutes, or until the scones are golden brown on the bottom and just barely golden on top. The centers should feel firm to the touch. Rotate the pan halfway through for even baking.
- Cool: Transfer the scones to a cooling rack and let them cool for at least 10 minutes before glazing. Warm scones will absorb the glaze rather than letting it set on top.
- Make the Glaze: While the scones cool, whisk together 1 cup sifted powdered sugar, 2 tablespoons pure maple syrup, and 1 tablespoon heavy cream. Add more cream, 1 teaspoon at a time, until you reach a thick but pourable consistency. The glaze should slowly drip off the whisk. Add a pinch of salt if desired.
- Glaze: Drizzle the glaze over the cooled scones using a spoon or a piping bag with the tip snipped off. Let the glaze set for about 10 minutes before serving. If you’re feeling extra, add a second drizzle after the first sets.
Sensory Cue: When you cut into a baked scone, the edges should be crisp and the inside should be soft and tender, almost like a biscuit. The glaze should crackle slightly when you bite into it.
Cooking Tips & Techniques
I’ve made enough bad scones to know what goes wrong. Here’s how to avoid my mistakes:
- Keep Everything Cold: This is the golden rule of scone-making. Cold butter creates steam in the oven, which lifts the dough and creates flaky layers. If your kitchen is warm, chill the flour and bowl too. I once made scones in July without chilling—they spread into flat, greasy disks. Never again.
- Don’t Overmix: Overworking the dough develops gluten, which makes scones tough. Mix until the flour is just incorporated—a few dry spots are fine. The dough should look shaggy, not smooth.
- Pat, Don’t Roll: Use your hands to pat the dough into a circle instead of a rolling pin. Rolling pin pressure can compress the layers and make the scones dense.
- Use a Sharp Cutter: A bench scraper or sharp knife cuts cleanly without sealing the edges. If you use a dull knife, you’ll press the edges together and prevent rising.
- Chill Before Baking: Even 10 minutes in the freezer makes a noticeable difference. It firms up the butter so the scones rise tall instead of spreading wide.
- Rotate the Pan: Ovens have hot spots. Rotating halfway through ensures even browning. I learned this the hard way after pulling out a tray of scones that were burnt on one side and pale on the other.
- Glaze at the Right Temperature: If the scones are too warm, the glaze will melt and soak in. Too cold, and the glaze will slide off. Let them cool for 10-15 minutes—just warm enough to feel like a hug, but not hot.
If you’re looking for another baked good that benefits from the cold-butter technique, check out my Cozy Brown Butter Banana Zucchini Bread. The same principle applies—cold ingredients make for a better texture.
Variations & Adaptations
This recipe is a great base for customization. Here are a few ways to make it your own:
- Gluten-Free Option: Substitute the all-purpose flour with a 1:1 gluten-free baking blend that contains xanthan gum. I’ve used Bob’s Red Mill with good results. The texture will be slightly more crumbly, but the flavor is still fantastic.
- Dairy-Free Adaptation: Use cold coconut oil or vegan butter instead of regular butter. Replace the heavy cream with full-fat coconut cream, and use a dairy-free yogurt. The glaze can be made with coconut cream and maple syrup—just note that it won’t set as firmly.
- Add Mix-Ins: Fold in ½ cup of dried cranberries, chopped pecans, or white chocolate chips after the wet and dry ingredients are partially combined. I love the combination of pumpkin and pecans—it adds a nice crunch.
- Spice It Up: Add ¼ teaspoon of ground ginger or cardamom for a different flavor profile. A pinch of black pepper (trust me) enhances the pumpkin and spices in a subtle, warm way.
- Savory Version: Omit the sugar and maple glaze. Add ½ cup shredded cheddar cheese, 2 tablespoons chopped fresh sage, and ¼ teaspoon black pepper. Bake as directed, and serve warm with butter. It’s a fantastic side for soup.
- Mini Scones: Pat the dough into a 6-inch circle and cut into 12 smaller wedges. Reduce baking time to 12-14 minutes. Perfect for brunch buffets or afternoon tea.
I once tried a version with candied ginger folded into the dough—it added a spicy-sweet kick that was surprisingly good. Don’t be afraid to experiment; scone dough is forgiving.
Serving & Storage Suggestions
These scones are best served slightly warm, with the maple glaze set and crackly. Here’s how to make the most of them:
- Serving Temperature: Room temperature or slightly warm. If you’ve refrigerated them, pop them in a 300°F (150°C) oven for 5 minutes to revive the texture. Microwaving works in a pinch but can make them rubbery.
- Presentation: Arrange on a wooden board or a simple white plate. Drizzle extra glaze on top and sprinkle with a pinch of flaky sea salt for a bakery-style finish. A small ramekin of softened butter on the side is never a bad idea.
- Complementary Dishes: These scones pair beautifully with a hot cup of coffee, chai tea, or spiced apple cider. For a full brunch spread, serve alongside a frittata or a fruit salad. They also work as a dessert with a dollop of whipped cream.
- Storage: Store in an airtight container at room temperature for up to 3 days. Place a paper towel in the container to absorb excess moisture—this prevents the scones from getting soggy. Change the paper towel daily if storing longer.
- Freezing: Freeze unglazed scones for up to 3 months. Wrap each scone individually in plastic wrap, then place in a freezer bag. Thaw at room temperature, then reheat in the oven. Glaze after reheating for the best texture. You can also freeze the shaped, unbaked dough—just bake directly from frozen, adding 2-3 minutes to the baking time.
- Flavor Development: These scones actually taste better the day after baking. The spices meld together, and the texture softens slightly. I’ve been known to hide a couple in the back of the fridge for “emergencies.”
Nutritional Information & Benefits
Here’s an approximate nutritional breakdown per scone (1 of 8, with glaze):
- Calories: 320
- Fat: 14g
- Saturated Fat: 8g
- Carbohydrates: 45g
- Fiber: 2g
- Sugar: 22g
- Protein: 5g
These values are estimates and will vary based on specific ingredients and substitutions.
Health Benefits: Pumpkin is a nutritional powerhouse—it’s rich in vitamin A (beta-carotene), which supports eye health and immune function. It’s also a good source of fiber, which aids digestion. The Greek yogurt adds protein and calcium, while the heavy cream provides a small amount of vitamin D. The maple syrup in the glaze contains antioxidants and minerals like zinc and manganese, though it should be enjoyed in moderation.
Dietary Considerations: This recipe is vegetarian. For gluten-free or dairy-free options, see the Variations section above. It contains dairy (butter, cream, yogurt) and gluten (flour). The glaze contains maple syrup and powdered sugar; for a lower-sugar option, reduce the glaze amount or skip it entirely—the scones are still delicious on their own.
I’m not a nutritionist, but I believe in balance. These scones are a treat, not a health food, and that’s okay. Sometimes you need a little sweetness in your day, and a pumpkin scone with maple glaze is a pretty wonderful way to get it.
Conclusion
These Perfect Pumpkin Scones with Maple Glaze are the kind of recipe that becomes a fall tradition. They’re simple enough for a weekday morning, but special enough for a holiday brunch. The texture is spot-on—crisp edges, tender center, and a glaze that adds just the right amount of sweetness.
I hope you’ll make these your own. Add your favorite mix-ins, try the savory version, or double the glaze (I won’t judge). The best recipes are the ones you tweak and adjust until they feel like yours. That’s what I did, and I’m so glad I stuck with it.
If you make these scones, I’d love to hear about it. Drop a comment below and let me know how they turned out—did you add pecans? Try the dairy-free version? Share your photos on social media and tag me so I can see your beautiful creations. And if you’re looking for more cozy baking inspiration, don’t miss my Moist Healthy Lemon Blueberry Zucchini Bread—it’s another breakfast favorite that uses simple ingredients for big flavor.
Happy baking, friend. Your kitchen is about to smell amazing.
Frequently Asked Questions
Can I use pumpkin pie filling instead of pumpkin purée?
No, please don’t. Pumpkin pie filling is pre-sweetened and spiced, which will throw off the balance of the recipe. Stick with 100% pumpkin purée for the best results.
Why did my scones spread out flat?
This usually happens when the butter is too warm or the dough is overmixed. Make sure your butter is cold straight from the fridge, and chill the shaped scones for 10-15 minutes before baking. Also, check that your baking powder is fresh—expired baking powder won’t provide enough lift.
Can I freeze the unbaked scone dough?
Absolutely. Shape the dough into wedges, place them on a baking sheet, and freeze until solid. Transfer to a freezer bag and store for up to 3 months. Bake directly from frozen, adding 2-3 minutes to the baking time. No need to thaw first.
How do I make the glaze thicker or thinner?
For a thicker glaze, add more powdered sugar, 1 tablespoon at a time. For a thinner glaze, add more heavy cream or maple syrup, 1 teaspoon at a time. The ideal consistency is thick but pourable—it should slowly drip off the whisk and hold its shape briefly on the scone before setting.
Can I make these scones without a pastry cutter?
Yes, definitely. You can use two forks to cut the butter into the flour, or simply use your fingertips. Just work quickly so the butter stays cold. If your hands are warm, run them under cold water first and dry them off before handling the dough.
Pin This Recipe!

Perfect Pumpkin Scones with Easy Maple Glaze Recipe

These Perfect Pumpkin Scones with Maple Glaze are tender, flaky, and bursting with warm fall spices. The easy maple glaze seeps into every crack, making each bite a moment of pure comfort.
- Prep Time: 15 minutes
- Cook Time: 18 minutes
- Total Time: 33 minutes
- Yield: 8 servings 1x
- Category: Breakfast, Brunch, Dessert
- Cuisine: American
Ingredients
- 2 cups (240g) all-purpose flour
- 1/3 cup (66g) granulated sugar
- 1 tablespoon (14g) baking powder
- 1 ½ teaspoons pumpkin pie spice
- ½ teaspoon ground cinnamon
- ½ teaspoon salt
- 6 tablespoons (85g) unsalted butter, cold and cubed
- ½ cup (120g) pumpkin purée (not pumpkin pie filling)
- ¼ cup (60ml) heavy cream
- 2 tablespoons (30g) plain Greek yogurt (full-fat preferred)
- 1 teaspoon vanilla extract
- 1 large egg, room temperature
- 1 cup (120g) powdered sugar, sifted
- 2 tablespoons (30ml) pure maple syrup (Grade A dark amber preferred)
- 1–2 tablespoons (15-30ml) heavy cream (for glaze)
- Pinch of salt (optional, for glaze)
Instructions
- Preheat your oven to 400°F (200°C). Line a baking sheet with parchment paper and set aside.
- In a large bowl, whisk together 2 cups all-purpose flour, 1/3 cup granulated sugar, 1 tablespoon baking powder, 1 ½ teaspoons pumpkin pie spice, ½ teaspoon cinnamon, and ½ teaspoon salt.
- Add the cold, cubed butter to the flour mixture. Use a pastry cutter or your fingertips to work the butter into the flour until the mixture resembles coarse sand with a few pea-sized butter pieces remaining (about 2-3 minutes).
- In a separate small bowl, whisk together ½ cup pumpkin purée, ¼ cup heavy cream, 2 tablespoons Greek yogurt, 1 teaspoon vanilla extract, and 1 egg until smooth.
- Make a well in the center of the dry ingredients. Pour the wet mixture into the well. Use a rubber spatula or your hands to gently fold everything together until just combined. The dough will look shaggy and slightly sticky—do not overmix.
- Turn the dough out onto a lightly floured surface. Gently bring it together into a rough ball, then pat it into a ¾-inch thick circle, about 8 inches in diameter. Use a bench scraper or sharp knife to cut the circle into 8 equal wedges.
- Place the wedges on the prepared baking sheet, spacing them about 2 inches apart. Chill in the freezer for 10-15 minutes while the oven finishes preheating.
- Bake for 15-18 minutes, or until the scones are golden brown on the bottom and just barely golden on top. Rotate the pan halfway through for even baking.
- Transfer the scones to a cooling rack and let them cool for at least 10 minutes before glazing.
- While the scones cool, whisk together 1 cup sifted powdered sugar, 2 tablespoons pure maple syrup, and 1 tablespoon heavy cream. Add more cream, 1 teaspoon at a time, until you reach a thick but pourable consistency. Add a pinch of salt if desired.
- Drizzle the glaze over the cooled scones using a spoon or a piping bag with the tip snipped off. Let the glaze set for about 10 minutes before serving.
Notes
Keep all ingredients cold for flaky layers. Do not overmix the dough. Chilling the shaped scones before baking helps them rise tall. Glaze when scones are just warm, not hot. For best texture, serve slightly warm or at room temperature.
Nutrition
- Serving Size: 1 scone
- Calories: 320
- Sugar: 22
- Fat: 14
- Saturated Fat: 8
- Carbohydrates: 45
- Fiber: 2
- Protein: 5
Keywords: pumpkin scones, maple glaze, fall baking, easy scone recipe, pumpkin spice, breakfast treat, brunch recipe


