I need a Halloween treat that actually looks creepy—not cute, not adorable, not “spooky but still pretty.” I want something that makes people do a double-take, maybe even hesitate before taking a bite. And honestly, that’s harder than it sounds when you’re working with pretzel rods and almond slivers. But here’s the thing: I’ve got salty pretzels, I’ve got melted caramel, I’ve got white chocolate, and I’ve got this nagging feeling that if I just lean into the weirdness, something genuinely unsettling (and delicious) is going to happen. That’s how these Spooky Witch Finger Pretzel Cookies were born—in a moment of pure, unfiltered Halloween mischief.
The first batch I made looked more like sad, bloated sausages than witch fingers. Not exactly the vibe I was going for. But after some trial and error (and a very patient husband who acted as my taste-testing guinea pig), I figured out the trick: you need the right almond placement, the right caramel-to-pretzel ratio, and just enough white chocolate “blood” to sell the illusion. These aren’t just cookies—they’re little edible props that happen to taste incredible.
There’s something deeply satisfying about watching someone’s face shift from “what is that?” to “wait, that’s actually amazing” after they take a bite. These pretzel cookies do exactly that. They’re salty, sweet, crunchy, and just the right amount of creepy. Perfect for Halloween parties, movie nights, or honestly just because you want to eat something that looks like it belongs in a haunted house.
Why You’ll Love This Recipe
Let me tell you why these Spooky Witch Finger Pretzel Cookies are about to become your new Halloween obsession. I’ve tested this recipe more times than I care to admit, and every single batch has delivered the same reaction: pure delight mixed with just a hint of horror. That’s the sweet spot, right there.
- Quick & Easy: These come together in under 30 minutes. No fancy techniques, no complicated steps—just simple assembly that looks way more impressive than it actually is.
- Simple Ingredients: You probably have most of this stuff in your pantry already. Pretzel rods, caramel bits, white chocolate chips, sliced almonds—that’s basically it. No weird specialty items that you’ll use once and forget about.
- Perfect for Halloween: These are the life of any Halloween party. Kids love them, adults love them, and everyone loves the creepy factor. They’re conversation starters that taste as good as they look.
- Crowd-Pleaser: The salty-sweet combination is universally adored. I’ve never met anyone who didn’t go back for seconds (or thirds).
- Unbelievably Delicious: The texture is what gets me every time—crunchy pretzel, chewy caramel, smooth white chocolate, and that little almond nail on top. It’s a party in your mouth, and everyone’s invited.
What makes these different from every other Halloween treat out there? It’s the attention to detail. I’m not just slapping caramel on a pretzel and calling it a day. I’m shaping each finger individually, adding knuckle lines, positioning the almond “nail” just right, and finishing with that perfect drip of red gel “blood.” This isn’t just another version of a witch finger cookie—it’s the best version, tested and perfected through multiple batches of glorious failure.
And here’s the emotional hook: these cookies make people laugh. They make people gasp. They make people take photos and share them with friends. In a world that’s often too serious, there’s something beautiful about creating edible art that brings pure, silly joy. That’s why I keep making them year after year.
What Ingredients You Will Need
This recipe uses simple, everyday ingredients to create something that looks like it crawled straight out of a witch’s kitchen. You don’t need anything fancy—just a few pantry staples and a little bit of patience. Here’s what you’ll need:
For the Witch Fingers
- Pretzel rods (about 24 rods) – The base of our witch fingers. I prefer the thicker rods for a more realistic finger shape. Snyder’s or Utz work great.
- Caramel bits (1 cup) – These melt smoothly and give us that chewy, slightly sticky texture that mimics skin. Kraft caramel bits are my go-to.
- Sliced almonds (about 24 slices) – These become the fingernails. Look for whole almond slices, not slivers. The wider ones look more realistic.
- White chocolate chips (1 cup) – For that pale, witchy skin tone. Ghirardelli or Guittard melt beautifully.
- Coconut oil (1 teaspoon) – Helps thin the white chocolate for smoother dipping. Optional but highly recommended.
- Red gel food coloring – For the “blood” effect at the base of the nail. Americolor or Wilton work well.
For Decoration
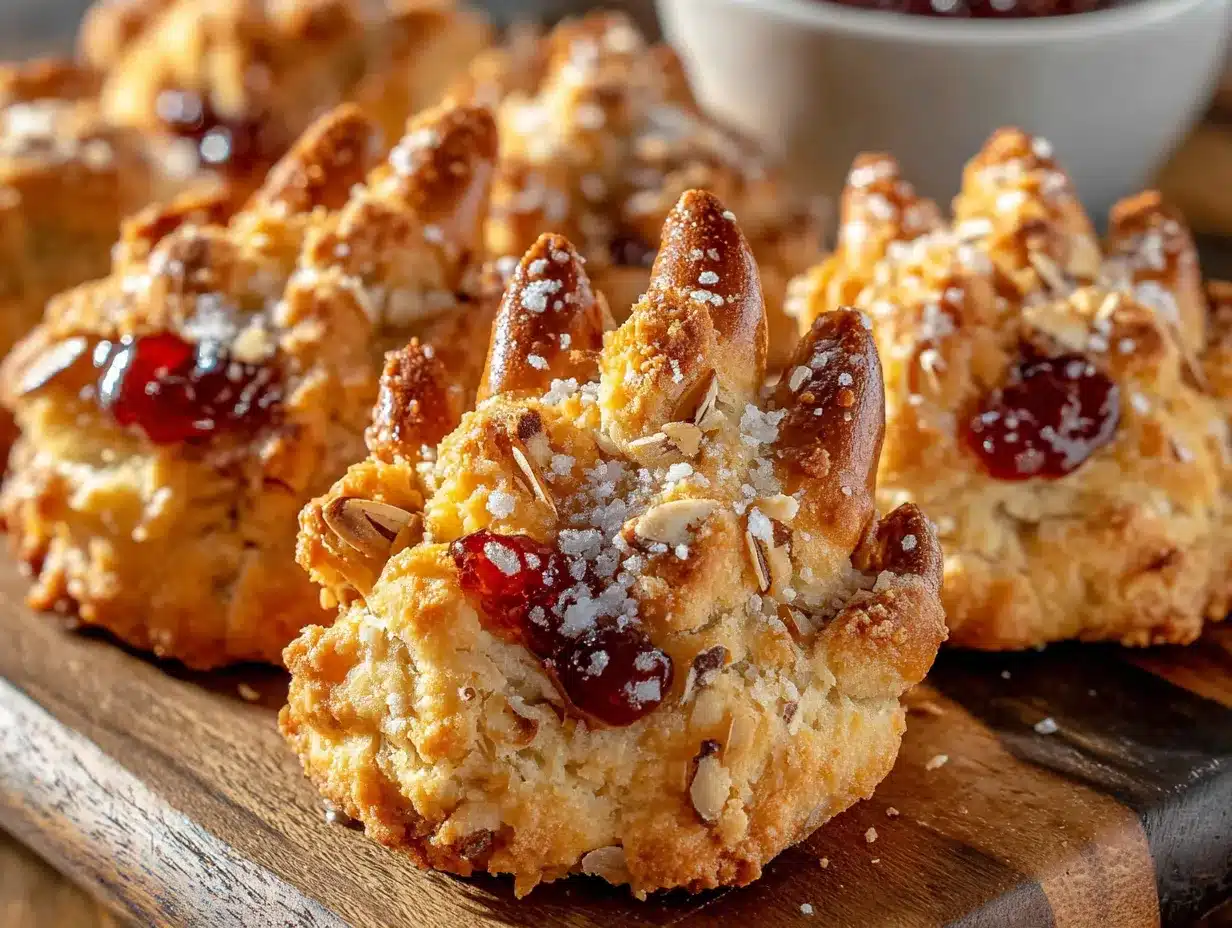
- Green food coloring (optional) – A tiny drop in the white chocolate gives a slightly greenish, undead tint.
- Black sanding sugar (optional) – For a dirt or grime effect on the fingers.
- Edible glitter (optional) – Because even witch fingers deserve a little sparkle.
Substitution notes: If you can’t find caramel bits, you can melt soft caramel candies instead—just add a tablespoon of heavy cream to keep them smooth. For a dairy-free version, use vegan white chocolate and dairy-free caramel. The texture will be slightly different, but the creepy factor remains intact.
I always recommend using good-quality white chocolate for this recipe. Cheap white chocolate tends to seize up or have a waxy texture that just doesn’t look right on a witch finger. Trust me on this one—I learned the hard way after a batch of lumpy, sad-looking fingers that looked more like zombie toes.
Equipment Needed
You don’t need a professional bakery setup for these Spooky Witch Finger Pretzel Cookies. Here’s what you’ll need:
- Baking sheet – Lined with parchment paper or a silicone baking mat. The silicone mat is my preference because nothing sticks to it.
- Small microwave-safe bowls – For melting caramel and white chocolate separately. Glass bowls work best.
- Piping bag or zip-top bag – For drizzling the caramel and white chocolate. A zip-top bag with a tiny corner snipped off works perfectly.
- Toothpicks – For adding knuckle lines and detail work. Also useful for repositioning almond nails.
- Small offset spatula – For spreading caramel evenly. A butter knife works in a pinch.
- Tweezers – For precise placement of almond nails. Sounds fussy, but it makes a huge difference.
- Wax paper – For letting the finished fingers set without sticking.
If you don’t have a piping bag, don’t stress. A simple zip-top bag with the corner snipped off does the exact same job. I’ve made entire batches using nothing but sandwich bags and scissors, and they turned out perfectly. The tweezers, though—those are worth the investment. They make placing those tiny almond nails so much easier, and your fingers will thank you for not getting covered in sticky caramel.
Preparation Method
Alright, let’s make some magic happen. Follow these steps carefully, and you’ll have a batch of witch fingers that would make even the Wicked Witch of the West proud.
- Prepare your workspace: Line a baking sheet with parchment paper or a silicone mat. Arrange your pretzel rods in a single layer, leaving a little space between each one. You should have about 24 rods ready to go.
- Melt the caramel: Place your caramel bits in a microwave-safe bowl. Microwave in 30-second intervals, stirring between each, until completely smooth. This usually takes about 1-2 minutes total. Be careful not to overheat—caramel can burn quickly and turn grainy.
- Shape the fingers: Using a small offset spatula or butter knife, spread a generous layer of warm caramel over the top half of each pretzel rod. Don’t worry about being perfect—the caramel should look organic and slightly lumpy, like actual skin. Leave the bottom third of the pretzel exposed so people have something to hold onto. This step takes patience, but it’s worth it.
- Add the knuckle lines: While the caramel is still warm, use a toothpick to gently press two or three horizontal lines into the caramel, mimicking knuckles. Don’t press too hard—you just want an impression, not a cut through the caramel. Space them unevenly for a more realistic look.
- Attach the almond nails: Take a sliced almond and gently press it into the tip of the caramel-covered pretzel, positioning it so it looks like a fingernail. The wider end should be at the tip, and the pointed end should face inward. Press firmly enough that it stays in place, but not so hard that the almond breaks. Use tweezers for precision if needed.
- Let the caramel set: Place the baking sheet in the refrigerator for 10-15 minutes, or until the caramel is firm to the touch. This is crucial—if the caramel isn’t set, the white chocolate coating will slide right off.
- Melt the white chocolate: While the caramel sets, melt your white chocolate chips with the coconut oil in a microwave-safe bowl. Microwave in 30-second intervals, stirring each time, until smooth and fluid. If you want a slightly greenish tint (for that undead witch look), add a tiny drop of green food coloring and stir well.
- Dip the fingers: Once the caramel is firm, hold each pretzel by the exposed bottom end and dip the caramel-covered portion into the melted white chocolate. Gently tap the pretzel on the edge of the bowl to let excess chocolate drip off. You want a thin, even coating—not a thick, gloppy mess.
- Create the nail bed effect: Before the white chocolate sets, use a toothpick to gently push the chocolate away from the base of the almond nail, creating a small gap. This mimics the cuticle area and makes the nail look more realistic. It’s a small detail, but it makes a huge difference.
- Add the “blood”: Using a toothpick or the tip of a small knife, dab a tiny amount of red gel food coloring at the base of each almond nail. Let it drip slightly for that fresh-from-the-witch’s-cauldron look. Don’t overdo it—a little goes a long way.
- Let everything set: Place the finished fingers back on the parchment-lined sheet and refrigerate for another 10-15 minutes, or until the white chocolate is completely firm. The chocolate should be hard to the touch, not soft or tacky.
- Final touches: Once set, you can add optional details like a light dusting of black sanding sugar for a “dirty” effect, or a tiny smear of red gel on the tip of the almond for a bloody nail. Get creative!
Sensory cues to watch for: When you dip the caramel-coated pretzel into the white chocolate, you should feel a slight resistance as the caramel meets the warm chocolate. The white chocolate should flow smoothly and coat evenly—if it’s too thick, add another ½ teaspoon of coconut oil. When you tap the pretzel on the bowl, you should see thin ribbons of chocolate falling, not thick globs.
Troubleshooting tip: If your white chocolate seizes up (turns grainy and stiff), you’ve overheated it. Don’t panic—just add a teaspoon of coconut oil and stir vigorously. It should smooth out. If it doesn’t, start over with fresh chocolate. I’ve ruined more batches than I’d like to admit by getting impatient with the microwave.
Cooking Tips & Techniques
After making these Spooky Witch Finger Pretzel Cookies more times than I can count, I’ve picked up a few tricks that make the process smoother and the results creepier. Let me share what I’ve learned the hard way.
Temperature is everything. Caramel that’s too hot will run right off the pretzel. Caramel that’s too cold won’t spread. You want it warm enough to be fluid but not so hot that it’s runny. Think thick honey consistency. If you’re unsure, let it cool for a minute before dipping. I’ve had entire batches slide off because I got impatient and used caramel that was still molten.
Don’t skip the chilling step. I know it’s tempting to move straight to the white chocolate dip, but trust me—if the caramel isn’t fully set, the white chocolate will just push it around and create a mess. Ten minutes in the fridge saves you twenty minutes of frustration. This is one of those lessons I had to learn three times before it stuck.
Work in small batches. Don’t try to coat all 24 fingers at once. Work with 4-6 at a time, keeping the rest in the fridge. The white chocolate will start to set as you work, and you want it fluid for a smooth finish. I learned this the hard way when my last batch of fingers ended up looking like they had white chocolate warts.
The almond nail trick: If your almond slices are too thin and keep breaking, try using whole almonds and slicing them yourself. You get thicker, sturdier nails that hold up better. Also, make sure the almond is firmly pressed into the caramel before it sets—if it’s loose, it’ll fall off during the white chocolate dip.
Multitasking strategy: While the caramel is chilling in the fridge, melt your white chocolate. While the white chocolate is setting after dipping, clean up your workspace. This recipe moves fast, and having everything ready before you start makes the whole process smoother. I like to set up an assembly line: pretzels on the left, caramel in the middle, white chocolate on the right, and a cooling rack at the end.
Variations & Adaptations
One of the best things about these Spooky Witch Finger Pretzel Cookies is how adaptable they are. Here are some variations I’ve tried and loved:
Chocolate Witch Fingers
Swap the white chocolate for dark or milk chocolate for a completely different look. Dark chocolate gives a gothier, more sinister vibe that works perfectly for Halloween. I’ve also done a half-and-half batch with white and dark chocolate, and the contrast is stunning.
Vegan Witch Fingers
Use vegan caramel (many store-bought caramels are accidentally vegan), dairy-free white chocolate, and coconut oil. The texture will be slightly different, but the creepy factor remains. I made these for a vegan friend’s Halloween party, and they were gone before the regular ones.
Spicy Witch Fingers
Add a pinch of cayenne pepper or chili powder to the melted white chocolate for a spicy kick. The heat pairs surprisingly well with the salty pretzel and sweet caramel. Start with a tiny amount—you can always add more, but you can’t take it out.
Gluten-Free Option
Use gluten-free pretzel rods. Most caramel and white chocolate are naturally gluten-free, so this is an easy swap. Just check your labels to be sure.
Different Nail Shapes
Use different nuts for different nail shapes. Pistachios give a greenish tint that’s perfect for a swamp witch. Cashews offer a more rounded, less scary nail. Macadamia nuts look almost comically large but add a fun twist. I once made a batch with sunflower seeds for tiny, delicate nails, and they were adorable.
My personal favorite variation? I made a batch with black cocoa powder mixed into the white chocolate for a charcoal-gray witch finger that looked like it belonged in a Tim Burton movie. The flavor was slightly bitter, which balanced the sweetness perfectly. Just don’t add too much or your fingers will look more like zombie toes than witch fingers.
Serving & Storage Suggestions
These Spooky Witch Finger Pretzel Cookies are best served at room temperature, arranged on a platter that looks like it belongs in a haunted house. Here’s how to make the most of them:
Serving temperature: Let the fingers sit at room temperature for about 10 minutes before serving. This softens the caramel slightly and makes them easier to bite into. Cold caramel is tough and chewy; room temperature caramel is perfectly pliable.
Presentation ideas: Arrange the fingers on a black platter or a wooden board that looks like a witch’s cutting board. Scatter some edible “dirt” (crushed chocolate cookies) around them for a freshly-dug effect. You can also stand them upright in a small vase or jar for a truly unsettling display—like a bouquet of severed fingers.
Complementary dishes: These pair beautifully with other easy no-bake treats for a full Halloween spread. A bowl of cast iron s’mores dip adds a warm, gooey contrast to the crunchy fingers. For drinks, serve with apple cider or a dark, spooky punch.
Storage instructions: Store the fingers in an airtight container at room temperature for up to 5 days. Do not refrigerate them after they’re fully set—the condensation will make the white chocolate sticky and ruin the texture. If you live in a humid climate, add a silica gel packet to the container to keep them crisp.
Freezer instructions: These freeze beautifully. Place them in a single layer in a freezer-safe container, separating layers with wax paper. They’ll keep for up to 3 months. Thaw at room temperature for about 30 minutes before serving. I always keep a batch in the freezer for unexpected Halloween guests or late-night cravings.
Flavor development: Interestingly, these taste even better the next day. The caramel and white chocolate have time to meld together, creating a more cohesive flavor. The pretzel stays crunchy, but the caramel softens slightly. It’s a beautiful thing.
Nutritional Information & Benefits
Let’s be real—these Spooky Witch Finger Pretzel Cookies are a treat, not a health food. But here’s what you’re working with per finger (approximate values):
| Nutrient | Amount per finger |
|---|---|
| Calories | 180 |
| Total Fat | 9g |
| Saturated Fat | 5g |
| Carbohydrates | 24g |
| Sugar | 16g |
| Protein | 3g |
| Sodium | 200mg |
Health highlights: The almonds provide a small amount of healthy fats, vitamin E, and magnesium. The pretzel offers a little bit of iron from enriched flour. The white chocolate… well, it’s white chocolate. But hey, everything in moderation, right?
Dietary considerations: These contain gluten (from the pretzels), dairy (from the caramel and white chocolate), and tree nuts (from the almonds). Not suitable for vegan or dairy-free diets unless substitutions are made. Always check your ingredient labels for hidden allergens.
My personal philosophy? Halloween comes once a year. If you’re going to indulge, do it right. These cookies bring joy, laughter, and a little bit of delicious horror to your celebration. That’s worth every calorie.
Conclusion
These Spooky Witch Finger Pretzel Cookies are more than just a Halloween treat—they’re an experience. Every time I make them, I watch people’s faces transform from confusion to delight to pure, childlike joy. There’s something magical about creating food that makes people laugh, gasp, and reach for seconds all at the same time.
I’ve shared this recipe with friends, family, and even a few strangers at Halloween parties, and the reaction is always the same: “Wait, these are actually delicious!” That’s the beauty of this recipe—it looks like a prop from a horror movie but tastes like a gourmet treat. The salty-sweet combination is irresistible, the texture is perfect, and the creepy factor is off the charts.
Don’t be afraid to get creative with your witch fingers. Add more “blood,” experiment with different nail shapes, or try a green-tinted white chocolate for an extra-undead look. The best part about Halloween baking is that there are no rules—the weirder, the better.
So go ahead, give these a try. Make a batch for your next Halloween party, your family movie night, or just because you want to eat something that looks like it belongs in a witch’s kitchen. And when you do, come back and tell me how they turned out. Did your kids scream? Did your friends laugh? Did you eat three before anyone else got a chance? I want to hear all of it. Drop a comment below, share your photos, and let’s make this Halloween the creepiest (and tastiest) one yet.
Happy haunting, and happy baking!
Frequently Asked Questions
Can I make these ahead of time?
Absolutely! These witch fingers can be made up to 3 days in advance and stored in an airtight container at room temperature. They actually taste better the next day as the flavors have time to meld together. For longer storage, freeze them for up to 3 months.
Why is my white chocolate seizing up?
White chocolate is notoriously finicky. It seizes when it gets too hot or when even a tiny drop of water gets into the bowl. Always use dry bowls and utensils, and microwave in short 30-second bursts, stirring thoroughly between each. If it does seize, add a teaspoon of coconut oil and stir vigorously to smooth it out.
Can I use regular pretzel sticks instead of rods?
You can, but the fingers will be much thinner and less realistic-looking. Pretzel rods give you that nice, thick finger shape that really sells the illusion. If you only have thin pretzel sticks, try doubling them up by gluing two together with caramel before coating.
How do I get the almond nails to stay on?
The key is pressing the almond firmly into the caramel while it’s still warm and slightly tacky. If the caramel has cooled too much, the almond won’t stick. You can also dab a tiny bit of melted white chocolate on the back of the almond before pressing it into the caramel for extra adhesion.
Can I make these without a microwave?
Yes! Use a double boiler or a heatproof bowl set over a pot of simmering water to melt your caramel and white chocolate. Just be careful not to let any steam or water get into the chocolate. The process takes a bit longer, but the results are just as good.
Pin This Recipe!

Best Spooky Witch Finger Pretzel Cookies – Easy Halloween Treat

These Spooky Witch Finger Pretzel Cookies are salty, sweet, crunchy, and just the right amount of creepy. Perfect for Halloween parties, they combine pretzel rods, caramel, white chocolate, and almond ‘nails’ for a deliciously unsettling treat.
- Prep Time: 15 minutes
- Cook Time: 10 minutes
- Total Time: 25 minutes
- Yield: 24 servings 1x
- Category: Dessert
- Cuisine: American
Ingredients
- 24 pretzel rods (about 24 rods)
- 1 cup caramel bits
- 24 sliced almonds (about 24 slices)
- 1 cup white chocolate chips
- 1 teaspoon coconut oil
- Red gel food coloring
- Green food coloring (optional)
- Black sanding sugar (optional)
- Edible glitter (optional)
Instructions
- Prepare your workspace: Line a baking sheet with parchment paper or a silicone mat. Arrange your pretzel rods in a single layer, leaving a little space between each one. You should have about 24 rods ready to go.
- Melt the caramel: Place your caramel bits in a microwave-safe bowl. Microwave in 30-second intervals, stirring between each, until completely smooth. This usually takes about 1-2 minutes total. Be careful not to overheat—caramel can burn quickly and turn grainy.
- Shape the fingers: Using a small offset spatula or butter knife, spread a generous layer of warm caramel over the top half of each pretzel rod. Don’t worry about being perfect—the caramel should look organic and slightly lumpy, like actual skin. Leave the bottom third of the pretzel exposed so people have something to hold onto.
- Add the knuckle lines: While the caramel is still warm, use a toothpick to gently press two or three horizontal lines into the caramel, mimicking knuckles. Don’t press too hard—you just want an impression, not a cut through the caramel. Space them unevenly for a more realistic look.
- Attach the almond nails: Take a sliced almond and gently press it into the tip of the caramel-covered pretzel, positioning it so it looks like a fingernail. The wider end should be at the tip, and the pointed end should face inward. Press firmly enough that it stays in place, but not so hard that the almond breaks. Use tweezers for precision if needed.
- Let the caramel set: Place the baking sheet in the refrigerator for 10-15 minutes, or until the caramel is firm to the touch. This is crucial—if the caramel isn’t set, the white chocolate coating will slide right off.
- Melt the white chocolate: While the caramel sets, melt your white chocolate chips with the coconut oil in a microwave-safe bowl. Microwave in 30-second intervals, stirring each time, until smooth and fluid. If you want a slightly greenish tint (for that undead witch look), add a tiny drop of green food coloring and stir well.
- Dip the fingers: Once the caramel is firm, hold each pretzel by the exposed bottom end and dip the caramel-covered portion into the melted white chocolate. Gently tap the pretzel on the edge of the bowl to let excess chocolate drip off. You want a thin, even coating—not a thick, gloppy mess.
- Create the nail bed effect: Before the white chocolate sets, use a toothpick to gently push the chocolate away from the base of the almond nail, creating a small gap. This mimics the cuticle area and makes the nail look more realistic.
- Add the ‘blood’: Using a toothpick or the tip of a small knife, dab a tiny amount of red gel food coloring at the base of each almond nail. Let it drip slightly for that fresh-from-the-witch’s-cauldron look. Don’t overdo it—a little goes a long way.
- Let everything set: Place the finished fingers back on the parchment-lined sheet and refrigerate for another 10-15 minutes, or until the white chocolate is completely firm. The chocolate should be hard to the touch, not soft or tacky.
- Final touches: Once set, you can add optional details like a light dusting of black sanding sugar for a ‘dirty’ effect, or a tiny smear of red gel on the tip of the almond for a bloody nail. Get creative!
Notes
Temperature is everything. Caramel that’s too hot will run right off the pretzel. Caramel that’s too cold won’t spread. You want it warm enough to be fluid but not so hot that it’s runny. Don’t skip the chilling step. Work in small batches. If your white chocolate seizes up, add a teaspoon of coconut oil and stir vigorously. These taste even better the next day.
Nutrition
- Serving Size: 1 finger
- Calories: 180
- Sugar: 16
- Sodium: 200
- Fat: 9
- Saturated Fat: 5
- Carbohydrates: 24
- Protein: 3
Keywords: Halloween treats, witch finger cookies, pretzel cookies, easy Halloween dessert, spooky snacks, no-bake cookies, caramel pretzels, white chocolate treats


