My nephew took one bite, looked at the treat in his hand, and then looked at me with this dead-serious expression and said, “Auntie, you’re not allowed to bring anything else to Halloween ever again.” And honestly? I wasn’t mad about it. I’d been testing out a batch of these Easy Halloween Rice Krispie Treats with Candy Corn the night before his school costume parade, and I’d already eaten three myself before they even cooled. That moment—when a seven-year-old declares your snack the official Halloween staple—is the kind of validation no food blog comment can touch.
It started as a lazy Tuesday afternoon project. I had a box of cereal, a bag of marshmallows, and a half-open bag of candy corn staring at me from the pantry. I wasn’t trying to be clever. I just wanted something festive that didn’t require turning on the oven (because let’s face it, October can still be warm in some places). I melted the butter, stirred in the marshmallows, and tossed in the candy corn almost as an afterthought. The first bite surprised me—the marshmallow-candy corn combo creates this creamy, almost buttery sweetness that feels like Halloween in dessert form. It’s not complicated. It’s just right.
These treats have become the thing I bring to every fall gathering now. They disappear fast, they’re impossible to mess up, and they actually look like you tried way harder than you did. That’s the kind of recipe I can get behind.
Why You’ll Love This Recipe
I’ve made a lot of rice krispie treats in my day—plain ones, chocolate-dipped ones, even some fancy ones with browned butter that were admittedly delicious but took forever. This version is different. It’s the one I keep coming back to because it’s genuinely foolproof and the flavor is exactly what you want for a Halloween party or a classroom treat.
- Quick & Easy: From start to finish, you’re looking at about 15 minutes of active work. No baking, no complicated steps, no special equipment. Just melt, stir, press, and wait.
- Simple Ingredients: You need exactly four main ingredients plus a little butter for greasing. Chances are you already have most of them in your pantry right now.
- Perfect for Halloween: The candy corn adds that festive pop of color and sweetness that makes these treats feel like a celebration. They’re great for parties, school events, or just a fun after-school snack.
- Crowd-Pleaser: Kids love them because they’re sweet and colorful. Adults love them because they’re nostalgic and not overly complicated. Everyone wins.
- Unbelievably Delicious: The texture is chewy with a slight crunch from the candy corn, and the marshmallow base is perfectly gooey without being sticky. It’s the kind of treat that makes you reach for a second one before you’ve finished the first.
What sets this recipe apart from other Halloween desserts is the way the candy corn melts slightly into the warm marshmallow mixture. It creates little pockets of creamy sweetness that you don’t get with regular rice krispie treats. It’s a small detail, but it makes a big difference. Trust me on this one.
What Ingredients You Will Need
This recipe uses simple, pantry-friendly ingredients to create something that feels special without any fuss. Here is everything you will need and a few notes on how to get the best results.
- 6 tablespoons unsalted butter (plus extra for greasing the pan) – I use salted butter in a pinch and just skip the added salt later. The butter gives the treats that rich, classic flavor.
- 1 package (10 oz) marshmallows – Standard-size marshmallows work best here. Mini marshmallows melt faster, but regular ones are totally fine. I’ve tried both and honestly cannot tell the difference in the final texture.
- 6 cups crispy rice cereal – The classic brand works great, but any store brand will do the job. I’ve used generic cereal before and the treats turned out just as good.
- 1 cup candy corn – You can use regular candy corn or the autumn mix with the little pumpkins and leaves. I personally prefer the classic candy corn for the color contrast.
- 1/4 teaspoon vanilla extract (optional but recommended) – This adds a subtle warmth that balances the sweetness. I forgot it once and the treats were still delicious, but the vanilla really does round out the flavor.
- Pinch of salt (optional) – If you are using unsalted butter, a tiny pinch of salt helps cut through the sweetness. I add it about half the time depending on my mood.
A few ingredient tips: For the best texture, use fresh marshmallows. Stale marshmallows don’t melt as smoothly and can leave you with lumpy treats. I learned this the hard way when I used a bag that had been sitting in my pantry for months—the treats were edible but not nearly as good. Also, if you want to get fancy, you can use the autumn mix candy corn that has the little pumpkins and leaves. It adds a nice variety of shapes and colors, though the flavor is essentially the same.
Substitution guidance: If you need a dairy-free option, use a plant-based butter substitute. The texture will be slightly different but still good. For a gluten-free version, just make sure your crispy rice cereal is certified gluten-free—most standard brands are, but it’s worth checking the label.
Equipment Needed
You don’t need much for this recipe, which is part of the beauty of it. Here is what you will need:
- Large pot or Dutch oven – You need something big enough to stir the cereal and marshmallow mixture without spilling. A 5-quart pot works perfectly.
- Wooden spoon or silicone spatula – A wooden spoon is sturdy enough to stir the thick mixture without bending. Silicone spatulas work too, but they can be a little flimsy for this job.
- 9×13-inch baking dish – This gives you treats that are about an inch thick. If you want thicker treats, use a 9×9-inch pan instead.
- Parchment paper or wax paper – Lining the pan makes lifting the treats out so much easier. I’ve made the mistake of skipping this step and ended up wrestling with stuck treats. Not worth it.
- Sharp knife – A good chef’s knife or a large serrated knife works best for cutting clean squares. I’ve used a plastic knife before too—it actually works surprisingly well and doesn’t stick to the treats.
- Measuring cups and spoons – Standard set for the butter, cereal, and candy corn.
If you don’t have a 9×13-inch pan, you can use a large sheet pan with sides. The treats will be thinner, but they’ll still taste great. I’ve also used a cast iron skillet in a pinch—the treats came out with crispy edges that were honestly amazing.
Preparation Method
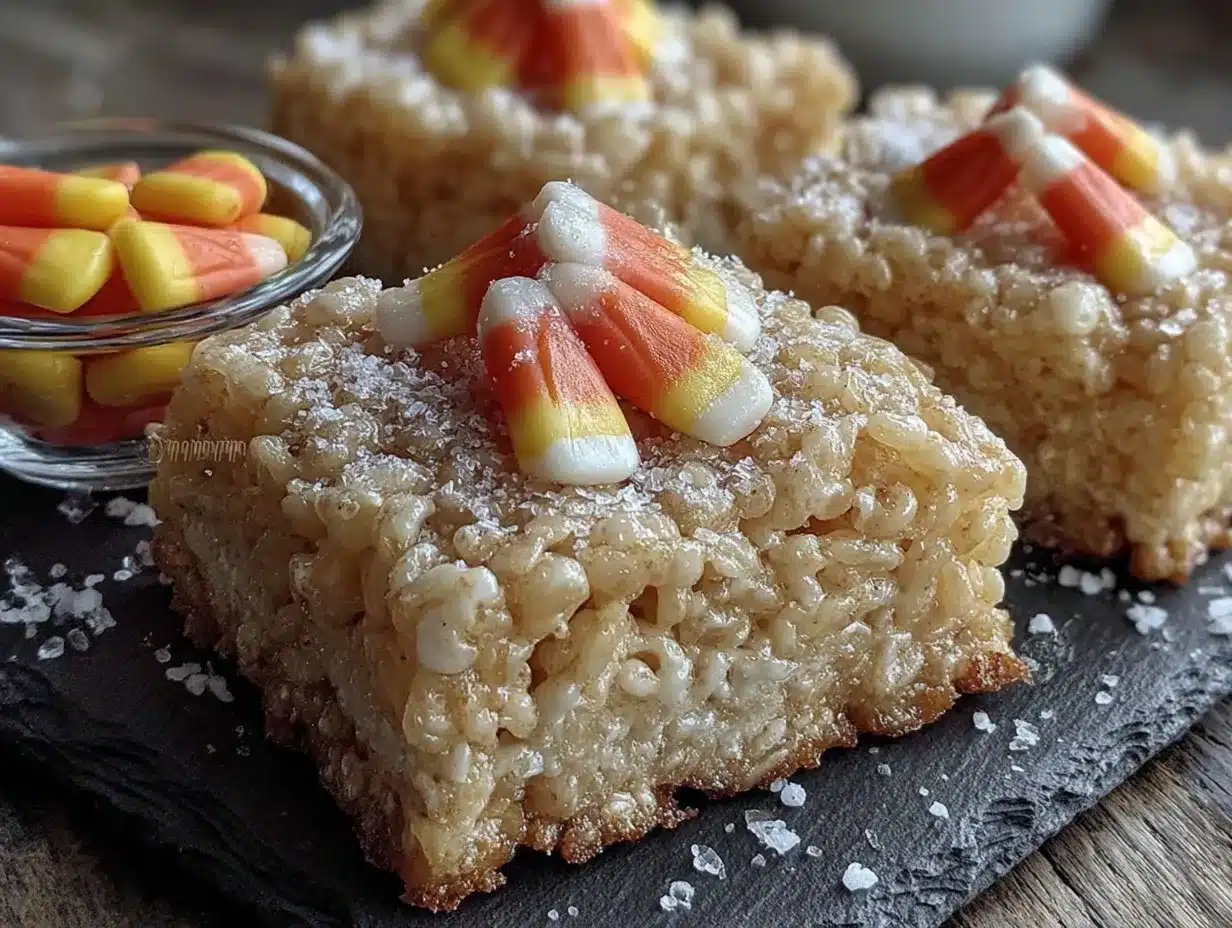
Making these treats is straightforward, but there are a few small details that can make the difference between good treats and great treats. Follow these steps and you’ll be set.
- Prep your pan. Grease a 9×13-inch baking dish generously with butter. Then line it with parchment paper, leaving some overhang on two sides. This creates handles that make lifting the treats out super easy. Grease the parchment paper too, just to be safe.
- Melt the butter. Place the 6 tablespoons of butter in a large pot over medium-low heat. Let it melt slowly, stirring occasionally. Do not rush this step—if the butter burns, the whole batch will taste off. I speak from experience here. Burnt butter treats are not a good time.
- Add the marshmallows. Once the butter is fully melted, add the entire package of marshmallows. Stir constantly with your wooden spoon or silicone spatula until the marshmallows are completely melted and the mixture is smooth. This usually takes about 3 to 5 minutes. Keep the heat on low to medium-low—too high and the marshmallows will scorch.
- Add vanilla and salt. If you are using the vanilla extract and salt, stir them in now. The vanilla will sizzle a little when it hits the hot mixture, which is totally normal. Stir until everything is well combined.
- Remove from heat and add cereal. Take the pot off the stove. Add the 6 cups of crispy rice cereal all at once. Stir gently but thoroughly until every piece of cereal is coated in the marshmallow mixture. Be careful not to crush the cereal—you want those little puffs to stay intact for the best texture.
- Fold in the candy corn. Add the 1 cup of candy corn and fold it into the mixture. Do this gently so you don’t break up the candy corn too much. You want some pieces to stay whole for that pop of color and texture.
- Press into the pan. Transfer the mixture to your prepared baking dish. Use a piece of wax paper or greased spatula to press it evenly into the pan. Press firmly but not too hard—you want the treats to hold together without being compressed into rocks. Take your time with this step. Even pressure makes for even treats.
- Let them set. Allow the treats to cool completely at room temperature. This usually takes about 30 to 45 minutes. Do not put them in the fridge to speed things up—the condensation can make them soggy. I know it’s tempting, but just be patient.
- Cut and serve. Once the treats are cool and firm, use the parchment paper handles to lift them out of the pan. Place them on a cutting board and use a sharp knife to cut into squares. I like to cut them into 12 large squares or 24 smaller ones depending on the occasion. Wipe the knife clean between cuts for neater edges.
Sensory cues: The marshmallow mixture should be smooth and glossy, not lumpy. When you stir in the cereal, you should hear a soft crackling sound. The finished treats should feel firm but give slightly when you press on them. They should smell buttery and sweet, with a hint of vanilla.
Cooking Tips & Techniques
I’ve made these treats more times than I can count, and I’ve definitely made my share of mistakes along the way. Here are some tips to help you avoid the same pitfalls.
Don’t overheat the marshmallows. This is the number one mistake people make. If you cook the marshmallow mixture too long or on too high heat, the treats will turn out hard and crunchy instead of soft and chewy. Low and slow is the way to go. I once walked away to answer a text and came back to a pot of scorched marshmallows. The whole batch went in the trash. Learn from my mistake—stay close to the stove.
Work quickly once the cereal is added. The marshmallow mixture starts to set as it cools, so you want to get the cereal mixed in and pressed into the pan as fast as possible. Have everything ready before you start—measured cereal, greased pan, and candy corn within arm’s reach.
Grease your hands or tools for pressing. The mixture is sticky, and it will stick to everything. I like to grease my hands with a little butter or cooking spray and press the mixture directly. Some people prefer using a greased spatula or a piece of wax paper. Find what works for you and stick with it.
Use a sharp knife for clean cuts. A dull knife will drag through the treats and leave ragged edges. A sharp chef’s knife or a serrated knife works best. I’ve also had good luck with a plastic knife—it glides through without sticking. If you want perfectly clean cuts, try running the knife under hot water and wiping it dry between each cut.
Let them cool completely before cutting. I know it’s hard to wait, but cutting warm treats is a recipe for a sticky mess. They’ll fall apart and you’ll end up with a pile of crumbs instead of neat squares. Patience pays off here.
Store them properly to maintain freshness. These treats stay soft and chewy for about 3 to 4 days if stored in an airtight container at room temperature. Do not refrigerate them—the cold air dries them out and makes them hard. If they do get a little stale, you can revive them in the microwave for about 10 seconds.
Variations & Adaptations
One of the best things about this recipe is how easy it is to adapt. Here are some variations I’ve tried and loved.
Chocolate Drizzle Version
Melt about 1/2 cup of chocolate chips with a teaspoon of coconut oil and drizzle it over the cooled treats. The chocolate adds a nice richness that balances the sweetness of the candy corn. I did this for a Halloween party last year and the treats disappeared in about 15 minutes. If you want to go all out, try my fudgy chocolate zucchini brownies with cream cheese swirl for another chocolate-forward treat that pairs perfectly with these.
Spooky Sprinkle Version
Before the treats set, sprinkle the top with Halloween-themed sprinkles—orange and black jimmies, candy eyeballs, or little pumpkins. Press them in gently so they stick. This is a great option if you’re making these for a kids’ party or classroom event.
Peanut Butter Twist
Stir in 1/3 cup of creamy peanut butter along with the marshmallows. The peanut butter adds a savory note that plays beautifully with the sweet candy corn. If you’re a fan of sweet and salty combos, this one is for you.
Gluten-Free and Dairy-Free Options
Use certified gluten-free crispy rice cereal and a plant-based butter substitute. The texture will be slightly different—a bit less chewy and a bit more delicate—but still delicious. I’ve tested this with a few different butter substitutes and found that the ones with a higher fat content work best.
White Chocolate Cranberry Version
Swap the candy corn for dried cranberries and white chocolate chips. This turns the treats into a holiday-friendly version that works for Christmas parties or winter gatherings. The tartness of the cranberries cuts through the sweetness beautifully.
Serving & Storage Suggestions
These treats are best served at room temperature. The texture is perfectly chewy and the candy corn stays slightly firm, giving you a nice contrast in every bite. If you’re serving them at a party, arrange them on a platter or cake stand for a festive presentation. You can also stack them in a mason jar or wrap them individually in cellophane bags tied with orange ribbon for party favors.
What to serve with them: These treats pair wonderfully with a cold glass of milk or a warm mug of apple cider. For a Halloween party spread, serve them alongside other no-bake treats like my no-bake rice krispie treat stars for a fun themed dessert table. They also go great with a cup of hot chocolate or a pumpkin spice latte.
Storage: Store the treats in an airtight container at room temperature for up to 4 days. Layer them between sheets of wax paper to prevent sticking. Do not refrigerate them—the cold air will dry them out and make them hard. If you need to store them longer, you can freeze them for up to 3 months. Wrap each treat individually in plastic wrap, then place them in a freezer-safe bag. Thaw at room temperature for about 30 minutes before serving.
How flavors develop over time: The treats are best within the first 24 hours, when the marshmallow is still soft and the candy corn has a slight chew. After a day or two, the candy corn softens and blends more into the marshmallow base. Some people actually prefer them this way—the flavors meld together into a more uniform sweetness. I personally like them both ways, depending on my mood.
Nutritional Information & Benefits
Let’s be honest—these are a treat, not a health food. But that doesn’t mean they can’t fit into a balanced lifestyle. Here’s a rough estimate of the nutritional information per serving (based on 12 servings):
- Calories: Approximately 280-320 per serving
- Total Fat: 8-10g
- Saturated Fat: 5-6g
- Carbohydrates: 50-55g
- Sugar: 30-35g
- Protein: 2-3g
- Sodium: 200-250mg
Health considerations: These treats are not gluten-free unless you use certified gluten-free cereal. They contain dairy from the butter, but you can easily substitute a dairy-free alternative. The candy corn is high in sugar, so if you’re watching your sugar intake, you might want to use less or skip it altogether. That said, these are a once-in-a-while treat, not an everyday snack. Enjoy them in moderation and savor every bite.
Personal perspective: I believe in balance. I eat my vegetables, I drink my water, and I also enjoy a good rice krispie treat when the occasion calls for it. Life is too short to skip dessert, especially when it’s this easy and this fun.
Conclusion
These Easy Halloween Rice Krispie Treats with Candy Corn are the kind of recipe that proves you don’t need fancy techniques or obscure ingredients to make something memorable. They’re simple, they’re fun, and they taste exactly like the best part of Halloween—sweet, nostalgic, and a little bit silly. Whether you’re making them for a classroom party, a Halloween gathering, or just because you want a treat that makes you smile, these are the ones to go with.
I love this recipe because it brings people together. There’s something about the combination of crispy cereal, gooey marshmallow, and bright candy corn that makes everyone feel like a kid again. And honestly? That’s the whole point of Halloween. So go ahead and make a batch. Eat one while it’s still warm. Share them with someone you love. And if you come up with your own twist on the recipe, I’d love to hear about it.
Have you tried these treats? Let me know in the comments below! I’d love to hear how they turned out and any variations you tried. And if you’re looking for more easy dessert ideas, check out my full collection of recipes for more inspiration.
Frequently Asked Questions
Can I use mini marshmallows instead of regular ones?
Yes, you can. Mini marshmallows melt faster and more evenly, so they’re actually a great option if you want to speed up the process. Use the same amount by weight—about 10 ounces. The texture will be very similar to using regular marshmallows.
Why did my treats turn out hard?
This usually happens when the marshmallow mixture is cooked too long or on too high heat. The sugar in the marshmallows can crystallize and harden as it cools. To avoid this, cook the marshmallows on low to medium-low heat and remove them from the stove as soon as they’re fully melted. Also, make sure you’re not pressing the mixture too firmly into the pan—gentle pressure is all you need.
Can I freeze these treats?
Absolutely. Wrap each treat individually in plastic wrap, then place them in a freezer-safe bag or container. They’ll keep for up to 3 months. To thaw, leave them at room temperature for about 30 minutes. The texture will be very close to fresh, though they might be slightly less chewy.
How do I keep the candy corn from melting into the marshmallow?
The key is to add the candy corn after you’ve removed the pot from the heat and stirred in the cereal. If you add it while the marshmallow mixture is still on the stove, the heat will melt the candy corn and you’ll lose that distinct color and texture. Fold it in gently at the very end, and you’ll get nice pockets of candy corn throughout the treats.
Can I use a different type of candy instead of candy corn?
Definitely. You can substitute any Halloween candy you like—chopped Reese’s cups, M&Ms, or even chopped chocolate bars work great. Keep in mind that different candies will melt or soften at different rates, so the texture might vary. I’ve used chopped peanut butter cups before and the result was amazing—just make sure to let them cool completely before cutting so the chocolate sets properly.
Pin This Recipe!
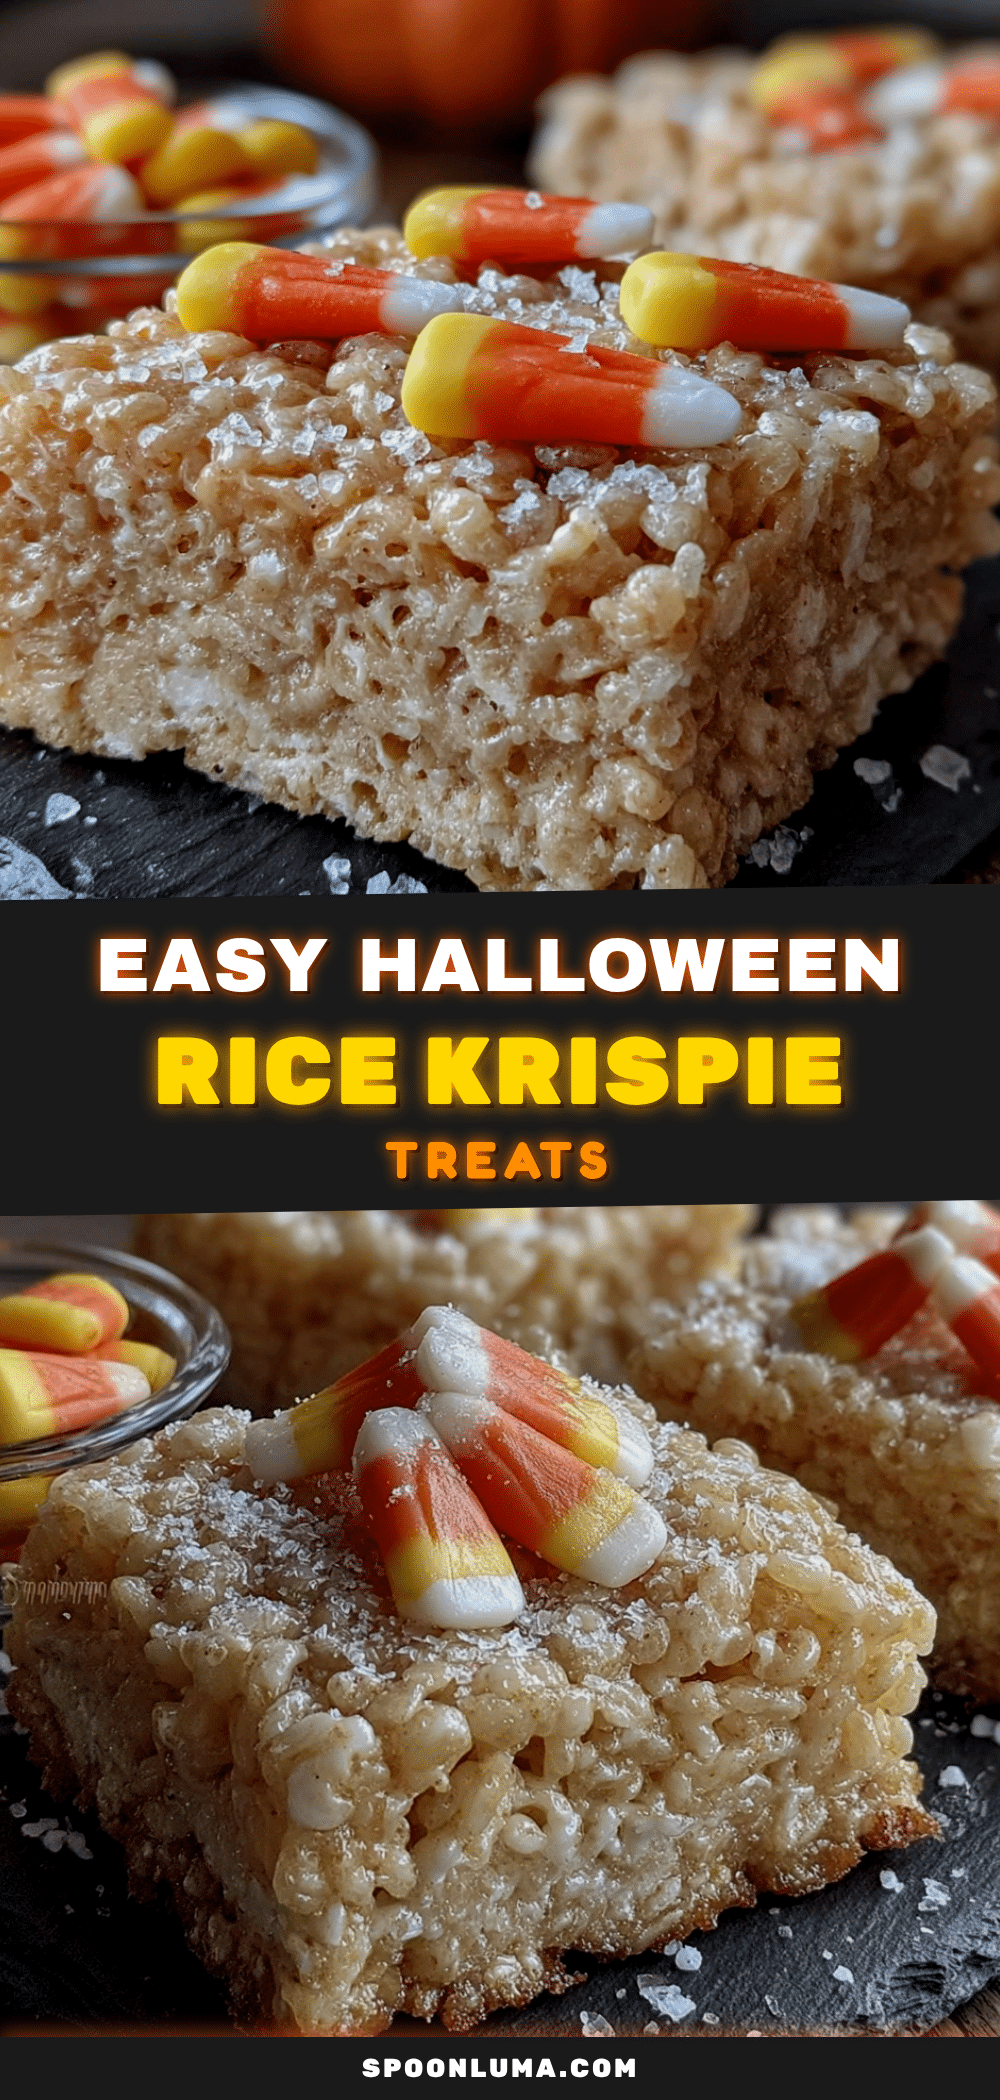
Easy Halloween Rice Krispie Treats with Candy Corn
These Easy Halloween Rice Krispie Treats with Candy Corn are a quick, no-bake dessert that combines crispy rice cereal, gooey marshmallows, and festive candy corn for a sweet and nostalgic Halloween treat. Perfect for parties, school events, or a fun after-school snack, they’re foolproof and ready in about 15 minutes.
- Prep Time: 15 minutes
- Cook Time: 5 minutes
- Total Time: 45 minutes
- Yield: 12 servings 1x
- Category: Dessert
- Cuisine: American
Ingredients
- 6 tablespoons unsalted butter (plus extra for greasing the pan)
- 1 package (10 oz) marshmallows
- 6 cups crispy rice cereal
- 1 cup candy corn
- 1/4 teaspoon vanilla extract (optional but recommended)
- Pinch of salt (optional)
Instructions
- Prep your pan. Grease a 9×13-inch baking dish generously with butter. Then line it with parchment paper, leaving some overhang on two sides. Grease the parchment paper too.
- Melt the butter. Place the 6 tablespoons of butter in a large pot over medium-low heat. Let it melt slowly, stirring occasionally.
- Add the marshmallows. Once the butter is fully melted, add the entire package of marshmallows. Stir constantly until the marshmallows are completely melted and the mixture is smooth, about 3 to 5 minutes. Keep the heat on low to medium-low.
- Add vanilla and salt. If using, stir in the vanilla extract and salt until well combined.
- Remove from heat and add cereal. Take the pot off the stove. Add the 6 cups of crispy rice cereal all at once. Stir gently but thoroughly until every piece of cereal is coated.
- Fold in the candy corn. Add the 1 cup of candy corn and fold it into the mixture gently.
- Press into the pan. Transfer the mixture to the prepared baking dish. Use a piece of wax paper or greased spatula to press it evenly into the pan. Press firmly but not too hard.
- Let them set. Allow the treats to cool completely at room temperature, about 30 to 45 minutes.
- Cut and serve. Once cool and firm, use the parchment paper handles to lift them out of the pan. Cut into squares with a sharp knife.
Notes
For best texture, use fresh marshmallows. Do not overheat the marshmallow mixture or treats will become hard. Work quickly once cereal is added. Let treats cool completely before cutting. Store in an airtight container at room temperature for up to 4 days. Do not refrigerate. Can be frozen for up to 3 months.
Nutrition
- Serving Size: 1 square (based on 1
- Calories: 300
- Sugar: 32
- Sodium: 225
- Fat: 9
- Saturated Fat: 5.5
- Carbohydrates: 52
- Protein: 2.5
Keywords: Halloween Rice Krispie treats, candy corn treats, no-bake Halloween dessert, easy Halloween recipe, rice krispie treats with candy corn


