Barely two tablespoons of salted caramel left in the jar and a whole bag of apples staring at me from the counter when the text came in. Potluck in three hours. My first thought was panic. My second thought was, well, I have cream cheese in the fridge and a box of graham crackers nobody touched last week. That’s how these Ultimate Salted Caramel Apple Cheesecake Bars were born—out of a fridge cleanout and a desperate need to show up with something that didn’t scream “I bought this at the gas station.”
I layered a buttery shortbread crust, a creamy cheesecake filling, and a generous pile of cinnamon-spiced apples on top. Then I drizzled that sad little bit of caramel over everything and crossed my fingers. The bars came out of the oven looking like a messy pile of fall goodness. I cut them into squares, threw them on a plate, and honestly expected them to disappear into the background of the dessert table. Instead, three people asked for the recipe before I even sat down. One person asked twice.
There’s something about that combination—sweet apples, tangy cream cheese, and salty caramel—that just works. It’s not fancy. It’s not complicated. But it tastes like you spent hours in the kitchen when really you just threw things together and hoped for the best. These bars have become my go-to for fall gatherings, lazy Sunday baking, and any time I want to feel like I have my life together in the kitchen. Which, let’s be honest, isn’t every day.
Why You’ll Love This Recipe
Let me tell you why these bars keep showing up at every event I attend. First off, they’re forgiving. I’ve made them with different apples, different cream cheese brands, and even a gluten-free crust that somehow still worked. They don’t punish you for being imperfect.
- Quick & Easy : You can have these in the oven in about 20 minutes. No stand mixer required. No complicated techniques. Just mixing, layering, and baking.
- Simple Ingredients : Apples, cream cheese, butter, sugar, flour, and a jar of good salted caramel. That’s the whole list. You probably have most of it already.
- Perfect for Fall Gatherings : These bars scream autumn without being fussy. They’re great for Thanksgiving, Friendsgiving, or just a cozy Sunday afternoon.
- Crowd-Pleaser : I’ve served these to kids, adults, picky eaters, and people who claim they “don’t really like dessert.” Every single one of them came back for seconds.
- Unbelievably Delicious : The contrast between the buttery crust, the creamy cheesecake layer, and the soft, spiced apples is next-level comfort food. And the caramel? It ties everything together like a warm hug.
What makes this recipe different from the dozens of apple cheesecake bars floating around the internet is the balance. The crust isn’t too thick. The cheesecake isn’t too sweet. The apples aren’t swimming in syrup. Every bite hits all three layers without one overpowering the others. I tested this recipe four times to get the ratios right—once with too much crust, once with not enough caramel, and once where the apples turned into applesauce (still good, but not what we’re going for here). This is the version that finally worked.
This is the kind of dessert that makes you close your eyes after the first bite. It’s comfort food reimagined—familiar enough to feel nostalgic, but elevated just enough to feel special. Perfect for impressing guests without stressing yourself out.
What Ingredients You Will Need
This recipe uses simple, wholesome ingredients that come together to create something truly special. Most of these are pantry staples, so you might not even need a grocery run.
For the Crust
- 1 ½ cups all-purpose flour (spooned and leveled—don’t pack it down)
- ½ cup granulated sugar
- ½ cup unsalted butter, cold and cubed (I use Kerrygold for the flavor, but any good butter works)
- ¼ teaspoon salt (fine sea salt preferred)
For the Cheesecake Layer
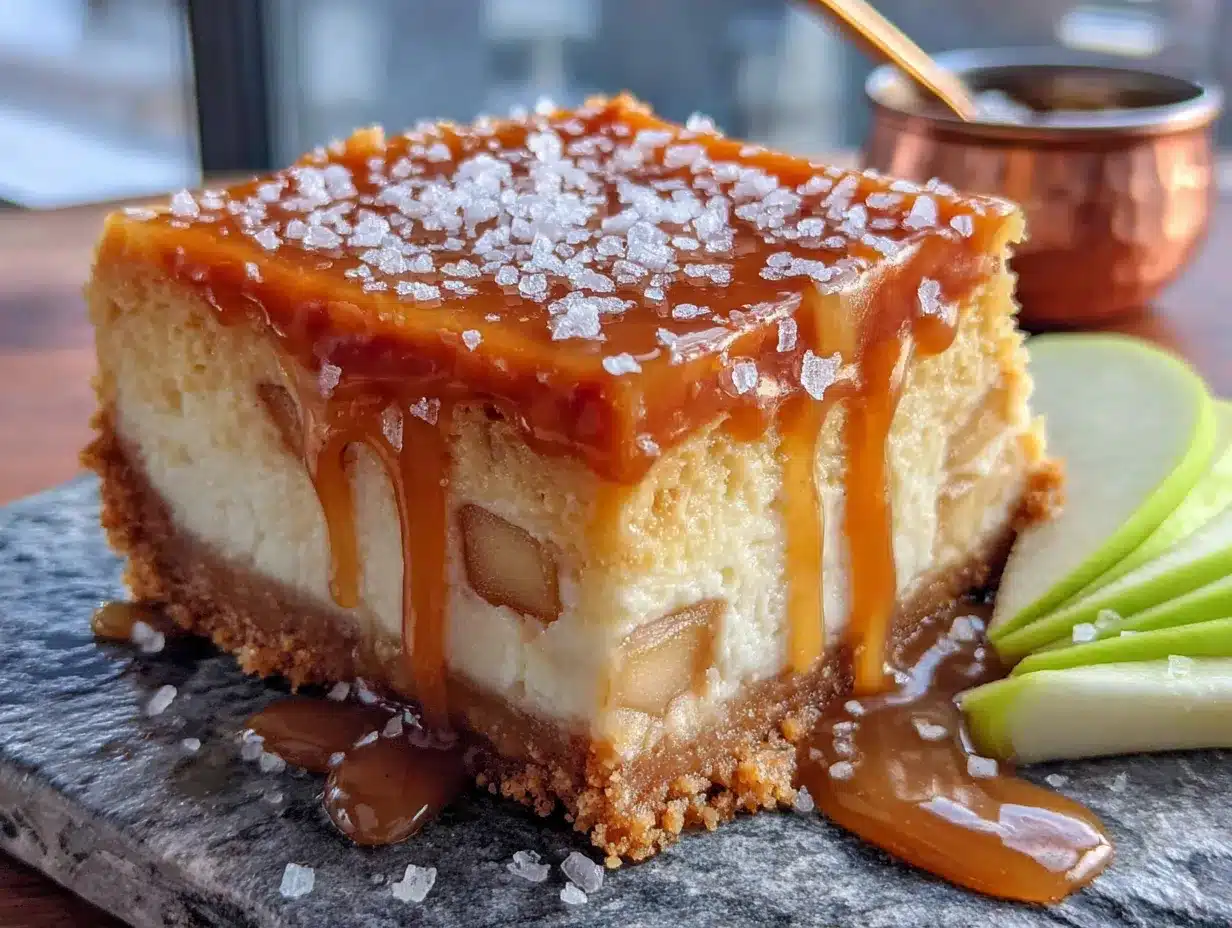
- 16 ounces cream cheese, softened (full-fat gives the best texture—Philadelphia is my go-to)
- ½ cup granulated sugar
- 2 large eggs, room temperature (cold eggs can make the filling lumpy)
- 1 teaspoon vanilla extract (pure, not imitation)
- 2 tablespoons all-purpose flour (helps stabilize the filling)
For the Apple Layer
- 3 medium apples, peeled and thinly sliced (I recommend Honeycrisp or Granny Smith for the best texture and flavor balance)
- 2 tablespoons granulated sugar
- 1 teaspoon ground cinnamon
- ¼ teaspoon ground nutmeg (freshly grated if you have it)
- 1 tablespoon lemon juice (keeps the apples from browning)
For the Topping
- ½ cup salted caramel sauce (store-bought is fine—I like Trader Joe’s or Stonewall Kitchen)
- Flaky sea salt (like Maldon—trust me on this)
A quick note on apples: You want something that holds its shape during baking. Honeycrisp is my favorite because it stays firm and has that perfect sweet-tart balance. Granny Smith works beautifully if you prefer a tangier flavor. Avoid Red Delicious or Gala—they turn into mush. And if you’re feeling adventurous, try mixing two varieties. Half Honeycrisp and half Granny Smith gives you the best of both worlds.
For the caramel sauce, you can absolutely make your own if you’re feeling ambitious. But honestly, a good quality store-bought version saves time and works just as well. Just make sure it’s salted caramel—the salt cuts through the sweetness and makes everything taste more complex.
Equipment Needed
You don’t need a fancy kitchen to make these bars. Here’s what I use:
- 9×13-inch baking pan (metal or glass both work—I prefer metal for even browning)
- Parchment paper (for easy lifting—don’t skip this)
- Electric hand mixer or stand mixer (for the cheesecake filling—a whisk works but your arm will hate you)
- Large mixing bowls (one for crust, one for filling, one for apples)
- Sharp knife and cutting board (for slicing apples)
- Measuring cups and spoons
- Rubber spatula (for scraping every last bit of cheesecake filling)
- Cooling rack (optional but helpful)
If you don’t have a 9×13 pan, you can use a 9×9 square pan—just increase the baking time by about 10 minutes and expect thicker bars. I’ve also used a disposable aluminum pan for potlucks, and it works perfectly. Just be careful when cutting—those pans are flimsy.
One tip I learned the hard way: line your pan with parchment paper, leaving overhang on two opposite sides. This lets you lift the entire block of bars out after they’ve cooled, making cutting clean squares so much easier. Trust me, trying to cut bars in the pan is a recipe for disaster.
Preparation Method
Let’s walk through this step by step. I’ll include all the little details I wish someone had told me the first time.
Step 1: Prep the Pan and Preheat
Preheat your oven to 350°F (175°C). Line your 9×13-inch baking pan with parchment paper, leaving about 2 inches of overhang on the long sides. Lightly grease the parchment with butter or cooking spray. This seems like an extra step, but it’s the difference between perfect bars and bars that crumble into pieces when you try to lift them out.
Step 2: Make the Crust
In a medium bowl, whisk together the flour, sugar, and salt. Add the cold, cubed butter. Use a pastry cutter, two forks, or your fingertips to cut the butter into the flour mixture until it resembles coarse sand with a few pea-sized butter pieces remaining. You want some texture here—not a uniform paste. Those little butter pockets create flakiness.
Press the mixture evenly into the bottom of your prepared pan. Use the bottom of a measuring cup or a flat glass to really pack it down. Bake for 15 minutes, until the edges are just barely golden. Set aside to cool slightly while you make the filling. The crust will firm up more as it cools.
Step 3: Make the Cheesecake Filling
In a large bowl, beat the softened cream cheese with an electric mixer on medium speed until smooth and creamy—about 2 minutes. Scrape down the sides and bottom of the bowl. Add the sugar and beat until combined. Add the eggs one at a time, beating on low after each addition just until incorporated. Overmixing at this stage adds too much air, which can cause cracks. Stir in the vanilla and the 2 tablespoons of flour until just combined.
The mixture should be smooth and thick, like a very dense yogurt. If it looks curdled or watery, your cream cheese was probably too cold. Let it sit at room temperature for 10 minutes and mix again gently.
Step 4: Prepare the Apples
In a separate bowl, toss the sliced apples with the sugar, cinnamon, nutmeg, and lemon juice. Make sure every slice gets coated. Let them sit for 5 minutes—this draws out a little liquid and helps the spices penetrate. Don’t skip the lemon juice; it keeps the apples from turning brown and adds a subtle brightness that balances the richness of the cheesecake.
Step 5: Assemble the Bars
Pour the cheesecake filling over the slightly cooled crust and spread it evenly with a spatula. Arrange the apple slices on top in an even layer. Don’t worry about being too precise—just scatter them around. Some will sink into the filling slightly, and that’s exactly what you want.
Drizzle the salted caramel sauce over the apples. Use about half the jar—you want ribbons of caramel, not a flood. Reserve the rest for drizzling after baking.
Step 6: Bake
Bake at 350°F (175°C) for 35-40 minutes, or until the edges are set and the center is just slightly jiggly. The cheesecake will continue to set as it cools. If the top starts browning too quickly, tent the pan loosely with foil after 25 minutes. Every oven is different, so start checking at 30 minutes.
Let the bars cool completely at room temperature—about 1 hour. Then refrigerate for at least 3 hours, preferably overnight. This step is non-negotiable. Warm cheesecake bars are a gooey mess. Chilled bars cut cleanly and hold their shape.
Step 7: Finish and Serve
Once fully chilled, lift the bars out of the pan using the parchment overhang. Place on a cutting board. Drizzle with the remaining caramel sauce and sprinkle with flaky sea salt. Cut into squares with a sharp knife, wiping the blade clean between cuts for neat edges.
Cooking Tips & Techniques
I’ve made these bars more times than I care to admit, and I’ve learned a few things along the way. Here are the tips that made the biggest difference.
Room temperature ingredients matter. Cold cream cheese creates lumps that are nearly impossible to smooth out. Cold eggs can seize the mixture. Leave everything on the counter for at least 30 minutes before starting. If you’re in a hurry, cut the cream cheese into cubes and microwave on low power for 10-second bursts until softened but not warm.
Don’t overbake. The center should still have a slight wobble when you pull the pan out. Overbaked cheesecake turns dry and cracks. If you see cracks forming on the surface, you’ve gone too far. It’s still edible—just not as pretty.
Patience is a virtue. I know you want to eat these immediately. I know. But cutting into warm cheesecake bars is like trying to cut a cloud with a butter knife. The filling hasn’t set, the layers slide apart, and you end up with a delicious but structurally unsound mess. Give them the full chilling time. Your future self will thank you.
Use a hot knife for clean cuts. Run your knife under hot water, dry it off, and slice. Wipe the blade clean between each cut. This gives you those beautiful, Instagram-worthy squares with clean edges and distinct layers.
Toast the crust before adding the filling. This is the tip that changed everything for me. Pre-baking the crust for 15 minutes gives it a head start so it stays crisp instead of turning soggy from the cheesecake filling. It also adds a subtle nuttiness that pairs beautifully with the apples and caramel.
Variations & Adaptations
One of the best things about this recipe is how flexible it is. Here are some variations I’ve tried and loved.
Gluten-Free Version: Swap the all-purpose flour in the crust with a 1:1 gluten-free baking flour blend. I’ve used Bob’s Red Mill with great results. The texture is slightly more crumbly but still delicious. For the cheesecake filling, use a gluten-free flour blend or cornstarch in place of the 2 tablespoons of flour.
Vegan Option: Use vegan cream cheese (Kite Hill is my favorite), a flax egg (1 tablespoon ground flaxseed + 3 tablespoons water, let sit for 5 minutes), and vegan butter. The texture won’t be exactly the same—vegan cheesecake is always a little softer—but the flavor is still fantastic. Use a dairy-free caramel sauce like the one from Cocomels.
Nutty Crust: Add ½ cup of finely chopped pecans or walnuts to the crust mixture. Press into the pan as usual. The nuts add crunch and a toasty flavor that complements the apples beautifully. I do this every time I’m feeling extra fancy.
Spiced Caramel: Warm your caramel sauce with a cinnamon stick and a pinch of cardamom before drizzling. Let it cool slightly and remove the cinnamon stick. The warm spices elevate the whole dessert without overpowering it.
Individual Servings: Make these in a muffin tin for perfectly portioned bars. Line 12 muffin cups with parchment paper strips, press the crust into each cup, and divide the filling and apples evenly. Bake for 18-22 minutes. These are great for parties or portion control.
If you’re looking for another dessert that travels well and feeds a crowd, check out my quick Fourth of July cast iron s’mores dip. It’s completely different from these bars but equally addictive.
Serving & Storage Suggestions
These bars are best served chilled, straight from the refrigerator. The cold temperature keeps the layers distinct and the texture firm. If you prefer a softer cheesecake, let them sit at room temperature for 10-15 minutes before serving.
For presentation, I like to arrange the squares on a white platter and drizzle a little extra caramel over the top. A sprinkle of flaky sea salt right before serving adds that perfect salty crunch. If you’re feeling extra, add a dollop of whipped cream and a thin apple slice on top of each bar.
These pair beautifully with a cup of hot coffee, a spiced chai latte, or a glass of cold milk. For a dessert spread, serve them alongside a warm apple cider or a bourbon cocktail. They also work great on a Thanksgiving dessert table next to pumpkin pie and pecan tart.
Storage: Keep the bars in an airtight container in the refrigerator for up to 5 days. Place a piece of parchment paper between layers to prevent sticking. The flavors actually deepen after a day or two—the caramel soaks into the apples and the cheesecake firms up beautifully.
Freezing: These bars freeze remarkably well. Wrap individual squares tightly in plastic wrap, then place them in a freezer-safe bag or container. Freeze for up to 3 months. To thaw, transfer to the refrigerator overnight. Don’t microwave them—the crust gets soggy and the cheesecake turns rubbery.
If you’re a fan of cream cheese desserts, you’ll love my fudgy chocolate zucchini brownies with cream cheese swirl. It’s another easy recipe that uses simple ingredients and delivers big flavor.
Nutritional Information & Benefits
These bars are a treat, so I’m not going to pretend they’re health food. But I do believe in knowing what you’re eating.
Estimated per bar (based on 12 servings):
| Nutrient | Amount |
|---|---|
| Calories | 385 |
| Total Fat | 22g |
| Saturated Fat | 13g |
| Cholesterol | 95mg |
| Sodium | 280mg |
| Total Carbohydrates | 42g |
| Dietary Fiber | 2g |
| Sugars | 30g |
| Protein | 6g |
Health highlights: Apples provide fiber and vitamin C, and the cinnamon offers antioxidant properties. The cream cheese adds calcium and protein. Is this a balanced breakfast? No. But as an occasional dessert, it fits just fine into a healthy diet.
Dietary considerations: This recipe contains gluten, dairy, and eggs. For gluten-free and vegan options, see the variations section above. The bars are nut-free as written, but the pecan crust variation contains tree nuts.
I’ve always believed that desserts like this have a place in a balanced life. You’re not going to eat these every day. But when you do, you should enjoy every single bite without guilt. That’s the whole point of comfort food.
Conclusion
These Ultimate Salted Caramel Apple Cheesecake Bars are everything I want in a fall dessert—comforting, beautiful, and forgiving. They’re the kind of recipe that makes you look like a hero at a potluck without requiring a culinary degree or a trip to a specialty grocery store.
I love that you can make them ahead, freeze them for later, and customize them to fit your dietary needs. I love that they use real ingredients that I actually have in my kitchen. And I really love that first bite, when the buttery crust gives way to creamy cheesecake and soft apples, all tied together with that ribbon of salted caramel.
Don’t be afraid to make these your own. Use your favorite apples. Add extra cinnamon. Double the caramel. This recipe is a starting point, not a rulebook. The best version is the one that makes you happy.
If you give these a try, I’d love to hear how they turned out. Drop a comment below, tag me in your photos, or tell me what variations you tried. And if you’re looking for more easy, crowd-pleasing desserts, check out my no-bake Rice Krispie treat stars for a fun, festive option that’s ready in minutes.
Happy baking, friends. Go make something delicious.
Frequently Asked Questions
Can I use pre-made graham cracker crust instead of making my own?
You can, but I don’t recommend it. The shortbread crust in this recipe is sturdier than a graham cracker crust, which helps support the weight of the cheesecake and apples. Pre-made crusts are also usually smaller and sweeter, which throws off the balance. If you’re short on time, try a store-bought shortbread crust instead.
Why did my cheesecake layer crack?
Cracks usually happen from overbaking or overmixing. Bake just until the edges are set and the center is slightly jiggly. Also, make sure your cream cheese and eggs are at room temperature before mixing. Cold ingredients create lumps, and overmixing those lumps adds too much air, which leads to cracks.
Can I use frozen apples?
I don’t recommend it. Frozen apples release too much water as they thaw, which makes the cheesecake layer watery and the crust soggy. Fresh apples give you the best texture and flavor. If you only have frozen apples, thaw them first, drain off the excess liquid, and pat them dry with paper towels before using.
How do I prevent the crust from getting soggy?
Pre-baking the crust for 15 minutes is the key. This gives it a head start so it stays crisp even after you add the cheesecake filling. Also, make sure your apples aren’t too wet—toss them with the sugar and spices, but don’t let them sit for more than 10 minutes before assembling.
Can I make these bars dairy-free?
Yes, with some adjustments. Use vegan cream cheese (Kite Hill or Violife work well), vegan butter, and a dairy-free caramel sauce. The texture will be slightly softer than the original, but the flavor is still delicious. Just be sure to chill them thoroughly before cutting.
Pin This Recipe!
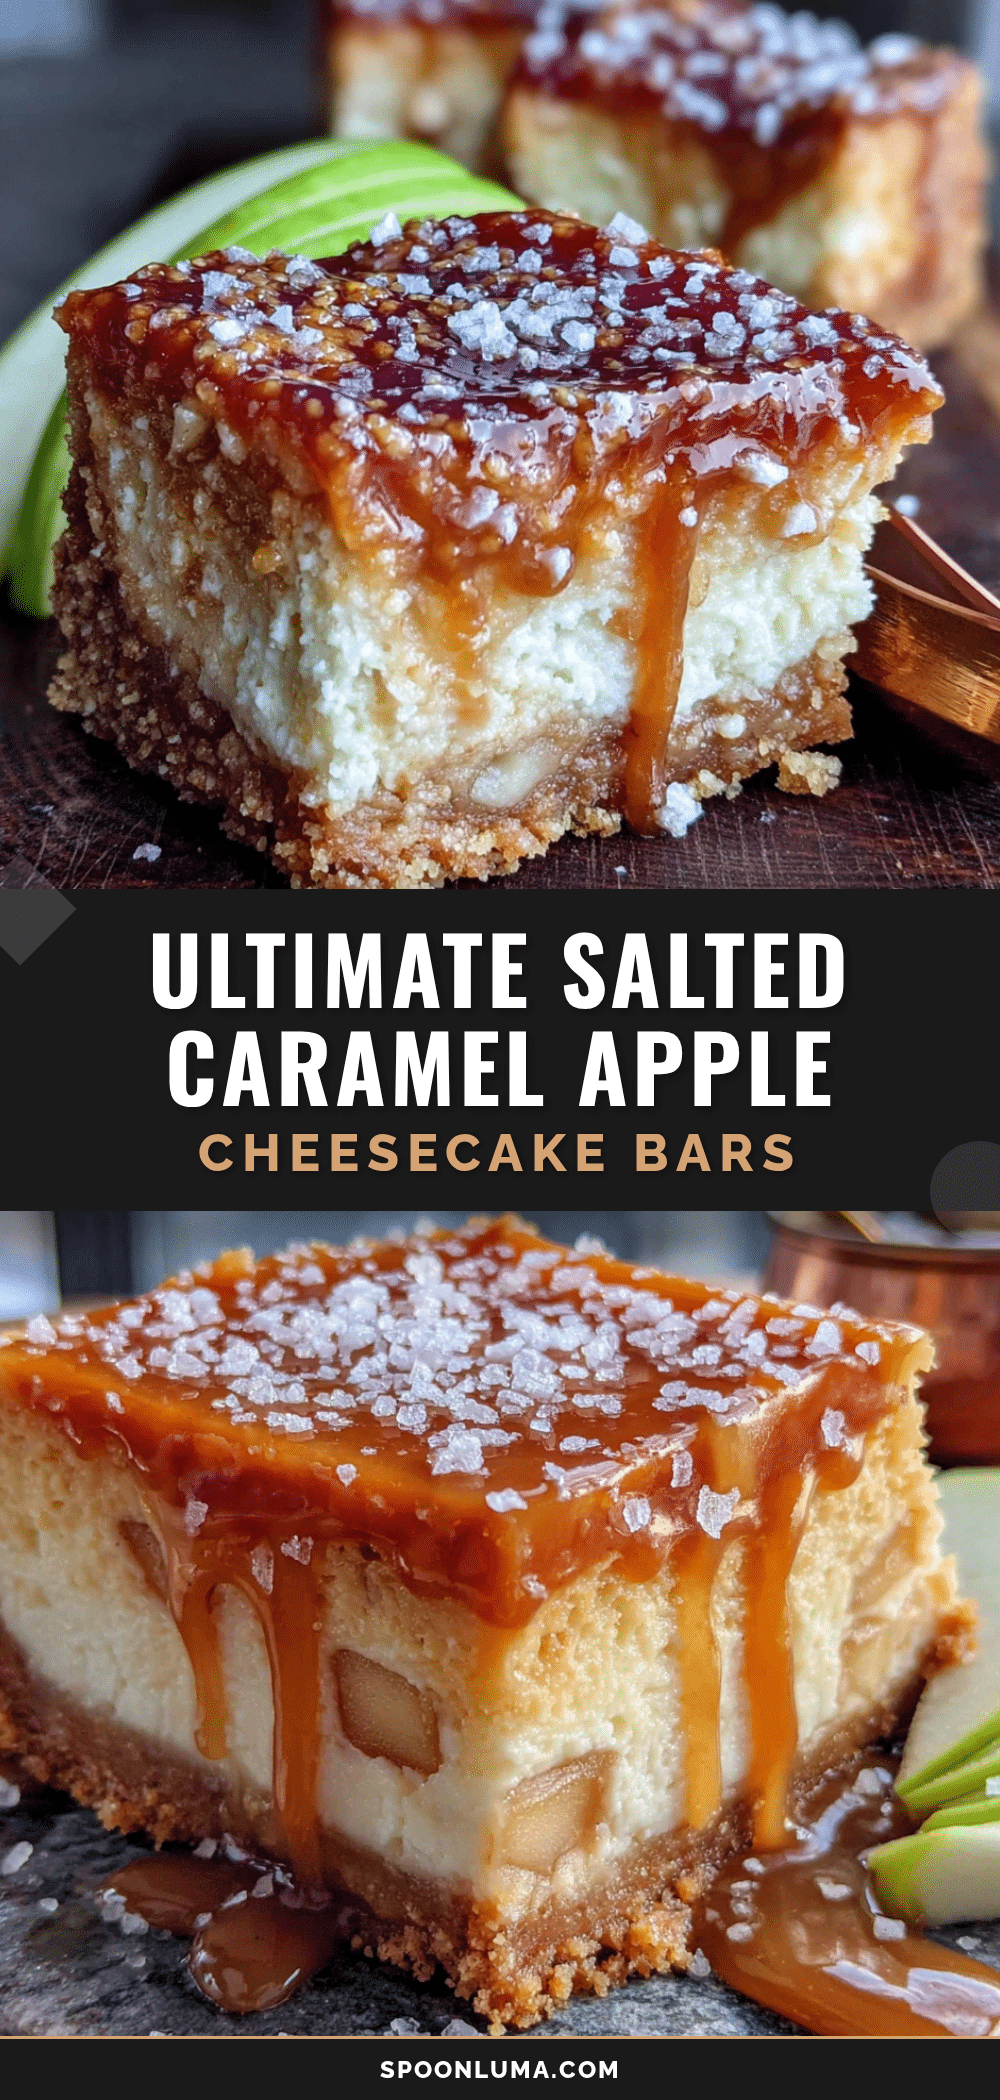
Ultimate Salted Caramel Apple Cheesecake Bars – Easy Fall Dessert
These Ultimate Salted Caramel Apple Cheesecake Bars feature a buttery shortbread crust, creamy cheesecake filling, cinnamon-spiced apples, and a drizzle of salted caramel. They’re an easy, crowd-pleasing fall dessert perfect for potlucks and gatherings.
- Prep Time: 20 minutes
- Cook Time: 35-40 minutes
- Total Time: 4 hours 55 minutes (including chilling)
- Yield: 12 servings 1x
- Category: Dessert
- Cuisine: American
Ingredients
- 1 ½ cups all-purpose flour (spooned and leveled)
- ½ cup granulated sugar
- ½ cup unsalted butter, cold and cubed
- ¼ teaspoon fine sea salt
- 16 ounces cream cheese, softened (full-fat)
- ½ cup granulated sugar
- 2 large eggs, room temperature
- 1 teaspoon pure vanilla extract
- 2 tablespoons all-purpose flour
- 3 medium apples, peeled and thinly sliced (Honeycrisp or Granny Smith)
- 2 tablespoons granulated sugar
- 1 teaspoon ground cinnamon
- ¼ teaspoon ground nutmeg (freshly grated if possible)
- 1 tablespoon lemon juice
- ½ cup salted caramel sauce (store-bought, like Trader Joe’s or Stonewall Kitchen)
- Flaky sea salt (like Maldon)
Instructions
- Preheat oven to 350°F (175°C). Line a 9×13-inch baking pan with parchment paper, leaving about 2 inches of overhang on the long sides. Lightly grease the parchment with butter or cooking spray.
- Make the crust: In a medium bowl, whisk together 1 ½ cups flour, ½ cup sugar, and ¼ teaspoon salt. Add cold cubed butter. Use a pastry cutter, two forks, or your fingertips to cut the butter into the flour mixture until it resembles coarse sand with a few pea-sized butter pieces remaining. Press the mixture evenly into the bottom of the prepared pan. Bake for 15 minutes, until edges are just barely golden. Set aside to cool slightly.
- Make the cheesecake filling: In a large bowl, beat softened cream cheese with an electric mixer on medium speed until smooth and creamy, about 2 minutes. Scrape down sides. Add ½ cup sugar and beat until combined. Add eggs one at a time, beating on low just until incorporated. Stir in vanilla and 2 tablespoons flour until just combined.
- Prepare the apples: In a separate bowl, toss sliced apples with 2 tablespoons sugar, cinnamon, nutmeg, and lemon juice until coated. Let sit for 5 minutes.
- Assemble the bars: Pour cheesecake filling over the slightly cooled crust and spread evenly. Arrange apple slices on top in an even layer. Drizzle about half the salted caramel sauce over the apples.
- Bake at 350°F (175°C) for 35-40 minutes, until edges are set and center is slightly jiggly. If top browns too quickly, tent loosely with foil after 25 minutes. Let cool completely at room temperature (about 1 hour), then refrigerate for at least 3 hours, preferably overnight.
- Once fully chilled, lift bars out of pan using parchment overhang. Place on cutting board. Drizzle with remaining caramel sauce and sprinkle with flaky sea salt. Cut into squares with a sharp knife, wiping blade clean between cuts.
Notes
Room temperature ingredients matter for a smooth cheesecake filling. Don’t overbake; the center should still have a slight wobble. Chill thoroughly before cutting for clean slices. Use a hot knife for neat edges. Pre-baking the crust helps prevent sogginess.
Nutrition
- Serving Size: 1 bar
- Calories: 385
- Sugar: 30
- Sodium: 280
- Fat: 22
- Saturated Fat: 13
- Carbohydrates: 42
- Fiber: 2
- Protein: 6
Keywords: salted caramel apple cheesecake bars, fall dessert, apple cheesecake bars, easy cheesecake bars, potluck dessert, apple dessert, cheesecake bars


