It was 11:47 PM on a drizzly Wednesday in late October, and I had a very specific craving for something warm, spiced, and chewy. I didn’t have the energy for a full pumpkin pie or the patience for a layer cake, but I had a half-used stick of butter, a can of pumpkin puree that was staring at me from the back of the fridge, and this wild idea that browning the butter first might turn a simple snickerdoodle into something… more. Honestly, I was in my pajamas, the kitchen was a mess, and I was pretty sure I was out of cream of tartar. But the craving was louder than my common sense.
So I stood there, watching butter foam and sizzle in a small saucepan, the nutty smell filling my tiny apartment. I remember the way the brown bits settled at the bottom like little promises. I had to let it cool, which felt like an eternity, but the wait was worth it. I mean, who knew that a little burnt butter and a can of pumpkin could turn a classic cookie into something this cozy? Maybe you’ve been there—standing in your kitchen at an ungodly hour, convinced that the perfect bite is just one weird substitution away.
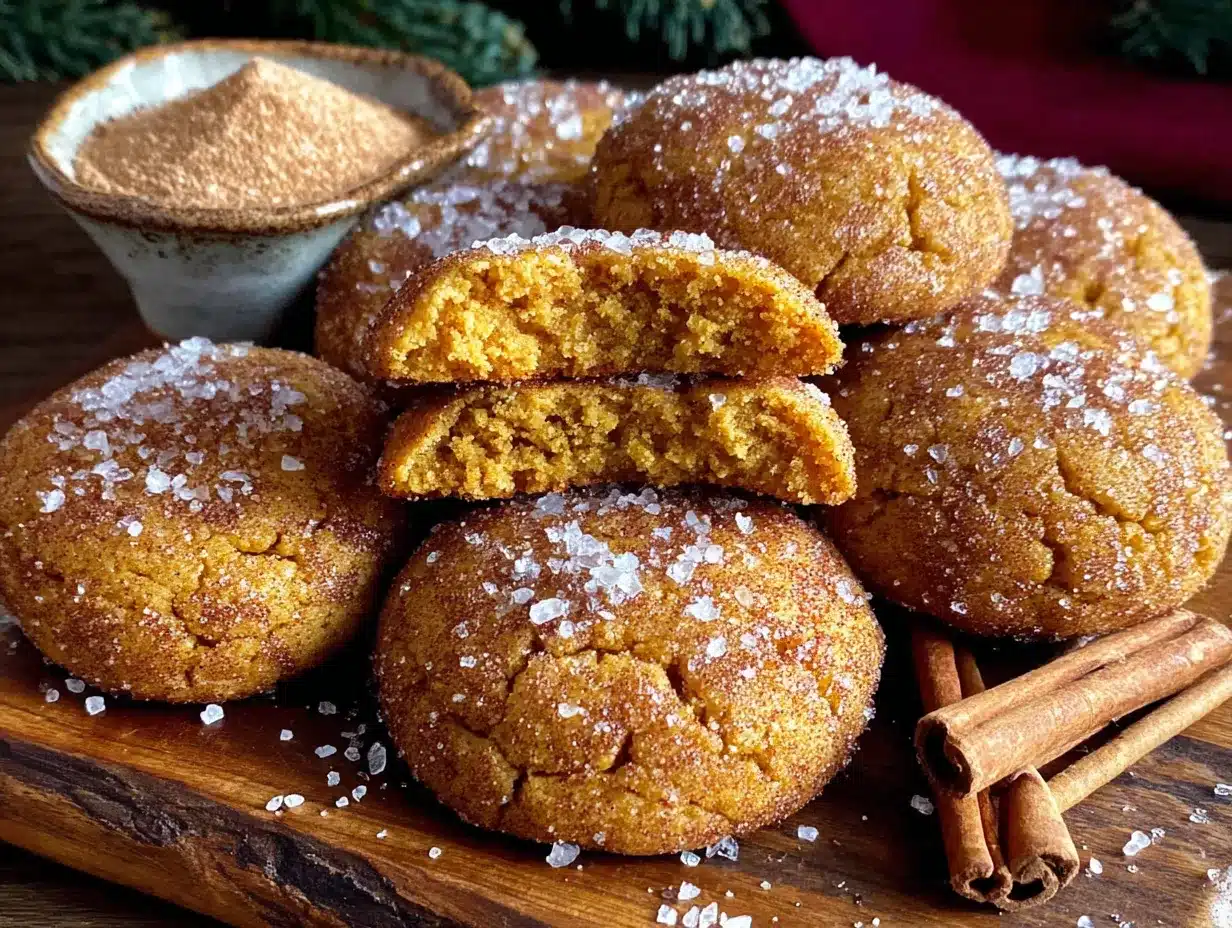
The first batch came out a little flat, honestly. I forgot to chill the dough. But the second batch? Those little pillows of pumpkin-spiced goodness, rolled in cinnamon sugar, with that deep, nutty undertone from the brown butter? That was the moment I knew I had stumbled onto something. This recipe stayed with me because it felt like a hug you could hold in your hand. It’s the cookie version of a warm blanket and a crackling fire.
Why You’ll Love This Recipe
Let me tell you, after testing this recipe four times in one week (my neighbors were very happy), I can say with confidence that these Cozy Brown Butter Pumpkin Snickerdoodle Cookies are the real deal. They’re not just another pumpkin cookie—they’re the one you’ll keep coming back to all season long.
- Quick & Easy: From start to finish, you’re looking at about 30 minutes of active time. The dough needs a quick chill, but the payoff is worth every minute.
- Simple Ingredients: No fancy grocery trips needed. You likely already have flour, sugar, butter, and pumpkin puree in your kitchen. The brown butter is the secret weapon that transforms the ordinary.
- Perfect for Cozy Evenings: These cookies are made for cold weather, rough days, or moments when you just need a little comfort. They pair perfectly with a hot cup of tea or a glass of cold milk.
- Crowd-Pleaser: I’ve brought these to two potlucks and a family dinner, and they disappear every single time. Kids love the cinnamon sugar coating, and adults can’t get enough of that nutty brown butter flavor.
- Unbelievably Delicious: The texture is soft and chewy with a slight crisp edge. The pumpkin keeps them moist, and the brown butter adds a depth that regular cookies just can’t touch.
What makes this recipe different from the rest? It’s the brown butter. That simple step of browning the butter before mixing it into the dough changes everything. It adds a toasty, caramelized flavor that perfectly complements the warm pumpkin spices. Plus, the combination of pumpkin puree and brown butter creates an incredibly tender crumb. This isn’t just another version of a snickerdoodle—it’s the best version.
This recipe is the kind that makes you close your eyes after the first bite. It’s comfort food reimagined—a little bit healthier than a traditional cookie, faster to make than a pie, but with the same soul-soothing satisfaction. Perfect for impressing guests without stress, or turning a simple Tuesday night into something memorable.
What Ingredients You Will Need
This recipe uses simple, wholesome ingredients to deliver that cozy, spiced flavor and soft, chewy texture. Most of these are pantry staples, but a few key players make all the difference.
- Unsalted butter: 1 cup (2 sticks), cut into cubes. You’ll be browning this, so the quality matters. I prefer Kerrygold or Land O’Lakes for a rich, creamy flavor.
- Pumpkin puree: ½ cup (about 120g). Make sure it’s 100% pure pumpkin, not pumpkin pie filling. Libby’s is my go-to brand—it’s consistent and not too watery.
- Granulated sugar: 1 cup (200g) for the dough. You need the sweetness to balance the earthy pumpkin and nutty brown butter.
- Light brown sugar: ½ cup (100g), packed. This adds moisture and a hint of molasses flavor that deepens the overall taste.
- All-purpose flour: 2 ¼ cups (280g). Spoon and level it—don’t scoop directly from the bag or you’ll end up with dry cookies.
- Baking soda: 1 teaspoon. Helps the cookies spread just enough while staying soft in the middle.
- Baking powder: ½ teaspoon. Adds a little lift for a tender crumb.
- Salt: ½ teaspoon. Use fine sea salt. It balances the sweetness and enhances the brown butter flavor.
- Pumpkin pie spice: 1 ½ teaspoons. You can use store-bought or make your own with cinnamon, nutmeg, ginger, and cloves. I like the McCormick blend for consistency.
- Ground cinnamon: ½ teaspoon. Adds extra warmth to the dough.
- Vanilla extract: 1 teaspoon. Pure vanilla, not imitation. It rounds out the flavors beautifully.
- Egg: 1 large, at room temperature. A cold egg can seize the brown butter, so let it sit out for 20 minutes.
- For the cinnamon sugar coating: ¼ cup (50g) granulated sugar mixed with 2 teaspoons ground cinnamon. This is the classic snickerdoodle finish.
Ingredient Selection Tips: When choosing pumpkin puree, look for a can that feels heavy for its size—that means less air and more pumpkin. For the brown butter, use unsalted butter so you can control the salt level. If you’re out of pumpkin pie spice, mix ½ teaspoon cinnamon, ¼ teaspoon nutmeg, ¼ teaspoon ginger, and a pinch of cloves.
Substitution Guidance: For a dairy-free option, use vegan butter (I like Miyoko’s) and brown it the same way. For a gluten-free version, swap the all-purpose flour with a 1:1 gluten-free baking blend that contains xanthan gum. The texture will be slightly more tender, but still delicious. If you don’t have pumpkin puree, you can use sweet potato puree—just make sure it’s smooth and not too watery.
Equipment Needed
You don’t need a fancy kitchen to pull these off, but a few key tools will make the process smoother.
- Small saucepan: For browning the butter. A light-colored pan is best so you can see the brown bits form. I use a stainless steel one.
- Mixing bowls: One medium for dry ingredients, one large for wet ingredients. Glass or stainless steel works great.
- Whisk: For combining the dry ingredients and for mixing the wet ingredients.
- Spatula: A silicone spatula is perfect for scraping every last bit of brown butter from the pan.
- Hand mixer or stand mixer: You can mix by hand, but a mixer makes creaming the butter and sugars easier. I’ve done both, and honestly, a hand mixer is faster.
- Baking sheets: Two large baking sheets. Line them with parchment paper or silicone baking mats for easy cleanup.
- Cookie scoop: A 1.5-tablespoon scoop ensures uniform cookies. If you don’t have one, use two spoons.
- Cooling rack: Lets the cookies cool evenly without getting soggy on the bottom.
- Plastic wrap: For chilling the dough. You can also use a reusable beeswax wrap.
Budget-Friendly Alternatives: If you don’t have a cookie scoop, use a tablespoon measure. No cooling rack? Let the cookies cool on the baking sheet for 5 minutes, then transfer them to a plate. The parchment paper does a good job of preventing sticking.
Personal Note: I’ve made these cookies with a cheap saucepan and a wooden spoon, and they turned out just as good. The only non-negotiable is the saucepan for browning the butter—don’t try to brown butter in a microwave. Trust me, I’ve tried, and it’s a disaster.
Preparation Method
Let’s get baking. Follow these steps carefully, and you’ll have a batch of the most incredible fall cookies you’ve ever tasted.
- Brown the butter: Place the cubed unsalted butter in a small saucepan over medium heat. Stir constantly with a silicone spatula or wooden spoon. The butter will melt, then foam, then start to sizzle. After about 5-7 minutes, you’ll see golden brown specks forming at the bottom. The butter will smell nutty and toasty. Immediately remove the pan from the heat and pour the brown butter into a heatproof bowl (including all those brown bits). Let it cool for 15-20 minutes until it’s warm but not hot. You don’t want it to solidify, but it shouldn’t be hot enough to cook the egg.
- Mix the dry ingredients: In a medium bowl, whisk together the all-purpose flour, baking soda, baking powder, salt, pumpkin pie spice, and ground cinnamon. Set aside.
- Cream the butter and sugars: In a large bowl, combine the cooled brown butter, granulated sugar, and packed light brown sugar. Beat with a hand mixer on medium speed for 2-3 minutes until the mixture is light and fluffy. It should look like wet sand. Scrape down the sides of the bowl.
- Add the wet ingredients: Beat in the pumpkin puree, room temperature egg, and vanilla extract. Mix on low speed until just combined. The mixture will look a little curdled—that’s okay. It’s the pumpkin doing its thing.
- Combine wet and dry: Gradually add the dry ingredients to the wet mixture, mixing on low speed until just incorporated. Do not overmix. Overmixing will make the cookies tough. The dough will be soft and slightly sticky.
- Chill the dough: Cover the bowl with plastic wrap and refrigerate for at least 30 minutes, or up to 24 hours. Chilling is crucial—it prevents the cookies from spreading too much and allows the flavors to meld. I know it’s hard to wait, but trust me on this.
- Preheat the oven: When you’re ready to bake, preheat your oven to 350°F (175°C). Line two baking sheets with parchment paper.
- Prepare the cinnamon sugar coating: In a small bowl, mix the ¼ cup granulated sugar with 2 teaspoons ground cinnamon.
- Shape the cookies: Using a 1.5-tablespoon cookie scoop, portion out the dough. Roll each portion into a smooth ball between your palms. Then roll each ball in the cinnamon sugar mixture until fully coated. Place the coated dough balls on the prepared baking sheets, spacing them about 2 inches apart.
- Bake: Bake for 10-12 minutes, or until the edges are set and lightly golden. The centers will look slightly underdone—that’s perfect. They will continue to set as they cool. Do not overbake, or they’ll be dry.
- Cool: Let the cookies cool on the baking sheet for 5 minutes before transferring them to a wire cooling rack. This allows them to firm up without breaking.
Sensory Cues: When you brown the butter, listen for the sizzle to quiet down and watch for the golden specks. When the dough is ready, it should be soft but not sticky enough to glue your fingers together. The cookies are done when the edges are a light golden brown and the tops are just set. You should smell cinnamon and nutmeg filling your kitchen—that’s the sign.
Personal Tip: I always make a test cookie with the first scoop of dough. It’s my way of checking the spread and texture. If it spreads too much, I chill the dough longer. If it’s too thick, I press the dough balls down slightly before baking.
Cooking Tips & Techniques
After making these cookies more times than I care to admit, I’ve learned a few things the hard way. Let me save you some trouble.
Don’t skip the brown butter cooling step. I once added the egg to hot brown butter, and it scrambled. A complete disaster. Let the butter cool until it’s warm to the touch but not hot—about 15-20 minutes. If you’re in a hurry, pop the bowl in the fridge for 5 minutes, stirring every minute.
Chill the dough. Seriously. I know you want cookies now. I get it. But the first time I made these, I skipped the chilling step and ended up with flat, greasy discs. The pumpkin puree adds moisture, and without chilling, the cookies spread too much. Thirty minutes is the minimum. Overnight is even better—the flavors get deeper and more complex.
Measure your flour correctly. This is a common mistake. Scooping flour directly from the bag packs it down, and you can end up with 30% more flour than you need. Use the spoon-and-level method: spoon flour into your measuring cup, then level it off with a knife. Your cookies will thank you.
Use a cookie scoop for uniform size. Uniform cookies bake evenly. If you eyeball it, some will be done before others, and you’ll end up with a batch of half-overcooked cookies. A 1.5-tablespoon scoop is perfect for this recipe.
Watch the bake time. Ovens vary wildly. My old oven would bake these in exactly 10 minutes. My new one takes 12. Start checking at the 9-minute mark. The edges should be set and lightly golden, but the centers should still look soft and slightly puffy. They’ll continue to set as they cool.
Multitasking Strategy: While the brown butter is cooling, measure out your dry ingredients. While the dough is chilling, clean up your workspace and preheat the oven. This way, you’re never standing around waiting.
Variations & Adaptations
One of the best things about this recipe is how flexible it is. Here are a few ways to make it your own.
Dark Chocolate Chip Version: Fold in ½ cup of dark chocolate chips (about 85g) after combining the wet and dry ingredients. The slight bitterness of dark chocolate pairs beautifully with the sweet pumpkin and nutty brown butter. I tried this on a whim one night, and it’s now my husband’s favorite.
Gluten-Free Adaptation: Swap the all-purpose flour with a 1:1 gluten-free baking blend that contains xanthan gum. I’ve used King Arthur Measure for Measure with great results. The cookies will be slightly more tender and delicate, so handle them gently. Chill the dough for at least 45 minutes to help them hold their shape.
Vegan Version: Use vegan butter (like Miyoko’s) and brown it the same way. Replace the egg with a flax egg (1 tablespoon ground flaxseed mixed with 3 tablespoons water, let sit for 5 minutes). The cookies will be a bit less rich but still deliciously spiced and chewy.
Spiced-Up Variation: Add ¼ teaspoon of ground cardamom and a pinch of black pepper to the dough. The cardamom adds an aromatic floral note, and the black pepper gives a subtle warmth that sneaks up on you. It’s unexpected but amazing.
Stuffed Cookies: For a real treat, flatten a dough ball, place a small piece of cream cheese or a caramel candy in the center, then wrap the dough around it. Roll in cinnamon sugar and bake as directed. The gooey center is pure magic.
Personal Variation: I once added a tablespoon of bourbon to the dough (reducing the vanilla to ½ teaspoon). The bourbon adds a smoky sweetness that complements the brown butter perfectly. Just be aware that the cookies will be a little softer and may spread more—chill the dough for an extra 15 minutes.
Serving & Storage Suggestions
These cookies are best served slightly warm, when the edges are crisp and the centers are still soft and gooey. Let them cool on the baking sheet for 5 minutes, then transfer them to a cooling rack. If you can wait that long, that is.
Presentation Ideas: Arrange the cookies on a rustic wooden board or a white platter. Dust them with a little extra cinnamon sugar for a beautiful finish. They look gorgeous on a dessert table alongside a pitcher of cold milk or a pot of hot spiced tea.
Complementary Dishes & Beverages: These cookies are perfect with a cup of chai latte or a warm mug of spiced hot chocolate. For a cozy dessert spread, serve them with a scoop of vanilla bean ice cream or a dollop of whipped cream. They also pair wonderfully with a glass of cold apple cider.
Storage Instructions: Store the cookies in an airtight container at room temperature for up to 5 days. Place a slice of bread in the container to keep them soft—the cookies will absorb the moisture from the bread. Change the bread every other day.
Freezing Instructions: You can freeze the baked cookies for up to 3 months. Place them in a single layer in a freezer-safe container, separated by parchment paper. To thaw, let them sit at room temperature for about 30 minutes. For a just-baked taste, warm them in a 300°F (150°C) oven for 5 minutes.
Freezing the Dough: You can also freeze the unbaked dough balls. Roll them in cinnamon sugar, place them on a baking sheet, and freeze until solid. Transfer to a freezer bag. Bake from frozen, adding 2-3 minutes to the bake time. This is my go-to for spontaneous cookie cravings.
Flavor Development: Honestly, these cookies taste even better the next day. The spices meld together, and the brown butter flavor deepens. If you can resist eating them all on day one, you’re in for a treat on day two.
Nutritional Information & Benefits
Here’s the estimated nutritional breakdown for one cookie (based on a batch of 24 cookies):
| Nutrient | Amount per Cookie |
|---|---|
| Calories | 145 kcal |
| Total Fat | 8g |
| Saturated Fat | 5g |
| Cholesterol | 25mg |
| Sodium | 95mg |
| Total Carbohydrates | 18g |
| Dietary Fiber | 1g |
| Sugars | 11g |
| Protein | 2g |
Health Benefits: Pumpkin puree is packed with vitamin A, which supports eye health and immune function. It’s also a good source of fiber, which aids digestion. The brown butter adds healthy fats that help your body absorb fat-soluble vitamins. Plus, cinnamon has anti-inflammatory properties and can help regulate blood sugar levels.
Dietary Considerations: This recipe can be made gluten-free and vegan with the substitutions mentioned above. It is not low-carb or keto-friendly due to the sugar content. It contains dairy and gluten in its standard form.
Potential Allergens: This recipe contains wheat (gluten), dairy (butter), and eggs. For nut-free preparation, ensure your baking powder and vanilla extract are certified nut-free.
Personal Wellness Perspective: I believe in balance. These cookies are a treat, not an everyday food. But when you do indulge, make it count. Use quality ingredients, savor every bite, and share them with people you love. That’s the real nutrition.
Conclusion
These Cozy Brown Butter Pumpkin Snickerdoodle Cookies are more than just a recipe—they’re a moment. They’re the smell of butter browning on a cold evening, the warmth of cinnamon sugar on your fingers, and the joy of biting into a soft, chewy cookie that tastes like autumn itself. I’ve made them for quiet nights alone, for loud family gatherings, and for neighbors who needed a little pick-me-up. Every time, they deliver.
I encourage you to make this recipe your own. Add chocolate chips if that’s your thing. Stuff them with caramel if you’re feeling bold. Or keep them simple and let the brown butter and pumpkin shine. However you make them, I promise they’ll become a staple in your fall baking rotation.
I’d love to hear how yours turn out. Drop a comment below and let me know if you tried any variations, or tag me in your photos on social media. Your kitchen adventures make my day. Happy baking, friend—may your cookies be chewy, your kitchen warm, and your heart full.
Frequently Asked Questions
Can I use pumpkin pie filling instead of pumpkin puree?
No, please don’t. Pumpkin pie filling is pre-sweetened and spiced, which will throw off the sugar and spice balance in this recipe. Stick with 100% pure pumpkin puree for the best results.
Why did my cookies turn out flat?
Flat cookies usually mean the dough wasn’t chilled long enough, or the butter was too warm when you mixed it. Make sure you chill the dough for at least 30 minutes, and let the brown butter cool to room temperature before using it.
Can I make these cookies without a hand mixer?
Absolutely. You can mix everything by hand with a wooden spoon or a sturdy spatula. Just make sure to cream the butter and sugars really well—it might take a little more elbow grease, but it works perfectly.
How do I know when the butter is properly browned?
Watch for the butter to turn a golden amber color with small brown specks at the bottom of the pan. It should smell nutty and toasty. Swirl the pan frequently and don’t walk away—brown butter can go from perfect to burnt in seconds.
Can I double this recipe?
Yes, this recipe doubles beautifully. Just make sure you use a large enough bowl for the dough, and bake in batches to avoid overcrowding the oven. You may need to chill the dough in two separate bowls to ensure even cooling.
Pin This Recipe!
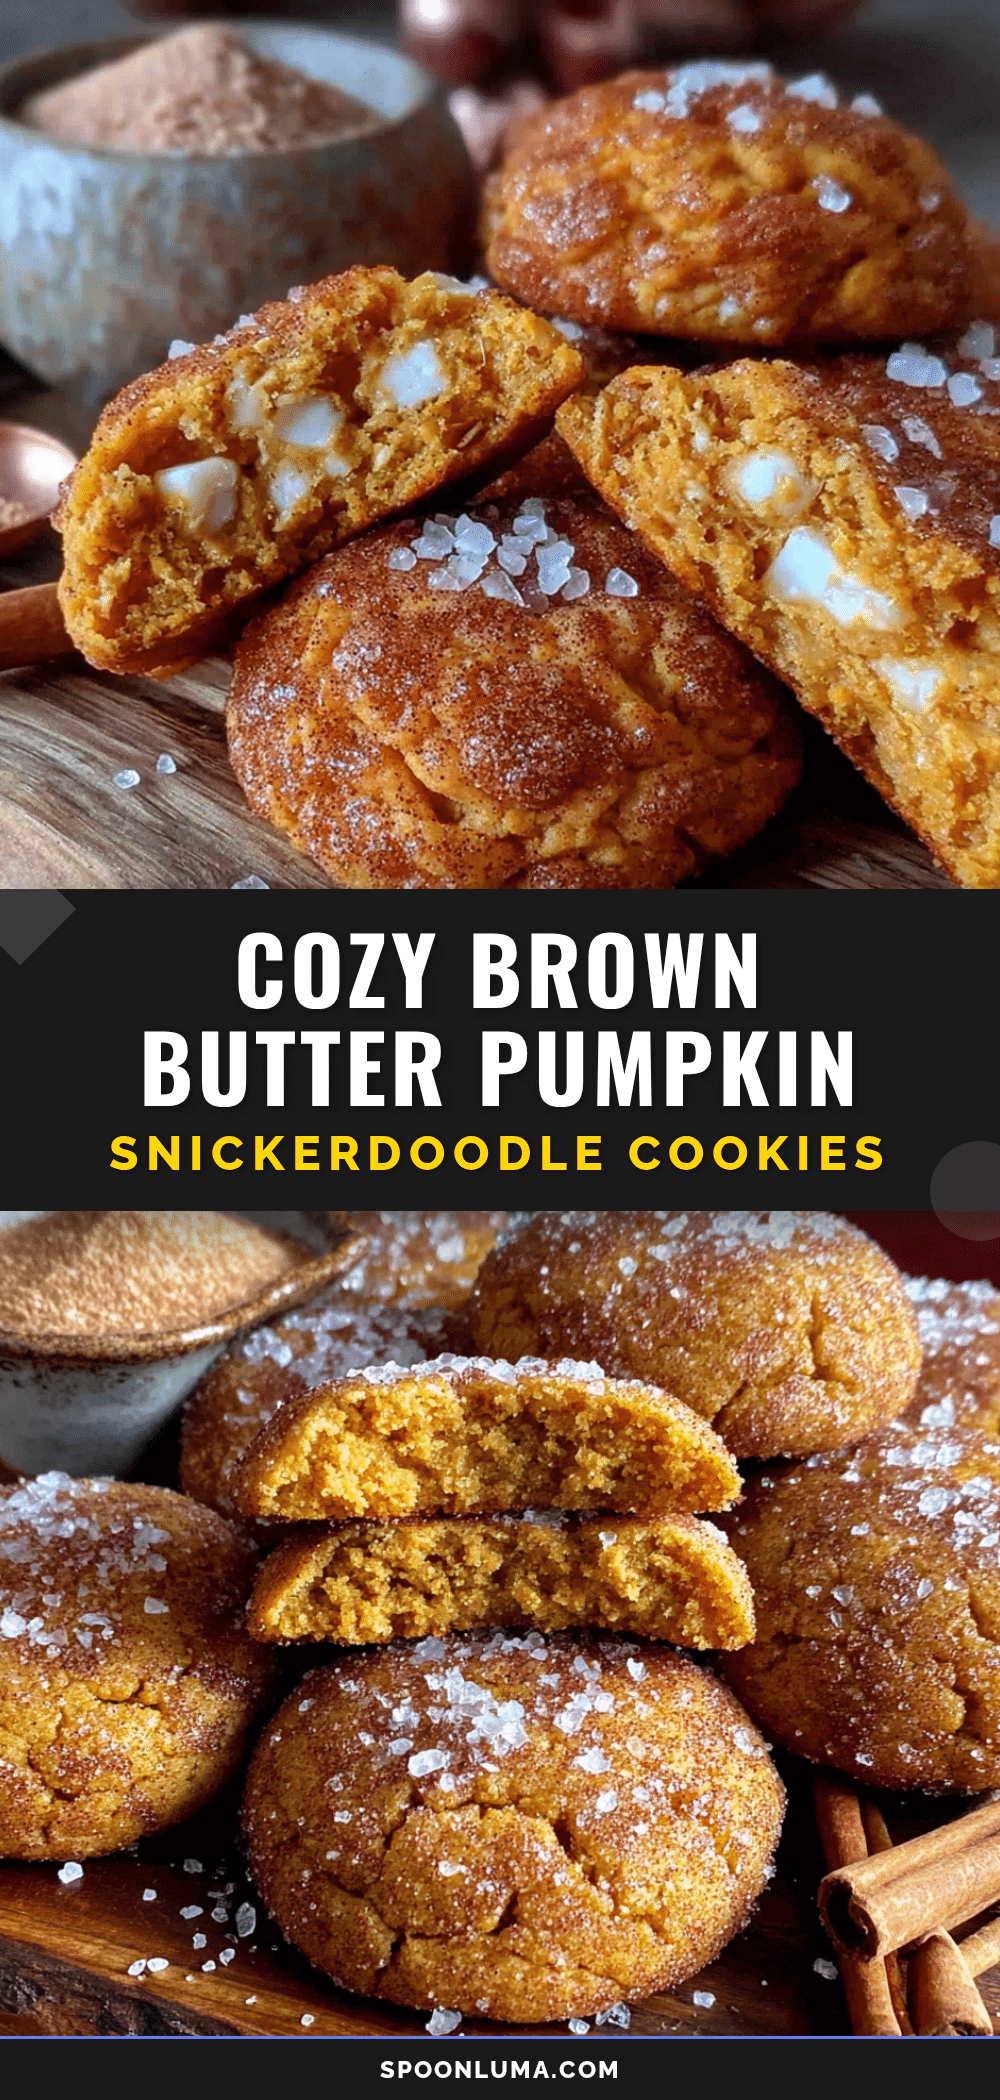
Cozy Brown Butter Pumpkin Snickerdoodle Cookies: Best Easy Fall Recipe
These soft and chewy pumpkin snickerdoodle cookies are made with nutty brown butter and rolled in cinnamon sugar. They’re the perfect cozy fall treat, ready in about 30 minutes of active time.
- Prep Time: 30 minutes
- Cook Time: 12 minutes
- Total Time: 1 hour 12 minutes (includes chilling)
- Yield: 24 cookies 1x
- Category: Dessert
- Cuisine: American
Ingredients
- 1 cup (2 sticks) unsalted butter, cut into cubes
- ½ cup (120g) pumpkin puree (100% pure pumpkin)
- 1 cup (200g) granulated sugar
- ½ cup (100g) light brown sugar, packed
- 2 ¼ cups (280g) all-purpose flour
- 1 teaspoon baking soda
- ½ teaspoon baking powder
- ½ teaspoon fine sea salt
- 1 ½ teaspoons pumpkin pie spice
- ½ teaspoon ground cinnamon
- 1 teaspoon pure vanilla extract
- 1 large egg, at room temperature
- For the cinnamon sugar coating: ¼ cup (50g) granulated sugar mixed with 2 teaspoons ground cinnamon
Instructions
- Brown the butter: Place the cubed unsalted butter in a small saucepan over medium heat. Stir constantly with a silicone spatula or wooden spoon. The butter will melt, then foam, then start to sizzle. After about 5-7 minutes, you’ll see golden brown specks forming at the bottom. The butter will smell nutty and toasty. Immediately remove the pan from the heat and pour the brown butter into a heatproof bowl (including all those brown bits). Let it cool for 15-20 minutes until it’s warm but not hot.
- Mix the dry ingredients: In a medium bowl, whisk together the all-purpose flour, baking soda, baking powder, salt, pumpkin pie spice, and ground cinnamon. Set aside.
- Cream the butter and sugars: In a large bowl, combine the cooled brown butter, granulated sugar, and packed light brown sugar. Beat with a hand mixer on medium speed for 2-3 minutes until the mixture is light and fluffy. It should look like wet sand. Scrape down the sides of the bowl.
- Add the wet ingredients: Beat in the pumpkin puree, room temperature egg, and vanilla extract. Mix on low speed until just combined. The mixture will look a little curdled—that’s okay.
- Combine wet and dry: Gradually add the dry ingredients to the wet mixture, mixing on low speed until just incorporated. Do not overmix. The dough will be soft and slightly sticky.
- Chill the dough: Cover the bowl with plastic wrap and refrigerate for at least 30 minutes, or up to 24 hours.
- Preheat the oven: When you’re ready to bake, preheat your oven to 350°F (175°C). Line two baking sheets with parchment paper.
- Prepare the cinnamon sugar coating: In a small bowl, mix the ¼ cup granulated sugar with 2 teaspoons ground cinnamon.
- Shape the cookies: Using a 1.5-tablespoon cookie scoop, portion out the dough. Roll each portion into a smooth ball between your palms. Then roll each ball in the cinnamon sugar mixture until fully coated. Place the coated dough balls on the prepared baking sheets, spacing them about 2 inches apart.
- Bake: Bake for 10-12 minutes, or until the edges are set and lightly golden. The centers will look slightly underdone—that’s perfect.
- Cool: Let the cookies cool on the baking sheet for 5 minutes before transferring them to a wire cooling rack.
Notes
Chilling the dough is crucial to prevent spreading. Brown butter must cool to warm (not hot) before adding egg to avoid scrambling. For best flavor, chill dough overnight. Cookies taste even better the next day.
Nutrition
- Serving Size: 1 cookie
- Calories: 145
- Sugar: 11
- Sodium: 95
- Fat: 8
- Saturated Fat: 5
- Carbohydrates: 18
- Fiber: 1
- Protein: 2
Keywords: brown butter pumpkin snickerdoodle cookies, easy fall recipe, pumpkin cookies, snickerdoodle cookies, fall baking