The woman at the community garden plot next to mine—her name is Rosa—watched me one October morning as I stared at a mountain of pumpkins I’d grown, completely unsure what to do with them all. She didn’t say anything at first. Then she reached into her worn canvas bag, pulled out a tiny mason jar filled with pumpkin puree, and handed it over with a shrug. “For donuts,” she said. “My grandmother’s way.” That was three autumns ago, and honestly, I haven’t stopped making them since.
Rosa’s grandmother didn’t use gluten-free flour, of course. But when I explained that regular wheat flour doesn’t agree with my stomach, she just nodded like it was the most obvious thing in the world. “Then use something else,” she said. “The pumpkin doesn’t care.” And she was right. The pumpkin doesn’t care. It just brings that deep, earthy sweetness and that impossibly moist texture that makes these baked gluten-free pumpkin donuts taste like you spent hours in the kitchen when really, they come together in about 30 minutes flat.
I’ll be honest with you—the first batch I made was a disaster. I used too much almond flour, and the donuts came out greasy and dense. Rosa found me sulking over them and laughed. “Too much nut flour,” she said, pointing at my sad little donuts. “Add oat flour next time. It soaks up the pumpkin better.” That tiny piece of advice changed everything, and now I’m passing it along to you. Maybe you’ve been there too—trying to make something gluten-free that actually tastes good, not like cardboard dressed up in frosting.
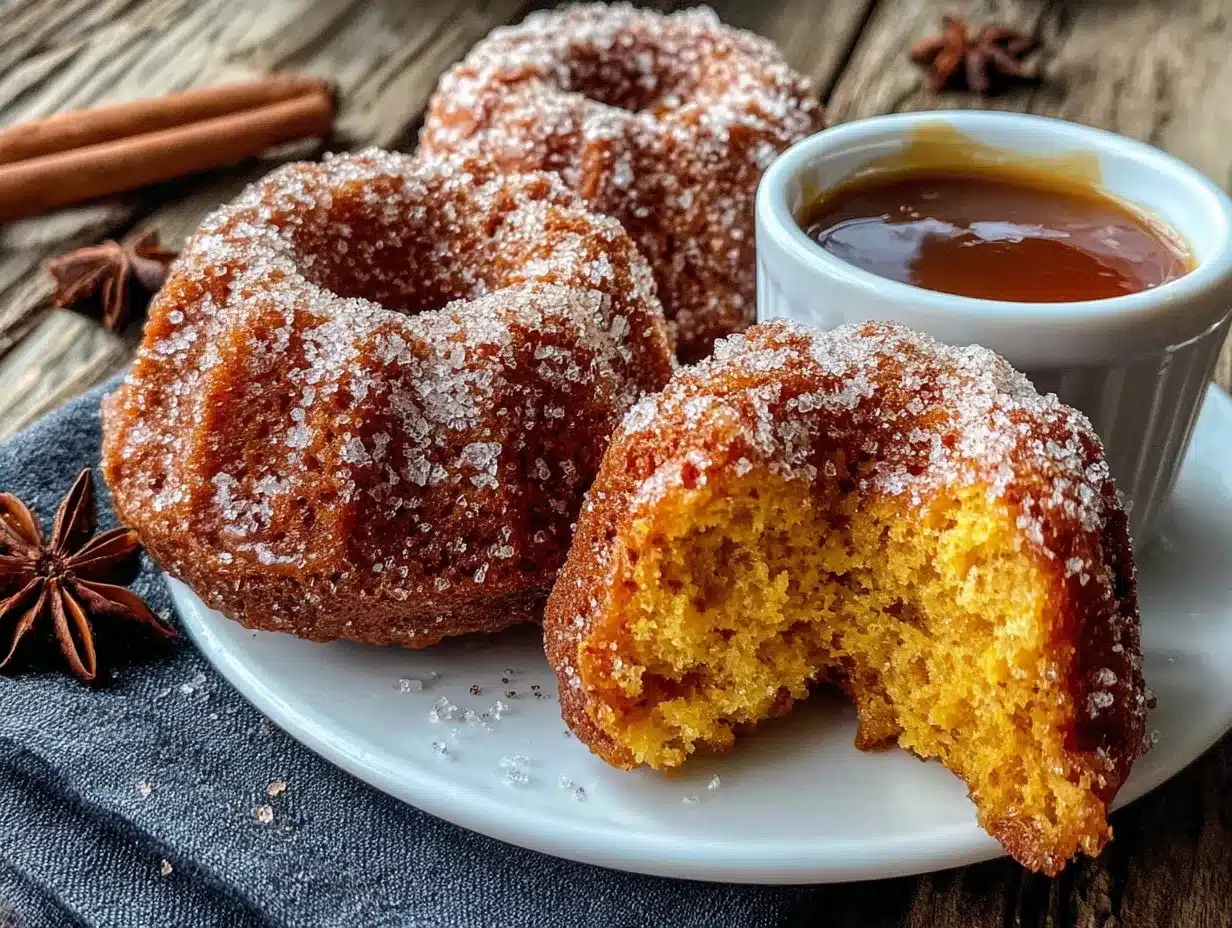
These donuts are the kind that make you close your eyes after the first bite. They’re tender, spiced just right with cinnamon and nutmeg, and topped with a simple cinnamon-sugar coating that gives them that classic donut shop feel. The best part? They’re baked, not fried, so you don’t have to deal with hot oil or that heavy, greasy feeling afterward. They’re cozy in the way only pumpkin can be—warm, spiced, and perfect for those crisp fall mornings when all you want is a mug of coffee and something sweet to go with it.
I keep making these because they’ve become my fall ritual. Every time I pull that pan out of the oven and the whole kitchen smells like cinnamon and pumpkin, I think of Rosa and her grandmother’s jar. It’s funny how a recipe can carry so much more than just ingredients. It carries a moment, a conversation, a little piece of someone else’s world.
Why You’ll Love This Recipe
Let me tell you why these baked gluten-free pumpkin donuts have become my most-requested fall recipe. I’ve tested this version at least a dozen times, tweaking the flour ratios and spice levels until everything clicked. The result? Donuts that are fluffy, tender, and actually taste like something you’d buy from a bakery—only better because you made them yourself.
- Quick & Easy: From start to finish, you’re looking at about 30 minutes. Mix the batter, fill the pan, bake, and you’re done. No yeast, no rising time, no complicated techniques.
- Simple Ingredients: You probably already have most of these in your pantry. Pumpkin puree, gluten-free flour blend, eggs, sugar, and warm spices. Nothing fancy or hard to find.
- Perfect for Fall Mornings: These donuts were made for cozy weekends, pumpkin patch mornings, or Thanksgiving brunch. They fit right into the season.
- Crowd-Pleaser: I’ve served these to gluten-free eaters and regular wheat-eaters alike, and everyone goes back for seconds. No one misses the gluten.
- Unbelievably Delicious: The texture is what gets people every time. Moist, tender, with that slight crispness on the outside from the cinnamon-sugar coating. It’s comfort food at its finest.
What makes this recipe different from the dozens of other pumpkin donut recipes out there? It’s the flour blend. I spent weeks testing ratios of oat flour, almond flour, and tapioca starch to get that perfect crumb—not too dense, not too fragile. The oat flour gives structure, the almond flour adds tenderness, and the tapioca starch keeps everything from getting gummy. It’s a combination I’ve refined through trial and error, and it works every single time.
These aren’t just good “for gluten-free” donuts. They’re good donuts, period. The kind that make you slow down and actually enjoy your morning. The kind that pair perfectly with a hot latte and a good book. The kind that remind you why fall is the best season for baking.
What Ingredients You Will Need
This recipe uses simple, wholesome ingredients to deliver bold flavor and satisfying texture without the fuss. Most of these are pantry staples, especially if you keep a well-stocked gluten-free kitchen. Here’s what you’ll need and why each ingredient matters.
For the Donuts
- 1 ½ cups gluten-free all-purpose flour blend (I recommend King Arthur Measure for Measure or Bob’s Red Mill 1-to-1—they have the right balance of rice flour, starches, and xanthan gum for baking)
- ½ cup oat flour (you can buy it pre-ground or make your own by pulsing rolled oats in a blender until fine—just make sure they’re certified gluten-free if needed)
- 1 teaspoon baking powder (for lift and fluffiness)
- ½ teaspoon baking soda (reacts with the pumpkin’s acidity to help the donuts rise)
- ½ teaspoon salt (balances the sweetness and enhances the pumpkin flavor)
- 2 teaspoons pumpkin pie spice (or make your own: 1 teaspoon cinnamon, ½ teaspoon ginger, ¼ teaspoon nutmeg, ¼ teaspoon cloves)
- 1 teaspoon ground cinnamon (for extra warmth)
- 2 large eggs, room temperature (room temperature eggs blend more evenly into the batter and create a smoother texture)
- ¾ cup packed light brown sugar (adds moisture and a deeper, caramel-like sweetness than white sugar alone)
- ½ cup pumpkin puree (not pumpkin pie filling—make sure it’s 100% pure pumpkin. Libby’s is my go-to brand for consistent results)
- ⅓ cup melted coconut oil (or vegetable oil, or melted butter if dairy isn’t an issue. Coconut oil adds a subtle richness that pairs beautifully with pumpkin)
- ¼ cup milk of choice (any milk works—dairy, almond, oat, or coconut. I use oat milk for extra creaminess)
- 1 teaspoon vanilla extract (rounds out the flavors and makes everything taste more “baked”)
For the Topping
- ¼ cup melted butter (or dairy-free butter substitute—I like Miyoko’s for a clean flavor)
- ½ cup granulated sugar (for that classic crunchy coating)
- 1 teaspoon ground cinnamon (mixed with the sugar for the coating)
Ingredient Tips: For the best texture, make sure your pumpkin puree isn’t too watery. If it looks thin, let it sit in a fine-mesh strainer for 10 minutes to drain off excess liquid. Also, don’t skip the oat flour—it’s the secret to that soft, bakery-style crumb. If you’re strictly grain-free, you can substitute more almond flour, but the texture will be denser and a bit more moist.
Substitution Guidance: Need this dairy-free? Use coconut oil instead of butter in the topping, and any non-dairy milk in the batter. Want it nut-free? Replace the oat flour with more gluten-free all-purpose blend—just add an extra tablespoon of milk to compensate for the difference in moisture absorption. For an egg-free version, try using flax eggs (1 tablespoon ground flaxseed mixed with 3 tablespoons water per egg), though the texture will be slightly more dense.
Equipment Needed
You don’t need a lot of fancy equipment to make these baked gluten-free pumpkin donuts, but a few key tools make the process much smoother.
- Donut pan: This is non-negotiable. A standard 6-cavity donut pan works perfectly. I’ve tried silicone pans and metal pans, and honestly, I prefer metal—it conducts heat more evenly and gives the donuts a nicer golden bottom. Silicone works too, but you’ll need to bake them a minute or two longer.
- Mixing bowls: One large bowl for dry ingredients, one medium bowl for wet ingredients. Nothing fancy needed.
- Whisk and spatula: A whisk for combining dry ingredients and a rubber spatula for folding the wet into the dry. Don’t overmix—a spatula helps you fold gently.
- Piping bag or zip-top bag: This makes filling the donut cavities so much easier and less messy. If you don’t have a piping bag, just snip the corner off a gallon-size zip-top bag. It works like a charm.
- Cooling rack: Essential for letting the donuts cool evenly. If you leave them in the pan too long, they’ll steam and get soggy on the bottom.
- Pastry brush: For brushing the melted butter onto the donuts before coating them in cinnamon sugar. A regular basting brush works too.
Budget-Friendly Options: Don’t have a donut pan? You can actually make these as muffins! Just bake them in a standard muffin tin for 15-18 minutes, and skip the cinnamon-sugar coating if you want—they’re still delicious plain. Or you can use a mini muffin pan for bite-sized donut holes. The baking time will be shorter—about 8-10 minutes.
Personal Note: I bought my first donut pan at a thrift store for two dollars, and it’s still going strong five years later. Don’t feel like you need to invest in expensive equipment. A basic pan, a whisk, and some elbow grease are all you really need.
Preparation Method
Alright, let’s get baking! These baked gluten-free pumpkin donuts come together quickly, so I recommend reading through all the steps first before you start. Trust me, it makes the process feel effortless.
- Preheat your oven to 350°F (175°C). Spray your donut pan generously with non-stick cooking spray. I like using a spray that has flour in it for extra insurance—gluten-free batters can be sticky. Set the pan aside.
- In a large mixing bowl, whisk together the dry ingredients: gluten-free all-purpose flour, oat flour, baking powder, baking soda, salt, pumpkin pie spice, and cinnamon. Whisk until everything is evenly combined. This step is important because it distributes the leavening agents and spices throughout the flour, so you don’t end up with a pocket of baking soda in one donut.
- In a separate medium bowl, whisk together the wet ingredients: eggs, brown sugar, pumpkin puree, melted coconut oil, milk, and vanilla extract. Whisk until the mixture is smooth and the brown sugar has mostly dissolved. The batter will be thick and glossy at this point.
- Pour the wet ingredients into the dry ingredients. Use a rubber spatula to fold everything together gently. Stir just until no streaks of flour remain—overmixing will make the donuts tough. The batter will be thick, almost like a muffin batter. That’s exactly what you want.
- Transfer the batter to a piping bag or zip-top bag. If using a zip-top bag, snip about ½ inch off one corner. Pipe the batter into the prepared donut pan, filling each cavity about ¾ full. Don’t overfill—the donuts will rise slightly as they bake, and you want that classic donut shape with a hole in the middle.
- Bake for 10-12 minutes, or until the donuts are golden brown around the edges and a toothpick inserted into the thickest part comes out clean. Every oven runs a little differently, so start checking at 10 minutes. Mine are usually perfect at 11 minutes.
- Let the donuts cool in the pan for 5 minutes. This is crucial—if you try to remove them too soon, they’ll fall apart. After 5 minutes, gently run a small offset spatula or butter knife around the edges to loosen them, then transfer the donuts to a wire cooling rack. Let them cool for another 5 minutes before coating.
- While the donuts cool, prepare the topping. Melt the butter in a small bowl. In a separate shallow bowl, mix the granulated sugar and cinnamon together. Once the donuts are cool enough to handle but still warm, brush each one lightly with melted butter, then dip it into the cinnamon-sugar mixture, turning to coat all sides. Tap off any excess.
- Repeat with the remaining donuts. If you need to bake a second batch, let the pan cool completely before re-greasing and refilling with batter. A hot pan will cause the batter to spread too quickly and bake unevenly.
- Serve immediately or store for later. These donuts are best enjoyed the same day, but they’ll keep for a couple of days if stored properly (more on that below).
Sensory Cues: When the batter is ready, it should be thick enough to hold its shape when piped—not runny at all. You’ll know the donuts are done when your kitchen smells like a pumpkin spice candle and the edges have turned a deep golden brown. The tops will spring back when lightly pressed.
Personal Tip: I always double the batch because these disappear fast. If you’re making them for a gathering, go ahead and make 12 instead of 6. You won’t regret it.
Cooking Tips & Techniques
After making these baked gluten-free pumpkin donuts more times than I can count, I’ve picked up a few tricks that make the process smoother and the results more consistent. Here are my best tips.
Don’t overmix the batter. This is the number one mistake I see people make with gluten-free baking. Gluten-free flours don’t have the same protein structure as wheat flour, so overmixing doesn’t create toughness in the same way—but it can make the donuts dense and gummy. Mix until the flour just disappears, then stop. A few tiny lumps are perfectly fine.
Use room temperature ingredients. Cold eggs and cold milk can cause the melted coconut oil to solidify into little clumps in the batter. If your eggs are straight from the fridge, place them in a bowl of warm water for 5 minutes before using. Same goes for the milk. Room temperature ingredients blend together more smoothly and create a more even crumb.
Pipe, don’t spoon. I learned this the hard way. Spooning the batter into the donut cavities is messy and uneven. A piping bag or zip-top bag gives you much more control and keeps the batter where it belongs—in the pan, not all over your counter. Plus, it’s faster.
Let the pan cool between batches. If you’re making a double batch, run the pan under cool water for a few seconds after the first batch comes out, dry it thoroughly, and then re-grease it. Pouring batter into a hot pan will cause it to spread and bake unevenly.
Test for doneness with a toothpick, not your eyes. Gluten-free baked goods can look golden on the outside while still being undercooked in the middle. Insert a toothpick into the thickest part of a donut—if it comes out clean or with just a few moist crumbs, they’re done. If it’s wet batter, give them another minute or two.
My biggest failure: The first time I made these, I forgot to add the baking powder. The donuts came out flat, dense, and sad. I almost gave up on the recipe entirely until I realized my mistake. So check your ingredients twice—it’s an easy thing to overlook when you’re in a hurry.
Timing strategy: Make the topping while the donuts bake. That way, everything is ready to go as soon as they come out of the oven. The donuts need to be warm for the butter to stick, so you don’t want to be scrambling to mix cinnamon and sugar while they’re cooling.
Variations & Adaptations
One of the best things about this recipe is how versatile it is. Here are some of my favorite ways to change it up, depending on the season, your diet, or just your mood.
Maple Glaze Version: Skip the cinnamon-sugar coating and make a simple maple glaze instead. Whisk together 1 cup powdered sugar, 2 tablespoons maple syrup, and 1 tablespoon milk until smooth. Dip the cooled donuts into the glaze and let them set on a rack for 10 minutes. The maple flavor pairs beautifully with the pumpkin and spices.
Chocolate Pumpkin Donuts: Replace ¼ cup of the gluten-free flour with unsweetened cocoa powder. The chocolate and pumpkin combo is surprisingly good—rich and earthy with a hint of sweetness. Top with the cinnamon-sugar coating or a simple chocolate glaze.
Vegan Adaptation: Use flax eggs (2 tablespoons ground flaxseed mixed with 6 tablespoons water, let sit for 5 minutes), swap the coconut oil for a neutral vegetable oil, and use non-dairy milk. For the topping, use melted coconut oil instead of butter. The texture will be slightly more dense, but the flavor is still fantastic.
Paleo-Friendly Version: Replace the gluten-free flour blend with 1 cup almond flour and ½ cup coconut flour. Reduce the milk to 2 tablespoons since coconut flour absorbs a lot of liquid. The donuts will be more delicate, so handle them gently when removing from the pan.
Savory-Sweet Twist: Add ½ cup finely chopped pecans or walnuts to the batter for extra crunch. The nuts add texture and a little savory note that balances the sweetness of the pumpkin and sugar.
Personal Variation: My favorite way to make these is with a pinch of cardamom added to the spice mix. It gives the donuts a slightly floral, exotic note that makes them feel extra special. I discovered this by accident when I ran out of nutmeg and used cardamom instead—it was a happy mistake.
Serving & Storage Suggestions
These baked gluten-free pumpkin donuts are best served warm, right after they’ve been coated in that cinnamon-sugar goodness. The contrast between the slightly crisp exterior and the soft, tender interior is pure magic.
How to Serve: Arrange the donuts on a pretty plate or cake stand. They’re perfect on their own, but if you want to go all out, serve them with a side of warm apple cider or a pumpkin spice latte. For brunch, pair them with scrambled eggs and bacon for a sweet-and-savory balance that works surprisingly well.
Temperature: These donuts are delicious at room temperature too, but I recommend warming them in the microwave for about 10 seconds before serving if they’ve been sitting out for a while. It brings back that fresh-from-the-oven softness.
Storage: Store leftover donuts in an airtight container at room temperature for up to 2 days. If you live in a humid climate, add a paper towel to the container to absorb excess moisture—otherwise, the coating can get sticky. Do not refrigerate them, as the cold will dry them out.
Freezing: Yes, these freeze beautifully! Place the cooled, uncoated donuts in a single layer on a baking sheet and freeze for 1 hour. Then transfer them to a freezer-safe bag or container. They’ll keep for up to 3 months. When you’re ready to enjoy them, thaw at room temperature, then warm in the oven at 300°F for 5 minutes before brushing with butter and coating with cinnamon sugar.
Flavor Development: Honestly, these donuts are best on day one. The coating stays crunchy, and the texture is at its peak. By day two, the coating softens a bit, but they’re still delicious—especially if you warm them up. I’ve never had leftovers last longer than that because they disappear too fast!
Nutritional Information & Benefits
While these baked gluten-free pumpkin donuts are definitely a treat, they do come with some nutritional perks—especially compared to their fried, wheat-filled counterparts.
Estimated Nutritional Values (per donut, makes 6):
- Calories: 285
- Total Fat: 14g
- Saturated Fat: 10g
- Carbohydrates: 38g
- Fiber: 3g
- Sugar: 22g
- Protein: 5g
Health Benefits: Pumpkin is packed with vitamin A (from beta-carotene), which supports eye health and immune function. It’s also a good source of fiber, which aids digestion and helps keep you full longer. The oat flour adds soluble fiber, which can help lower cholesterol. And because these are baked instead of fried, they have significantly less fat and fewer calories than traditional donuts.
Dietary Considerations: This recipe is naturally gluten-free (if you use certified gluten-free oats and flour). It can easily be made dairy-free and vegan with the substitutions mentioned above. It’s also nut-free if you skip the almond flour and use only oat flour and the gluten-free blend.
Potential Allergens: Contains eggs and coconut (if using coconut oil). May contain traces of nuts depending on your flour blend. Always check labels if you’re cooking for someone with severe allergies.
Personal Wellness Perspective: I believe in balance. These donuts aren’t health food, but they’re made with real ingredients and no weird additives. For me, that’s the sweet spot—a treat that feels indulgent but isn’t loaded with preservatives or artificial flavors. Enjoy them mindfully, and don’t feel guilty about it.
Conclusion
These baked gluten-free pumpkin donuts have become a staple in my fall baking rotation, and I hope they become one in yours too. They’re quick, simple, and genuinely delicious—the kind of recipe that proves gluten-free baking doesn’t have to be complicated or disappointing. Whether you’re making them for a cozy weekend breakfast, a Thanksgiving brunch, or just because you’re craving something warm and spiced, they deliver every single time.
What I love most about this recipe is how adaptable it is. You can change the topping, swap the spices, or make them vegan—the basic formula works no matter what. Don’t be afraid to experiment and make it your own. That’s what cooking is all about, right? Taking something someone shared with you and putting your own spin on it.
I’d love to hear how these turn out for you! Did you try the maple glaze? Add chocolate chips? Forget the baking powder like I did? Drop a comment below and let me know. And if you share a photo on Pinterest, tag me—I love seeing your creations. Happy baking, and here’s to a cozy, pumpkin-filled season!
Frequently Asked Questions
Can I make these donuts without a donut pan?
Absolutely! You can bake the batter in a standard muffin tin for about 15-18 minutes. They won’t have the classic donut shape, but they’ll taste just as good. You can also use a mini muffin pan for bite-sized donut holes—just bake for 8-10 minutes.
Why did my donuts turn out dense and heavy?
This usually happens for one of two reasons: overmixing the batter or using too much moisture. Mix the batter just until the flour disappears, and make sure your pumpkin puree isn’t watery. If it looks thin, drain it in a fine-mesh strainer for 10 minutes before using.
Can I use a different gluten-free flour blend?
Yes, but results may vary. I recommend a blend that contains xanthan gum, like King Arthur Measure for Measure or Bob’s Red Mill 1-to-1. If your blend doesn’t have xanthan gum, add ½ teaspoon to the dry ingredients. Avoid using coconut flour alone—it absorbs too much liquid and will make the donuts dry.
How do I keep the cinnamon-sugar coating from getting soggy?
The key is to coat the donuts while they’re still warm but not hot. If they’re too hot, the butter will soak in completely and the sugar won’t stick as well. Let them cool for about 5 minutes after baking, then brush with butter and coat immediately. Store them in an airtight container with a paper towel to absorb excess moisture.
Can I freeze these donuts?
Yes! Freeze the uncoated donuts in a single layer on a baking sheet for 1 hour, then transfer to a freezer-safe bag. They’ll keep for up to 3 months. When ready to serve, thaw at room temperature, warm in the oven at 300°F for 5 minutes, then brush with butter and coat with cinnamon sugar.
Pin This Recipe!
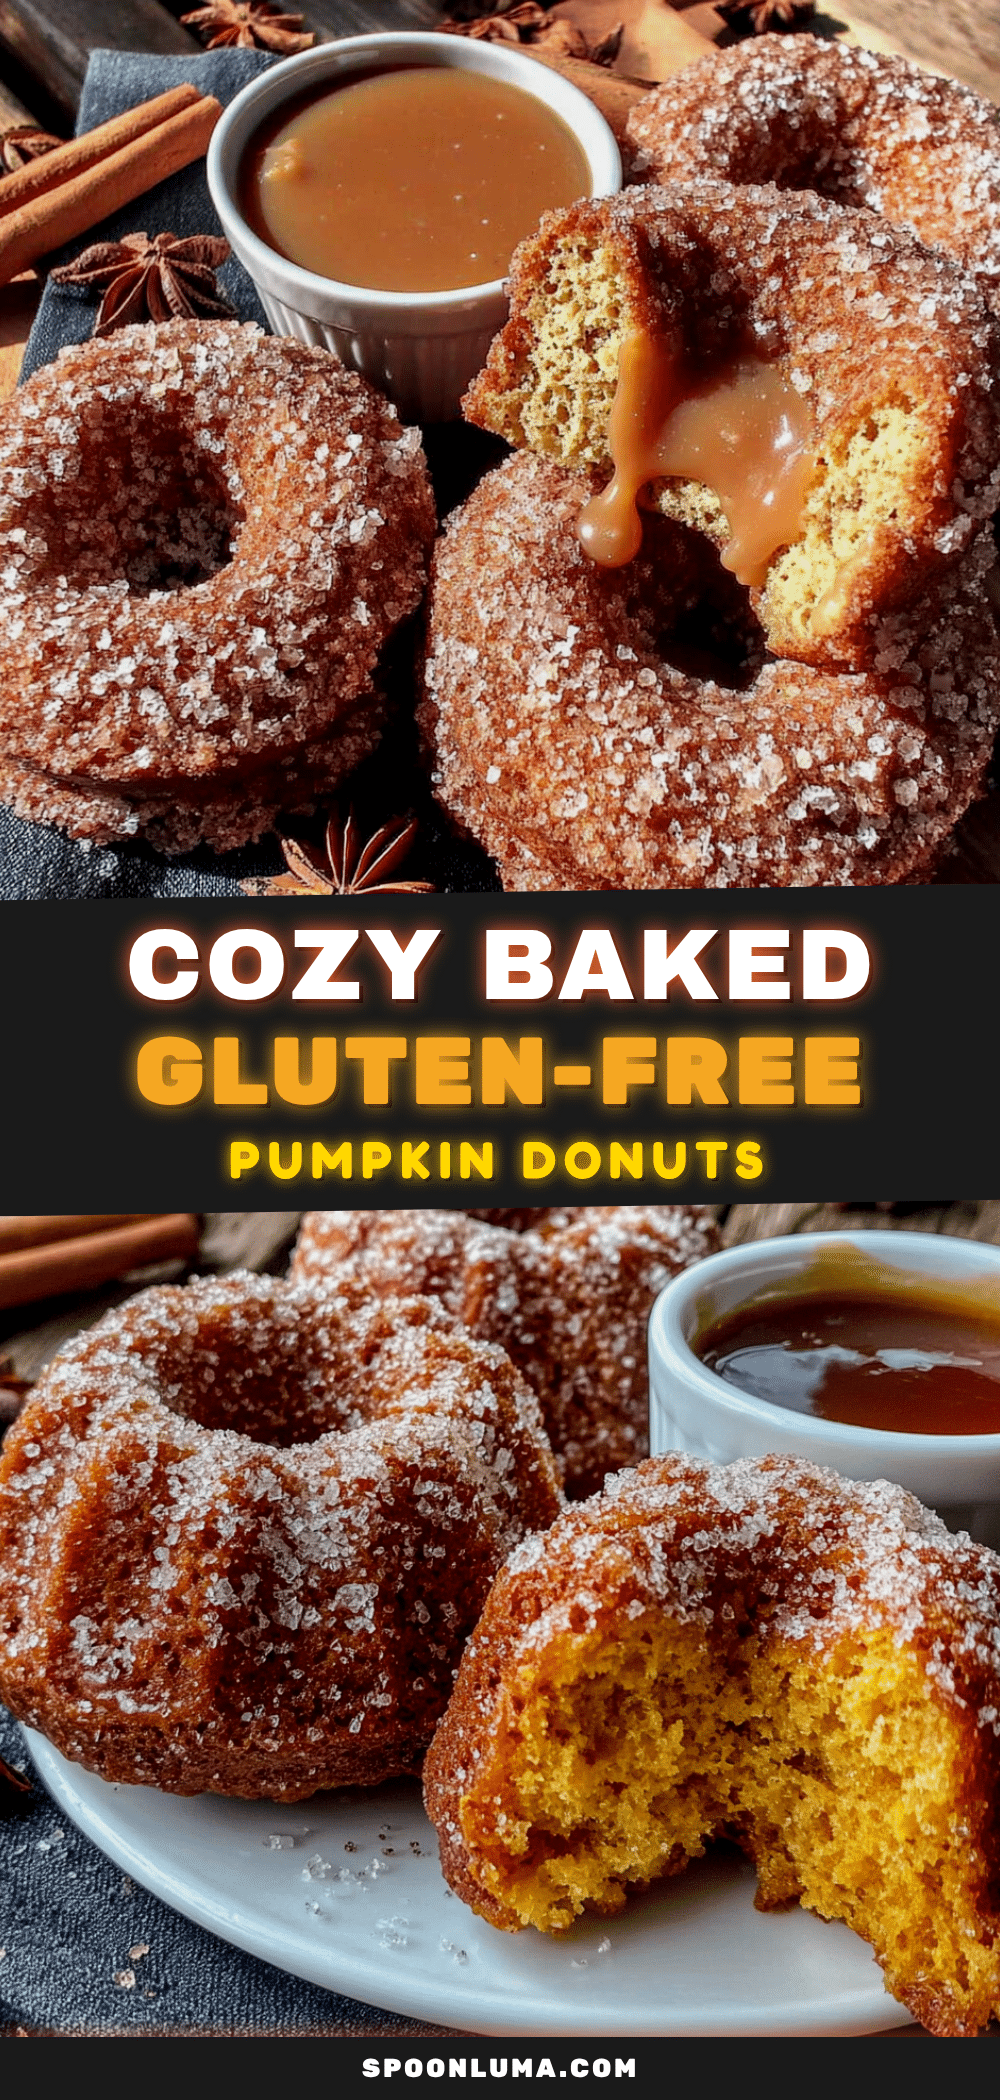
Perfect Baked Gluten-Free Pumpkin Donuts in 30 Minutes
These baked gluten-free pumpkin donuts are tender, spiced with cinnamon and nutmeg, and topped with a simple cinnamon-sugar coating. They come together in about 30 minutes and are perfect for cozy fall mornings.
- Prep Time: 15 minutes
- Cook Time: 12 minutes
- Total Time: 30 minutes
- Yield: 6 servings 1x
- Category: Dessert
- Cuisine: American
Ingredients
- 1 ½ cups gluten-free all-purpose flour blend (e.g., King Arthur Measure for Measure or Bob’s Red Mill 1-to-1)
- ½ cup oat flour (certified gluten-free if needed)
- 1 teaspoon baking powder
- ½ teaspoon baking soda
- ½ teaspoon salt
- 2 teaspoons pumpkin pie spice (or 1 tsp cinnamon, ½ tsp ginger, ¼ tsp nutmeg, ¼ tsp cloves)
- 1 teaspoon ground cinnamon
- 2 large eggs, room temperature
- ¾ cup packed light brown sugar
- ½ cup pumpkin puree (100% pure pumpkin, not pie filling)
- ⅓ cup melted coconut oil (or vegetable oil or melted butter)
- ¼ cup milk of choice (dairy, almond, oat, or coconut)
- 1 teaspoon vanilla extract
- ¼ cup melted butter (or dairy-free butter substitute, for topping)
- ½ cup granulated sugar (for topping)
- 1 teaspoon ground cinnamon (for topping)
Instructions
- Preheat your oven to 350°F (175°C). Spray a 6-cavity donut pan generously with non-stick cooking spray.
- In a large mixing bowl, whisk together the gluten-free all-purpose flour, oat flour, baking powder, baking soda, salt, pumpkin pie spice, and cinnamon until evenly combined.
- In a separate medium bowl, whisk together the eggs, brown sugar, pumpkin puree, melted coconut oil, milk, and vanilla extract until smooth and the brown sugar has mostly dissolved.
- Pour the wet ingredients into the dry ingredients. Use a rubber spatula to fold together gently until no streaks of flour remain. The batter will be thick, like muffin batter.
- Transfer the batter to a piping bag or a zip-top bag with a ½-inch corner snipped off. Pipe the batter into the prepared donut pan, filling each cavity about ¾ full.
- Bake for 10-12 minutes, or until the donuts are golden brown around the edges and a toothpick inserted into the thickest part comes out clean.
- Let the donuts cool in the pan for 5 minutes. Then gently run a small offset spatula or butter knife around the edges to loosen them, and transfer to a wire cooling rack. Let cool for another 5 minutes.
- While the donuts cool, prepare the topping: Melt the butter in a small bowl. In a separate shallow bowl, mix the granulated sugar and cinnamon together.
- Once the donuts are cool enough to handle but still warm, brush each one lightly with melted butter, then dip into the cinnamon-sugar mixture, turning to coat all sides. Tap off any excess.
- Serve immediately or store for later. For a second batch, let the pan cool completely before re-greasing and refilling.
Notes
For best texture, ensure pumpkin puree isn’t watery; drain in a fine-mesh strainer for 10 minutes if needed. Don’t overmix the batter. Use room temperature ingredients to prevent coconut oil from solidifying. Pipe batter for even filling. Let pan cool between batches. Test doneness with a toothpick. Make topping while donuts bake. Store in an airtight container at room temperature for up to 2 days; freeze uncoated donuts for up to 3 months.
Nutrition
- Serving Size: 1 donut
- Calories: 285
- Sugar: 22
- Fat: 14
- Saturated Fat: 10
- Carbohydrates: 38
- Fiber: 3
- Protein: 5
Keywords: gluten-free pumpkin donuts, baked donuts, pumpkin spice, fall baking, gluten-free breakfast


