There used to be a tiny bakery tucked between a laundromat and a hardware store on the corner of Elm and 4th that made the most incredible chocolate chip cookies I have ever tasted. When they closed their doors three summers ago—”retirement,” the sign said—I honestly felt a little lost. Those cookies were my go-to bribe, my peace offering, my “I love you” wrapped in parchment paper. My kids would fight over the last one, and I’d pretend to be annoyed while secretly feeling like the world’s best mom.
After eleven tries—eleven!—I finally cracked the code. The secret wasn’t some fancy imported chocolate or a complicated technique. It was brown butter. That nutty, toasty flavor made all the difference, and the best part? No mixer required. You just need a whisk, a bowl, and two hands. Maybe you’ve been there, staring at a recipe that promises “bakery-style” cookies only to end up with flat, sad discs. I’ve been there too, let me tell you. The first batch I made after that bakery closed was so disappointing I almost gave up. But I kept at it, tweaking and testing, until my kids looked up from their plates and said, “Mom, these are even better than the ones from the bakery.” I knew I had something special.
This recipe became our family’s thing. It’s the one we make on rainy Sundays, the one I bring to school bake sales, the one my son requested for his birthday instead of cake. And honestly? It’s the easiest cookie recipe I’ve ever made. No mixer, no chilling, just a wooden spoon and a little patience. The brown butter does all the heavy lifting, giving you that deep, caramelized flavor without any fuss. So if you’re looking for a cookie that’ll make your kitchen smell like heaven and your kids think you’re a superhero, you’ve come to the right place.
Why You’ll Love This Recipe
Let me tell you why these cookies are about to become your new best friend. First off, they’re ridiculously simple. You don’t need a stand mixer or a hand mixer—just a bowl and a whisk. That means less cleanup and more time actually enjoying the cookies. I’ve tested this recipe with my own kids (ages 7 and 10), and they can handle most of the steps themselves. It’s the perfect weekend baking project.
- Quick & Easy: From start to finish, these cookies come together in about 30 minutes. No chilling required, so you can satisfy a cookie craving fast. Perfect for those after-school “I need a snack” moments.
- Simple Ingredients: You probably have everything in your pantry right now. Butter, sugar, eggs, flour, vanilla, chocolate chips—that’s it. No fancy extracts or specialty flours needed.
- Perfect for Family Baking: This recipe is practically foolproof. My daughter made a batch by herself last week (with a little supervision), and they turned out perfect. It’s a great way to get kids involved in the kitchen without the stress.
- Crowd-Pleaser: I’ve brought these to potlucks, playdates, and holiday parties, and they always disappear first. Kids and adults alike go crazy for that nutty brown butter flavor.
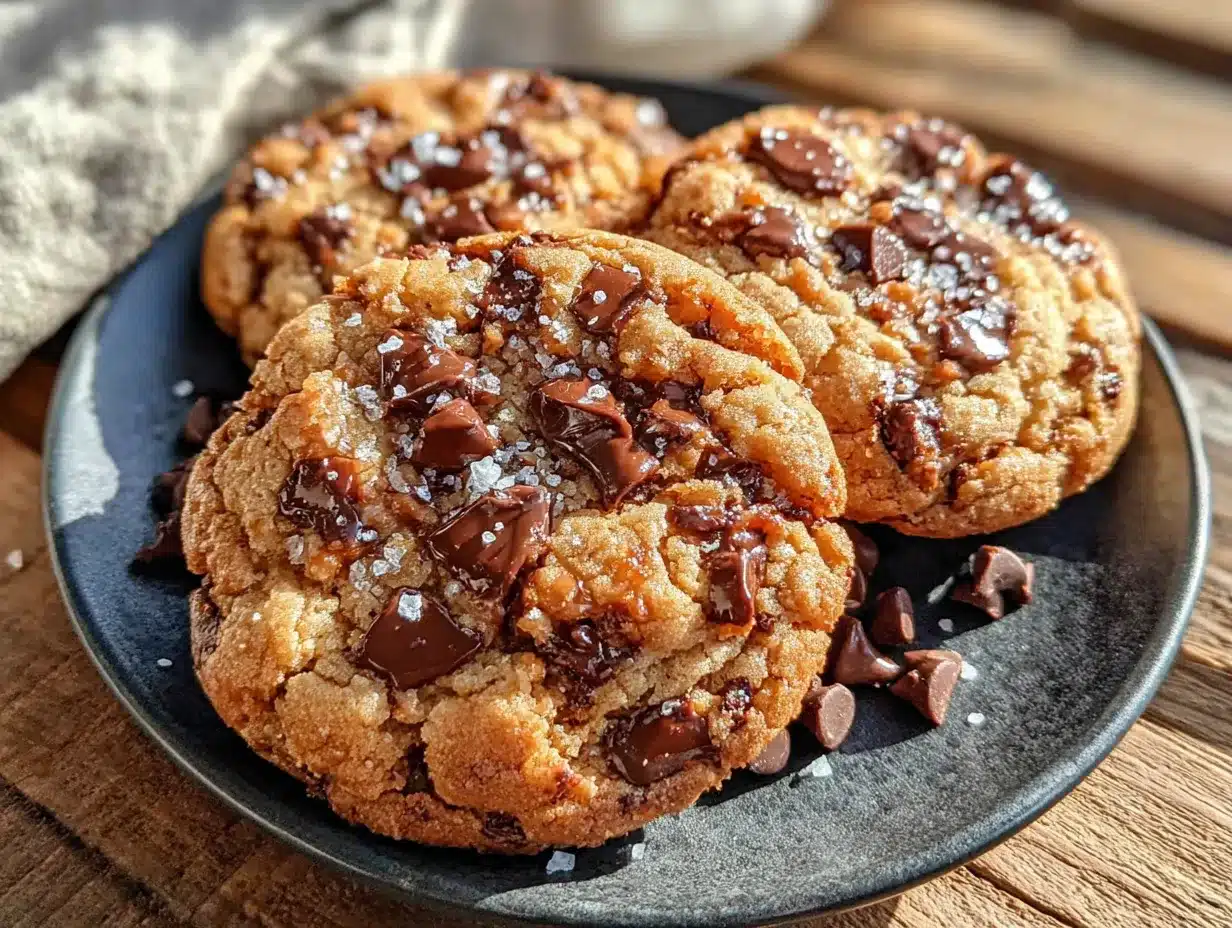
- Unbelievably Delicious: The texture is chewy on the inside with slightly crispy edges, and the brown butter adds a depth of flavor you just can’t get from regular melted butter. It’s like a hug in cookie form.
What makes this recipe different from all the other chocolate chip cookie recipes out there? It’s the brown butter technique combined with the no-mixer approach. Most recipes that use brown butter require you to chill the dough for hours, but I’ve figured out a way to skip that step entirely. The result is a cookie that’s just as good—if not better—than anything you’d get from a bakery. And because there’s no mixer involved, you’re less likely to overmix the dough, which means your cookies stay tender and soft every single time.
Honestly, this recipe is comfort food at its finest. It’s the kind of cookie that makes you close your eyes after the first bite. The kind that makes your kids say “these are the best cookies ever” without any prompting. It’s perfect for impressing guests without any stress, or turning a regular Tuesday into something special. You deserve cookies this good.
What Ingredients You Will Need
This recipe uses simple, everyday ingredients to create something truly special. The magic really comes from the brown butter, which adds a nutty, caramel-like flavor that regular butter just can’t match. Here’s everything you’ll need:
- Unsalted butter, 1 cup (2 sticks or 226g) — I recommend using a good quality butter like Kerrygold or Land O’Lakes for the best flavor. The butter is the star here, so don’t skimp. You’ll be browning it, so the milk solids will toast and develop that amazing nutty taste.
- Light brown sugar, 1 cup (200g), packed — Brown sugar adds moisture and that deep molasses flavor that pairs perfectly with the brown butter. Make sure to pack it firmly into your measuring cup. Dark brown sugar works too, but it will give a stronger molasses taste.
- Granulated sugar, 1/2 cup (100g) — This adds sweetness and helps create those crispy edges. The combination of both sugars gives you the perfect texture—chewy centers with slightly crunchy edges.
- Large egg, 1, room temperature — Room temperature eggs incorporate better into the butter mixture. If you forgot to take yours out ahead of time, place it in a bowl of warm water for 5 minutes.
- Vanilla extract, 2 teaspoons — Pure vanilla extract makes a difference here. I prefer Nielsen-Massey or simply store-brand pure vanilla. Avoid imitation vanilla if you can—it has a harsh, artificial taste.
- All-purpose flour, 2 cups (240g) — Spoon and level your flour for the most accurate measurement. Scooping directly from the bag can pack in too much flour, leading to dry cookies. If you want a slightly chewier texture, try bread flour instead.
- Baking soda, 1 teaspoon — This helps the cookies spread just the right amount. Make sure your baking soda is fresh—test it by dropping a little into vinegar; it should fizz immediately.
- Salt, 1/2 teaspoon — I use fine sea salt. Salt balances the sweetness and enhances the brown butter flavor. If you use kosher salt, increase to 3/4 teaspoon.
- Semi-sweet chocolate chips, 2 cups (about 340g) — My personal favorite is Ghirardelli 60% cacao chips. They hold their shape during baking and have a rich, complex flavor. Milk chocolate chips work too if your kids prefer a sweeter cookie. You can also chop up a good quality chocolate bar for those melty pools of chocolate.
Optional but recommended: Flaky sea salt, for sprinkling — A pinch of Maldon sea salt on top right after baking takes these cookies to another level. The salty crunch against the sweet, buttery cookie is absolutely divine.
Substitution Guidance: If you need to make these dairy-free, use a high-quality vegan butter like Miyoko’s or Country Crock Plant Butter. The browning process might take a little longer, but it still works. For a gluten-free version, swap the all-purpose flour with a 1:1 gluten-free baking flour blend (I like King Arthur’s Measure for Measure). The texture will be slightly different, but still delicious. If you’re out of brown sugar, you can make your own by mixing 1 cup of granulated sugar with 1 tablespoon of molasses.
Equipment Needed
One of the best things about this recipe is how little equipment you need. Here’s what you’ll need to have on hand:
- Medium saucepan — A light-colored saucepan is ideal for browning butter because you can easily see the milk solids turn golden. A dark pan makes it harder to judge the color. I use my trusty 2-quart All-Clad, but any saucepan will work.
- Large mixing bowl — You’ll need a bowl big enough to hold all the ingredients. A glass or stainless steel bowl works great. Avoid plastic bowls as they can absorb odors over time.
- Wooden spoon or silicone spatula — This is your “mixer.” A sturdy wooden spoon works perfectly for creaming the butter and sugar together. I actually prefer my wooden spoon over a mixer for this recipe—it gives me more control.
- Whisk — For whisking the dry ingredients together. A simple wire whisk does the job.
- Measuring cups and spoons — Accurate measurements are key for baking. Use dry measuring cups for flour and sugar, and liquid measuring cups for the vanilla.
- Kitchen scale (optional but helpful) — Weighing your ingredients ensures consistent results every time. I use my scale for flour especially, since it’s easy to accidentally pack too much.
- Baking sheets — Two standard half-sheet pans work well. Avoid dark-colored baking sheets as they can cause the bottoms of your cookies to burn.
- Parchment paper or silicone baking mat — This prevents sticking and makes cleanup a breeze. I prefer parchment paper because it’s disposable and gives slightly crisper bottoms.
- Cooling rack — Letting cookies cool on a rack prevents them from steaming and getting soggy on the bottom.
- Cookie scoop (about 2 tablespoons) — A scoop ensures uniform cookies that bake evenly. I use a #40 scoop (about 1.5 tablespoons) for smaller cookies, or a #20 scoop (about 3 tablespoons) for bakery-style giants.
If you don’t have a cookie scoop, you can use two spoons to portion the dough. It’s a little messier, but it works just fine. And if you don’t have a cooling rack, you can let the cookies cool on the baking sheet for a few minutes, then transfer them to a plate. No need to buy fancy equipment—this recipe is designed to work with what you already have.
Preparation Method
Let’s get to the fun part! Follow these steps carefully, and you’ll have perfect cookies every time. I’ve included time estimates and sensory cues so you know exactly what to look for.
- Brown the butter (5-7 minutes): Place the butter in your medium saucepan over medium heat. Let it melt completely, stirring occasionally with your wooden spoon. Once melted, the butter will start to foam and sputter. Keep stirring. After about 3-4 minutes, the foam will subside, and you’ll see tiny brown specks forming at the bottom. This is the milk solids toasting. Swirl the pan gently and watch carefully—the butter can go from perfectly browned to burnt in seconds. When it smells nutty and looks like liquid gold with brown specks, remove it from the heat immediately. Pour it into a heatproof bowl (including all those brown bits) and let it cool for 10 minutes. Pro tip: I once got distracted by a phone call and burnt my butter. The whole kitchen smelled like burnt popcorn. Don’t be like me—stay close!
- Mix the sugars and butter (2-3 minutes): Once the brown butter has cooled slightly (it should be warm but not hot), add the brown sugar and granulated sugar to the bowl. Whisk vigorously until combined. The mixture will look like wet sand at first, then smooth out. Keep whisking for about 2 minutes until it thickens slightly and looks like a thick paste. You’ll see the mixture become glossy—that’s a good sign.
- Add the egg and vanilla (1 minute): Crack the egg into the butter-sugar mixture and add the vanilla extract. Whisk until everything is fully incorporated and the mixture looks smooth and shiny. It should be thick and fall in ribbons from your whisk. If the mixture looks separated or greasy, keep whisking—it will come together.
- Combine the dry ingredients (30 seconds): In a separate small bowl, whisk together the flour, baking soda, and salt. This ensures the baking soda and salt are evenly distributed throughout the flour. No one wants a pocket of salt in their cookie!
- Add the dry ingredients to the wet (1-2 minutes): Pour the flour mixture into the butter mixture. Use your wooden spoon or silicone spatula to fold everything together. Stir just until you see no more streaks of flour. Do not overmix! Overmixing develops gluten, which makes cookies tough. Stop as soon as the dough comes together. It will look a little shaggy, and that’s perfect.
- Fold in the chocolate chips (30 seconds): Add the chocolate chips to the dough and fold them in with your spatula. Make sure they’re evenly distributed throughout the dough. If you want chocolate in every bite, go ahead and add a few extra chips on top after scooping.
- Preheat the oven and prepare baking sheets: Preheat your oven to 350°F (175°C). While it’s heating, line two baking sheets with parchment paper. This gives the dough time to rest while the oven comes to temperature.
- Scoop the cookies (5 minutes): Using your cookie scoop or two spoons, portion the dough into balls about 2 tablespoons each (about 30g). Place them on the prepared baking sheets, spacing them about 2 inches apart. They will spread, so give them room. For bakery-style cookies, use a 3-tablespoon scoop and space them 3 inches apart.
- Bake (10-12 minutes): Place one baking sheet on the center rack of your preheated oven. Bake for 10-12 minutes, rotating the pan halfway through. The cookies are done when the edges are golden brown and the centers look slightly underbaked and puffy. They will continue to set on the baking sheet after you take them out. My personal preference is 11 minutes—the edges are perfectly crispy, and the centers stay soft and chewy.
- Cool and enjoy: Let the cookies cool on the baking sheet for 5 minutes. This allows them to set properly. Then transfer them to a cooling rack. If you’re using flaky sea salt, sprinkle a little on top while they’re still warm. Let them cool completely if you can resist—they’re even better after they’ve fully set.
Important notes: If your dough seems too soft or sticky, don’t worry—that’s normal. The brown butter keeps the dough very pliable. If you’re having trouble scooping, pop the dough in the fridge for 15 minutes. And if you want thicker cookies, chill the scooped dough for 30 minutes before baking. This helps prevent spreading.
Cooking Tips & Techniques
After making these cookies more times than I can count, I’ve learned a few tricks that make a real difference. Let me share them with you so you can avoid my mistakes.
Master the brown butter: This is the most important step. Use a light-colored pan so you can see the color change. Swirl the pan occasionally instead of stirring constantly—this helps the milk solids toast evenly. When you see the butter turn a warm amber color and smell that nutty aroma, take it off the heat immediately. I once left it on the stove for “just 10 more seconds” and ended up with black specks instead of golden ones. Burnt butter tastes bitter, not nutty. Trust me, you don’t want that.
Don’t skip the cooling step: After browning the butter, let it cool for at least 10 minutes before adding the sugars. If you add the sugars to hot butter, they’ll melt and your cookies will spread too much. I learned this the hard way when my first batch turned into flat, greasy disks. The butter should be warm but not hot—think bathwater temperature.
Use a cookie scoop for uniform cookies: This isn’t just about looks (though uniform cookies are prettier). When all your cookies are the same size, they bake evenly. No more burnt edges on small cookies while the big ones are still raw in the middle. A #40 scoop (about 1.5 tablespoons) gives you perfectly sized cookies that bake in exactly 11 minutes.
Rotate your baking sheets: Ovens have hot spots, and the back often gets hotter than the front. Halfway through baking, rotate your pan 180 degrees. If you’re baking two sheets at once, swap their positions too. This ensures all your cookies bake evenly. I forgot to do this once, and half my batch came out darker than the other half. My kids didn’t complain, but I knew.
Let them rest on the pan: The 5-minute rest on the baking sheet is crucial. During this time, the cookies continue to bake from the residual heat, setting the centers without over-browning the edges. If you try to move them too soon, they’ll fall apart. Be patient—it’s worth it.
Make ahead and freeze: This dough freezes beautifully. Scoop the dough into balls, place them on a baking sheet, and freeze until solid. Then transfer them to a freezer bag. You can bake them straight from frozen—just add 2-3 minutes to the baking time. This is my secret weapon for last-minute guests or emergency cookie cravings.
Variations & Adaptations
One of the best things about this recipe is how versatile it is. Here are some of my favorite variations:
Chocolate Lover’s Dream: Swap 1/2 cup of the semi-sweet chips for dark chocolate chunks and add 1/4 cup of cocoa powder to the flour mixture. The result is a double-chocolate cookie that’s rich, fudgy, and absolutely irresistible. My son calls these “the black cookies” and requests them for every sleepover.
Nutty Brown Butter Cookies: Add 1 cup of toasted pecans or walnuts, roughly chopped, along with the chocolate chips. Toast the nuts in a dry pan over medium heat for 3-4 minutes until fragrant, then let them cool before adding. The crunch of the nuts against the soft cookie is heavenly. My husband loves these—he says they remind him of his grandmother’s kitchen.
Gluten-Free Version: Substitute the all-purpose flour with a 1:1 gluten-free baking flour blend. I’ve tested this with King Arthur’s Measure for Measure and Bob’s Red Mill, and both work well. The cookies will be slightly more delicate, so handle them gently. Add an extra tablespoon of milk if the dough seems too dry.
Vegan Adaptation: Use vegan butter (I like Miyoko’s or Country Crock Plant Butter) and a flax egg (1 tablespoon ground flaxseed mixed with 3 tablespoons water, let sit for 5 minutes). The browning process works with vegan butter, though it takes a minute or two longer. The cookies won’t spread as much, so flatten them slightly before baking.
Seasonal Twist: In the fall, add 1 teaspoon of cinnamon and 1/2 teaspoon of nutmeg to the flour mixture. In the winter, try adding 1/2 teaspoon of peppermint extract along with the vanilla and use white chocolate chips instead of semi-sweet. For summer, swap the chocolate chips for dried cherries or chopped dried apricots. My family loves the autumn version—it makes the whole house smell like a bakery.
Lower Sugar Option: Reduce the brown sugar to 3/4 cup and the granulated sugar to 1/4 cup. The cookies will be less sweet, but the brown butter flavor really shines through. You can also use a sugar substitute like Swerve, but the texture will be slightly different.
Serving & Storage Suggestions
These cookies are best served warm, when the chocolate is still slightly melted and the edges are perfectly crispy. But let’s be honest—they’re pretty amazing at room temperature too.
Serving Temperature: If you’re serving them fresh from the oven, let them cool for 5 minutes on the baking sheet first. They’ll be too fragile to move right away. For a special treat, warm them in the microwave for 10 seconds before serving. It brings back that just-baked magic.
Presentation Ideas: Stack them on a pretty plate or arrange them in a mason jar for a rustic look. For parties, I like to place them on a wooden board with small bowls of extra chocolate chips and flaky salt for dipping. Kids love building their own cookie experience.
Perfect Pairings: These cookies are amazing with a cold glass of milk (obviously), but they also pair beautifully with coffee, hot chocolate, or a scoop of vanilla ice cream. For a grown-up treat, try them with a glass of bourbon or a cup of chai tea. The nutty brown butter complements both flavors perfectly.
Storage Instructions: Store baked cookies in an airtight container at room temperature for up to 5 days. Place a slice of bread in the container to keep them soft—the cookies will absorb the moisture from the bread. Change the bread every couple of days if they last that long. In my house, they’re usually gone within 48 hours.
Freezing Instructions: Baked cookies freeze beautifully. Place them in a single layer in a freezer-safe container or bag, separating layers with parchment paper. They’ll keep for up to 3 months. Thaw at room temperature for about 30 minutes, or pop them in a 300°F oven for 5 minutes to re-crisp the edges.
Dough Storage: The unbaked dough can be refrigerated for up to 3 days. Just scoop it into balls and store them in an airtight container. You can bake them straight from the fridge—just add 1-2 minutes to the baking time. The flavor actually improves after a day in the fridge as the brown butter flavor has time to develop.
Nutritional Information & Benefits
Let’s be real—these are cookies, not health food. But they’re made with real ingredients, and that counts for something! Here’s the approximate nutritional breakdown per cookie (based on 24 cookies using a 2-tablespoon scoop):
- Calories: ~180
- Total Fat: 10g
- Saturated Fat: 6g
- Cholesterol: 25mg
- Sodium: 95mg
- Total Carbohydrates: 23g
- Dietary Fiber: 1g
- Sugars: 15g
- Protein: 2g
Ingredient Benefits: Despite being a treat, these cookies do have some redeeming qualities. Brown butter contains butyrate, a fatty acid that supports gut health. Dark chocolate is rich in antioxidants and can improve heart health when consumed in moderation. And let’s not forget the joy factor—baking with your kids creates memories and teaches valuable skills. That’s good for the soul, if not for the waistline.
Dietary Considerations: This recipe contains dairy, eggs, and gluten. For those with allergies, check out the variations section for vegan and gluten-free options. The cookies are nut-free as written, but if you add nuts, be sure to label them clearly for guests. I always make a separate batch without nuts for school events, just to be safe.
My Personal Take: I believe in balance. We eat healthy meals most of the time, but life is too short to skip dessert. These cookies are made with real, recognizable ingredients—no preservatives, no artificial flavors, no weird chemicals. That’s a win in my book. Plus, the act of baking together as a family is a healthy habit in itself. So go ahead, enjoy a cookie (or two). You’ve earned it.
Conclusion
These Kid-Approved Brown Butter Chocolate Chip Cookies are more than just a recipe—they’re a little piece of happiness you can make in your own kitchen. No mixer, no fuss, just pure, buttery, chocolatey goodness that’ll have your whole family coming back for more. Whether you’re baking with little helpers or sneaking a midnight snack, these cookies deliver every single time.
I love this recipe because it’s proof that you don’t need fancy equipment or complicated techniques to make something truly special. Just good ingredients, a little patience, and a lot of love. The brown butter adds a depth of flavor that makes these cookies taste like they came from a bakery, but they’re made right in your own kitchen. And honestly? That’s the best kind of magic.
Now it’s your turn! I’d love to hear how these cookies turn out for you. Did your kids help? Did you try any of the variations? Did you manage to save any for the next day? Drop a comment below and let me know—I read every single one. And if you loved this recipe, please share it with a friend who needs a little cookie therapy. Happy baking!
Frequently Asked Questions
Can I use salted butter instead of unsalted?
Yes, you can! Just reduce the added salt to 1/4 teaspoon. The salted butter will add enough salt to balance the sweetness. I’ve made this swap many times when I was out of unsalted butter, and the cookies still turned out great. Just keep an eye on the salt level so they don’t end up too salty.
Why did my cookies spread too much?
This usually happens for a few reasons. Your butter might have been too hot when you added the sugars, causing them to melt. Make sure the brown butter has cooled for at least 10 minutes before mixing. Also, check that your baking soda is fresh—old baking soda loses its oomph. If your dough seems very soft, pop it in the fridge for 15-20 minutes before scooping. That should help them hold their shape better.
Can I make these cookies ahead of time?
Absolutely! The dough can be refrigerated for up to 3 days or frozen for up to 3 months. Scoop the dough into balls first, then freeze them on a baking sheet. Once solid, transfer to a freezer bag. Bake straight from frozen, adding 2-3 minutes to the baking time. This is my favorite way to have fresh cookies on demand. The flavor actually improves after the dough rests overnight in the fridge.
How do I get perfectly round cookies?
Right after the cookies come out of the oven, use a round cookie cutter or a glass that’s slightly larger than the cookies. Gently swirl it around each cookie to nudge the edges into a perfect circle. Work quickly while the cookies are still warm and soft. This trick gives you that bakery-style look every time. My kids love helping with this step—it’s like cookie surgery!
Can I use milk chocolate chips instead of semi-sweet?
Of course! Milk chocolate chips will make the cookies sweeter, which kids especially love. If you’re using milk chocolate, you might want to reduce the granulated sugar by 2 tablespoons to balance the sweetness. I often make a batch with milk chocolate for school events and a batch with semi-sweet for the grown-ups. Both are delicious, just different levels of sweetness.
Pin This Recipe!
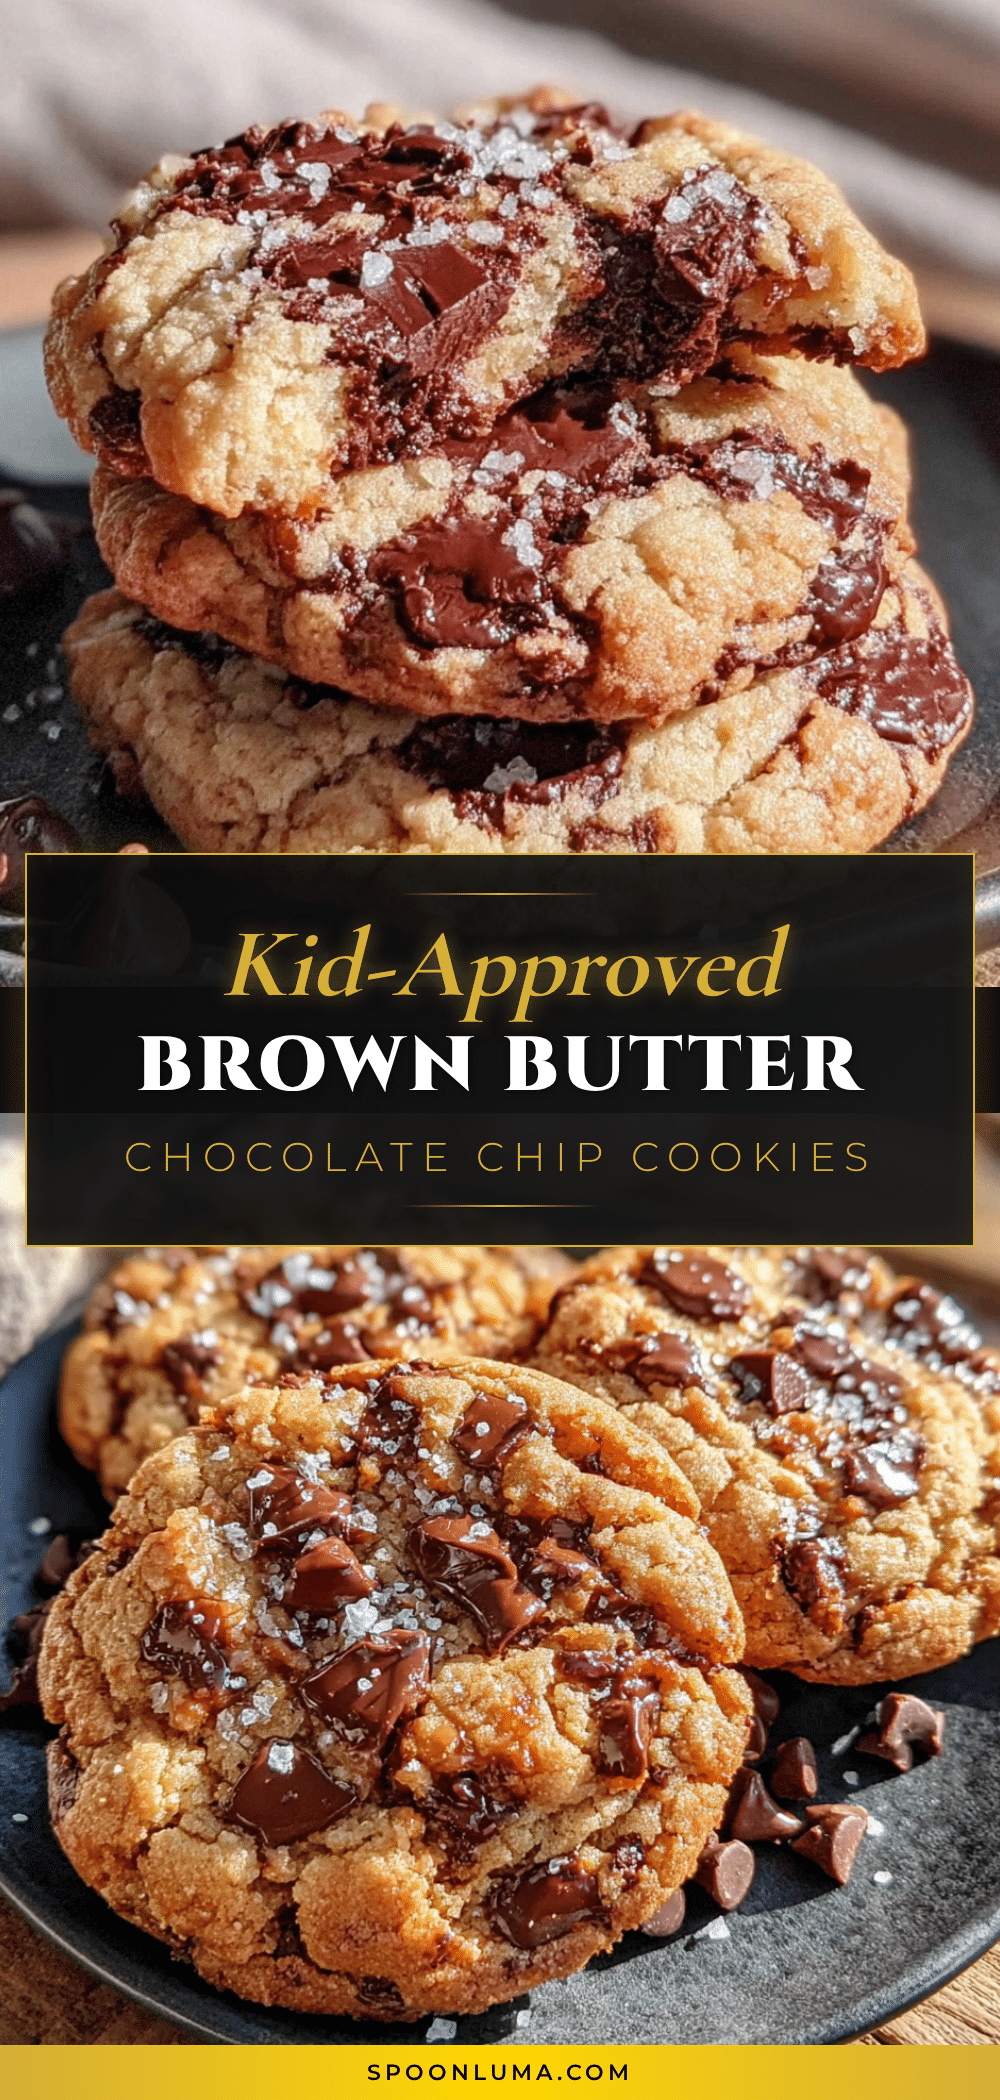
Best Kid-Approved Brown Butter Chocolate Chip Cookies (Easy No Mixer)
These no-mixer brown butter chocolate chip cookies are chewy on the inside with crispy edges, featuring a nutty, caramelized flavor from browned butter. Perfect for family baking, they come together in about 30 minutes with simple pantry ingredients.
- Prep Time: 15 minutes
- Cook Time: 11 minutes
- Total Time: 26 minutes
- Yield: 24 cookies 1x
- Category: Dessert
- Cuisine: American
Ingredients
- 1 cup (2 sticks or 226g) unsalted butter
- 1 cup (200g) light brown sugar, packed
- 1/2 cup (100g) granulated sugar
- 1 large egg, room temperature
- 2 teaspoons vanilla extract
- 2 cups (240g) all-purpose flour
- 1 teaspoon baking soda
- 1/2 teaspoon fine sea salt
- 2 cups (about 340g) semi-sweet chocolate chips
- Flaky sea salt for sprinkling (optional)
Instructions
- Brown the butter (5-7 minutes): Place butter in a medium saucepan over medium heat. Melt completely, stirring occasionally. After 3-4 minutes, foam subsides and brown specks form. When it smells nutty and looks golden with brown specks, remove from heat immediately. Pour into a heatproof bowl and let cool for 10 minutes.
- Mix the sugars and butter (2-3 minutes): Once brown butter has cooled slightly (warm but not hot), add brown sugar and granulated sugar. Whisk vigorously until combined and mixture becomes glossy and thick, about 2 minutes.
- Add the egg and vanilla (1 minute): Crack egg into butter-sugar mixture and add vanilla extract. Whisk until fully incorporated, smooth, and shiny. Mixture should fall in ribbons from whisk.
- Combine the dry ingredients (30 seconds): In a separate small bowl, whisk together flour, baking soda, and salt.
- Add dry ingredients to wet (1-2 minutes): Pour flour mixture into butter mixture. Fold with wooden spoon or silicone spatula just until no streaks of flour remain. Do not overmix.
- Fold in chocolate chips (30 seconds): Add chocolate chips and fold until evenly distributed.
- Preheat oven to 350°F (175°C). Line two baking sheets with parchment paper.
- Scoop cookies (5 minutes): Using a cookie scoop or two spoons, portion dough into balls about 2 tablespoons each (about 30g). Place on prepared baking sheets, spacing 2 inches apart.
- Bake (10-12 minutes): Place one baking sheet on center rack. Bake 10-12 minutes, rotating pan halfway through. Cookies are done when edges are golden brown and centers look slightly underbaked and puffy.
- Cool and enjoy: Let cookies cool on baking sheet for 5 minutes, then transfer to a cooling rack. Sprinkle with flaky sea salt while warm if desired.
Notes
If dough seems too soft, refrigerate for 15 minutes before scooping. For thicker cookies, chill scooped dough for 30 minutes before baking. Dough can be frozen for up to 3 months; bake from frozen adding 2-3 minutes. Baked cookies store in an airtight container at room temperature for up to 5 days.
Nutrition
- Serving Size: 1 cookie
- Calories: 180
- Sugar: 15
- Sodium: 95
- Fat: 10
- Saturated Fat: 6
- Carbohydrates: 23
- Fiber: 1
- Protein: 2
Keywords: brown butter chocolate chip cookies, no mixer cookies, easy chocolate chip cookies, kid-approved cookies, bakery-style cookies