I ruined three batches of these muffins before I got them right. Not a little overdone—I mean full-on hockey pucks with burnt chocolate chips staring up at me like little charcoal eyes. The first batch came out dense enough to use as doorstops. The second one? I forgot the sugar. Let’s not talk about the third, where I confused baking soda with baking powder and created some kind of volcanic muffin situation in my oven.
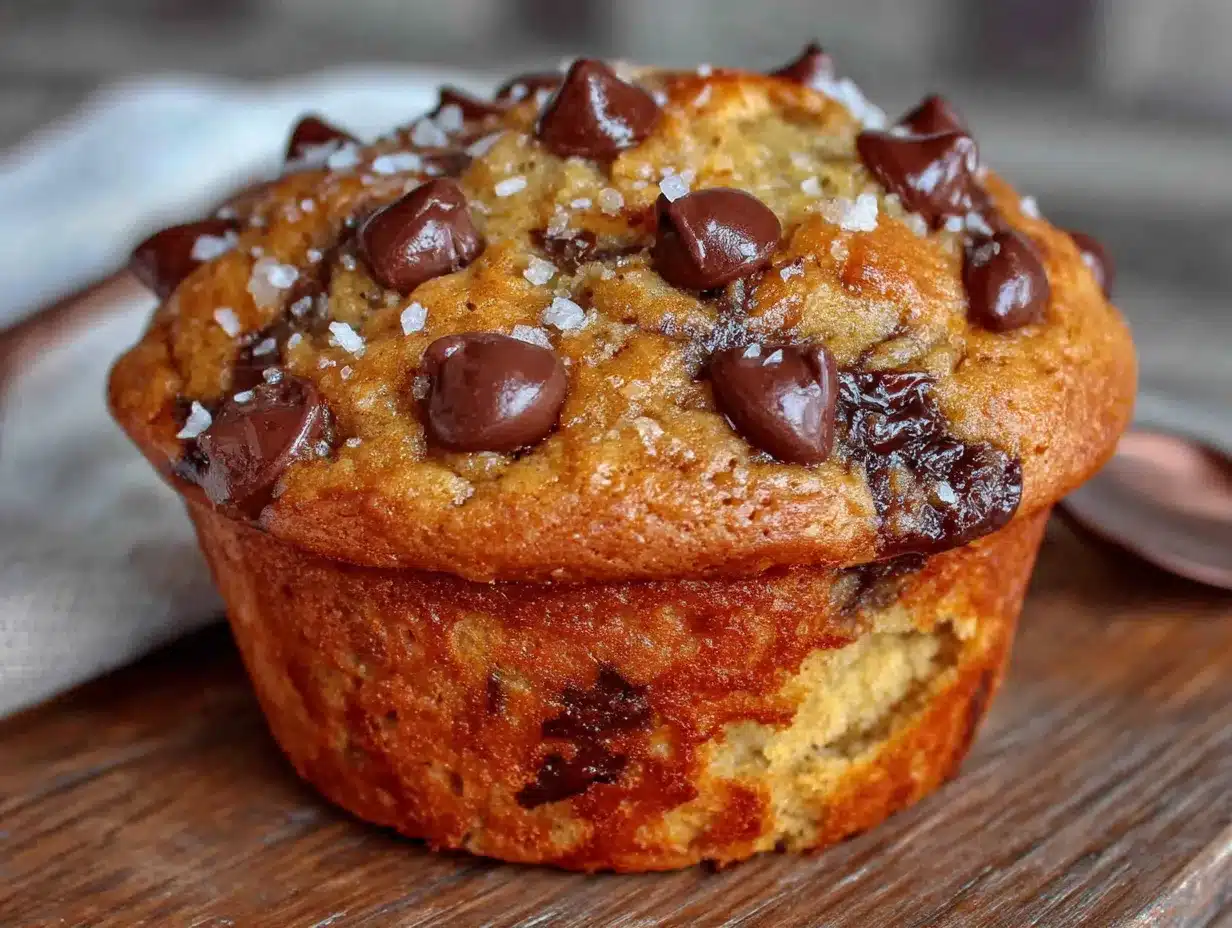
Here’s the thing though—I kept coming back to this recipe because I was chasing something specific. You know those muffins you get from a real bakery? The ones with the domed tops that crack just slightly, the ones where the pumpkin flavor doesn’t get lost under all that spice, and the chocolate chips are actually melted into every single bite? That’s what I wanted. Not a dry, crumbly breakfast puck. Not a muffin that falls apart the second you look at it. A real bakery-style muffin that tastes like someone who knows what they’re doing actually made it.
After those three disasters, I finally figured out what I was doing wrong. I was treating pumpkin muffins like they were regular muffins—and they’re not. Pumpkin brings moisture, sure, but it also brings density. You have to work with that, not against it. The trick ended up being something I stumbled on by accident: the way you handle the chocolate chips matters way more than you’d think, and the oven temperature needs to start higher than feels comfortable.
These bakery-style chocolate chip pumpkin muffins are what came out of all that trial and error. They’re the ones I finally stopped messing up. And honestly? They’re better than anything I’ve bought from an actual bakery. The tops get that perfect dome, the inside stays tender and soft, and every single muffin has chocolate in every single bite. Not just on top—all the way through.
Why You’ll Love This Recipe
These aren’t your average pumpkin muffins. I tested this recipe seven times before I felt confident sharing it, and each version taught me something new about what makes a muffin truly bakery-style.
- Quick & Easy: From start to finish, these come together in about 35 minutes. The batter takes maybe 10 minutes to mix by hand—no stand mixer required.
- Simple Ingredients: You probably already have most of this in your pantry. Canned pumpkin, flour, sugar, eggs, oil, and chocolate chips. Nothing weird or hard to find.
- Perfect for Fall Mornings: These muffins were made for those crisp autumn days when you want something warm and comforting with your coffee. They also freeze beautifully, so you can make a batch and have bakery-style muffins all week.
- Crowd-Pleaser: I brought these to a neighborhood brunch and three different people asked for the recipe before I’d even finished my coffee. Kids love them. Adults love them. Even my friend who “doesn’t really like pumpkin stuff” ate two.
- Unbelievably Delicious: The texture is what gets people. The outside has that slight crust, the inside is tender and soft, and the chocolate chips melt into little pockets of richness throughout. It’s the kind of muffin that makes you close your eyes after the first bite.
What makes these different from every other pumpkin muffin recipe out there is the technique. I use a higher initial oven temperature to create that domed top, and I fold the chocolate chips in at just the right moment so they distribute evenly without sinking to the bottom. It’s not complicated—it’s just the difference between a good muffin and a great one.
What Ingredients You Will Need
This recipe uses simple, wholesome ingredients that work together to create that bakery-style texture and flavor. Most of these are pantry staples, which makes these muffins perfect for spontaneous baking sessions.
For the Muffins:
- All-purpose flour — 2 cups (250g). Spoon and level it into your measuring cup. Don’t scoop directly from the bag or you’ll end up with dense muffins.
- Granulated sugar — 1 cup (200g). Regular white sugar works perfectly here. It helps create that golden crust on top.
- Light brown sugar — 1/2 cup (100g), packed. This adds moisture and a subtle molasses flavor that pairs beautifully with pumpkin. I use Domino brand personally.
- Baking soda — 1 teaspoon. Make sure yours is fresh. Test it by dropping a little into vinegar—if it fizzes vigorously, you’re good.
- Baking powder — 1 teaspoon. Again, check the expiration date. Old baking powder won’t give you that domed top.
- Salt — 1/2 teaspoon. Fine sea salt works best. It balances the sweetness and enhances the pumpkin flavor.
- Ground cinnamon — 2 teaspoons. This is non-negotiable for that warm pumpkin spice flavor.
- Ground nutmeg — 1/2 teaspoon. Freshly grated if you have it, but pre-ground works fine.
- Ground ginger — 1/2 teaspoon. Adds a little warmth without being overpowering.
- Ground cloves — 1/4 teaspoon. Just a pinch—cloves are strong and can easily take over.
- Pumpkin purée — 1 can (15 ounces). Make sure you’re buying 100% pumpkin purée, not pumpkin pie filling. Libby’s is my go-to brand. The filling has added sugar and spices that will throw off the recipe.
- Large eggs — 2, at room temperature. Cold eggs can seize up the batter. Let them sit on the counter for 30 minutes before starting.
- Vegetable oil — 1/2 cup (120ml). Canola or avocado oil also work. Oil keeps these muffins moist longer than butter would.
- Vanilla extract — 2 teaspoons. Pure vanilla extract makes a difference here. The imitation stuff has an artificial aftertaste that you’ll notice in the finished muffins.
- Milk — 1/4 cup (60ml). Whole milk gives the best texture, but 2% works fine. For a dairy-free option, use oat milk or almond milk.
- Semi-sweet chocolate chips — 1 cup (175g). I prefer Ghirardelli or Guittard. The quality of the chocolate matters because it’s such a prominent flavor. You can also use dark chocolate chips if you prefer less sweetness.
Equipment Needed
You don’t need fancy equipment for these muffins. Here’s what I use:
- 12-cup muffin tin — Standard size. I’ve had good results with both non-stick and dark metal pans. Dark metal tends to brown the bottoms faster, so keep an eye on them.
- Paper muffin liners — I prefer the parchment-style liners because they peel off cleanly. The standard white ones work too, but they sometimes stick.
- Large mixing bowl — For the dry ingredients.
- Medium mixing bowl — For the wet ingredients.
- Whisk — For combining the dry ingredients evenly.
- Rubber spatula — For folding everything together without overmixing.
- Cookie scoop or ice cream scoop — This is my secret weapon for evenly sized muffins. A 3-tablespoon scoop works perfectly.
- Cooling rack — Essential for getting air circulation around the muffins so they don’t get soggy on the bottom.
If you don’t have a cookie scoop, you can use two spoons to portion the batter. It’s not as neat, but it works. And if you don’t have a cooling rack, you can let the muffins cool in the pan for 5 minutes, then carefully transfer them to a plate. Just flip them on their sides so air can circulate.
Preparation Method
Let me walk you through this step by step. I’ve made these muffins so many times that I’ve got the rhythm down, and I’ll share every little trick I’ve learned along the way.
Step 1: Preheat and Prep
Preheat your oven to 425°F (220°C). Line your muffin tin with paper liners. This higher initial temperature is what creates that beautiful domed top. Don’t skip this—it makes a real difference.
Step 2: Mix the Dry Ingredients
In a large bowl, whisk together 2 cups all-purpose flour, 1 cup granulated sugar, 1/2 cup packed light brown sugar, 1 teaspoon baking soda, 1 teaspoon baking powder, 1/2 teaspoon salt, 2 teaspoons cinnamon, 1/2 teaspoon nutmeg, 1/2 teaspoon ginger, and 1/4 teaspoon cloves. Whisk until everything is evenly distributed. This takes about 30 seconds. Make a well in the center of the dry ingredients.
Step 3: Mix the Wet Ingredients
In a medium bowl, whisk together the entire can of pumpkin purée, 2 room-temperature eggs, 1/2 cup vegetable oil, 2 teaspoons vanilla extract, and 1/4 cup milk. Whisk until the mixture is smooth and fully combined. It should be a uniform orange color with no streaks of egg white.
Step 4: Combine Wet and Dry
Pour the wet ingredients into the well you made in the dry ingredients. Use your rubber spatula to fold everything together. Here’s the important part: mix only until you can’t see any more dry flour. A few lumps are totally fine. Overmixing develops the gluten and makes the muffins tough. You want about 10 to 12 gentle folds.
Step 5: Add the Chocolate Chips
Fold in 1 cup of chocolate chips. Reserve about 2 tablespoons to sprinkle on top later. Fold just until the chips are distributed evenly throughout the batter. If you overmix at this stage, the chips can sink to the bottom during baking.
Step 6: Fill the Muffin Cups
Using your cookie scoop or two spoons, divide the batter evenly among the 12 muffin cups. Each cup should be filled almost to the top—about 3/4 full to the rim. This is key for getting those bakery-style domed tops. If you underfill, you’ll get flat muffins. Sprinkle the reserved chocolate chips on top of each muffin.
Step 7: Bake at High Heat
Place the muffin tin in the preheated oven and bake at 425°F (220°C) for 5 minutes. This initial blast of high heat sets the tops and creates that dome. After 5 minutes, reduce the oven temperature to 350°F (175°C) without opening the door. Continue baking for another 15 to 18 minutes.
Step 8: Check for Doneness
The muffins are done when a toothpick inserted into the center comes out clean or with just a few moist crumbs. The tops should be golden brown and spring back when you gently press them. If the toothpick has wet batter on it, give them another 2 to 3 minutes.
Step 9: Cool Properly
Let the muffins cool in the pan for 5 minutes. This allows them to set up so they don’t fall apart when you remove them. Then transfer them to a wire cooling rack to cool completely. If you leave them in the pan too long, the bottoms can get soggy from the steam.
Cooking Tips & Techniques
I’ve made every mistake in the book with these muffins, so let me save you some trouble.
The Temperature Trick
That initial 425°F bake for 5 minutes is non-negotiable. I tried baking these at a steady 350°F once, and the tops came out flat and pale. The high heat creates steam that pushes the batter up, giving you that gorgeous domed top. Just remember to turn the temperature down after 5 minutes, or the bottoms will burn before the centers are done.
Don’t Overmix
This is the most common mistake I see. When you combine the wet and dry ingredients, mix just until the flour disappears. A few lumps are fine. Overmixing develops gluten, which makes the muffins tough and dense instead of tender and light. I learned this the hard way with that first batch of hockey pucks.
Room Temperature Ingredients Matter
Cold eggs can cause the batter to seize up, and cold milk can prevent the baking soda and baking powder from activating properly. Let your eggs and milk sit on the counter for 30 minutes before you start. It makes a noticeable difference in the texture.
The Chocolate Chip Distribution
Here’s a trick I figured out after too many muffins with all the chips at the bottom: toss the chocolate chips in about a tablespoon of flour before folding them into the batter. The flour coating helps suspend the chips throughout the muffin instead of letting them sink. It’s a small step that makes a big difference.
Check Your Oven Temperature
Ovens lie. I’m serious. My old oven ran 25 degrees hot, and I ruined more baked goods than I care to admit before I bought an oven thermometer. They’re cheap and they’ll save your muffins. Place it in the center of the oven and adjust your temperature accordingly.
Variations & Adaptations
These muffins are pretty perfect as written, but I’ve played around with enough variations to know what works and what doesn’t.
Gluten-Free Version
Substitute the all-purpose flour with a 1:1 gluten-free baking flour blend. I’ve had good results with Bob’s Red Mill. The texture will be slightly more delicate, but the flavor is still there. Add an extra tablespoon of milk to compensate for the drier gluten-free flour.
Dairy-Free Version
Use oat milk or almond milk instead of regular milk, and make sure your chocolate chips are dairy-free. Enjoy Life makes great dairy-free semi-sweet chips. The texture comes out almost identical to the original.
Extra Pumpkin Spice
If you’re a pumpkin spice fanatic like my sister, add an extra teaspoon of cinnamon and a pinch more nutmeg. You can also swap the regular chocolate chips for white chocolate chips, which pairs beautifully with the warm spices. I did this for a fall baking swap and they disappeared in minutes.
Nutty Addition
Fold in 1/2 cup of chopped pecans or walnuts along with the chocolate chips. Toast them first in a dry pan over medium heat for about 3 minutes until they’re fragrant. It adds a lovely crunch and depth of flavor.
Mini Muffin Version
Use a mini muffin tin and bake at 350°F (175°C) for 10 to 12 minutes. Skip the high-temperature trick for minis—they bake too quickly and the tops can burn. You’ll get about 36 mini muffins from this recipe.
Serving & Storage Suggestions
These muffins are best served warm, about 10 minutes after they come out of the oven. The chocolate chips are still melted and the texture is at its peak. If you’re serving them later, pop them in the microwave for 10 to 15 seconds to bring back that fresh-from-the-oven feel.
For a breakfast spread, I love serving these alongside a cozy brown butter banana zucchini bread for variety. They also pair beautifully with a hot cup of coffee or a cold glass of milk.
Storage Instructions
Store leftover muffins in an airtight container at room temperature for up to 3 days. Place a paper towel at the bottom of the container and another on top to absorb excess moisture. This keeps the tops from getting soggy.
Freezer Instructions
These muffins freeze beautifully. Let them cool completely, then place them in a single layer in a freezer-safe bag or container. They’ll keep for up to 3 months. To thaw, leave them on the counter for about an hour, or microwave for 20 to 30 seconds.
Reheating Tips
For best results, reheat in a 350°F oven for 5 to 7 minutes. This brings back the crispy top and warm, melty chocolate chips. The microwave works in a pinch, but the tops won’t be as crisp.
The flavors actually develop overnight. I honestly prefer these on day two—the pumpkin and spice flavors meld together and the texture evens out. If you can resist eating them all on day one, you’re in for a treat.
Nutritional Information & Benefits
Here’s the estimated nutrition for one muffin (based on 12 servings):
| Nutrient | Amount |
|---|---|
| Calories | 310 |
| Total Fat | 14g |
| Saturated Fat | 4g |
| Cholesterol | 35mg |
| Sodium | 280mg |
| Total Carbohydrates | 44g |
| Dietary Fiber | 2g |
| Sugars | 26g |
| Protein | 4g |
These muffins aren’t health food, but they do have some redeeming qualities. Pumpkin is rich in vitamin A and fiber, and it adds moisture without requiring as much oil as other baked goods. The chocolate chips provide a little antioxidants, if we’re being generous.
If you’re looking for a lighter option, try swapping half the oil with unsweetened applesauce. The texture will be slightly less tender, but it cuts the fat significantly. For a healthier breakfast option, these pair nicely with a moist healthy lemon blueberry zucchini bread for a balanced fall spread.
These muffins contain gluten, dairy, and eggs. They are not suitable for vegans or those with celiac disease without the substitutions mentioned above.
Frequently Asked Questions
Can I use fresh pumpkin instead of canned?
You can, but I don’t recommend it for this recipe. Fresh pumpkin purée has more water content than canned, which can make the muffins dense and gummy. If you really want to use fresh, cook and drain the pumpkin overnight in a cheesecloth to remove excess moisture.
Why did my muffins sink in the middle?
This usually happens for three reasons: the oven temperature was too low, you opened the oven door too early, or the batter was overmixed. Make sure your oven is properly preheated and resist the urge to peek until the 15-minute mark.
Can I reduce the sugar?
You can reduce the granulated sugar to 3/4 cup, but don’t go lower than that. Sugar does more than sweeten—it affects the texture, moisture, and browning. Cutting it too much will result in flat, pale muffins that dry out quickly.
How do I get even bigger muffin tops?
For extra-large tops, let the batter rest for 15 minutes before baking. This allows the starches to absorb more moisture, which creates a taller rise. You can also fill the muffin cups all the way to the top instead of 3/4 full.
Can I make this into a loaf instead of muffins?
Absolutely. Pour the batter into a greased 9×5-inch loaf pan and bake at 350°F (175°C) for 50 to 60 minutes. Skip the high-temperature trick for loaves. Check for doneness with a toothpick around 50 minutes.
Conclusion
These bakery-style chocolate chip pumpkin muffins are the result of more failed batches than I’d like to admit, but every single mistake taught me something. The high heat trick. The flour-coated chocolate chips. The gentle folding. These aren’t complicated techniques, but they’re the difference between a muffin that’s just okay and one that makes people ask for the recipe.
I love these muffins because they capture everything I want in fall baking. They’re warm and spiced and comforting, but they also have that little bit of indulgence from the chocolate chips. They feel special without being fussy. They’re the kind of thing you can whip up on a Sunday morning and feel like you’ve accomplished something good.
If you’re looking for another cozy fall treat, try my healthy zucchini bread with Greek yogurt for a lighter option that still hits that comfort food spot.
I’d love to hear how these turn out for you. Leave a comment below and let me know if you tried any variations, or tag me in your photos if you share them online. Happy baking, friends.
Pin This Recipe!
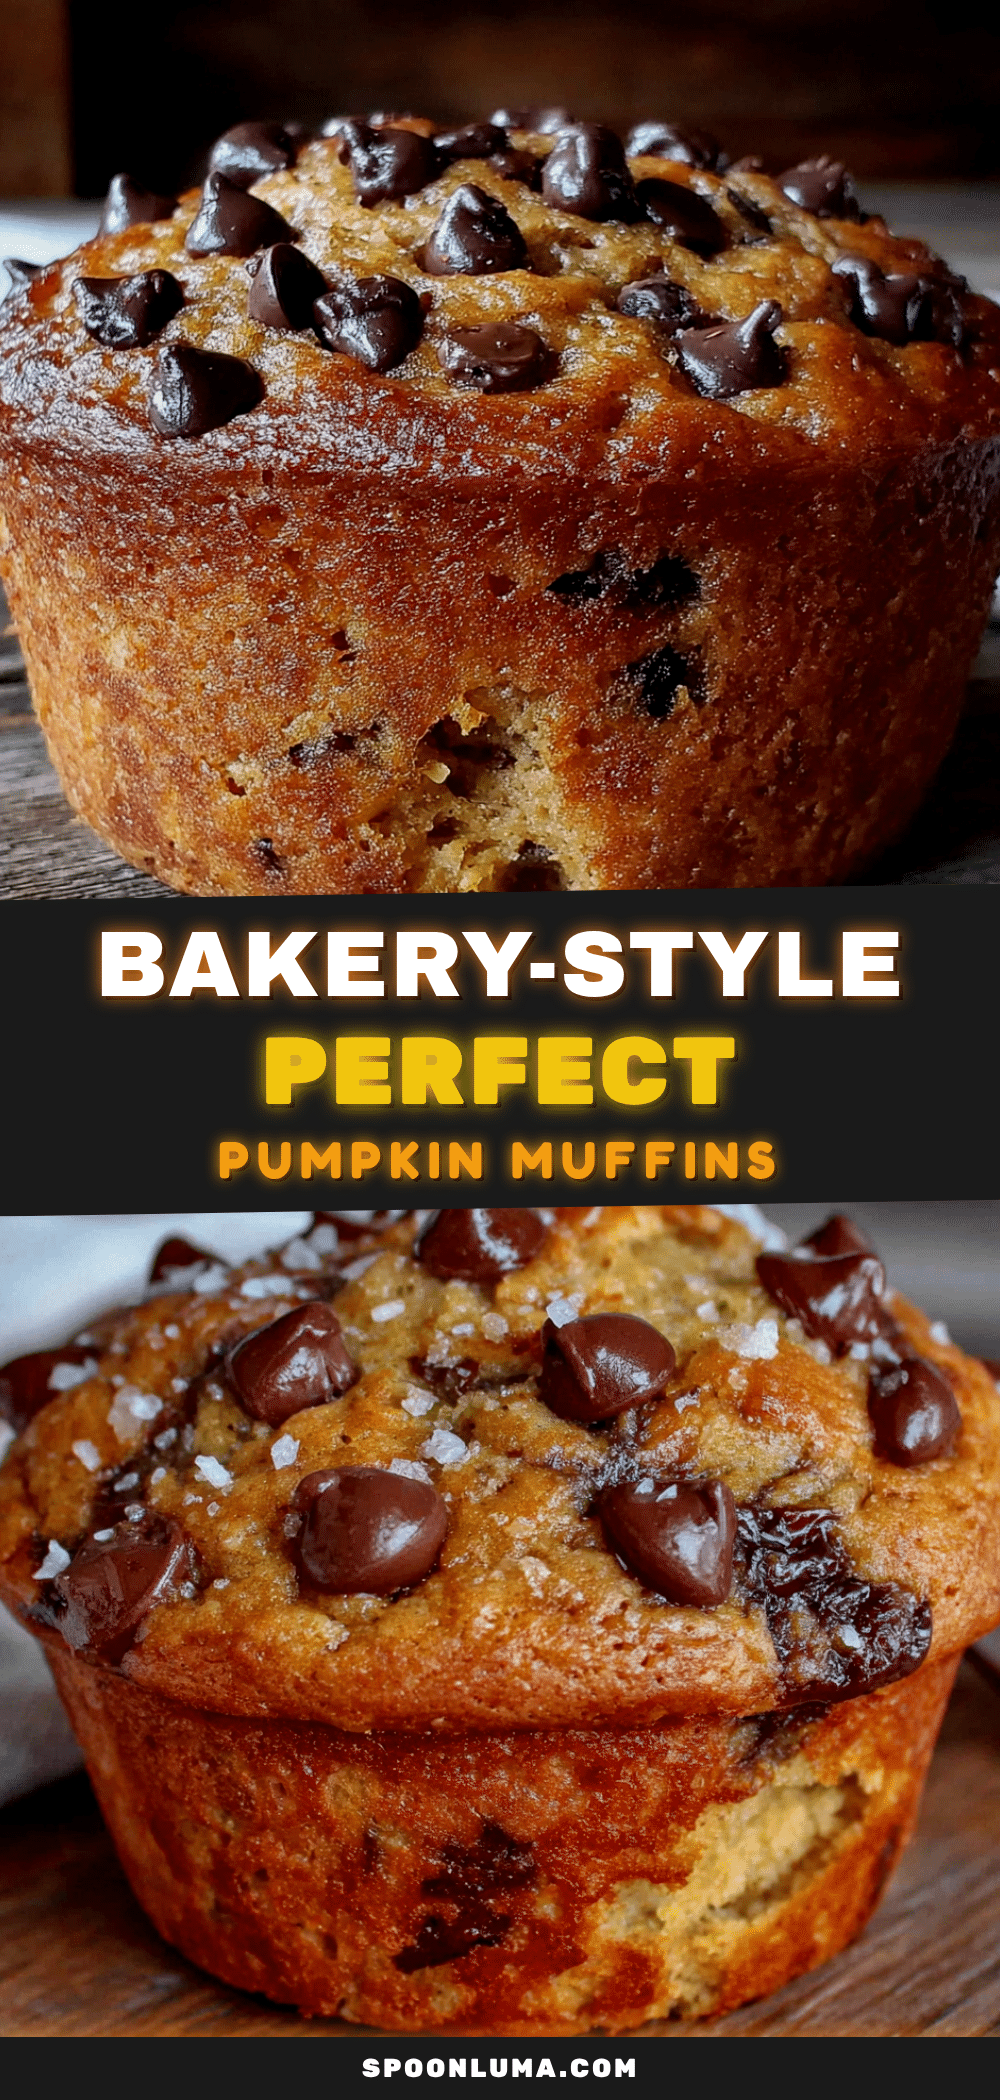
Best Bakery-Style Chocolate Chip Pumpkin Muffins Recipe
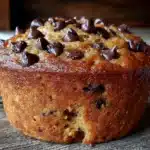
These bakery-style chocolate chip pumpkin muffins have perfectly domed tops, tender interiors, and melted chocolate in every bite. Made with simple ingredients and a clever high-heat trick, they’re quick, easy, and perfect for fall mornings.
- Prep Time: 10 minutes
- Cook Time: 20 minutes
- Total Time: 35 minutes
- Yield: 12 servings 1x
- Category: Breakfast
- Cuisine: American
Ingredients
- 2 cups (250g) all-purpose flour
- 1 cup (200g) granulated sugar
- 1/2 cup (100g) packed light brown sugar
- 1 teaspoon baking soda
- 1 teaspoon baking powder
- 1/2 teaspoon fine sea salt
- 2 teaspoons ground cinnamon
- 1/2 teaspoon ground nutmeg
- 1/2 teaspoon ground ginger
- 1/4 teaspoon ground cloves
- 1 can (15 ounces) pumpkin purée (100% pumpkin, not pie filling)
- 2 large eggs, at room temperature
- 1/2 cup (120ml) vegetable oil (canola or avocado oil also work)
- 2 teaspoons pure vanilla extract
- 1/4 cup (60ml) whole milk (or 2%, oat milk, or almond milk for dairy-free)
- 1 cup (175g) semi-sweet chocolate chips (plus 2 tablespoons for topping)
Instructions
- Preheat your oven to 425°F (220°C). Line a 12-cup muffin tin with paper liners.
- In a large bowl, whisk together 2 cups all-purpose flour, 1 cup granulated sugar, 1/2 cup packed light brown sugar, 1 teaspoon baking soda, 1 teaspoon baking powder, 1/2 teaspoon salt, 2 teaspoons cinnamon, 1/2 teaspoon nutmeg, 1/2 teaspoon ginger, and 1/4 teaspoon cloves until evenly distributed. Make a well in the center.
- In a medium bowl, whisk together the pumpkin purée, 2 room-temperature eggs, 1/2 cup vegetable oil, 2 teaspoons vanilla extract, and 1/4 cup milk until smooth and fully combined.
- Pour the wet ingredients into the well of the dry ingredients. Use a rubber spatula to fold together gently, mixing only until no dry flour remains (about 10 to 12 folds). A few lumps are fine—do not overmix.
- Fold in 1 cup of chocolate chips, reserving about 2 tablespoons for topping. Fold just until evenly distributed. For best results, toss the chips in 1 tablespoon of flour first to prevent sinking.
- Divide the batter evenly among the 12 muffin cups, filling each almost to the top (about 3/4 full). Sprinkle the reserved chocolate chips on top.
- Bake at 425°F (220°C) for 5 minutes. Without opening the oven door, reduce the temperature to 350°F (175°C) and continue baking for 15 to 18 minutes, until a toothpick inserted into the center comes out clean or with a few moist crumbs.
- Let the muffins cool in the pan for 5 minutes, then transfer to a wire cooling rack to cool completely.
Notes
For best results, use room temperature eggs and milk. Toss chocolate chips in a tablespoon of flour to prevent sinking. The initial 425°F bake for 5 minutes is key for domed tops. Do not overmix the batter. Muffins can be stored in an airtight container at room temperature for up to 3 days or frozen for up to 3 months. Reheat in a 350°F oven for 5-7 minutes for best texture.
Nutrition
- Serving Size: 1 muffin
- Calories: 310
- Sugar: 26
- Sodium: 280
- Fat: 14
- Saturated Fat: 4
- Carbohydrates: 44
- Fiber: 2
- Protein: 4
Keywords: pumpkin muffins, chocolate chip pumpkin muffins, bakery-style muffins, fall muffins, easy pumpkin muffins, pumpkin chocolate chip muffins