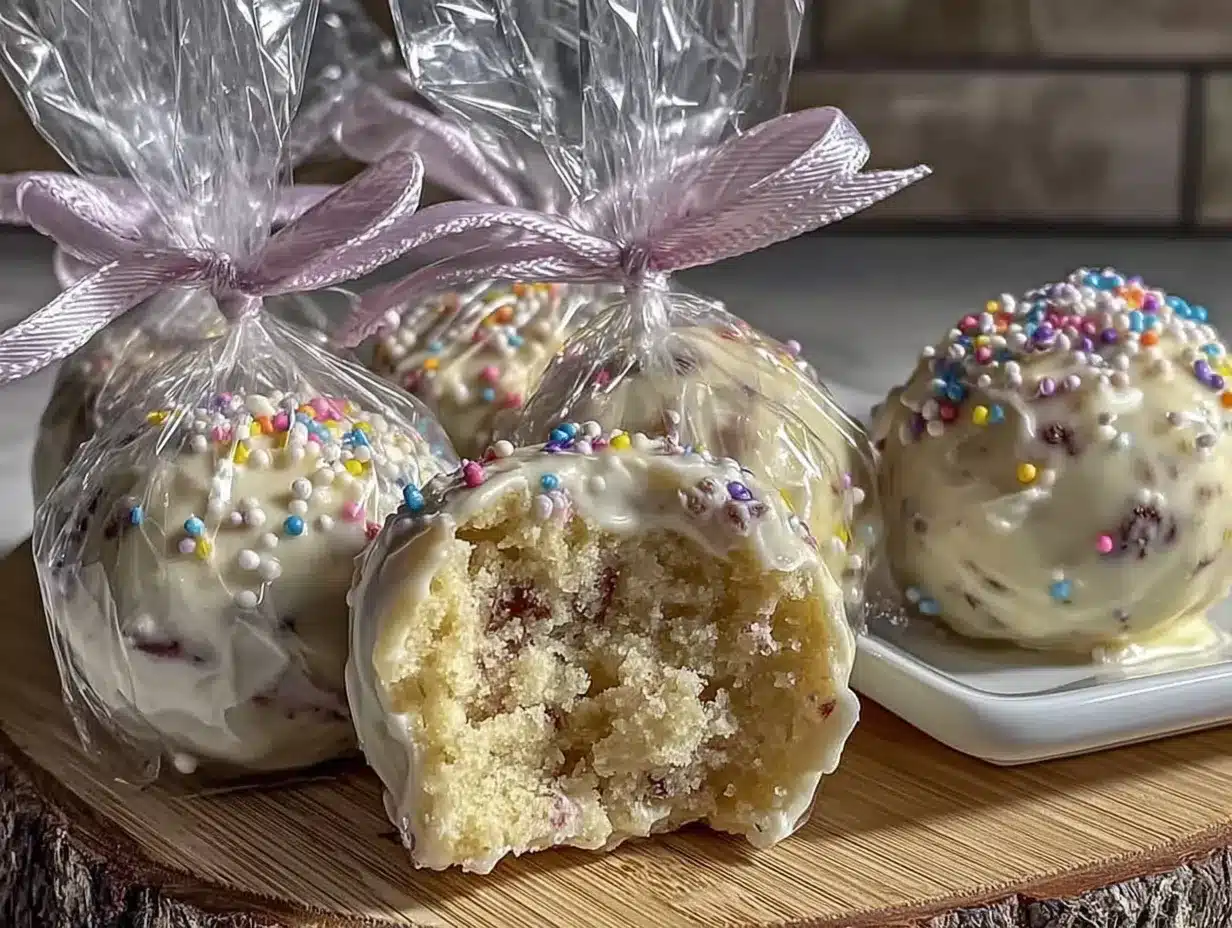
The last sprinkle didn’t even hit the tray before my niece snatched one off the cooling rack. “Auntie, these are better than the bakery ones,” she said, mouth already full. I wasn’t sure whether to be flattered or offended for the bakery. But honestly? She was right. These funfetti cake pops had that perfect crunch on the outside and a soft, buttery inside that didn’t crumble apart when you bit into them. The best part? I hadn’t spent hours fussing with royal icing or expensive molds.
I stumbled onto this method completely by accident. I was trying to use up leftover birthday cake from a birthday cake I’d made the day before, and I didn’t have the patience for the traditional cake-pop route. You know the one—where you crumble the cake, mix it with frosting, roll it into balls, and then pray they don’t fall off the stick. I’ve had that disaster happen more times than I’d like to admit. So I tried something different. I baked the cake specifically for pops, used a binding trick I’d learned from making mini cheesecakes, and crossed my fingers.
What came out of that experiment was a recipe that has since become my go-to for every party, potluck, and “I-need-a-dessert-that-looks-impressive-but-took-no-effort” situation. These aren’t just cake pops. They’re the kind of dessert that makes people do that little happy dance in their seat. And isn’t that what we’re all really after?
Why You’ll Love This Recipe
Let me tell you why these funfetti cake pops are different. I’ve tested this recipe at least a dozen times—through humid summer days, dry winter afternoons, and even at high altitude when I visited my sister in Denver. It works every single time.
- No Special Skills Required : If you can bake a boxed cake mix, you can make these. There’s no piping, no complicated dipping technique, and no stress.
- Perfect for Parties : These are the ultimate crowd-pleaser. Kids love the sprinkles, adults love the nostalgia, and everyone loves that they’re bite-sized. I’ve brought them to BBQ pulled pork slider parties and watched them disappear faster than the main course.
- Make-Ahead Friendly : You can prep these days in advance. The cake balls freeze beautifully, and the finished pops stay fresh for up to a week in the fridge. That means less stress on party day.
- Endlessly Customizable : I’ll show you how to switch up the colors, flavors, and decorations so these work for any occasion—birthdays, holidays, baby showers, you name it.
- No Crumbling : The biggest complaint I hear about cake pops is that they fall apart. My binding technique—using a specific ratio of frosting to cake—creates a sturdy ball that holds its shape even after dipping.
The first time I made these for a friend’s birthday, she texted me the next day saying her coworkers had asked for the recipe. That’s when I knew I’d cracked the code. These funfetti cake pops aren’t just easy—they’re the kind of dessert that makes you look like a rockstar without any of the effort.
What Ingredients You Will Need
This recipe uses simple ingredients you can find at any grocery store. No hunting down specialty baking supplies or expensive extracts.
For the Cake Base
- 1 box white cake mix (I prefer Duncan Hines or Betty Crocker—they yield the softest crumb)
- 3 large eggs (room temperature for best results)
- 1/2 cup vegetable oil (canola or avocado oil works too)
- 1 cup water (or milk for a richer cake)
- 1/3 cup rainbow sprinkles (jimmies, not nonpareils—they bleed less)
For the Binding & Coating
- 1/2 cup cream cheese frosting (store-bought is fine, but homemade gives better texture)
- 16 oz candy melts (white or vanilla flavor—I use Wilton brand for consistent melting)
- 2 tablespoons coconut oil or shortening (this thins the coating so it’s easier to dip)
- Extra sprinkles for decoration
Ingredient Tips from My Kitchen
Let’s talk about sprinkles for a second. I learned the hard way that not all sprinkles are created equal. Nonpareils—those tiny round balls—bleed their color into the cake batter and turn everything a muddy gray. Stick with jimmies, the long cylinder-shaped ones. They hold their color and give you those beautiful rainbow flecks.
For the candy melts, I’ve tried a dozen brands and always go back to Wilton. They melt smoothly, don’t seize up easily, and have a nice vanilla flavor. If you’re dairy-free, there are vegan candy melts available, but check the label—some contain milk solids.
The cream cheese frosting is my secret weapon. Traditional recipes use buttercream, but cream cheese frosting has a tang that balances the sweetness of the cake and candy coating. It also makes the cake balls easier to roll—they’re less sticky than with buttercream. If you’re not a cream cheese fan, vanilla buttercream works fine, just use a little less since it’s sweeter.
Equipment Needed
You don’t need a lot of fancy tools for these funfetti cake pops, but a few things make the process much smoother.
- 9×13 baking pan or two 8-inch round pans
- Large mixing bowls
- Electric hand mixer or stand mixer (a whisk works too, but your arm will get tired)
- Cookie scoop (a 1-tablespoon scoop is perfect for uniform balls)
- Baking sheet lined with parchment paper
- Lollipop sticks (I get mine at Michaels or Amazon—they’re cheap)
- Styrofoam block or floral foam for drying the pops upright
- Microwave-safe bowl for melting candy
- Tall glass or jar (for holding pops while they set)
If you don’t have a cookie scoop, just use your hands—make sure they’re slightly damp so the mixture doesn’t stick. And if you don’t have a Styrofoam block, you can poke the sticks into a cardboard box or even a grapefruit. Yes, I’ve done that. It works.
Preparation Method
This is where the magic happens. Follow these steps carefully, and you’ll have perfect funfetti cake pops every time.
Step 1: Bake the Cake
Preheat your oven to 350°F (175°C). Grease your 9×13 pan lightly. In a large bowl, combine the cake mix, eggs, oil, and water. Beat on medium speed for 2 minutes until smooth. Gently fold in the sprinkles with a spatula—don’t overmix or the colors will bleed. Pour the batter into the prepared pan and bake for 25-30 minutes. The cake is done when a toothpick inserted in the center comes out clean or with a few moist crumbs. Let it cool completely in the pan. This is crucial—warm cake will turn into a sticky mess.
Step 2: Crumble the Cake
Once the cake is completely cool, break it into large chunks and place them in a large bowl. Use your hands or a fork to crumble the cake into fine crumbs. You want it to look like wet sand. No big chunks should remain. This takes about 3-4 minutes if you’re using your hands. Put on a podcast or music—it’s a little tedious but worth it.
Step 3: Make the Cake Balls
Add the cream cheese frosting to the cake crumbs. Start with 1/2 cup and mix with your hands or a spatula. The mixture should hold together when squeezed—like playdough. If it’s too dry, add a tablespoon more frosting. If it’s too wet, add a little more cake crumbs. Roll the mixture into 1-inch balls and place them on a parchment-lined baking sheet. You should get about 30-35 balls. Refrigerate for at least 30 minutes. This firms them up so they don’t fall apart when you dip them.
Step 4: Melt the Coating
Place the candy melts in a microwave-safe bowl. Microwave in 30-second intervals, stirring after each, until fully melted. Add the coconut oil or shortening and stir until smooth. The mixture should be thin enough to coat a spoon but not runny. If it’s too thick, add a little more oil. If it’s too thin, let it cool for a minute.
Step 5: Dip the Pops
Remove the cake balls from the fridge. Dip the tip of a lollipop stick into the melted candy, then insert it about halfway into a cake ball. This acts as glue and prevents the pop from sliding off. Dip the entire cake ball into the melted candy, gently tapping the stick on the edge of the bowl to let excess drip off. Don’t swirl or twist—that can crack the coating. Immediately add sprinkles before the coating sets. Place the pop upright in your Styrofoam block or jar. Repeat with the remaining pops.
Step 6: Let Them Set
Let the cake pops set at room temperature for about 15-20 minutes. Don’t refrigerate them while the coating is still wet—condensation will form and make them sticky. Once set, you can store them or serve them immediately.
Cooking Tips & Techniques
I’ve made every mistake in the book so you don’t have to. Here are the lessons I learned the hard way.
Don’t overbake the cake. A dry cake makes crumbly cake balls. Bake it just until done—the toothpick should have a few moist crumbs, not be completely clean. If you accidentally overbake, add an extra tablespoon of frosting to compensate.
Chill the cake balls thoroughly. I cannot stress this enough. Warm or room-temperature cake balls will fall off the stick and create a mess in your coating. Thirty minutes in the fridge is the minimum. An hour is better.
Use the tapping method for excess coating. Instead of twirling the stick, tap it gently on the edge of the bowl. This gives you a smooth, even coating without air bubbles. If you see an air bubble, pop it with a toothpick before the coating sets.
Work in small batches. Only take out 4-5 cake balls from the fridge at a time. If they sit out too long, they warm up and become difficult to dip. Keep the rest chilled until you’re ready for them.
Fix cracks with a second dip. If your coating cracks (usually from the cake ball being too cold or the coating too hot), let the first layer set completely, then dip again. The second layer hides the cracks beautifully.
I once tried to rush the process and dipped room-temperature cake balls into hot coating. Every single one cracked. I ended up with a bowl of sad, speckled orbs and a sticky counter. Learn from my impatience.
Variations & Adaptations
These funfetti cake pops are a blank canvas. Here are some of my favorite ways to change them up.
- Chocolate Funfetti : Use a chocolate cake mix instead of white, and dip in milk chocolate candy melts. The chocolate-sprinkle combo is ridiculously good.
- Lemon Funfetti : Add the zest of one lemon to the cake batter and use lemon frosting instead of cream cheese. Dip in white candy melts and top with yellow sprinkles. Perfect for spring parties.
- Red Velvet Funfetti : Use a red velvet cake mix and cream cheese frosting. Dip in white candy melts and top with red sprinkles. These are showstoppers for Valentine’s Day or Christmas.
- Vegan Version : Use a vegan cake mix, flax eggs (1 tablespoon ground flax + 3 tablespoons water per egg), and vegan cream cheese frosting. Most candy melts are accidentally vegan, but check the label.
- Gluten-Free Version : Use a gluten-free cake mix. I’ve tested this with King Arthur’s gluten-free yellow cake mix and it works perfectly. Just make sure your sprinkles are gluten-free too—some brands use wheat starch.
My personal favorite variation is the lemon version. I made it for a baby shower last spring and people were literally asking for the recipe before they finished eating. The brightness of the lemon cuts through the sweetness in a way that feels sophisticated but still fun.
Serving & Storage Suggestions
These cake pops are best served at room temperature. If you’ve stored them in the fridge, let them sit out for 15 minutes before serving. The coating softens slightly and the cake becomes tender again.
For parties: Arrange them upright in a tall jar or vase filled with beans or rice. It looks festive and keeps them stable. You can also stick them into a foam ball covered in tissue paper for a DIY cake pop display.
Pairings: These go beautifully with coffee, hot chocolate, or a cold glass of milk. For adult parties, try them with champagne or a vanilla vodka cocktail—the sweetness of the pops balances the acidity of the drinks.
Storage: Store finished cake pops in an airtight container in the refrigerator for up to 5 days. To freeze, place them in a single layer in a freezer-safe container with parchment paper between layers. They’ll keep for up to 3 months. Thaw in the refrigerator overnight, then bring to room temperature before serving.
One thing I love about these is that the flavors actually develop over time. Day-old cake pops taste even better than fresh ones—the frosting absorbs into the cake and creates a more uniform texture. So don’t feel bad about making them ahead.
Nutritional Information & Benefits
Let’s be real—these are a treat, not a health food. But here’s the breakdown so you know what you’re working with.
Per cake pop (based on 30 pops):
- Calories: 180
- Fat: 9g
- Carbohydrates: 24g
- Sugar: 16g
- Protein: 2g
The good news? They’re portion-controlled. One cake pop is satisfying without being overwhelming. And if you use a gluten-free cake mix, they’re naturally low in FODMAPs (just check the sprinkles).
If you’re looking to lighten them up, you can use a sugar-free cake mix and sugar-free frosting. The texture won’t be quite as tender, but the flavor is still solid. I’ve also made them with whole wheat cake mix—surprisingly good, with a nutty undertone that works well with the sprinkles.
For what it’s worth, these cake pops are a great way to use up leftover cake from a naked birthday layer cake or any other celebration cake. Nothing goes to waste, and you get a second dessert out of one baking session.
Conclusion
These funfetti cake pops have become my signature party dessert. They’re the first thing people ask me to bring, and I never get tired of making them. There’s something deeply satisfying about watching someone take their first bite and seeing their eyes light up.
What I love most is how forgiving this recipe is. It doesn’t demand perfection. If your coating has a few cracks, add more sprinkles. If a pop falls off the stick, eat it and try again. The whole point is to have fun and share something delicious with the people you care about.
I’d love to hear how yours turn out. Did you try a variation? Did your kids help you roll the balls? Drop a comment below and let me know. And if you’re looking for more easy party desserts, check out my no-bake rice krispie treat stars or these red velvet whoopie pies—they’re just as fun and just as easy.
Happy baking, friends. And don’t forget the sprinkles.
Frequently Asked Questions
Why did my cake pops fall off the stick?
This usually happens when the cake balls are too warm or the coating is too thick. Make sure your cake balls are thoroughly chilled—at least 30 minutes in the fridge. Also, dip the tip of the stick in melted coating before inserting it into the ball. That acts as glue and helps everything stay together.
Can I use homemade cake instead of box mix?
Absolutely. Use your favorite vanilla cake recipe. Just make sure it’s fully cooled before crumbling. Homemade cake can be a little more delicate, so handle it gently when mixing with the frosting. You might need slightly less frosting since homemade cake is often more moist than boxed.
How do I prevent the coating from cracking?
Cracking happens when the cake ball is too cold and the coating is too hot. Let your cake balls sit at room temperature for 5 minutes after coming out of the fridge. And make sure your melted coating isn’t scorching hot—let it cool for a minute before dipping. If cracks still appear, do a second dip once the first layer sets.
Can I use chocolate chips instead of candy melts?
You can, but chocolate chips don’t melt as smoothly and can seize up. If you want to use chocolate, chop it finely and add a teaspoon of coconut oil to help it thin out. Dark chocolate works better than milk or white chocolate for dipping.
How far in advance can I make these?
You can make the cake balls up to 3 days ahead and store them in the fridge. Dip them the day before your party for best results. Finished cake pops stay fresh for up to 5 days in the fridge. You can also freeze undipped cake balls for up to 3 months—just thaw them in the fridge overnight before dipping.
Pin This Recipe!
Best Funfetti Cake Pops Easy Party Dessert

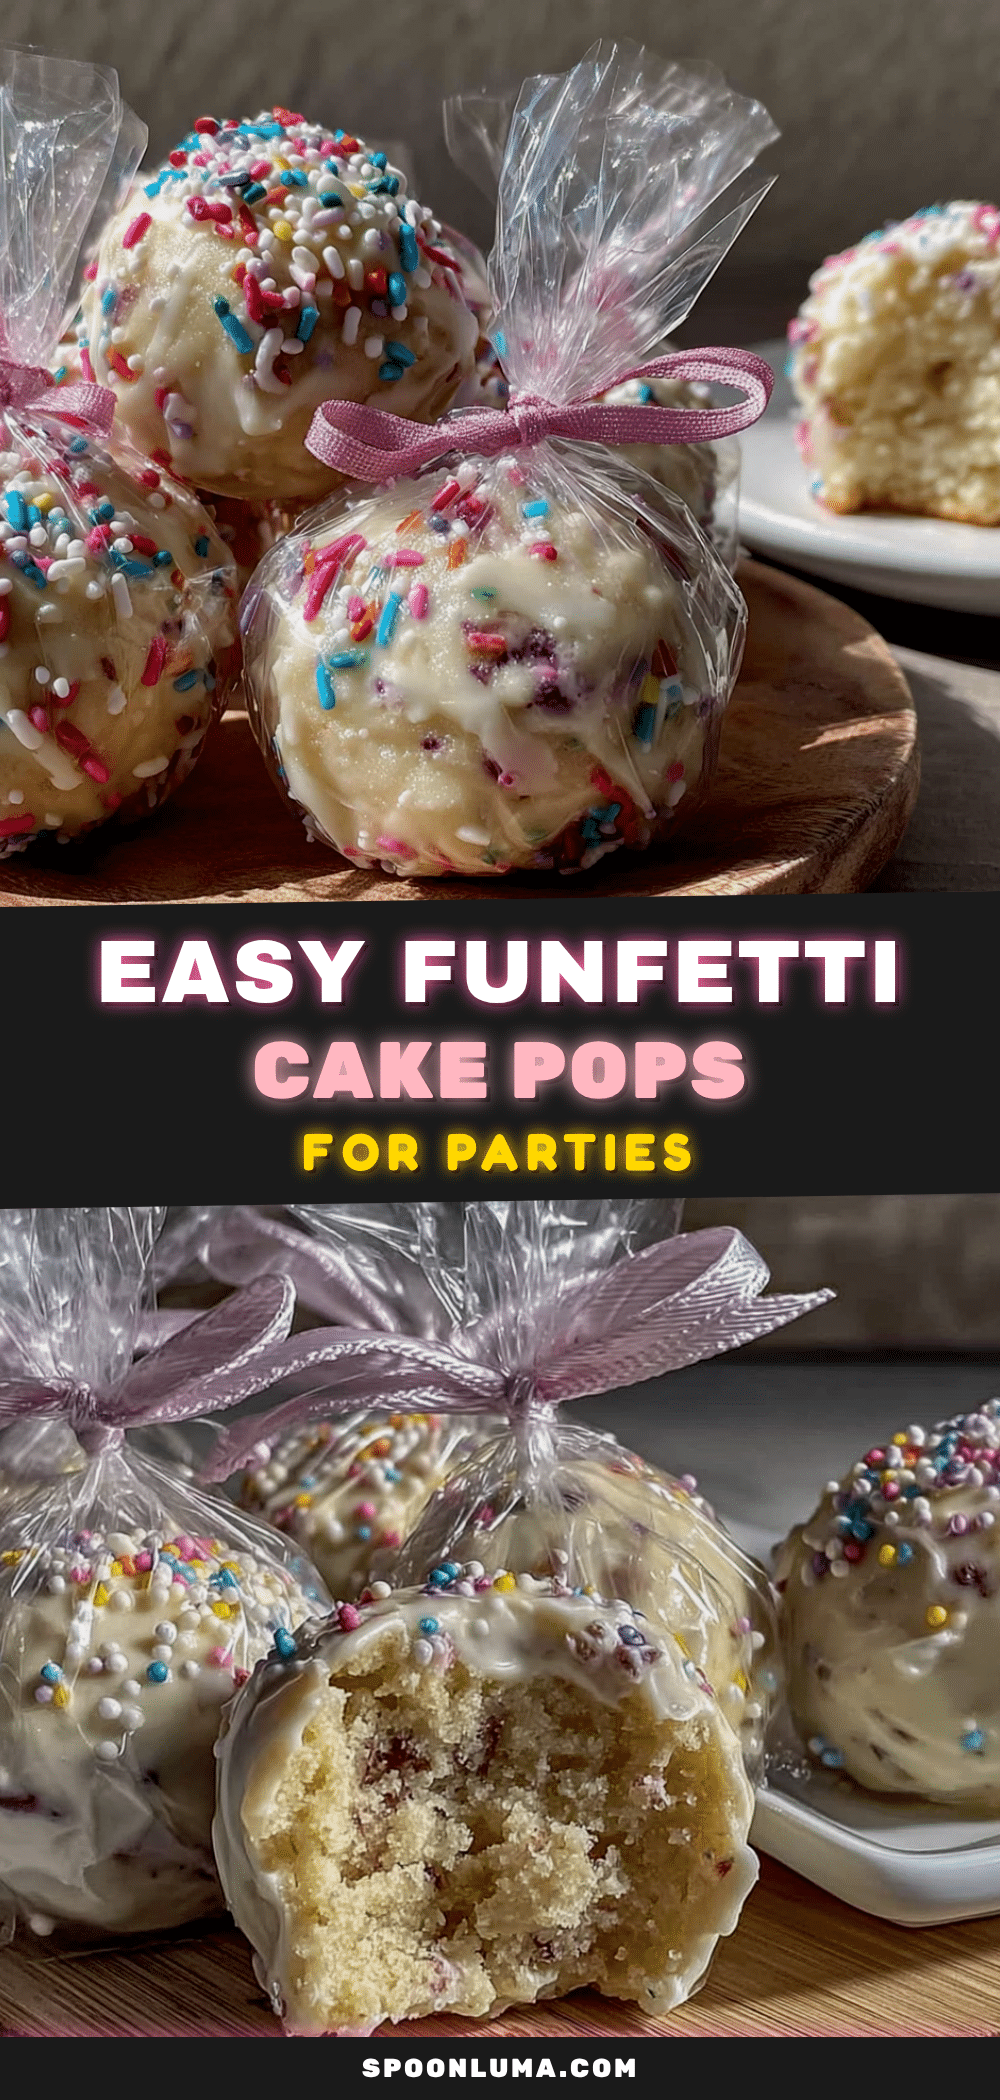
These funfetti cake pops have a perfect crunch on the outside and a soft, buttery inside that doesn’t crumble apart. They’re the ultimate crowd-pleaser for any party, potluck, or celebration, and they’re surprisingly easy to make with no special skills required.
- Prep Time: 30 minutes
- Cook Time: 25-30 minutes
- Total Time: 1 hour 15 minutes (including chilling time)
- Yield: 30-35 cake pops 1x
- Category: Dessert
- Cuisine: American
Ingredients
- 1 box white cake mix (Duncan Hines or Betty Crocker recommended)
- 3 large eggs (room temperature)
- 1/2 cup vegetable oil (canola or avocado oil works too)
- 1 cup water (or milk for a richer cake)
- 1/3 cup rainbow sprinkles (jimmies, not nonpareils)
- 1/2 cup cream cheese frosting (store-bought or homemade)
- 16 oz candy melts (white or vanilla flavor, Wilton brand recommended)
- 2 tablespoons coconut oil or shortening
- Extra sprinkles for decoration
Instructions
- Preheat your oven to 350°F (175°C). Grease a 9×13 baking pan lightly.
- In a large bowl, combine the cake mix, eggs, oil, and water. Beat on medium speed for 2 minutes until smooth. Gently fold in the sprinkles with a spatula—do not overmix.
- Pour the batter into the prepared pan and bake for 25-30 minutes, until a toothpick inserted in the center comes out clean or with a few moist crumbs. Let the cake cool completely in the pan.
- Once the cake is completely cool, break it into large chunks and place them in a large bowl. Use your hands or a fork to crumble the cake into fine crumbs, like wet sand.
- Add the cream cheese frosting to the cake crumbs. Mix with your hands or a spatula until the mixture holds together when squeezed—like playdough. If too dry, add a tablespoon more frosting; if too wet, add more cake crumbs.
- Roll the mixture into 1-inch balls and place them on a parchment-lined baking sheet. You should get about 30-35 balls. Refrigerate for at least 30 minutes to firm them up.
- Place the candy melts in a microwave-safe bowl. Microwave in 30-second intervals, stirring after each, until fully melted. Add the coconut oil or shortening and stir until smooth.
- Remove the cake balls from the fridge. Dip the tip of a lollipop stick into the melted candy, then insert it about halfway into a cake ball. Dip the entire cake ball into the melted candy, gently tapping the stick on the edge of the bowl to let excess drip off. Immediately add sprinkles before the coating sets.
- Place the pop upright in a Styrofoam block or jar. Repeat with the remaining pops.
- Let the cake pops set at room temperature for about 15-20 minutes. Do not refrigerate while the coating is still wet.
Notes
Chill the cake balls thoroughly before dipping to prevent them from falling off the stick. Use jimmies sprinkles instead of nonpareils to avoid color bleeding. If the coating cracks, let the first layer set completely, then dip again. Store finished cake pops in an airtight container in the refrigerator for up to 5 days, or freeze for up to 3 months.
Nutrition
- Serving Size: 1 cake pop
- Calories: 180
- Sugar: 16
- Sodium: 150
- Fat: 9
- Saturated Fat: 3
- Carbohydrates: 24
- Protein: 2
Keywords: funfetti cake pops, easy cake pops, party dessert, birthday dessert, sprinkle cake pops, homemade cake pops


