I dropped an entire pan of pumpkin cheesecake bars on my kitchen floor three years ago. Not a dramatic, slow-motion slip—just a clumsy, overconfident grab while talking with my mouth full. The bars shattered, the crust crumbled, and I stood there staring at a beautiful mess that smelled exactly like fall. I scraped what I could off the linoleum, tasted it, and realized I had something worth perfecting. That first batch was too sweet, the crust was soggy, and the spider web design looked like a toddler’s art project. But the flavor? That was the seed of something good.
These spider web pumpkin cheesecake bars are the result of three Thanksgivings of trial and error. I wanted a dessert that looked impressive enough for a Halloween party but tasted like the coziest autumn afternoon. Something that didn’t require a water bath, a springform pan, or a pastry degree. The first successful batch came together on a random Tuesday night, and I ate three bars standing over the counter before my husband got home. He walked in, saw the crumbs on my shirt, and just laughed.
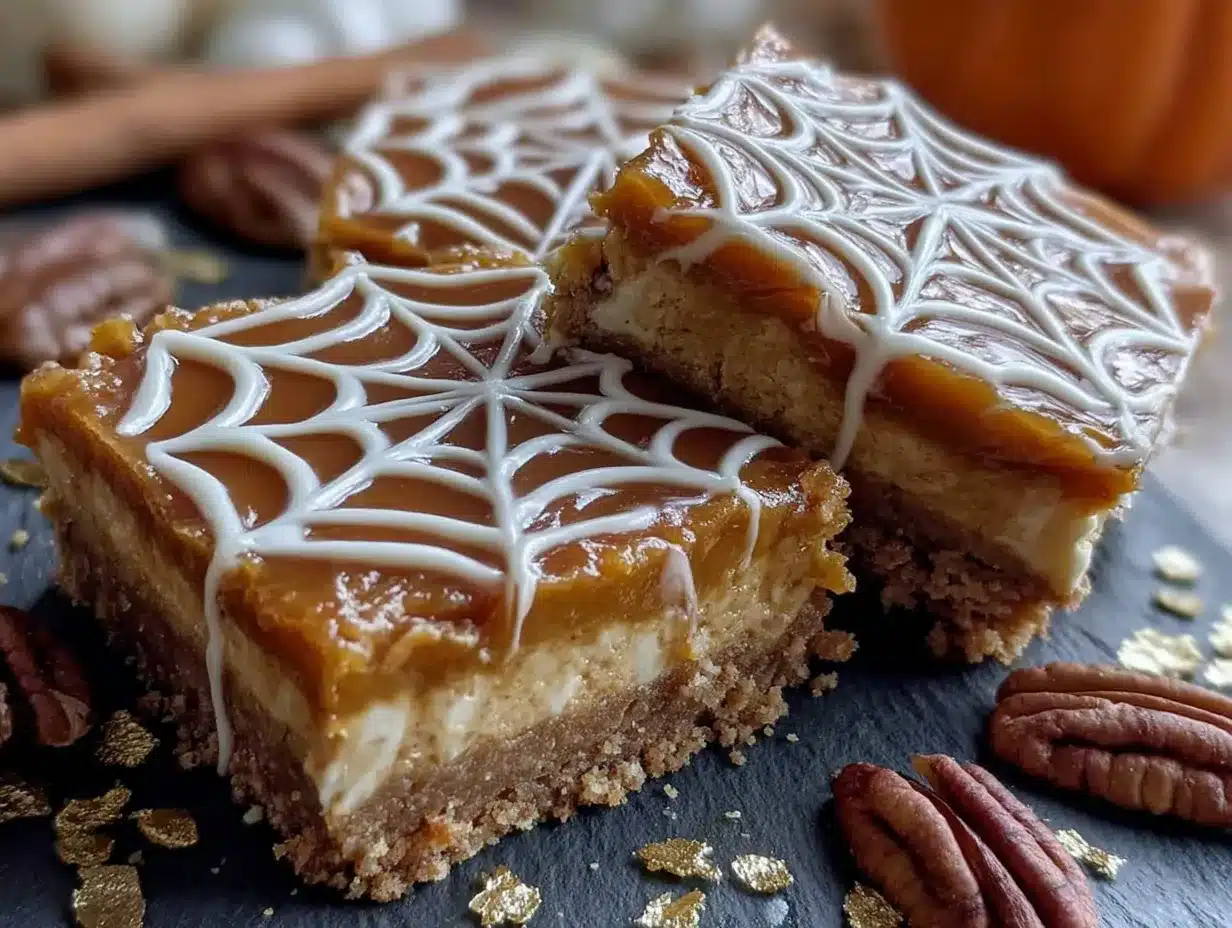
The secret to these bars is the balance between the tangy cheesecake layer and the spiced pumpkin base. The spider web on top isn’t just for show—it’s a ribbon of cream cheese that cuts through the richness and makes every bite feel intentional. I’ve made these for Halloween parties, Friendsgiving dinners, and lazy Sunday baking sessions when the leaves are turning and the air smells like cinnamon. Every time, someone asks for the recipe.
Why You’ll Love This Recipe
These spider web pumpkin cheesecake bars hit that sweet spot between showstopper and weeknight treat. They look like you spent hours piping intricate designs, but honestly, the spider web pattern takes about two minutes to create with a toothpick. That’s my favorite kind of recipe—one that makes you look like a baking wizard without the stress.
- Quick & Easy : From start to table in about an hour, with most of that time being hands-off baking. Perfect for when you need a dessert that impresses without eating your whole afternoon.
- Simple Ingredients : Nothing weird here. Cream cheese, pumpkin puree, pantry spices, and a box of graham crackers. You probably have most of this already.
- Perfect for Fall Gatherings : Halloween parties, Thanksgiving dessert tables, or that cozy Friendsgiving where everyone brings something. These bars fit right in.
- Crowd-Pleaser : I’ve served these to kids who hate pumpkin and adults who claim they don’t do cheesecake. Both groups came back for seconds.
- Unbelievably Delicious : The texture is what gets people. That creamy cheesecake layer against the spiced pumpkin base, all sitting on a buttery graham cracker crust. It’s comfort food in bar form.
What makes this recipe different from the dozens of pumpkin cheesecake bars out there is the technique. Instead of layering everything and hoping for the best, I use a slight temperature trick that keeps the pumpkin layer dense and the cheesecake layer light. The spider web design isn’t just decoration—it ensures every bar gets that perfect ratio of tangy to sweet in every bite.
This is the kind of dessert that makes you close your eyes after the first forkful. It’s fall in a pan, and it’s easier than you think.
What Ingredients You Will Need
This recipe uses simple, honest ingredients that work together to create something greater than the sum of their parts. No specialty items, no trips to three different stores. Just good baking basics with a fall twist.
For the Crust
- 1 ½ cups graham cracker crumbs (about 12 full sheets, crushed fine—I use a rolling pin and a zip-top bag because I hate washing the food processor)
- ¼ cup granulated sugar
- 6 tablespoons unsalted butter, melted (salted butter works too, just skip the pinch of salt below)
- Pinch of salt
For the Pumpkin Layer
- 1 cup pumpkin puree (not pumpkin pie filling—make sure it’s 100% pure pumpkin. I like Libby’s for consistent texture)
- 8 ounces cream cheese, softened (full-fat is best here, low-fat makes the layer too loose)
- ½ cup granulated sugar
- 1 large egg, room temperature
- 1 teaspoon vanilla extract
- 1 teaspoon pumpkin pie spice (or ½ teaspoon cinnamon + ¼ teaspoon nutmeg + ¼ teaspoon ginger + pinch of cloves)
- ¼ teaspoon salt
For the Cheesecake Layer
- 8 ounces cream cheese, softened
- ¼ cup granulated sugar
- 1 large egg, room temperature
- 1 teaspoon vanilla extract
For the Spider Web Design
- 2 tablespoons reserved cheesecake batter (from the layer above)
- 1 tablespoon milk or cream (to thin it out for piping)
I always buy an extra block of cream cheese just in case. Nothing worse than getting halfway through and realizing you’re short. For the graham crackers, Honey Maid is my go-to—they crush evenly and have that perfect buttery flavor. If you want a gluten-free version, use gluten-free graham crackers or crushed gluten-free vanilla cookies. The texture will be slightly different but still delicious.
Equipment Needed
You don’t need a fancy kitchen to make these bars. Here’s what you’ll actually use:
- 9×9-inch baking pan (an 8×8 works too, bars will just be slightly thicker—adjust baking time by 3-5 minutes)
- Parchment paper (for easy removal—don’t skip this, trust me)
- Mixing bowls (one large, one medium, one small)
- Hand mixer or stand mixer (a whisk and some elbow grease works too, but your arm will thank you for the mixer)
- Toothpick or skewer (for the spider web design)
- Rolling pin or food processor (for crushing graham crackers)
- Measuring cups and spoons
- Spatula
If you don’t have a 9×9 pan, a 9-inch round cake pan works fine. Just adjust the baking time and keep an eye on it. I’ve also used a disposable aluminum pan for potlucks—works perfectly and no cleanup.
Preparation Method
Let’s get into the actual making part. I’ve tested this method more times than I care to count, so trust the process.
- Preheat and Prep : Preheat your oven to 350°F (175°C). Line your 9×9 baking pan with parchment paper, leaving overhang on two opposite sides. This creates handles so you can lift the whole thing out later. Spray the parchment lightly with non-stick spray.
- Make the Crust : In a medium bowl, combine 1 ½ cups graham cracker crumbs, ¼ cup sugar, and a pinch of salt. Pour in 6 tablespoons melted butter and stir with a fork until every crumb is moistened. It should look like wet sand. Press this mixture firmly into the bottom of your prepared pan. I use the bottom of a measuring cup to get it even. Bake for 8 minutes, then set aside to cool slightly. Do not turn off the oven.
- Make the Pumpkin Layer : In a large bowl, beat 8 ounces softened cream cheese with ½ cup sugar until smooth—about 2 minutes. Add 1 cup pumpkin puree, 1 egg, 1 teaspoon vanilla, 1 teaspoon pumpkin pie spice, and ¼ teaspoon salt. Beat until combined, scraping down the sides. The mixture will be thick and slightly fluffy. Spread this evenly over the pre-baked crust.
- Make the Cheesecake Layer : In a medium bowl, beat 8 ounces softened cream cheese with ¼ cup sugar until smooth. Add 1 egg and 1 teaspoon vanilla, beating just until combined. Don’t overmix—you don’t want to incorporate too much air. Reserve 2 tablespoons of this mixture in a small bowl for the spider web design.
- Layer and Swirl : Gently spoon the remaining cheesecake mixture over the pumpkin layer. Use a spatula to spread it evenly, being careful not to mix the layers. You want a clean separation.
- Create the Spider Web : Thin the reserved 2 tablespoons of cheesecake batter with 1 tablespoon milk or cream. It should be thick but pipeable—like slightly runny yogurt. Transfer to a small zip-top bag, snip a tiny corner off, and pipe concentric circles on top of the cheesecake layer. Start in the center and work outward, spacing the circles about ½ inch apart. Then, using a toothpick or skewer, drag lines from the center outward through all the circles. Wipe the toothpick between each drag for clean lines. You’ll see the web pattern emerge immediately.
- Bake : Bake at 350°F (175°C) for 35-40 minutes. The edges should be set and slightly puffed, but the center should still jiggle slightly when you shake the pan. That’s the cheesecake texture you want. Overbaking leads to cracks, so err on the side of underdone.
- Cool : Let the bars cool completely on a wire rack—about 1 hour. Then refrigerate for at least 3 hours, preferably overnight. This is non-negotiable. The bars need time to set properly for clean slices.
- Slice and Serve : Using the parchment handles, lift the entire block out of the pan. Use a sharp knife, wiping it clean between cuts, to slice into 16 squares. Serve cold or at room temperature.
Cooking Tips & Techniques
I learned most of these the hard way, so you don’t have to.
Room temperature ingredients matter. Cold cream cheese creates lumps that won’t smooth out no matter how long you beat. Leave your cream cheese and eggs on the counter for at least 30 minutes before starting. If you’re in a rush, cut the cream cheese into cubes and microwave for 10 seconds at a time until softened but not warm.
Don’t overmix the cheesecake layer. I used to beat it until it was fluffy and light, which created a soufflé-like texture that rose and then collapsed. You want the cheesecake to be smooth but dense. Mix just until the ingredients come together—about 30 seconds after the egg is incorporated.
The jiggle test is your friend. When you shake the pan, the center should wobble like Jell-O, not slosh like soup. If it’s completely firm, you’ve overbaked. If it ripples like liquid, give it another 5 minutes. I check at 35 minutes and go from there.
Patience with cooling is the hardest part. I’ve cut into warm bars out of desperation, and they were a soupy mess. The refrigerator time allows the cream cheese to firm up and the flavors to meld. Overnight is best, but if you’re short on time, 3 hours minimum.
Clean cuts every time. Dip your knife in hot water and wipe it dry between each slice. This gives you those beautiful, Instagram-worthy edges. I learned this after serving a pan of jagged, sad squares to my in-laws.
Variations & Adaptations
Once you’ve got the basic method down, the possibilities are endless. Here are some variations I’ve tried and loved:
- Gluten-Free Version : Use gluten-free graham crackers or crushed gluten-free vanilla cookies. The texture is slightly more crumbly, but the flavor holds up beautifully. I’ve also used crushed pecans mixed with a little almond flour for a nutty crust.
- Dairy-Free Adaptation : Substitute dairy-free cream cheese (I like Kite Hill or Violife) and use a plant-based butter alternative in the crust. The texture will be slightly less creamy, but it’s still delicious. Add an extra tablespoon of sugar to the cheesecake layer to balance the tang.
- Chocolate Spider Web : Instead of thinning the reserved cheesecake batter with milk, mix it with 1 tablespoon of melted dark chocolate. The chocolate web against the orange pumpkin layer is stunning for Halloween.
- Spice It Up : Add ¼ teaspoon of cayenne pepper to the pumpkin layer for a subtle heat that plays beautifully with the sweetness. I tried this on a dare and it’s now my secret weapon for adult gatherings.
- Mini Bar Version : Press the crust into a mini muffin tin (lined with paper liners) and reduce baking time to 18-20 minutes. Perfect for parties where people want a single bite.
I once made a maple version by swapping 2 tablespoons of the sugar in the pumpkin layer for maple syrup. The flavor was incredible, but the texture was slightly softer. If you try this, reduce the syrup to 1 tablespoon and add an extra tablespoon of flour to compensate.
Serving & Storage Suggestions
These bars are versatile enough for any occasion. Here’s how to serve and store them like a pro.
Serving Temperature : I prefer them cold from the fridge—the texture is firmer and the flavors are more pronounced. But they’re also lovely at room temperature if you let them sit out for 15 minutes. For a dramatic presentation, serve on a dark plate with a dusting of cinnamon and a dollop of whipped cream.
Complementary Pairings : A cup of black coffee or chai tea is the perfect companion. For a dessert spread, these bars pair beautifully with no-bake rice krispie treat stars for a fun contrast in textures. If you’re planning a fall brunch, serve them alongside lemon blueberry zucchini bread for a sweet and tangy combo.
Storage : Store bars in an airtight container in the refrigerator for up to 5 days. Layer them with parchment paper between each row to prevent sticking. The spider web design may soften slightly after a day or two, but the flavor actually improves.
Freezing : These freeze beautifully. Wrap individual bars in plastic wrap, then place in a freezer-safe bag. They’ll keep for up to 3 months. Thaw in the refrigerator overnight, then bring to room temperature before serving. I always keep a stash in the freezer for unexpected guests.
Reheating : I don’t recommend reheating these—they’re meant to be served cold or at room temperature. If you want a warm dessert, pop a bar in the microwave for 10 seconds, but don’t expect the same texture.
Nutritional Information & Benefits
Let’s be real—these are a treat, not a health food. But there are some redeeming qualities worth mentioning.
Estimated Nutritional Values (per bar, based on 16 servings) :
- Calories: 245
- Fat: 16g
- Carbohydrates: 22g
- Protein: 5g
- Fiber: 1g
- Sugar: 16g
Health Benefits : Pumpkin is packed with vitamin A, fiber, and antioxidants. The cream cheese provides calcium and protein. Is it a superfood? No. But it’s a dessert that offers a little more than empty calories. I like to think of it as a seasonal indulgence that makes you feel good because it tastes good, not because it’s virtuous.
Dietary Considerations : This recipe contains gluten, dairy, and eggs. For a gluten-free version, see the variations section. For a dairy-free version, use plant-based alternatives. The bars are nut-free as written, making them safe for school events.
Potential Allergens : Wheat (from graham crackers), dairy (from cream cheese and butter), eggs. Always check your ingredient labels if cooking for someone with allergies.
Conclusion
These spider web pumpkin cheesecake bars are the dessert I turn to when I want to impress without the stress. They look like you spent hours, they taste like autumn in a pan, and they come together with ingredients you probably already have. The spider web design is just the cherry on top—literally the easiest party trick in baking.
I love this recipe because it’s proof that you don’t need fancy equipment or professional training to make something beautiful. It’s about technique, patience, and a little bit of creativity. Every time I make these bars, I think about that first failed batch on my kitchen floor and how far they’ve come. And honestly, that’s what cooking is about—trying, failing, and trying again until you get it right.
Now I want to hear from you. Have you tried making these bars? Did you add your own twist? Drop a comment below and let me know how they turned out. And if you’re looking for more fall inspiration, check out our full recipe collection for cozy desserts, savory bakes, and everything in between. Happy baking, friends!
Frequently Asked Questions
Can I use canned pumpkin pie filling instead of pumpkin puree?
No, I wouldn’t recommend it. Pumpkin pie filling is pre-sweetened and spiced, which will throw off the sugar and spice balance in this recipe. Stick with 100% pure pumpkin puree for the best results. If you only have pie filling, reduce the sugar by half and skip the pumpkin pie spice, but the texture will still be different.
Why did my cheesecake layer crack?
Cracks happen when the cheesecake is overbaked or cooled too quickly. Make sure you pull the bars out when the center still jiggles slightly. Also, let them cool slowly on the counter before refrigerating. If cracks do appear, don’t panic—the spider web design hides them beautifully!
Can I make these bars ahead of time?
Absolutely. In fact, they’re better made a day ahead. The flavors meld and the texture firms up perfectly. Bake, cool, refrigerate overnight, and slice the next day. They’ll stay fresh in the fridge for up to 5 days.
How do I get clean slices without the layers smearing?
Use a sharp knife and wipe it clean with a damp paper towel between each cut. For extra clean slices, chill the bars for at least 4 hours or overnight before cutting. If the knife is sticking, dip it in hot water and dry it off before slicing.
Can I double this recipe for a larger pan?
Yes, you can double the recipe for a 9×13-inch pan. The baking time will increase to about 45-50 minutes. Keep an eye on it and use the jiggle test to determine doneness. You may need to extend the spider web design slightly to cover the larger surface area.
Pin This Recipe!
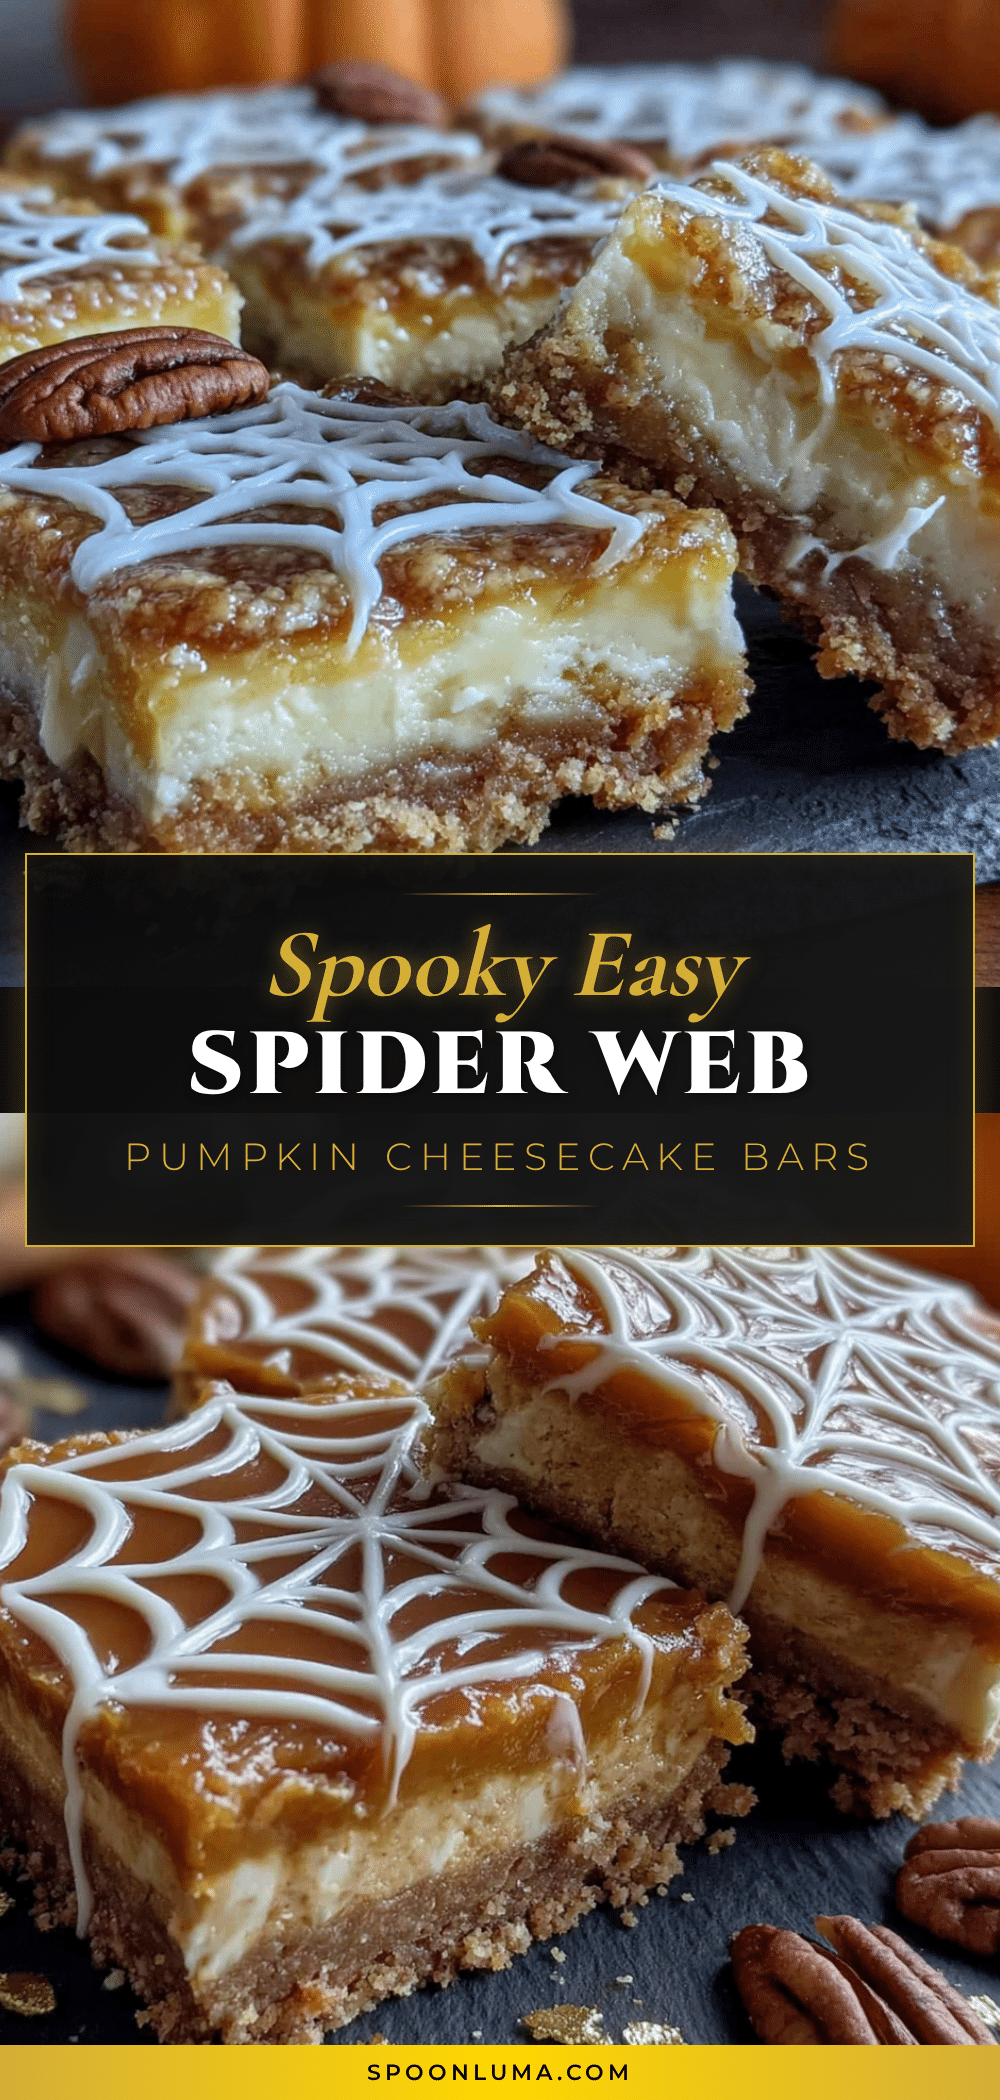
Best Spider Web Pumpkin Cheesecake Bars – Easy Fall Dessert
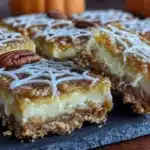
These spider web pumpkin cheesecake bars are the result of three Thanksgivings of trial and error. They look impressive enough for a Halloween party but taste like the coziest autumn afternoon, with a tangy cheesecake layer and spiced pumpkin base.
- Prep Time: 20 minutes
- Cook Time: 35-40 minutes
- Total Time: 1 hour (plus 3 hours chilling)
- Yield: 16 servings 1x
- Category: Dessert
- Cuisine: American
Ingredients
- 1 ½ cups graham cracker crumbs (about 12 full sheets)
- ¼ cup granulated sugar
- 6 tablespoons unsalted butter, melted
- Pinch of salt
- 1 cup pumpkin puree (not pumpkin pie filling)
- 8 ounces cream cheese, softened (for pumpkin layer)
- ½ cup granulated sugar
- 1 large egg, room temperature
- 1 teaspoon vanilla extract
- 1 teaspoon pumpkin pie spice (or ½ teaspoon cinnamon + ¼ teaspoon nutmeg + ¼ teaspoon ginger + pinch of cloves)
- ¼ teaspoon salt
- 8 ounces cream cheese, softened (for cheesecake layer)
- ¼ cup granulated sugar
- 1 large egg, room temperature
- 1 teaspoon vanilla extract
- 2 tablespoons reserved cheesecake batter (for spider web design)
- 1 tablespoon milk or cream
Instructions
- Preheat your oven to 350°F (175°C). Line your 9×9 baking pan with parchment paper, leaving overhang on two opposite sides. Spray the parchment lightly with non-stick spray.
- In a medium bowl, combine 1 ½ cups graham cracker crumbs, ¼ cup sugar, and a pinch of salt. Pour in 6 tablespoons melted butter and stir with a fork until every crumb is moistened. Press this mixture firmly into the bottom of your prepared pan. Bake for 8 minutes, then set aside to cool slightly. Do not turn off the oven.
- In a large bowl, beat 8 ounces softened cream cheese with ½ cup sugar until smooth—about 2 minutes. Add 1 cup pumpkin puree, 1 egg, 1 teaspoon vanilla, 1 teaspoon pumpkin pie spice, and ¼ teaspoon salt. Beat until combined, scraping down the sides. Spread this evenly over the pre-baked crust.
- In a medium bowl, beat 8 ounces softened cream cheese with ¼ cup sugar until smooth. Add 1 egg and 1 teaspoon vanilla, beating just until combined. Reserve 2 tablespoons of this mixture in a small bowl for the spider web design.
- Gently spoon the remaining cheesecake mixture over the pumpkin layer. Use a spatula to spread it evenly, being careful not to mix the layers.
- Thin the reserved 2 tablespoons of cheesecake batter with 1 tablespoon milk or cream. Transfer to a small zip-top bag, snip a tiny corner off, and pipe concentric circles on top of the cheesecake layer. Start in the center and work outward, spacing the circles about ½ inch apart. Then, using a toothpick or skewer, drag lines from the center outward through all the circles. Wipe the toothpick between each drag for clean lines.
- Bake at 350°F (175°C) for 35-40 minutes. The edges should be set and slightly puffed, but the center should still jiggle slightly when you shake the pan.
- Let the bars cool completely on a wire rack—about 1 hour. Then refrigerate for at least 3 hours, preferably overnight.
- Using the parchment handles, lift the entire block out of the pan. Use a sharp knife, wiping it clean between cuts, to slice into 16 squares. Serve cold or at room temperature.
Notes
Room temperature ingredients matter. Cold cream cheese creates lumps. Don’t overmix the cheesecake layer. The jiggle test is your friend. Patience with cooling is the hardest part. Clean cuts every time by dipping your knife in hot water and wiping it dry between each slice.
Nutrition
- Serving Size: 1 bar
- Calories: 245
- Sugar: 16
- Sodium: 220
- Fat: 16
- Saturated Fat: 9
- Carbohydrates: 22
- Fiber: 1
- Protein: 5
Keywords: pumpkin cheesecake bars, spider web dessert, fall dessert, Halloween dessert, cheesecake bars, pumpkin dessert, easy dessert