“So what exactly do you do with pear butter?” my neighbor asked, peering over my shoulder at the simmering pot on the stove. I remember just laughing and handing her a spoon. She dipped it in, took a taste, and her eyes went wide. “Oh,” she said, quieter this time. “Oh, I get it now.”
That pretty much sums up how I feel about homemade cinnamon sugar pear butter for canning. It is not quite jam, not quite applesauce, but something in between. Something that tastes like fall in a jar, if fall decided to be extra sweet and a little bit spicy. I had never really thought about making it until that moment. But watching her face change, I knew I had stumbled onto something worth sharing.
The funny thing is, I almost didn’t make it that day. The pears were sitting on my counter, getting softer and softer, and I kept telling myself I would deal with them tomorrow. But then I remembered my grandmother’s old canning pot collecting dust in the basement, and something clicked. This homemade cinnamon sugar pear butter for canning is now my go-to for using up those overly ripe pears that nobody wants to eat plain. It is forgiving, it is simple, and honestly, it makes your whole house smell incredible.
Why You’ll Love This Recipe
Let me tell you why this recipe has earned a permanent spot in my kitchen rotation. I have tested it more times than I care to count, and every batch turns out just a little bit better than the last.
- Simple Ingredients : You probably already have most of what you need in your pantry. No fancy pectin packets or special thickeners required. Just pears, sugar, cinnamon, and a few other basics.
- Perfect for Gifting : Homemade pear butter in a cute jar with a ribbon? That is the kind of gift people actually remember. I have given jars to neighbors, teachers, and mail carriers, and they always ask for more.
- Uses Up Overripe Pears : You know those pears that sit in the bowl and get too soft to eat out of hand? Those are perfect here. This recipe practically begs for blemished or bruised fruit.
- Long Shelf Life : When properly canned, this pear butter stays good for up to a year. That means you can enjoy summer’s bounty well into winter without any fuss.
- Unbelievably Delicious : The texture is smooth and spreadable, the flavor is warm and spiced, and it just feels special. Slather it on toast, swirl it into yogurt, or eat it straight from the jar. No judgment here.
What makes this different from other recipes I have tried is the slow cooking method. Most fruit butters are rushed, cooked too fast, and end up with a scorched taste. This one simmers low and slow, letting the pears break down naturally and the flavors meld together. It is not just another version. It is the version that made my neighbor understand what all the fuss was about.
What Ingredients You Will Need
This recipe uses simple, wholesome ingredients that come together to create something truly special. Most of these are pantry staples, which makes this homemade cinnamon sugar pear butter for canning incredibly accessible. Here is what you will need:
- 5 pounds ripe pears (about 10-12 medium pears) — Bartlett or Bosc work best, but any variety will do. They should be soft but not mushy. I prefer Bartlett for their natural sweetness and smooth texture.
- 3 cups granulated sugar — This helps preserve the butter and gives it that perfect sweetness. You can reduce it slightly if your pears are very sweet, but do not go below 2 cups.
- 1 cup packed light brown sugar — Adds depth and a subtle molasses note that pairs beautifully with cinnamon. Dark brown sugar works too, but it will darken the color.
- 2 tablespoons fresh lemon juice — This brightens the flavor and helps preserve the color. Bottled lemon juice works in a pinch, but fresh is better.
- 2 teaspoons ground cinnamon — The star of the show. Use a good quality cinnamon like Ceylon if you can find it. It is milder and sweeter than Cassia.
- 1/2 teaspoon ground nutmeg — Freshly grated is amazing, but pre-ground works perfectly fine.
- 1/4 teaspoon ground cloves — Just a touch for warmth. Too much can overpower the pears.
- 1/4 teaspoon salt — Balances the sweetness and enhances all the flavors. Do not skip it.
- 1 vanilla bean or 1 tablespoon vanilla extract — Adds a lovely floral note. I use vanilla extract most of the time because it is easier.
For the canning process, you will also need water for the water bath canner, but I will cover that in the equipment section. I recommend using organic pears if possible, especially since you are cooking them with the skins on initially. The skins contain natural pectin that helps thicken the butter.
One tip I learned the hard way: do not use overripe pears that are already turning brown inside. They will still work, but the color of your pear butter will be darker and less appealing. Aim for pears that are soft to the touch but still have a nice golden interior.
Equipment Needed
Before you start, make sure you have these tools on hand. They make the process smoother and safer, especially when dealing with hot jars and boiling water.
- Large heavy-bottomed pot or Dutch oven — At least 8 quarts. A heavy bottom prevents scorching during the long simmer. I use my enameled cast iron Dutch oven and it works beautifully.
- Immersion blender or food mill — For pureeing the cooked pears. An immersion blender is easier and creates less mess. A food mill works too, but it takes a bit more effort.
- Water bath canner with rack — This is essential for safe canning. You can use a large stockpot with a rack at the bottom if you do not have a dedicated canner.
- Canning jars with lids and bands — Half-pint or pint jars work best for pear butter. I prefer half-pints because they are perfect for gifting. Make sure they are free of cracks or chips.
- Jar lifter — Please do not skip this! Trying to grab hot jars with tongs is a disaster waiting to happen. Trust me, I have the burn scars to prove it.
- Wide-mouth funnel — Makes filling jars so much easier and less messy. It is worth the few dollars it costs.
- Clean kitchen towels — For wiping jar rims and handling hot jars. Keep a few handy.
- Magnetic lid wand — Optional but helpful for lifting lids out of hot water without burning your fingers.
If you are new to canning, do not let the equipment list intimidate you. You can find starter canning kits online for around $30 that include most of what you need. I started with a basic kit from a big box store and upgraded pieces over time.
Preparation Method
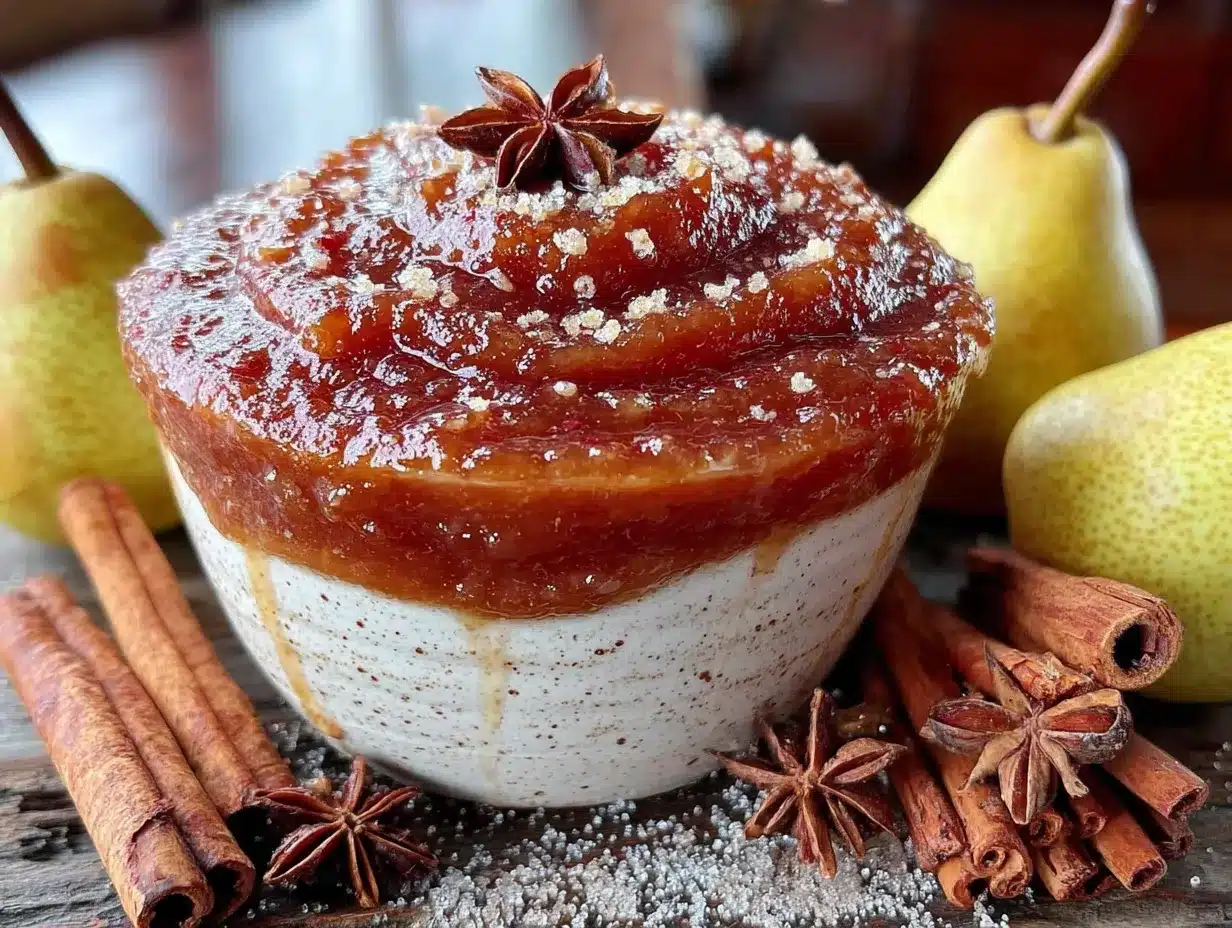
Making homemade cinnamon sugar pear butter for canning is a labor of love, but I promise it is worth every minute. Here is how I do it, step by step.
- Prepare the pears. Wash your pears thoroughly. Do not peel them yet. Cut them into quarters and remove the cores and stems. Place the pear quarters in your large pot. The skins will break down during cooking and add natural pectin.
- Cook the pears. Add about 1/2 cup of water to the pot to prevent sticking. Cover and cook over medium heat for about 20-25 minutes, stirring occasionally, until the pears are very soft and starting to fall apart. You should be able to easily mash a piece against the side of the pot.
- Puree the pears. Remove the pot from heat. Use your immersion blender to puree the pears until completely smooth. If you are using a food mill, process the cooked pears through it. Be careful, the mixture is hot. Let it cool for about 5 minutes first.
- Add the sugars and spices. Stir in the granulated sugar, brown sugar, lemon juice, cinnamon, nutmeg, cloves, and salt. If using a vanilla bean, split it lengthwise and scrape the seeds into the pot, then add the pod. If using vanilla extract, wait until after cooking to add it.
- Simmer the butter. Bring the mixture to a gentle boil over medium heat, then reduce the heat to low. Cook uncovered for 2 to 2 1/2 hours, stirring every 10-15 minutes. The mixture will bubble and sputter, so be careful. It is done when it has thickened significantly and mounds on a spoon without running off immediately. You should be able to draw a line through it on a plate and it holds its shape.
- Prepare your jars. While the pear butter simmers, wash your jars, lids, and bands in hot soapy water. Rinse well. Place the jars in your water bath canner, cover with water, and bring to a simmer. Keep them hot until ready to fill. Place the lids in a small saucepan of hot water and keep them warm.
- Fill the jars. When the pear butter is ready, remove the vanilla bean pod if you used one. Ladle the hot pear butter into the hot jars, leaving 1/4 inch headspace. Use your funnel to keep things clean. Wipe the jar rims with a clean, damp towel to remove any residue. Center a lid on each jar and screw on the band until fingertip tight.
- Process in the water bath. Place the filled jars in the canner rack. Lower them into the boiling water, making sure they are covered by at least 1 inch of water. Cover the canner and bring back to a full boil. Process for 10 minutes for half-pint jars or 15 minutes for pint jars. Adjust for altitude if needed.
- Cool and check seals. After processing, turn off the heat and let the jars sit in the water for 5 minutes. Then use your jar lifter to remove them and place them on a towel-lined counter. Leave them undisturbed for 12-24 hours. You will hear the satisfying “pop” as the lids seal. Press the center of each lid to check the seal. It should not flex up and down.
A few things I have learned along the way: if your pear butter seems too thin after the cooking time, do not panic. It will thicken more as it cools. And if it seems too thick, you can thin it with a little apple juice or water. The texture should be spreadable but not runny.
Cooking Tips & Techniques
After making this homemade cinnamon sugar pear butter for canning more times than I can count, I have picked up a few tricks that make a real difference. Let me share them with you.
Watch the heat. This is the biggest mistake I made early on. Cooking the pear butter over too high heat will cause it to scorch on the bottom. Low and slow is the way to go. I keep my burner on the lowest setting and stir frequently. If you notice dark specks forming on the bottom, you are cooking too hot.
Use a splatter screen. The pear butter bubbles and pops as it thickens, and it can make a huge mess on your stovetop. A splatter screen saves so much cleanup time. I learned this after spending twenty minutes scrubbing sticky residue off my stovetop.
Test for doneness properly. The spoon test is reliable, but I also like to do the plate test. Place a small spoonful on a cold plate and let it sit for a minute. Tilt the plate. If the pear butter stays in place and does not run, it is ready. If it slides, keep cooking.
Do not skip the lemon juice. Besides adding flavor, the acid in lemon juice helps preserve the color and ensures safe acidity levels for canning. I have tried making it without, and the color turned brown and unappetizing.
Batch size matters. I recommend sticking to 5 pounds of pears for your first few batches. Larger batches take much longer to cook down and are harder to stir evenly. Once you get comfortable, you can double the recipe if you have a big enough pot.
Keep jars hot. This is critical for safe canning. If you pour hot pear butter into cold jars, the temperature shock can cause the jars to crack. I keep my jars in the canner with simmering water until I am ready to fill them.
One failure I still remember: I once forgot to stir for about twenty minutes while I was on the phone. The bottom layer burned, and the whole batch had a bitter, smoky flavor. I had to throw it all out. So set a timer on your phone for every ten minutes and make stirring your priority.
Variations & Adaptations
One of the best things about this recipe is how easy it is to customize. Here are some variations I have tried and loved.
Spiced Pear Butter. Add 1/2 teaspoon ground ginger, 1/4 teaspoon cardamom, and a pinch of allspice along with the other spices. This creates a warmer, more complex flavor profile that is amazing on gingerbread or pancakes.
Vanilla Pear Butter. Increase the vanilla to 2 tablespoons of extract or use two vanilla beans. The floral notes really shine through, and it tastes almost like pear custard. This is my favorite version for spreading on scones.
Honey Sweetened Pear Butter. Replace the granulated sugar with 2 cups of honey. Keep the brown sugar for depth. The flavor is different, more floral and less sweet. Note that honey can cause the butter to darken more during cooking.
Apple-Pear Butter. Substitute half the pears with apples, preferably Granny Smith or Honeycrisp. The apples add natural pectin and a slightly firmer texture. This is a great way to use up a mix of fruit from your farmers market.
Low-Sugar Version. Reduce the total sugar to 2 cups and add 1/4 cup of apple juice concentrate. The texture will be softer and less firm, and it will not keep as long in the pantry. Store it in the fridge and use within 3 months.
I once made a batch with a pinch of cayenne pepper and a dash of smoked paprika. It sounds weird, I know, but it was incredible on roasted pork tenderloin. Do not be afraid to experiment. Pear butter is forgiving.
Serving & Storage Suggestions
This homemade cinnamon sugar pear butter for canning is incredibly versatile. Here is how I like to use and store it.
Serving temperature. I prefer it at room temperature, straight from the jar. It spreads beautifully on warm toast, English muffins, or croissants. If you want to get fancy, warm it slightly and drizzle it over vanilla ice cream or cheesecake.
Pairings. It pairs wonderfully with sharp cheeses like aged cheddar or manchego. I love making a cheese board with pear butter, crackers, nuts, and dried figs. It is also amazing swirled into oatmeal, yogurt, or even pancake batter. For a savory twist, use it as a glaze for roasted chicken or pork chops.
Storage. Sealed jars of properly canned pear butter can be stored in a cool, dark place for up to 1 year. Once opened, keep it in the refrigerator and use within 3 weeks. The flavor actually improves after a few weeks as the spices meld together.
Freezing option. If you do not want to go through the canning process, you can freeze the pear butter in airtight containers or freezer bags. Leave about 1/2 inch of headspace for expansion. It will keep for up to 6 months in the freezer. Thaw in the refrigerator overnight before using.
Reheating. If the pear butter crystallizes or separates slightly in the fridge, just stir it well or give it a quick zap in the microwave for 10-15 seconds. It will come right back together.
Nutritional Information & Benefits
While this is definitely a treat, there are some nutritional benefits worth noting. Here is an approximate breakdown per 2-tablespoon serving.
- Calories: 85
- Total Fat: 0g
- Sodium: 15mg
- Total Carbohydrates: 22g
- Dietary Fiber: 2g
- Sugars: 18g
- Protein: 0g
The pears themselves are a good source of dietary fiber and vitamin C. They also contain antioxidants like flavonoids that support heart health. The cinnamon in this recipe is known for its anti-inflammatory properties and can help regulate blood sugar levels. Of course, this is still a sweet spread, so enjoy it in moderation.
For those with dietary restrictions, this recipe is naturally vegan and dairy-free. It is also gluten-free, as long as you serve it on gluten-free bread. The only potential allergen is the pears themselves, which are not common allergens.
From a wellness perspective, I love that this homemade cinnamon sugar pear butter for canning allows me to control exactly what goes into it. No preservatives, no high fructose corn syrup, no artificial flavors. Just real food that tastes amazing.
Frequently Asked Questions
Can I use canned pears instead of fresh?
Technically yes, but I do not recommend it. Canned pears are already cooked and packed in syrup, which throws off the sugar balance and texture. The result is often too sweet and runny. Fresh pears give you much better control over the final product.
Why did my pear butter turn out too thin?
This usually happens when the pears were not cooked long enough or had too much water content. Next time, cook the pears uncovered for the full time and let them reduce properly. You can also cook the finished butter for an additional 15-20 minutes if it is still thin after the initial cooking time.
Do I really need to peel the pears?
No, and I actually recommend leaving the skins on during the initial cooking. The skins contain natural pectin that helps thicken the butter. Plus, they break down completely during the long simmer, so you will never know they were there. Just make sure to puree thoroughly.
How long does homemade pear butter last?
Properly canned and sealed, it will last up to 1 year in a cool, dark pantry. Once opened, refrigerate and use within 3 weeks. If you freeze it instead of canning, it keeps for about 6 months. Always check for signs of spoilage like mold, off smells, or bulging lids before using.
Can I reduce the sugar in this recipe?
Yes, but with caution. Sugar acts as a preservative in canning, so reducing it too much can affect shelf stability. I recommend keeping at least 2 cups of sugar total for safe canning. If you want a lower-sugar version, freeze it instead of canning it. The texture will also be softer with less sugar.
Conclusion
This homemade cinnamon sugar pear butter for canning has become one of those recipes that I come back to year after year. It is not flashy or complicated, but it is honest and satisfying. Every time I open a jar in the middle of winter, I am reminded of that afternoon with my neighbor, the smell of cinnamon filling the kitchen, and the simple joy of making something from scratch.
I really hope you give this recipe a try. Customize it to your taste, experiment with different spices, and do not worry if your first batch is not perfect. Mine was not either. The beauty of homemade pear butter is that even the imperfect batches taste pretty amazing. And if you end up with extra jars, well, you just made someone’s day with a very thoughtful gift.
I would love to hear how yours turns out. Leave a comment below and let me know what variations you tried, or share a photo of your jars on social media. Happy canning, friends!
Pin This Recipe!
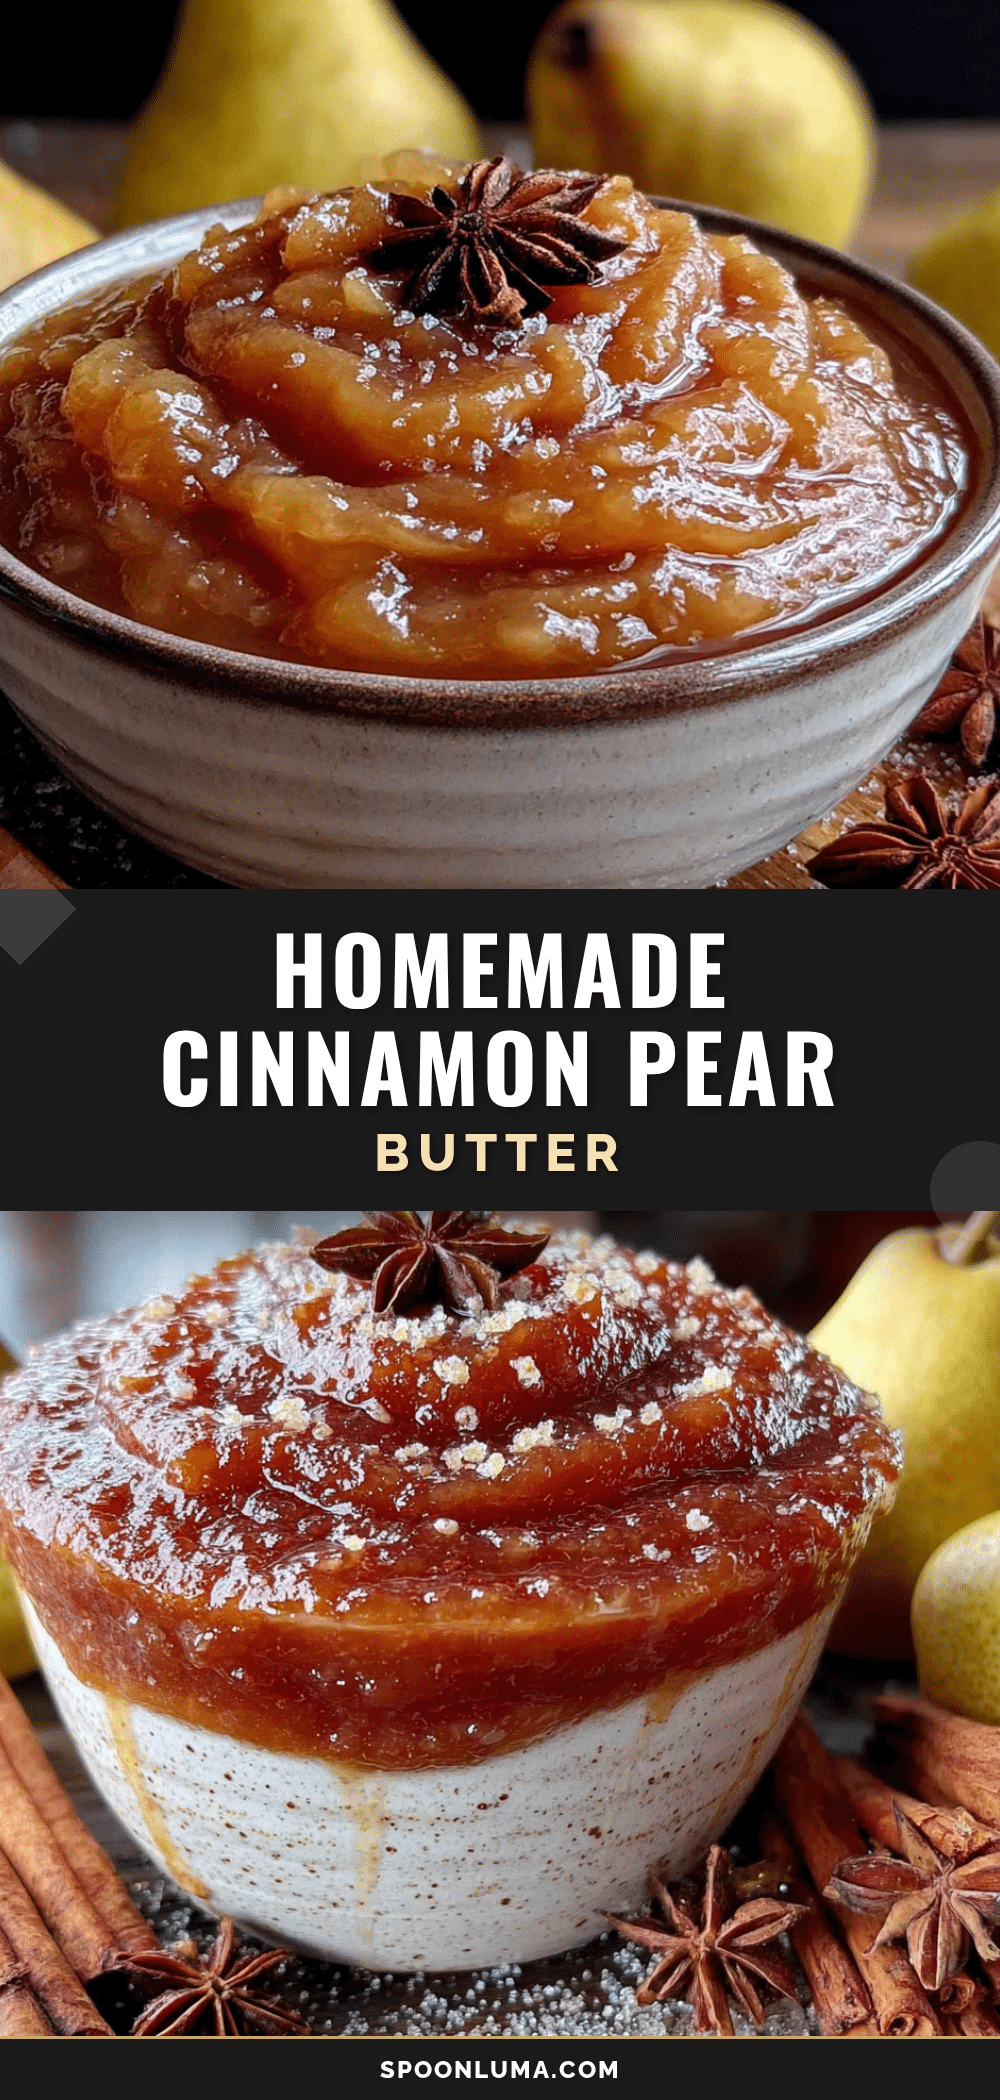
Easy Homemade Cinnamon Pear Butter for Canning
This homemade cinnamon sugar pear butter is smooth, spreadable, and tastes like fall in a jar. It’s perfect for using up overripe pears and makes a wonderful gift.
- Prep Time: 30 minutes
- Cook Time: 2 hours 30 minutes
- Total Time: 3 hours
- Yield: 4 half-pint jars (about 4 cups) 1x
- Category: Preserves
- Cuisine: American
Ingredients
- 5 pounds ripe pears (about 10–12 medium pears), Bartlett or Bosc preferred
- 3 cups granulated sugar
- 1 cup packed light brown sugar
- 2 tablespoons fresh lemon juice
- 2 teaspoons ground cinnamon
- 1/2 teaspoon ground nutmeg
- 1/4 teaspoon ground cloves
- 1/4 teaspoon salt
- 1 vanilla bean or 1 tablespoon vanilla extract
Instructions
- Wash pears thoroughly. Do not peel. Cut into quarters and remove cores and stems. Place pear quarters in a large heavy-bottomed pot or Dutch oven.
- Add about 1/2 cup water to the pot to prevent sticking. Cover and cook over medium heat for 20-25 minutes, stirring occasionally, until pears are very soft and starting to fall apart.
- Remove pot from heat. Use an immersion blender to puree pears until completely smooth. Alternatively, use a food mill. Let cool for about 5 minutes before blending.
- Stir in granulated sugar, brown sugar, lemon juice, cinnamon, nutmeg, cloves, and salt. If using a vanilla bean, split lengthwise, scrape seeds into pot, and add the pod. If using vanilla extract, add after cooking.
- Bring mixture to a gentle boil over medium heat, then reduce heat to low. Cook uncovered for 2 to 2 1/2 hours, stirring every 10-15 minutes, until thickened and mounds on a spoon without running off immediately.
- While pear butter simmers, wash jars, lids, and bands in hot soapy water. Rinse well. Place jars in water bath canner, cover with water, and bring to a simmer. Keep jars hot. Place lids in a small saucepan of hot water and keep warm.
- When pear butter is ready, remove vanilla bean pod if used. Ladle hot pear butter into hot jars, leaving 1/4 inch headspace. Wipe jar rims with a clean, damp towel. Center a lid on each jar and screw on band until fingertip tight.
- Place filled jars in canner rack. Lower into boiling water, ensuring jars are covered by at least 1 inch of water. Cover canner and bring back to a full boil. Process for 10 minutes for half-pint jars or 15 minutes for pint jars. Adjust for altitude if needed.
- After processing, turn off heat and let jars sit in water for 5 minutes. Use jar lifter to remove jars and place on a towel-lined counter. Leave undisturbed for 12-24 hours. Check seals by pressing center of each lid; it should not flex up and down.
Notes
Do not use overripe pears that are turning brown inside; they will darken the color. For safe canning, keep at least 2 cups of total sugar. If pear butter seems too thin after cooking, it will thicken as it cools. If too thick, thin with apple juice or water. Use a splatter screen to minimize mess. Set a timer to stir every 10 minutes to prevent scorching.
Nutrition
- Serving Size: 2 tablespoons
- Calories: 85
- Sugar: 18
- Sodium: 15
- Carbohydrates: 22
- Fiber: 2
Keywords: pear butter, cinnamon pear butter, homemade pear butter, canning recipe, fall preserves, fruit butter, pear spread


