My neighbor texted me a photo of her kids at the kitchen table last July. Three sticky faces, chocolate smeared from ear to ear, and a half-eaten pan of something that looked suspiciously like a construction site. She wrote, “Made your icebox cake. They didn’t speak for twelve minutes.” That quiet, that rare and beautiful silence—that’s when I knew this recipe had real power. This Easy No-Bake S’mores Icebox Cake isn’t just another summer dessert. It’s the kind of thing that makes people stop mid-conversation, close their eyes, and forget they were talking about anything at all.
I stumbled into this recipe by accident, honestly. I had a box of graham crackers about to go stale, a bag of marshmallows from a camping trip that never happened, and a heatwave that made turning on the oven feel like a personal insult. So I layered. I stacked. I let the fridge do all the heavy lifting. And what came out was this absurdly good, creamy, crunchy, melty situation that tastes exactly like a campfire—minus the bug spray and smoky hair.
You know what I love most about it? It’s not precious. You don’t need a pastry bag or a thermometer or any of that fussy stuff. You just build it, chill it, and watch it disappear. It’s the kind of dessert that makes you look like you tried way harder than you actually did. And honestly? That’s my favorite kind of recipe.
Why You’ll Love This Recipe
I’ve tested this Easy No-Bake S’mores Icebox Cake more times than I care to admit. Five versions, actually. Too much cream? Soggy grahams. Not enough marshmallow? Dry layers. But this version? It’s the Goldilocks of icebox cakes—everything landed exactly right. Here’s why this one works:
- No oven required. Not even for toasting the marshmallows. The fridge does all the work while you go about your day. Perfect for those 90-degree afternoons when standing near a hot stove feels like a punishment.
- Simple ingredients. Graham crackers, chocolate pudding, marshmallows, whipped cream. That’s it. You probably have most of this in your pantry right now—no special trip to the store required.
- Perfect for summer gatherings. Whether it’s a Fourth of July barbecue or a lazy Sunday cookout, this cake feeds a crowd without any last-minute stress. Make it the night before and forget about it.
- Crowd-pleaser across generations. Kids inhale it. Adults sneak seconds. I’ve watched grandparents go back for thirds. It’s nostalgia in a pan, and everyone has a s’mores memory attached to it.
- Unbelievably creamy texture. The graham crackers soften just enough to mimic a crumbly crust, while the pudding layer stays silky and rich. It’s like a cross between a cheesecake and a campfire dessert—without the fire.
This isn’t just another no-bake dessert. It’s the one I bring to every potluck, every family reunion, every summer party. People ask for the recipe before they even finish their first slice. And I don’t blame them—it’s that good.
What Ingredients You Will Need
This recipe uses simple, pantry-friendly ingredients that come together to create something way more than the sum of their parts. No fancy extracts, no obscure stabilizers—just honest ingredients that work together beautifully.
- Graham crackers (1 full box, about 14-16 whole sheets) – You’ll need the full rectangular sheets, not the crumbs. Honey or cinnamon flavor both work, but honey gives that classic s’mores taste. I prefer Nabisco brand for consistent texture.
- Instant chocolate pudding mix (two 3.9-ounce boxes) – Must be instant, not cook-and-serve. Jell-O brand is reliable here. The instant variety sets up firm enough to hold the layers without turning into soup.
- Cold whole milk (3 cups) – Whole milk gives the pudding a richer, creamier texture. You can use 2% in a pinch, but avoid skim—the pudding won’t set as firmly and the layers may slide.
- Heavy whipping cream (2 cups) – For the whipped cream layer. Don’t substitute Cool Whip here if you can help it. Real whipped cream adds a lightness that balances the dense pudding and crunchy grahams.
- Powdered sugar (¼ cup) – Just enough to sweeten the whipped cream without making it cloying. Sift it if you’re feeling fancy, but honestly, I’ve skipped that step plenty of times and it worked fine.
- Vanilla extract (1 teaspoon) – Pure vanilla adds warmth and depth. Imitation works, but pure makes a noticeable difference in the final flavor.
- Mini marshmallows (2 cups, plus extra for topping) – Mini marshmallows distribute more evenly through the layers than the big ones. Jet-Puffed is my go-to brand. For the topping, I like to use bigger marshmallows cut in half for that dramatic campfire look.
- Chocolate bar or chocolate chips (½ cup, for garnish) – A chopped dark chocolate bar (60-70% cacao) adds a nice bitter contrast to the sweet layers. Or use milk chocolate if your crowd prefers it sweeter.
Substitution notes: For a gluten-free version, use gluten-free graham crackers—they work exactly the same. Dairy-free? Swap the milk for oat milk (not almond, it’s too thin) and use coconut cream instead of heavy cream. The texture will be slightly different but still delicious. For a lower-sugar option, use sugar-free pudding mix and skip the powdered sugar in the whipped cream—the marshmallows provide plenty of sweetness.
Equipment Needed
You don’t need a fancy kitchen for this one. Here’s what you’ll need:
- 9×13-inch baking dish – Glass or ceramic works best. Metal can work, but glass lets you see the layers, which is half the fun. I use a Pyrex dish that’s survived countless moves and still looks new.
- Electric hand mixer or stand mixer – For whipping the cream. You can do it by hand with a whisk, but your arm will hate you. Trust me, I’ve tried.
- Large mixing bowls – One for the pudding, one for the whipped cream. Glass or stainless steel—plastic can retain odors.
- Spatula – A rubber spatula for spreading layers evenly. Offset spatulas work great too if you have one.
- Measuring cups and spoons – For precise measurements, though this recipe is forgiving enough that eyeballing works in a pinch.
- Plastic wrap or aluminum foil – For covering the cake while it chills. Press it directly onto the surface to prevent a skin from forming on the pudding.
- Sharp knife – For cutting clean slices. A serrated knife works best to get through the graham cracker layers without crushing them.
Budget tip: No hand mixer? A whisk and some elbow grease will get you there. Just make sure your cream is very cold and your bowl is chilled—it whips faster that way. I’ve made this in a rental cabin with nothing but a whisk and a wooden spoon. It took longer, but the result was just as good.
Preparation Method
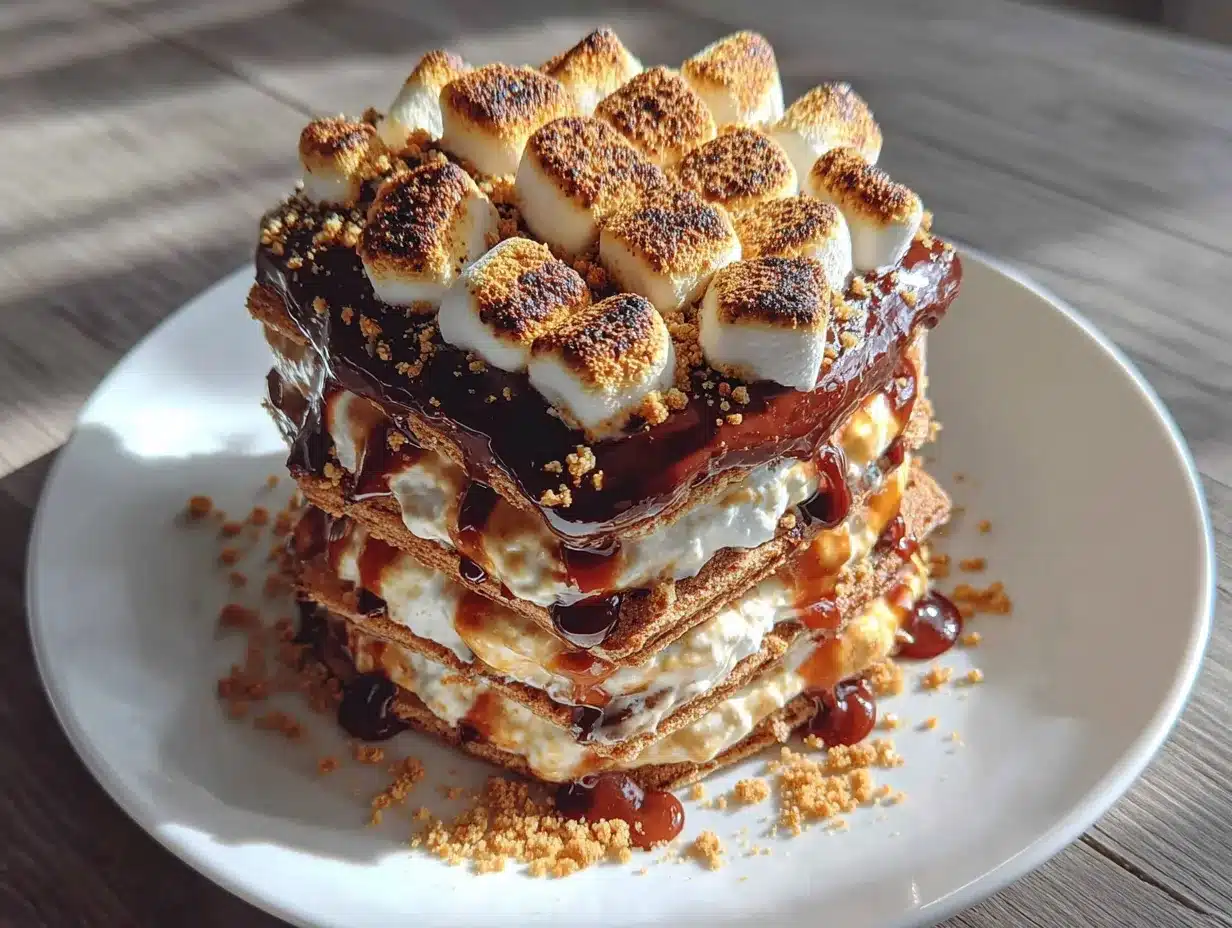
This method is foolproof, I promise. Follow these steps and you’ll have a perfect icebox cake every time.
- Make the chocolate pudding. In a large bowl, whisk together both boxes of instant chocolate pudding mix with 3 cups of cold whole milk. Whisk vigorously for about 2 minutes until the mixture thickens. It should look glossy and feel heavy on the whisk. Set it aside for 5 minutes to fully set—it will continue to thicken as it sits.
- Whip the cream. In a separate large bowl, pour 2 cups of cold heavy whipping cream. Add ¼ cup powdered sugar and 1 teaspoon vanilla extract. Beat with an electric mixer on medium-high speed until soft peaks form—about 3-4 minutes. You’re looking for peaks that hold their shape but still look pillowy, not stiff. Over-whipping turns it into butter, so stop when it looks like soft clouds.
- Fold the whipped cream into the pudding. Take about one-third of the whipped cream and gently fold it into the chocolate pudding using a spatula. This lightens the pudding and makes it easier to layer. Then fold in the remaining whipped cream until no white streaks remain. The mixture should be uniform, airy, and deeply chocolatey.
- Layer the graham crackers. Spread a thin layer of the pudding mixture (about ½ cup) on the bottom of your 9×13-inch dish. This helps the graham crackers stick and prevents them from sliding around. Then arrange a single layer of graham crackers on top, breaking them as needed to fill gaps. I like to fit them snugly—no large empty spaces.
- Add the first filling layer. Spread one-third of the remaining pudding mixture evenly over the graham crackers. Sprinkle about ⅓ cup of mini marshmallows over the pudding. Don’t press them in—just scatter them evenly.
- Repeat the layers. Add another layer of graham crackers, followed by another third of the pudding mixture, and another ⅓ cup of mini marshmallows. Repeat one more time—graham crackers, remaining pudding, and remaining mini marshmallows. You should end with a final layer of graham crackers on top.
- Top with whipped cream and garnish. Spread the reserved plain whipped cream (the portion you didn’t fold into the pudding) over the top layer of graham crackers. Smooth it out evenly. Sprinkle with chopped chocolate and extra marshmallows. For a dramatic look, I sometimes toast the top marshmallows under the broiler for 30 seconds—watch carefully, they burn fast.
- Chill, chill, chill. Cover the dish tightly with plastic wrap and refrigerate for at least 6 hours, but overnight is better. The graham crackers need time to soften and absorb the moisture from the pudding. I’ve made the mistake of rushing this step—the crackers were still crunchy and the layers didn’t hold together. Patience pays off here.
- Slice and serve. When ready to serve, use a sharp knife to cut clean squares. Wipe the knife between cuts for neat edges. Serve cold straight from the fridge. The cake should hold its shape beautifully—if it feels jiggly, give it another hour in the fridge.
Cooking Tips & Techniques
I’ve made this cake more times than I can count, and I’ve learned a few things the hard way. Here’s what I wish someone had told me:
- Don’t skip the chilling time. I know it’s tempting to dig in after a few hours, but the texture won’t be right. The graham crackers need at least 6 hours to soften properly. Overnight is ideal—the flavors meld and the texture becomes perfectly creamy. One time I served it after only 4 hours and the crackers were still crunchy in the middle. Lesson learned.
- Press the plastic wrap onto the surface. When covering the cake, press the plastic wrap directly onto the top layer of whipped cream. This prevents a skin from forming and keeps the texture silky. I learned this trick from a pastry chef friend, and it makes a noticeable difference.
- Use room temperature ingredients for the pudding. The milk should be cold, but let the pudding mix sit out for a few minutes before whisking. Cold powder doesn’t dissolve as evenly, and you’ll end up with lumps. I keep my pudding mix in the pantry, not the fridge, for this reason.
- Toast the marshmallows carefully. If you’re broiling the top marshmallows, keep a close eye on them. They go from golden to burnt in about 15 seconds. I set a timer for 20 seconds and watch through the oven door. Better to under-toast than to have a smoky kitchen and bitter marshmallows.
- Cut with a warm knife. Run your knife under hot water, dry it, then slice. The warm blade glides through the layers without dragging the whipped cream. Wipe the knife clean between cuts for the prettiest presentation.
Variations & Adaptations
This recipe is endlessly adaptable. Here are a few versions I’ve tried and loved:
- S’mores Icebox Cake with Toasted Meringue. Instead of whipped cream on top, make a Swiss meringue and toast it with a kitchen torch. The toasted meringue adds that campfire flavor without needing the oven. It’s a bit more work, but the presentation is stunning—perfect for when you want to impress.
- Peanut Butter S’mores Icebox Cake. Add ½ cup of creamy peanut butter to the pudding mixture before folding in the whipped cream. Swirl it in gently for a marbled effect. The peanut butter adds richness and a savory note that balances the sweetness. I made this for a Super Bowl party and it disappeared in minutes.
- Gluten-Free and Dairy-Free Version. Use gluten-free graham crackers (Kinnikinnick brand works well) and replace the milk with oat milk. For the whipped cream, use full-fat coconut cream—chill the can overnight, scoop out the solid part, and whip it with a little powdered sugar. The texture is slightly different but still delicious.
- Berry S’mores Icebox Cake. Add a layer of fresh raspberries or sliced strawberries between the graham cracker layers. The tartness of the berries cuts through the richness of the chocolate and marshmallow. I used this version for a summer brunch and it was a hit—the red berries against the dark chocolate looked gorgeous.
- Mint Chocolate S’mores Icebox Cake. Add ½ teaspoon of peppermint extract to the pudding mixture and use mint-flavored chocolate chips for the garnish. The cool mint pairs surprisingly well with the toasted marshmallow flavor. Just go easy on the extract—a little goes a long way.
Serving & Storage Suggestions
This cake is best served cold, straight from the fridge. The texture is at its peak when the graham crackers have softened completely but still have a slight bite—like a perfectly baked cheesecake crust.
- Serving temperature: Serve chilled, not room temperature. If it sits out too long, the layers can slide. I recommend taking it out of the fridge about 5-10 minutes before serving—just enough to take the chill off, but not long enough to soften.
- Presentation: Cut into clean squares and serve on individual plates. A drizzle of chocolate syrup or a dusting of powdered sugar adds a nice touch. For a Fourth of July party, I topped it with fresh blueberries and sliced strawberries for a patriotic look. It was a showstopper.
- Complementary dishes: This cake pairs beautifully with fresh fruit—especially berries or sliced peaches. The acidity cuts through the richness. A glass of cold milk or a scoop of vanilla ice cream on the side is never a bad idea either.
- Storage: Cover the dish tightly with plastic wrap and store in the refrigerator for up to 5 days. The texture actually improves after 24 hours as the flavors meld. After 3 days, the graham crackers start to get a bit too soft, but it’s still delicious.
- Freezing: You can freeze this cake for up to 2 months. Wrap the entire dish in plastic wrap, then a layer of aluminum foil. Thaw overnight in the refrigerator before serving. The texture will be slightly softer after freezing, but it’s still excellent.
- Reheating leftovers: If you have a slice that’s been in the fridge for a few days and the graham crackers have gotten too soft, pop it in the microwave for 10-15 seconds. It won’t be the same as fresh, but it’s still a tasty treat.
Nutritional Information & Benefits
Let’s be honest—this is a treat, not a health food. But it’s made with real ingredients, and there’s something to be said for that. Here’s the approximate nutritional breakdown per serving (based on 12 servings):
- Calories: 380-420 per serving
- Fat: 22g (14g saturated)
- Carbohydrates: 45g (28g sugar)
- Protein: 5g
- Fiber: 2g
- Sodium: 350mg
Health benefits of key ingredients: Dark chocolate is rich in antioxidants and can help improve heart health when consumed in moderation. Graham crackers provide a small amount of whole grains, and milk-based ingredients offer calcium and vitamin D. Marshmallows? Well, they make people happy—and that counts for something.
Dietary considerations: This recipe contains gluten, dairy, and sugar. For a gluten-free version, use gluten-free graham crackers. For a dairy-free version, use oat milk and coconut cream. For a lower-sugar option, use sugar-free pudding mix and skip the powdered sugar in the whipped cream. Always check labels for potential allergens if serving to others.
My personal take: I believe in balance. This cake is a celebration dessert—it’s not meant to be an everyday thing. But when you do indulge, make it count. Use real ingredients, take your time, and enjoy every bite. Food is about joy, connection, and creating memories. This cake delivers on all three.
Conclusion
This Easy No-Bake S’mores Icebox Cake is the kind of recipe that becomes a summer tradition. It’s simple enough for a weekday treat, impressive enough for a party, and nostalgic enough to make everyone smile. No oven required, no stress involved—just layers of chocolate, marshmallow, and graham cracker goodness that come together in a way that feels like magic.
I love this recipe because it reminds me of summer nights, fireflies, and the sound of laughter around a campfire. It’s comfort food at its finest—unpretentious, crowd-pleasing, and absolutely delicious. Whether you’re making it for a Fourth of July gathering or just because it’s Tuesday, this cake delivers every single time.
So go ahead—grab a box of graham crackers, a bag of marshmallows, and a little bit of patience. Build your layers, let the fridge work its magic, and get ready to watch this cake disappear. And when someone asks for the recipe? Share it freely. That’s what summer desserts are all about.
I’d love to hear how yours turns out! Drop a comment below and let me know if you tried any variations, toasted the marshmallows, or served it with a scoop of ice cream. Your tweaks might inspire someone else’s next great dessert. Happy no-baking, friends!
Frequently Asked Questions
Can I make this s’mores icebox cake ahead of time?
Absolutely! In fact, it’s better when made ahead. Prepare it the night before you plan to serve it, cover tightly with plastic wrap, and refrigerate for at least 8 hours. The graham crackers soften perfectly overnight, and the flavors meld together beautifully. It’s the ultimate make-ahead dessert for summer parties.
Why did my graham crackers stay crunchy?
This usually happens when the cake hasn’t chilled long enough. The graham crackers need at least 6 hours to absorb moisture from the pudding and soften properly. If they’re still crunchy after 8 hours, your pudding mixture might have been too thick. Next time, make sure the pudding is fully set but still soft before layering—it should be spreadable, not stiff.
Can I use Cool Whip instead of homemade whipped cream?
You can, but I don’t recommend it. Homemade whipped cream has a lighter, airier texture that balances the dense pudding and crunchy graham crackers. Cool Whip is more stable but also heavier and sweeter. If you’re short on time, thawed Cool Whip will work in a pinch—just expect a slightly different texture and flavor.
How do I get clean slices without the layers sliding?
Use a sharp knife and wipe it clean between cuts. For extra-clean slices, chill the cake for at least 8 hours, then run your knife under hot water, dry it, and slice. The warm blade glides through the layers without dragging the whipped cream. Also, make sure your layers are evenly spread—uneven layers can cause the cake to tilt or slide when cut.
Can I double this recipe for a larger crowd?
Yes, and it’s perfect for big gatherings! Double all ingredients and use a 12×17-inch half-sheet pan or two 9×13-inch dishes. The layering process is the same—just work in batches. Keep in mind that a larger pan may need slightly more chilling time (8-10 hours) to ensure the center sets properly. For a Fourth of July barbecue, this doubled recipe feeds a crowd with ease.
Pin This Recipe!
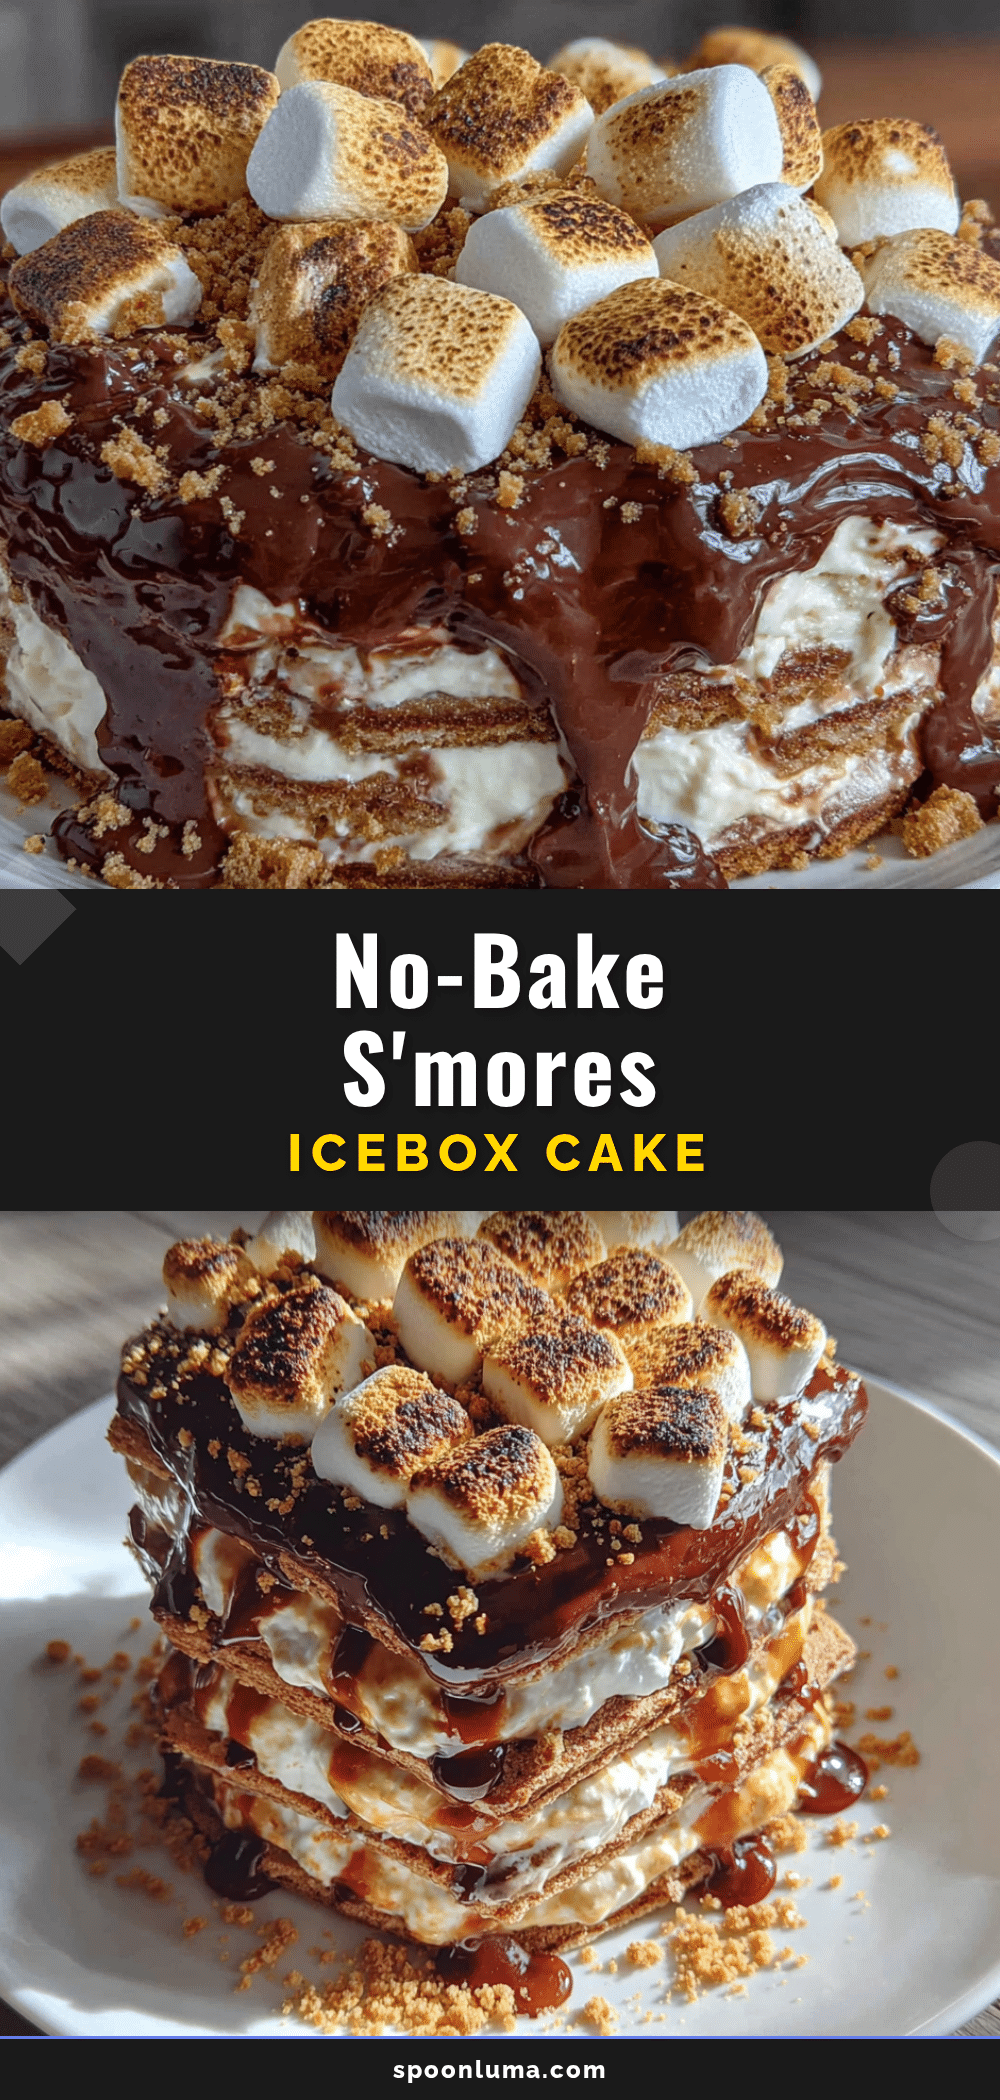
Easy No-Bake Smores Icebox Cake: The Best Summer Dessert

This Easy No-Bake S’mores Icebox Cake is a creamy, crunchy, melty no-bake dessert that tastes exactly like a campfire—minus the bug spray and smoky hair. Perfect for summer gatherings, it layers graham crackers, chocolate pudding, marshmallows, and whipped cream for a crowd-pleasing treat that requires no oven.
- Prep Time: 20 minutes
- Cook Time: 0 minutes
- Total Time: 6 hours 20 minutes (includes chilling)
- Yield: 12 servings 1x
- Category: Dessert
- Cuisine: American
Ingredients
- 1 full box (about 14–16 whole sheets) graham crackers
- 2 (3.9-ounce) boxes instant chocolate pudding mix
- 3 cups cold whole milk
- 2 cups heavy whipping cream
- 1/4 cup powdered sugar
- 1 teaspoon vanilla extract
- 2 cups mini marshmallows, plus extra for topping
- 1/2 cup chopped chocolate bar or chocolate chips (for garnish)
Instructions
- Make the chocolate pudding: In a large bowl, whisk together both boxes of instant chocolate pudding mix with 3 cups of cold whole milk. Whisk vigorously for about 2 minutes until the mixture thickens. Set aside for 5 minutes to fully set.
- Whip the cream: In a separate large bowl, pour 2 cups of cold heavy whipping cream. Add 1/4 cup powdered sugar and 1 teaspoon vanilla extract. Beat with an electric mixer on medium-high speed until soft peaks form, about 3-4 minutes.
- Fold the whipped cream into the pudding: Take about one-third of the whipped cream and gently fold it into the chocolate pudding using a spatula. Then fold in the remaining whipped cream until no white streaks remain.
- Layer the graham crackers: Spread a thin layer of the pudding mixture (about 1/2 cup) on the bottom of a 9×13-inch dish. Arrange a single layer of graham crackers on top, breaking them as needed to fill gaps.
- Add the first filling layer: Spread one-third of the remaining pudding mixture evenly over the graham crackers. Sprinkle about 1/3 cup of mini marshmallows over the pudding.
- Repeat the layers: Add another layer of graham crackers, followed by another third of the pudding mixture, and another 1/3 cup of mini marshmallows. Repeat one more time—graham crackers, remaining pudding, and remaining mini marshmallows. You should end with a final layer of graham crackers on top.
- Top with whipped cream and garnish: Spread the reserved plain whipped cream over the top layer of graham crackers. Smooth it out evenly. Sprinkle with chopped chocolate and extra marshmallows. Optionally, toast the top marshmallows under the broiler for 30 seconds.
- Chill: Cover the dish tightly with plastic wrap and refrigerate for at least 6 hours, but overnight is better.
- Slice and serve: Use a sharp knife to cut clean squares. Wipe the knife between cuts for neat edges. Serve cold straight from the fridge.
Notes
Don’t skip the chilling time—the graham crackers need at least 6 hours to soften properly. Overnight is ideal. Press plastic wrap directly onto the surface of the whipped cream to prevent a skin from forming. For clean slices, use a warm knife and wipe between cuts. This cake can be stored in the refrigerator for up to 5 days or frozen for up to 2 months.
Nutrition
- Serving Size: 1 slice (1/12 of cak
- Calories: 400
- Sugar: 28
- Sodium: 350
- Fat: 22
- Saturated Fat: 14
- Carbohydrates: 45
- Fiber: 2
- Protein: 5
Keywords: no-bake dessert, icebox cake, s'mores, summer dessert, graham cracker, chocolate pudding, marshmallow, easy dessert, crowd-pleaser


