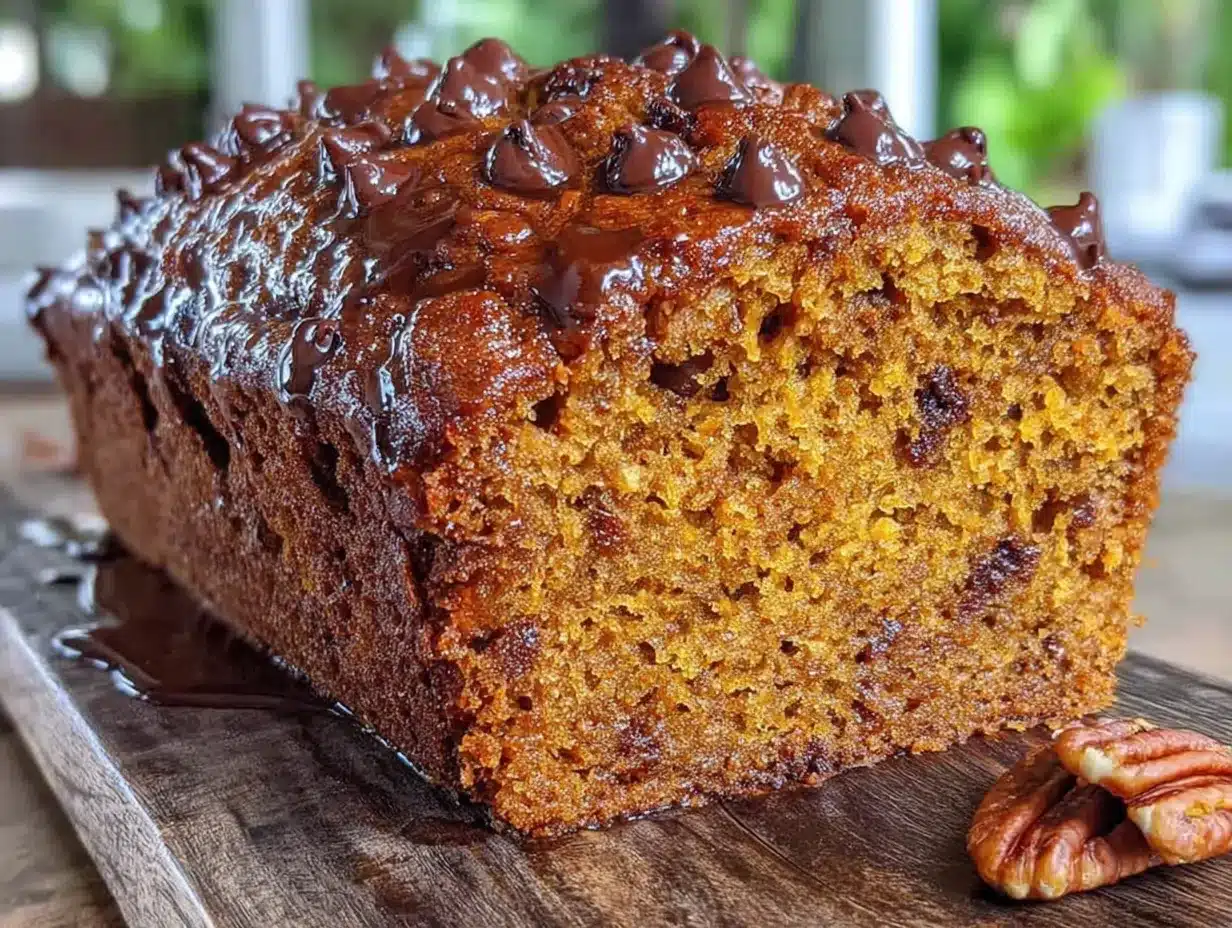
That first whiff of cinnamon and nutmeg—the kind that hits you before you even open the oven door—still takes me straight to my grandmother’s tiny kitchen on a rainy October afternoon. I was maybe ten, sitting on a wobbly stool, watching her pull a loaf pan from the oven that looked nothing special. Just a simple brown bread, slightly domed on top. But then she sliced it, and there they were: little dark pockets of melted chocolate, glistening against the pumpkin-colored crumb. I remember thinking, how did she know to put chocolate in there? She just shrugged and said, “Because it makes people happy.”
That moment stuck with me. Not the recipe itself—she never wrote anything down—but the feeling of biting into something warm and unexpected. For years, I tried to recreate that bread. I tested versions with too much spice, not enough chocolate, batter that was too wet or too dry. I overcomplicated it, honestly. I added streusel toppings and cream cheese swirls, all stuff that distracted from what made that first bite so perfect: the way the pumpkin kept the bread impossibly soft, and how the chocolate chips turned into little pools of sweetness against all that warm spice.
This Easy One-Bowl Pumpkin Chocolate Chip Bread is my version of that memory. It’s not fancy. It uses one bowl, basic pantry ingredients, and comes together in about ten minutes of active work. But the texture? It’s exactly that tender, moist crumb I remember. The chocolate chips stay suspended throughout the loaf, so every slice has those happy little surprises. I make it every fall, sometimes twice a week, and it never gets old. It’s the kind of recipe you don’t have to think about—you just mix, pour, and wait for the house to smell like October.
Why You’ll Love This Recipe
Let me tell you why this has become my most-requested fall bake. It’s not just because it tastes incredible—though it does—but because it actually respects your time. You know those recipes that require three bowls, a stand mixer, and a sink full of dishes before you even preheat the oven? This is the opposite of that.
- One Bowl, No Fuss: Everything goes into a single mixing bowl. No sifting, no creaming butter and sugar separately, no dirtying every dish in your kitchen. You can have the batter ready in under ten minutes flat.
- Simple Pantry Ingredients: You probably already have most of this in your kitchen right now. Canned pumpkin, flour, sugar, eggs, oil, and chocolate chips. No weird specialty items or trips to three different stores.
- Perfect for Fall Baking (or Any Time): This bread screams autumn, but honestly, I make it year-round. It’s great for Thanksgiving brunch, Halloween parties, or just a cozy Sunday afternoon when you want the house to smell amazing.
- Crowd-Pleaser Every Time: I’ve brought this to potlucks, work parties, and family gatherings, and it disappears fast. The chocolate chips win over the pumpkin skeptics, and the pumpkin keeps the bread so moist that everyone asks for the recipe.
- Unbelievably Soft and Tender: The pumpkin does something magical here. It keeps the bread incredibly moist without making it dense or gummy. Every slice is tender, almost cake-like, with those melty chocolate pockets throughout.
What makes this different from other pumpkin breads? It’s the ratio. I tested this about seven times to get the perfect balance of pumpkin to flour so the bread stays moist but still holds its shape. The chocolate chips aren’t an afterthought—they’re integrated so every bite gets a little hit of sweetness. Plus, I use a simple technique of coating the chocolate chips in a bit of flour before folding them in, which keeps them from sinking to the bottom. Small trick, huge difference.
This is the kind of bread that makes you close your eyes after the first bite. It’s comfort food at its simplest—no pretension, just pure, soul-soothing satisfaction. Perfect for impressing guests without any stress, or turning a regular Tuesday into something a little more special.
What Ingredients You Will Need
This recipe uses simple, wholesome ingredients that work together to create that perfect tender crumb and rich flavor. No complicated stuff here—just basics that deliver big results.
- All-Purpose Flour (1 ¾ cups / 220g): The backbone of the bread. I use standard all-purpose flour for the best texture. If you want to swap, a good quality gluten-free 1:1 blend works, but the crumb will be slightly more delicate. Spoon and level your flour—don’t scoop directly from the bag or you’ll pack it down and end up with dry bread.
- Granulated Sugar (1 cup / 200g): Adds sweetness and helps create that tender crumb. You can reduce it to ¾ cup if you prefer a less sweet bread, but keep in mind the sugar also affects the moisture and texture.
- Brown Sugar (½ cup / 100g, packed): This is my secret for extra moisture and a deeper, almost caramel-like flavor. Light or dark brown sugar both work—dark gives a richer taste. Pack it firmly into your measuring cup.
- Pumpkin Purée (1 can / 15 oz or 425g): Make sure you’re using 100% pumpkin purée, not pumpkin pie filling. The pie filling has added sugar and spices that will throw off the balance. I prefer Libby’s brand for consistent texture, but any pure pumpkin purée works. If you have leftover purée, you can freeze it in small portions for later.
- Vegetable Oil (½ cup / 120ml): Keeps the bread incredibly moist. I use a neutral oil like canola or grapeseed. You can substitute melted coconut oil or melted butter, but the texture will be slightly different—butter adds flavor but can make the bread a bit denser.
- Large Eggs (2): Room temperature is best so they incorporate smoothly into the batter. If you forgot to take them out ahead of time, place them in a bowl of warm water for 5 minutes.
- Vanilla Extract (2 teaspoons): Enhances all the other flavors. Pure vanilla is ideal, but good-quality imitation vanilla works fine too.
- Baking Soda (1 teaspoon): The leavening agent that helps the bread rise. Make sure it’s fresh—test it by dropping a bit into vinegar; if it fizzes vigorously, it’s good to go.
- Baking Powder (½ teaspoon): Works alongside the baking soda for extra lift. Again, check the expiration date.
- Salt (½ teaspoon): Balances the sweetness and enhances the pumpkin and spice flavors. I use fine sea salt.
- Ground Cinnamon (2 teaspoons): The star spice. It pairs beautifully with pumpkin and chocolate. I use Saigon cinnamon for a stronger, sweeter flavor.
- Ground Nutmeg (½ teaspoon): Adds warmth and depth. Freshly grated nutmeg is incredible if you have it, but pre-ground works perfectly.
- Ground Ginger (¼ teaspoon): A little kick that brightens up the spice mix. You can skip it if you don’t have it, but it adds a nice subtle warmth.
- Ground Cloves (⅛ teaspoon): Just a pinch—cloves are strong, but they add that classic pumpkin spice complexity. Go easy here.
- Semi-Sweet Chocolate Chips (1 cup / 175g): The star of the show alongside the pumpkin. Semi-sweet balances the sweetness of the bread perfectly. Dark chocolate chips are also excellent if you prefer a richer, less sweet flavor. Milk chocolate chips will make the bread quite sweet, so adjust your sugar if you go that route. I love using Guittard or Ghirardelli chips for the best flavor and melt quality.
- Optional Topping: Turbinado Sugar (1 tablespoon): Sprinkling this on top before baking gives a lovely crunchy, sparkly crust. Totally optional but highly recommended.
Equipment Needed
You don’t need a fancy kitchen to make this bread. Here’s what you’ll need:
- One Large Mixing Bowl: Any bowl works—glass, stainless steel, or ceramic. I use a standard 4-quart bowl.
- Whisk or Wooden Spoon: A whisk works great for combining wet ingredients, and a sturdy wooden spoon or silicone spatula is perfect for folding in the flour and chocolate chips.
- 9×5-Inch Loaf Pan: This is the standard size. If you use an 8×4-inch pan, your bread will be taller and可能需要 slightly longer baking time. Glass, metal, or ceramic all work—just adjust the baking time if using glass (it tends to bake faster). I prefer a light-colored metal pan for even browning.
- Parchment Paper: Line your loaf pan with a sling of parchment paper for easy removal. You can also grease the pan with butter or non-stick spray, but parchment is foolproof.
- Cooling Rack: Essential for letting the bread cool evenly so the bottom doesn’t get soggy.
- Measuring Cups and Spoons: For accurate measurements. A kitchen scale is even better for precision, especially with flour.
- Toothpick or Skewer: For testing doneness. A wooden skewer works beautifully.
If you don’t have a loaf pan, you can bake this in an 8×8-inch square pan for about 30-35 minutes to make pumpkin chocolate chip bars instead. No loaf pan? No problem.
Preparation Method
- Preheat and Prepare: Preheat your oven to 350°F (175°C). Position a rack in the center of the oven. Line your 9×5-inch loaf pan with a strip of parchment paper, letting the ends hang over the long sides—this creates handles for lifting the bread out later. Lightly grease the exposed ends of the pan with non-stick spray or butter.
- Combine the Wet Ingredients: In your large mixing bowl, add the pumpkin purée, vegetable oil, granulated sugar, brown sugar, eggs, and vanilla extract. Whisk everything together until smooth and well combined. Don’t worry if the mixture looks a bit separated at first—keep whisking until it comes together into a uniform, glossy batter. This takes about 30 seconds of vigorous whisking.
- Add the Dry Ingredients: Directly onto the wet mixture, add the all-purpose flour, baking soda, baking powder, salt, cinnamon, nutmeg, ginger, and cloves. Don’t stir yet—just pile them on top. This prevents overmixing later.
- Mix Until Just Combined: Using a rubber spatula or wooden spoon, gently fold the dry ingredients into the wet. Stir in a wide, sweeping motion, scraping the bottom of the bowl to make sure you get all the flour. Stop mixing as soon as you no longer see streaks of flour. A few small lumps are totally fine—overmixing at this stage will make the bread tough. The batter will be thick and slightly glossy.
- Prep the Chocolate Chips: In a small bowl, toss the chocolate chips with about 1 tablespoon of flour (take it from your measured flour before adding it to the bowl). This coating helps prevent the chips from sinking to the bottom of the loaf during baking. It’s a small step that makes a big difference.
- Fold in the Chocolate Chips: Gently fold the floured chocolate chips into the batter using just a few strokes. Distribute them evenly, but don’t overwork the batter. You want pockets of chocolate throughout, not a uniform chocolate batter.
- Transfer to Pan: Pour the batter into your prepared loaf pan. Use your spatula to spread it evenly into the corners and smooth the top. If you’re using the turbinado sugar topping, sprinkle it evenly over the surface now.
- Bake: Place the pan in the preheated oven and bake for 55-65 minutes. The exact time depends on your oven and pan. Start checking at 55 minutes—insert a toothpick or skewer into the center of the loaf. It should come out clean or with just a few moist crumbs attached (not wet batter). If the top is browning too quickly but the center isn’t done yet, loosely tent the loaf with aluminum foil for the last 10-15 minutes of baking.
- Cool in Pan: Remove the loaf from the oven and place it on a cooling rack. Let it cool in the pan for about 15 minutes. This allows the structure to set so the bread doesn’t fall apart when you remove it.
- Remove and Cool Completely: Using the parchment paper sling, lift the bread out of the pan and transfer it to the cooling rack. Let it cool completely before slicing—this is crucial. If you slice it while it’s still warm, the bread will be too tender and may crumble. Patience here pays off with clean, beautiful slices.
Cooking Tips & Techniques
I’ve made this bread more times than I can count, and I’ve learned a few things the hard way. Here are my best tips to ensure success every time.
Don’t Overmix the Batter. This is the number one mistake I see with quick breads. Once you add the flour, mix only until it disappears. Overmixing develops the gluten and makes the bread tough and dense. A few lumps are your friend here—they disappear during baking.
Room Temperature Ingredients Matter. Cold eggs can seize up the batter and make it lumpy. Cold pumpkin can cause the oil to solidify. Let everything sit on the counter for about 30 minutes before you start. If you’re in a hurry, place the eggs in a bowl of warm water for 5 minutes and microwave the pumpkin for about 15 seconds to take the chill off.
Check Your Oven Temperature. Ovens run hot or cold more often than you’d think. An oven thermometer is a cheap investment that pays off. If your bread is browning too fast on the outside but still raw in the middle, your oven is likely running hot. Tent with foil and reduce the temperature by 25°F.
The Toothpick Test Isn’t Foolproof. Chocolate chips can give you a false reading—if your toothpick hits a melted chip, it’ll look wet even though the bread is done. Test in a few different spots, and look for moist crumbs rather than completely dry. A little bit of chocolate on the toothpick is fine.
Let It Cool Completely. I know it’s tempting to slice into warm bread, but trust me on this one. The bread continues to set as it cools. Slicing too early will give you a crumbly mess. Wait at least an hour, ideally two. The flavor also deepens as it cools—the spices mellow and meld together beautifully.
One Pan, Many Uses. I’ve also made this batter into muffins (bake at 350°F for 18-22 minutes) and mini loaves (bake for 30-35 minutes). The recipe is versatile, so don’t feel locked into a loaf pan.
I once forgot the baking soda entirely. The bread came out flat and dense, like a pumpkin hockey puck. It still tasted okay, but it was a sad little loaf. Double-check your leavening agents before you start—it’s an easy mistake to make, and not one you want to learn the hard way.
Variations & Adaptations
This recipe is a fantastic base for experimentation. Here are some of my favorite variations.
Gluten-Free Version: Substitute the all-purpose flour with a high-quality 1:1 gluten-free baking flour blend (I like King Arthur Measure for Measure or Bob’s Red Mill). Add 1 teaspoon of xanthan gum if your blend doesn’t already include it. The texture will be slightly more delicate, but still delicious.
Dairy-Free Adaptation: This recipe is already dairy-free if you use dairy-free chocolate chips. Many semi-sweet chips are naturally dairy-free, but always check the label. Enjoy Life brand makes excellent dairy-free chips.
Nutty Twist: Fold in ½ cup of toasted chopped pecans or walnuts along with the chocolate chips. Toast them first in a dry skillet over medium heat for 3-4 minutes until fragrant—this brings out their flavor and keeps them crunchy in the bread.
Spice It Up: For a bolder spice profile, add ½ teaspoon of pumpkin pie spice in addition to the individual spices. Or try a pinch of cardamom for an unexpected, aromatic twist. I’ve done this with a bit of cayenne pepper too—just ⅛ teaspoon—for a subtle heat that plays nicely with the chocolate.
White Chocolate and Cranberry: Swap the semi-sweet chips for white chocolate chips and fold in ½ cup of dried cranberries. The tartness of the cranberries cuts through the sweetness beautifully. This version is especially lovely for holiday gatherings.
Lower Sugar Option: Reduce the granulated sugar to ¾ cup and the brown sugar to ⅓ cup. The bread will be less sweet, but the pumpkin and chocolate will still shine. You can also use a sugar substitute like monk fruit sweetener, but the texture may be slightly different.
I once made a version with dark chocolate chunks and a sprinkle of flaky sea salt on top before baking. It was absolutely incredible—the salt brings out the chocolate and balances the sweetness. Highly recommend trying that at least once.
Serving & Storage Suggestions
This bread is wonderful in so many ways. Here’s how to enjoy it at its best.
Serving: Serve at room temperature or slightly warm. A slice with a pat of butter melting into it is pure heaven. It’s also fantastic toasted—just pop a slice in the toaster or under the broiler for a minute until the edges are golden and the chocolate chips get a little melty again. For an extra treat, spread a little cream cheese or honey butter on top.
Pairings: This bread pairs beautifully with a hot cup of coffee, chai tea, or a cold glass of milk. It’s also wonderful alongside a bowl of vanilla ice cream for dessert, or as part of a fall brunch spread with a festive birthday cake for a special occasion.
Storage: Store the bread tightly wrapped in plastic wrap or in an airtight container at room temperature for up to 4 days. The moisture from the pumpkin actually helps it stay soft longer than regular quick breads. If you live in a humid climate, you might want to store it in the refrigerator after day two to prevent mold.
Freezing: This bread freezes beautifully. Wrap the completely cooled loaf (or individual slices) tightly in plastic wrap, then in a layer of aluminum foil or a freezer-safe bag. Freeze for up to 3 months. To thaw, leave it on the counter for a few hours or pop individual slices in the microwave for about 20 seconds. I always keep a loaf in the freezer for unexpected guests or sudden pumpkin cravings.
Flavor Development: Here’s a little secret—this bread actually tastes better on day two. The spices have time to meld and mellow, and the texture becomes even more moist and tender. So if you can resist, make it a day ahead of serving.
If you’re in the mood for another moist, vegetable-based quick bread, you might enjoy this healthy zucchini bread with Greek yogurt—it uses a similar one-bowl method and is perfect for using up summer zucchini.
Nutritional Information & Benefits
Here’s an approximate nutritional breakdown per slice (based on 12 slices):
- Calories: 320
- Fat: 14g
- Carbohydrates: 47g
- Fiber: 3g
- Sugar: 28g
- Protein: 5g
Please note these are estimates and will vary based on specific ingredients and portion sizes.
Health Benefits: Pumpkin is a nutritional powerhouse. It’s packed with vitamin A (beta-carotene), which supports eye health and immune function. It’s also a good source of fiber, which aids digestion and helps you feel full. The chocolate chips provide antioxidants (flavonoids) from the cocoa, especially if you use dark chocolate. Plus, using oil instead of butter keeps the saturated fat content lower than traditional quick breads.
Dietary Considerations: This recipe is nut-free (if you skip the optional nuts) and can easily be made dairy-free and gluten-free with the substitutions mentioned above. It’s also egg-free adaptable—use a flax egg (1 tablespoon ground flaxseed mixed with 3 tablespoons water per egg) for a vegan version, though the texture will be slightly denser.
Potential Allergens: This recipe contains wheat (gluten), eggs, and may contain dairy depending on your chocolate chip choice. Always check labels if you’re cooking for someone with allergies.
I love that this bread feels indulgent but has some real nutritional value hidden in there. It’s not health food, but it’s a far cry from empty calories. A slice with a piece of fruit makes a satisfying breakfast or snack that actually keeps you going.
Conclusion
This Easy One-Bowl Pumpkin Chocolate Chip Bread is the kind of recipe that becomes a staple. It’s simple enough for a weekday bake, impressive enough for company, and forgiving enough for beginner bakers. The combination of tender, spiced pumpkin bread and melty chocolate chips is just unbeatable—it’s fall in a loaf pan, honestly.
I love that this recipe doesn’t ask much of you. One bowl, a whisk, and about ten minutes of effort, and you get a loaf that fills your kitchen with the coziest aroma and makes everyone who tries it smile. That’s the kind of cooking I live for—simple, rewarding, and full of heart.
I encourage you to make this your own. Add different mix-ins, play with the spices, or turn it into muffins. The base is solid, and it welcomes creativity. If you try it, I’d love to hear how it turns out. Leave a comment below, tag me in your photos, or share your own twist on the recipe. Happy baking, friends—you’ve got this.
And if you’re looking for another quick bread that uses up seasonal produce, don’t miss this moist and healthy lemon blueberry zucchini bread—it’s a completely different flavor profile but just as easy and rewarding.
Frequently Asked Questions
Can I use fresh pumpkin instead of canned?
Yes, you can use fresh pumpkin purée. Roast a small sugar pumpkin (not a carving pumpkin) at 400°F until tender, then scoop out the flesh and blend until smooth. The main difference is that fresh pumpkin has more water content, so you may need to drain it slightly by letting it sit in a fine-mesh strainer for about 30 minutes. Canned pumpkin is more consistent and convenient, so I usually recommend it for this recipe.
Why did my chocolate chips sink to the bottom?
This happens when the batter is too thin or the chips are too heavy. The flour coating trick I mentioned in the recipe helps a lot. Also, make sure your batter isn’t too warm—if your pumpkin or eggs were room temperature, the batter should be fine. Avoid using mini chocolate chips, as they tend to sink more easily. Tossing them in flour is your best defense.
Can I make this into muffins instead of a loaf?
Absolutely. Divide the batter into a greased or lined 12-cup muffin tin. Bake at 350°F for 18-22 minutes, or until a toothpick inserted into the center comes out clean. Muffins will bake faster than a loaf, so start checking at 18 minutes. You’ll get about 12-14 muffins depending on how full you fill the cups.
How do I know when the bread is fully baked?
The top should be golden brown and spring back lightly when touched. A toothpick inserted into the center (avoiding any chocolate chips) should come out clean or with a few moist crumbs—not wet batter. The internal temperature should read about 200-205°F on an instant-read thermometer. If the top is browning too fast, tent with foil and continue baking.
Can I reduce the sugar in this recipe?
Yes, you can reduce the sugar, but keep in mind that sugar does more than sweeten—it also affects the moisture and tenderness of the bread. I’ve successfully reduced the granulated sugar to ¾ cup and the brown sugar to ⅓ cup without major issues. The bread will be less sweet, but the chocolate chips will still provide sweetness. If you reduce it further, the texture may become slightly drier. You can also experiment with sugar substitutes like monk fruit or stevia blends, but results may vary.
Pin This Recipe!
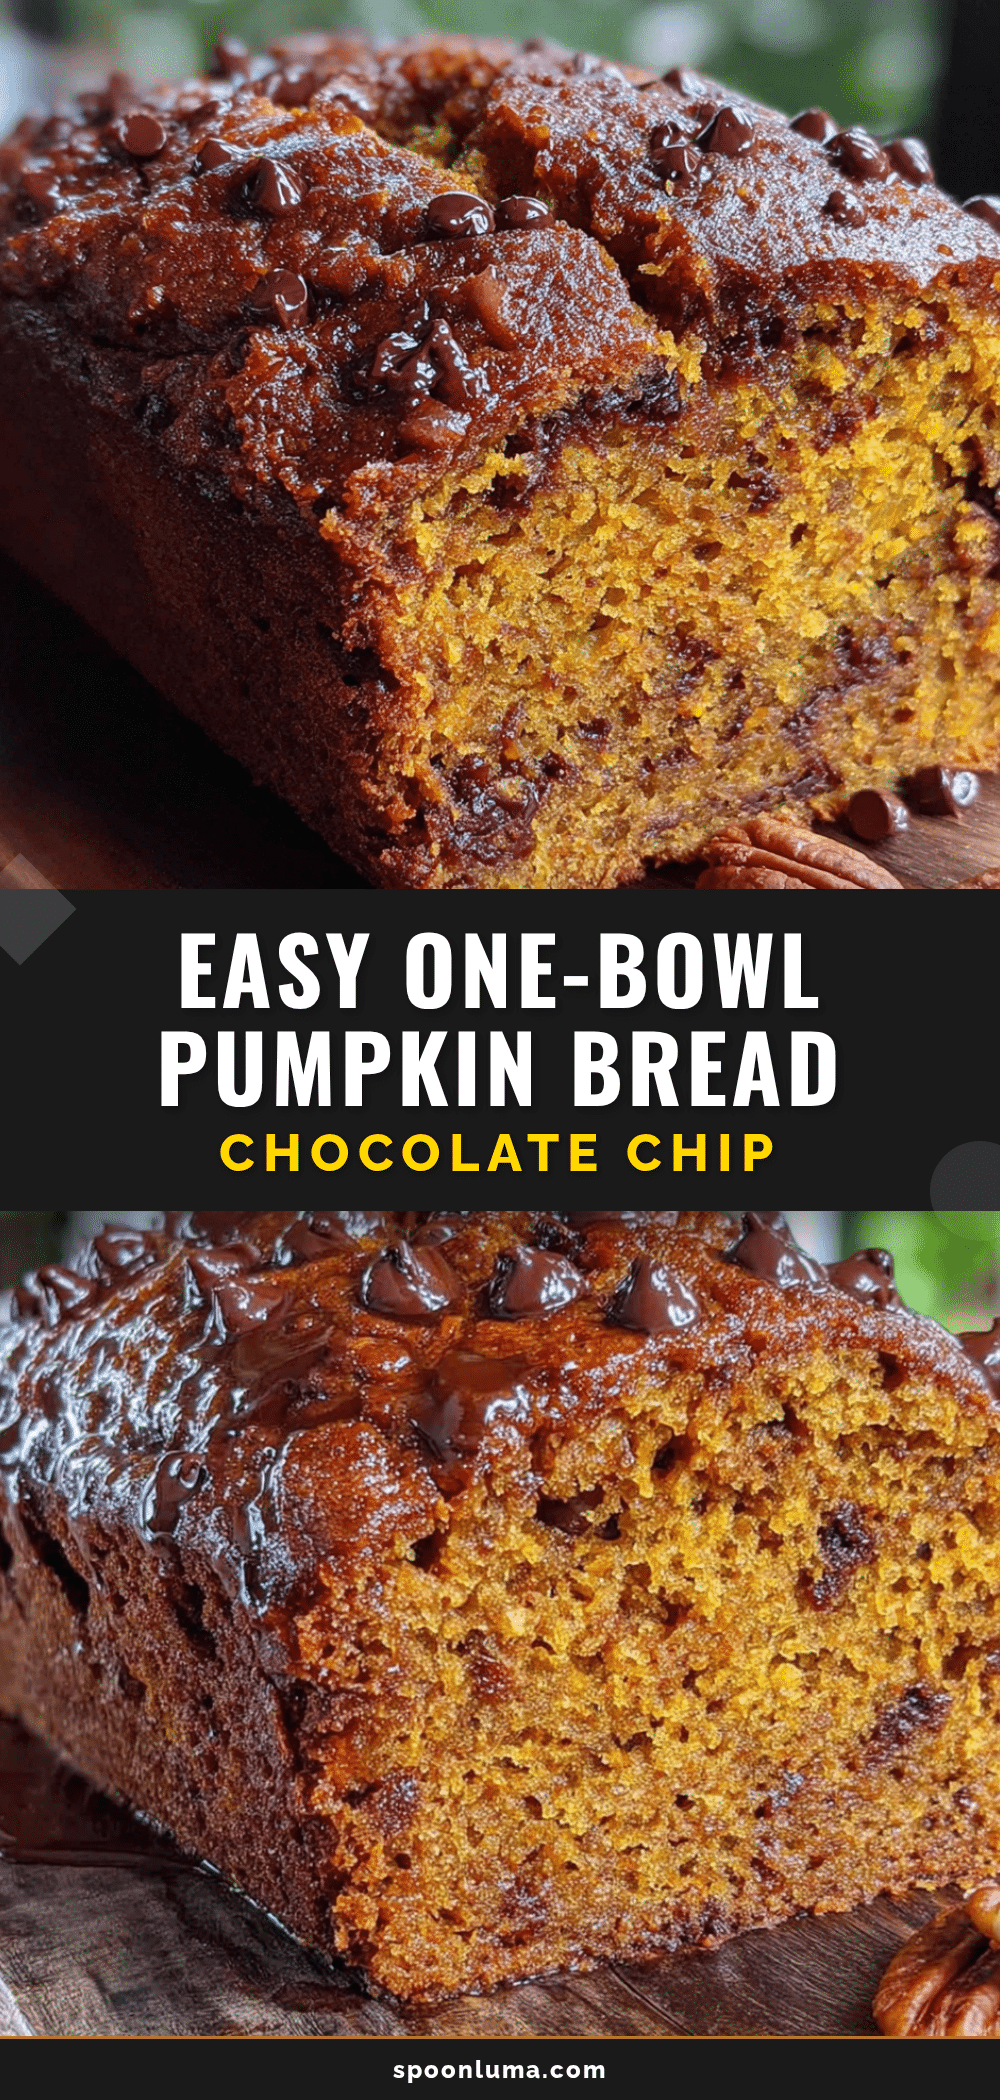
Easy One-Bowl Pumpkin Chocolate Chip Bread (Best Homemade Recipe)
This Easy One-Bowl Pumpkin Chocolate Chip Bread is a simple, tender, and moist quick bread packed with warm spices and melty chocolate chips. Made in one bowl with basic pantry ingredients, it’s the perfect fall bake that’s ready in about ten minutes of active work.
- Prep Time: 10 minutes
- Cook Time: 55-65 minutes
- Total Time: 1 hour 15 minutes (including cooling)
- Yield: 12 servings 1x
- Category: Dessert
- Cuisine: American
Ingredients
- 1 ¾ cups (220g) all-purpose flour
- 1 cup (200g) granulated sugar
- ½ cup (100g) packed brown sugar
- 1 can (15 oz or 425g) pumpkin purée (100% pumpkin, not pie filling)
- ½ cup (120ml) vegetable oil (or canola, grapeseed, melted coconut oil, or melted butter)
- 2 large eggs, room temperature
- 2 teaspoons vanilla extract
- 1 teaspoon baking soda
- ½ teaspoon baking powder
- ½ teaspoon fine sea salt
- 2 teaspoons ground cinnamon
- ½ teaspoon ground nutmeg
- ¼ teaspoon ground ginger
- ⅛ teaspoon ground cloves
- 1 cup (175g) semi-sweet chocolate chips
- 1 tablespoon turbinado sugar (optional, for topping)
Instructions
- Preheat your oven to 350°F (175°C). Position a rack in the center of the oven. Line a 9×5-inch loaf pan with a strip of parchment paper, letting the ends hang over the long sides. Lightly grease the exposed ends of the pan with non-stick spray or butter.
- In a large mixing bowl, combine the pumpkin purée, vegetable oil, granulated sugar, brown sugar, eggs, and vanilla extract. Whisk vigorously until smooth and well combined, about 30 seconds.
- Add the all-purpose flour, baking soda, baking powder, salt, cinnamon, nutmeg, ginger, and cloves directly onto the wet mixture. Do not stir yet.
- Using a rubber spatula or wooden spoon, gently fold the dry ingredients into the wet until just combined. Stop mixing as soon as no streaks of flour remain. A few small lumps are fine.
- In a small bowl, toss the chocolate chips with about 1 tablespoon of flour (taken from the measured flour) to coat them. This helps prevent sinking.
- Gently fold the floured chocolate chips into the batter with just a few strokes until evenly distributed.
- Pour the batter into the prepared loaf pan. Spread evenly and smooth the top. Sprinkle with turbinado sugar if using.
- Bake for 55-65 minutes, or until a toothpick inserted into the center comes out clean or with a few moist crumbs (avoid chocolate chips). If the top browns too quickly, tent loosely with foil for the last 10-15 minutes.
- Remove from the oven and let cool in the pan on a cooling rack for 15 minutes.
- Using the parchment sling, lift the bread out of the pan and transfer to the cooling rack. Let cool completely before slicing (at least 1-2 hours).
Notes
For best results, use room temperature ingredients. Do not overmix the batter. The flour coating on chocolate chips prevents sinking. Let the bread cool completely before slicing for clean slices. The bread tastes even better on day two as flavors meld. For muffins, bake at 350°F for 18-22 minutes. For mini loaves, bake for 30-35 minutes.
Nutrition
- Serving Size: 1 slice
- Calories: 320
- Sugar: 28
- Sodium: 280
- Fat: 14
- Saturated Fat: 4
- Carbohydrates: 47
- Fiber: 3
- Protein: 5
Keywords: pumpkin bread, chocolate chip bread, fall baking, quick bread, one bowl recipe, pumpkin chocolate chip bread, easy pumpkin bread


