I need to use up the bananas on my counter, and I have half a can of pumpkin puree in the fridge. That’s it. That’s the whole reason this bread exists. Not some elaborate plan or a cherished family heirloom recipe—just two ingredients staring at me, demanding to be baked together before they went bad. And honestly? Best decision I’ve made in the kitchen all month.
The walnuts were a last-minute addition. I grabbed a handful from the freezer (where I keep them so they don’t go rancid, a tip I learned the hard way) and tossed them in because this bread needed some crunch. Something to break up the soft, tender crumb that I knew was coming. The pumpkin adds this almost creamy texture that banana bread alone doesn’t have, and together they create this loaf that’s somehow both familiar and totally new.
I’ve made a lot of quick breads in my time. Some were dry and crumbly. Others were so dense they could double as doorstops. But this one? This one hit that sweet spot—moist without being gummy, flavorful without being overwhelming. The banana and pumpkin don’t fight each other; they just hang out together in perfect harmony, with the walnuts chiming in every few bites to keep things interesting.
I wasn’t planning on sharing this recipe at first. It felt too simple, too thrown-together. But then I made it again (and again) and realized that sometimes the best recipes come from using what you have, not from following a strict plan. This bread taught me that.
Why You’ll Love This Recipe
Let me tell you why this banana pumpkin walnut bread deserves a spot in your regular baking rotation. I’ve tested this recipe six times to get it just right, and each batch confirmed what I suspected from the start—this is one of those rare breads that checks every box.
- Incredibly Moist: The combination of ripe bananas and pumpkin puree creates a texture that stays soft for days. No dry crumbs here, I promise.
- Simple Ingredients: You probably have most of these in your pantry right now. No weird specialty items or expensive extracts.
- Perfect for Fall (and Year-Round): Sure, it screams autumn with the pumpkin, but honestly? I make this all year long. Bananas don’t care what season it is.
- Crowd-Pleaser: I brought this to a potluck and watched three different people ask for the recipe before the bread was even half gone.
- Freezer-Friendly: Make two loaves. Freeze one. Thank me later when you have homemade breakfast ready to go on a busy morning.
What makes this recipe different from the dozens of banana bread recipes out there? It’s the pumpkin. The pumpkin adds this velvety richness that banana bread alone just can’t achieve. And the walnuts? They provide that textural contrast that keeps every bite interesting. This isn’t just another version of banana bread—it’s the version that makes you wonder why you haven’t been adding pumpkin to everything all along.
There’s something about biting into a warm slice of this bread that just feels right. It’s comfort food at its finest—simple, honest, and deeply satisfying. The kind of bread that makes you close your eyes after the first bite and forget about everything else for a minute.
What Ingredients You Will Need
This recipe uses simple, wholesome ingredients that work together to create something truly special. Here’s what you’ll need and why each one matters.
For the Bread
- Ripe Bananas (3 medium, mashed): The riper the better. We’re talking spotty, almost-black bananas. They’re sweeter and easier to mash. About 1 ½ cups mashed.
- Pumpkin Puree (1 cup / 240g): Not pumpkin pie filling. Make sure you grab the pure puree. I prefer Libby’s for consistent results, but any brand works.
- All-Purpose Flour (2 cups / 250g): Spoon and level your flour. Scooping directly from the bag packs it down and gives you too much flour, which means dry bread.
- Granulated Sugar (¾ cup / 150g): Adds sweetness and helps with moisture retention. You can reduce to ½ cup if your bananas are very ripe.
- Brown Sugar (¼ cup / 50g, packed): Adds depth and a subtle molasses flavor that pairs beautifully with pumpkin and banana.
- Baking Soda (1 teaspoon): The leavening agent. Make sure it’s fresh—test it by dropping a bit into vinegar; it should fizz.
- Baking Powder (½ teaspoon): Extra lift for a lighter crumb.
- Salt (½ teaspoon): Balances sweetness and enhances all the flavors.
- Cinnamon (2 teaspoons): The warm spice that ties banana and pumpkin together.
- Nutmeg (½ teaspoon, freshly grated if possible): Adds that classic fall flavor. Skip the pre-ground stuff if you can.
- Cloves (¼ teaspoon): Just a pinch. It’s potent, so don’t go overboard.
- Eggs (2 large, room temperature): Room temperature eggs incorporate better into the batter. Set them out 30 minutes before baking.
- Vegetable Oil (½ cup / 120ml): Keeps the bread moist. You can use melted coconut oil or melted butter instead.
- Vanilla Extract (2 teaspoons): Pure vanilla, not imitation. It makes a difference.
- Walnuts (1 cup / 120g, chopped): Toasted for extra flavor. Toast them in a dry pan over medium heat for 3-4 minutes until fragrant.
For substitutions, you can swap the all-purpose flour with a gluten-free 1:1 blend if needed. Use coconut sugar instead of granulated sugar for a less processed option. And if walnuts aren’t your thing, pecans work beautifully too.
Equipment Needed
You don’t need a fancy kitchen to make this bread. Here’s what you’ll need:
- 9×5-inch Loaf Pan: The standard size for quick breads. Glass, metal, or ceramic all work. Metal gives the best browning.
- Mixing Bowls: One large bowl for dry ingredients, one medium bowl for wet ingredients. I use glass bowls because they don’t hold onto odors.
- Whisk: For combining dry ingredients evenly.
- Rubber Spatula: For folding the batter together. Don’t overmix—the spatula helps you control that.
- Parchment Paper: Lining the pan makes cleanup a breeze and helps the bread lift out cleanly.
- Cooling Rack: Essential for even cooling. Don’t skip this—cooling in the pan traps steam and makes the bottom soggy.
- Measuring Cups and Spoons: Accurate measurements matter in baking.
- Kitchen Scale: Optional but recommended for consistent results. I use mine for flour and pumpkin puree.
If you don’t have a loaf pan, you can bake this in an 8×8 square pan. Just reduce the baking time by 10-15 minutes and check for doneness early. Muffin tins work too—fill them ¾ full and bake for 18-22 minutes.
Preparation Method
Let’s get baking. Follow these steps carefully, and you’ll have a beautiful loaf of banana pumpkin walnut bread.
- Preheat your oven to 350°F (175°C). Position the rack in the center of the oven. Line your 9×5-inch loaf pan with parchment paper, leaving some overhang on the long sides. This creates handles for lifting the bread out later.
- Toast the walnuts. Spread the chopped walnuts on a baking sheet and toast in the preheating oven for 5-7 minutes until fragrant. Keep an eye on them—they burn quickly. Set aside to cool.
- Mash the bananas. In a medium bowl, mash the ripe bananas with a fork until mostly smooth. A few small lumps are fine—they add texture. You should have about 1 ½ cups.
- Mix the wet ingredients. In a large bowl, whisk together the mashed bananas, pumpkin puree, eggs, vegetable oil, and vanilla extract until well combined. The mixture should look smooth and slightly thick. Add both sugars and whisk until dissolved, about 1 minute.
- Combine the dry ingredients. In a separate bowl, whisk together the flour, baking soda, baking powder, salt, cinnamon, nutmeg, and cloves. Whisking aerates the flour and distributes the leavening agents evenly. No need to sift—just whisk thoroughly.
- Fold everything together. Pour the dry ingredients into the wet ingredients. Use a rubber spatula to fold gently. Stir just until you no longer see streaks of flour. A few small lumps are okay. Overmixing develops gluten and makes the bread tough. This is the most important step—stop mixing when it’s 90% combined.
- Add the walnuts. Gently fold in the toasted walnuts. Reserve a handful to sprinkle on top if you want a prettier presentation.
- Pour into the pan. Scrape the batter into the prepared loaf pan and spread it evenly. Tap the pan on the counter a few times to release any air bubbles. Sprinkle the reserved walnuts on top if using.
- Bake for 55-65 minutes. Start checking at 50 minutes. The bread is done when a toothpick inserted into the center comes out clean or with just a few moist crumbs. If the top is browning too quickly (after about 40 minutes), tent loosely with aluminum foil.
- Cool properly. Let the bread cool in the pan for 15 minutes. Then lift it out using the parchment paper handles and transfer to a wire rack. Cool completely before slicing—at least 1 hour. I know it’s hard to wait, but slicing too early makes the bread crumble and gummy.
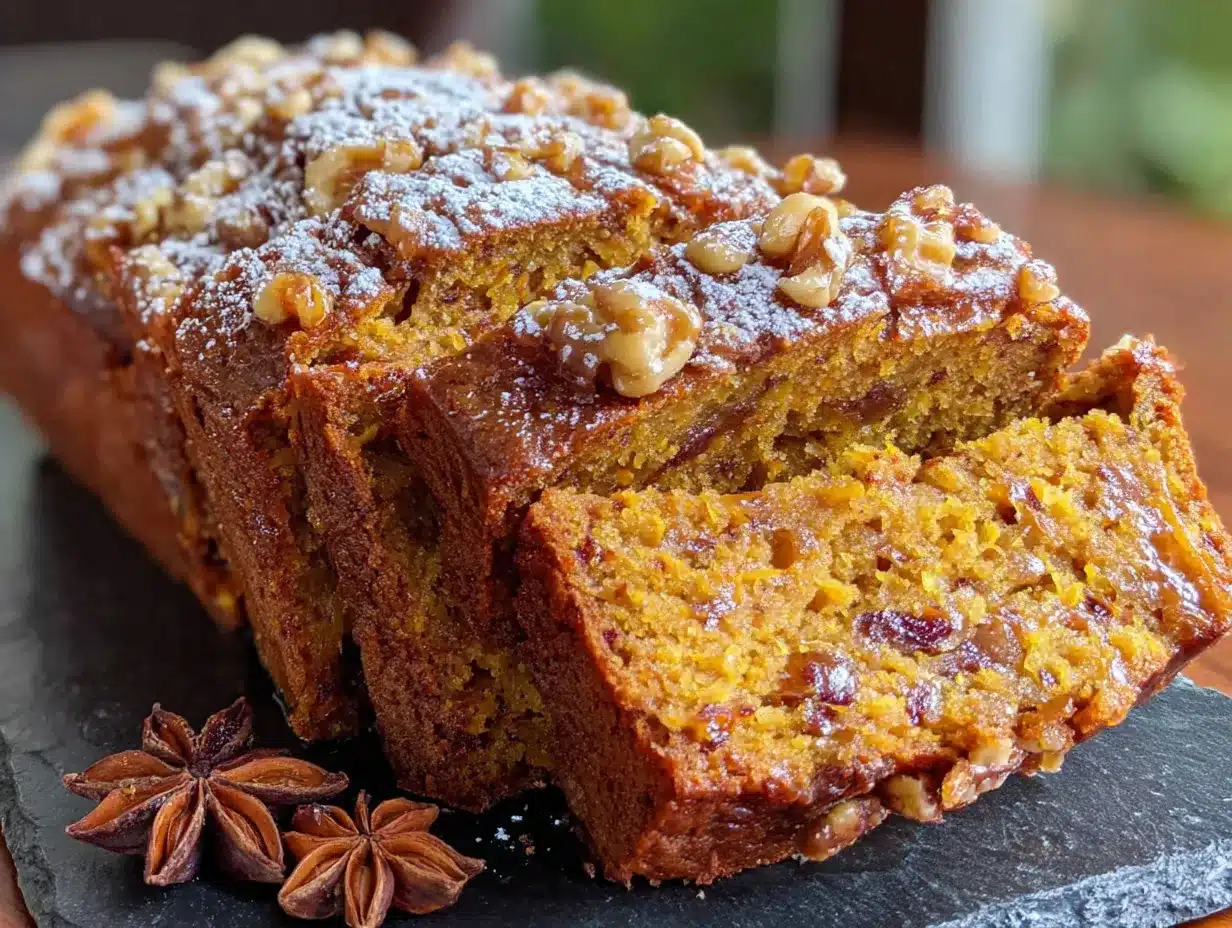
Your kitchen should smell incredible at this point. Like fall in a loaf pan. The top will be a deep golden brown, and the walnuts will look toasty and inviting.
Cooking Tips & Techniques
I’ve made enough quick breads to know where things can go wrong. Here are the lessons I learned the hard way so you don’t have to.
Don’t overmix the batter. This is the number one mistake. I ruined my first three batches by mixing until the batter was perfectly smooth. The result? Tough, dense bread with tunnels running through it. Mix until the flour just disappears, then stop. Your spatula is your best friend here—use gentle folding motions, not aggressive stirring.
Check your leavening agents. Baking soda and baking powder lose potency over time. If your bread doesn’t rise properly, this is probably why. Replace them every 6 months. To test baking soda, drop a pinch into vinegar—it should fizz immediately. For baking powder, drop a pinch into hot water—same reaction.
Room temperature ingredients matter. Cold eggs and cold pumpkin puree don’t emulsify as well with the oil and sugar. Your batter will look curdled instead of smooth. Set everything out 30 minutes before you start baking. Set a timer if you’re forgetful like me.
Use the toothpick test correctly. Insert the toothpick into the center of the bread, not near the edges. If it comes out wet with batter, bake longer. If it comes out with a few moist crumbs clinging to it, it’s perfect. If it comes out completely dry, you’ve overbaked it slightly.
Let it cool completely. I know. The smell is intoxicating. You want to slice into that warm loaf immediately. But here’s the thing—the bread continues to set as it cools. Cutting too early releases steam that should stay inside, leaving you with a dry, crumbly mess. Wait the full hour. Your patience will be rewarded.
Variations & Adaptations
This recipe is flexible. Here are some ways to make it your own.
Chocolate Chip Version: Swap the walnuts for 1 cup of chocolate chips. Dark chocolate, milk chocolate, or semi-sweet all work. The chocolate melts into pockets of gooey goodness throughout the bread. I’ve made this version for my nephew’s birthday breakfast, and it was a hit.
Gluten-Free Option: Use a 1:1 gluten-free all-purpose flour blend. I’ve tested this with Bob’s Red Mill and King Arthur Measure for Measure, and both work well. Add 1 tablespoon of extra oil to compensate for the drier texture of gluten-free flours.
Vegan Adaptation: Replace the eggs with flax eggs (2 tablespoons ground flaxseed mixed with 6 tablespoons water, let sit for 5 minutes). Use melted coconut oil instead of vegetable oil. The texture will be slightly denser but still delicious.
Spice It Up: Add ½ teaspoon of ground ginger and ¼ teaspoon of cardamom for a more complex spice profile. This version pairs beautifully with a cup of chai tea.
Streusel Topping: Mix ¼ cup flour, ¼ cup brown sugar, 2 tablespoons cold butter (cut into small pieces), and ½ teaspoon cinnamon. Sprinkle over the batter before baking. It creates a crunchy, buttery crust that takes this bread to another level. If you love streusel toppings, you’ll also enjoy this cozy brown butter banana zucchini bread with cinnamon streusel topping.
Lower Sugar Option: Reduce the granulated sugar to ½ cup and the brown sugar to 2 tablespoons. The bananas and pumpkin provide natural sweetness, so you won’t miss it much.
Serving & Storage Suggestions
This bread is versatile enough for any time of day.
Serving Temperature: Serve at room temperature for the best texture. If you want to warm it up, pop a slice in the toaster or microwave for 10-15 seconds. Spread a pat of butter on top while it’s still warm—the butter melts into the bread, and it’s absolutely heavenly.
Pairing Suggestions: A slice of this bread with a cup of coffee is my go-to breakfast. For a more indulgent treat, serve it with a dollop of whipped cream or a drizzle of caramel sauce. It also pairs beautifully with cream cheese spread—mix a little honey into softened cream cheese for an extra special touch.
Storage Instructions: Store the bread wrapped tightly in plastic wrap or in an airtight container at room temperature for up to 3 days. The moisture from the pumpkin and banana keeps it soft, but it will dry out if not properly sealed.
Freezing Instructions: This bread freezes beautifully. Wrap the cooled loaf tightly in plastic wrap, then in aluminum foil, and freeze for up to 3 months. To thaw, leave it on the counter overnight or microwave individual slices for 20-30 seconds. I always make a double batch—one for now, one for later.
Flavor Development: Here’s a secret—this bread actually tastes better on day two. The flavors meld together overnight, and the texture becomes even more moist. If you can resist eating it all on day one, you’re in for a treat on day two.
Nutritional Information & Benefits
Here’s the approximate nutritional breakdown per slice (based on 12 slices):
- Calories: 295
- Total Fat: 14g
- Saturated Fat: 2g
- Carbohydrates: 38g
- Fiber: 3g
- Sugar: 18g
- Protein: 6g
Health Benefits: Bananas are rich in potassium and vitamin B6, which support heart health and energy levels. Pumpkin is packed with vitamin A and antioxidants like beta-carotene, which are great for eye health and immune function. Walnuts provide omega-3 fatty acids, which are beneficial for brain health. This bread isn’t health food, but it’s certainly not junk either.
Dietary Considerations: This recipe can be made gluten-free and vegan with the substitutions mentioned above. It contains nuts (walnuts), eggs, and wheat (flour). For a nut-free version, simply omit the walnuts or substitute with sunflower seeds or pumpkin seeds.
I personally feel good about eating this bread because it uses real, recognizable ingredients. No preservatives, no artificial flavors, just honest food that happens to taste amazing.
Conclusion
This moist banana pumpkin walnut bread is the kind of recipe that earns a permanent spot in your baking rotation. It’s forgiving, adaptable, and consistently delivers a loaf that makes you proud to share it.
I love how this bread brings people together. I’ve made it for neighbors, coworkers, and family gatherings, and every time, someone asks for the recipe. It’s that good. And the best part? It’s so simple to make that you’ll find yourself whipping up a loaf on a random Tuesday night just because you have bananas that need using.
Don’t be afraid to make this recipe your own. Add chocolate chips instead of walnuts. Throw in some dried cranberries. Top it with a cream cheese glaze. The base is solid enough to handle whatever creative twists you throw at it.
If you make this bread, I’d love to hear about it. Leave a comment below and let me know how it turned out. Did you add your own twist? Did it disappear faster than you expected? Share your stories—I read every single one. And if you’re looking for another quick bread to try, check out this healthy zucchini bread with Greek yogurt for a lighter option that’s just as satisfying.
Happy baking, friends. Your kitchen is about to smell amazing.
Frequently Asked Questions
Can I use frozen bananas for this recipe?
Absolutely. Thaw them completely first, then drain off any excess liquid before mashing. Frozen bananas release more water when thawed, so draining prevents the batter from becoming too wet.
Why did my bread sink in the middle?
This usually happens when the bread is underbaked or the oven temperature is too low. Make sure your oven is properly preheated to 350°F. Also, avoid opening the oven door during the first 40 minutes of baking—the temperature fluctuation can cause the bread to collapse.
Can I make this into muffins instead of a loaf?
Yes! Fill muffin cups ¾ full and bake at 350°F for 18-22 minutes. You’ll get about 18 muffins. This is a great option for portion control or for packing in lunchboxes.
How do I know when the bread is done baking?
Use the toothpick test. Insert a toothpick or skewer into the center of the bread. If it comes out clean or with just a few moist crumbs, it’s done. If it comes out wet with batter, bake for 5 more minutes and test again.
Can I leave out the walnuts?
Of course. The bread will still be delicious without them. You can substitute pecans, chocolate chips, dried cranberries, or simply leave them out entirely. If you’re avoiding nuts, try using sunflower seeds or pumpkin seeds for a similar crunch.
Pin This Recipe!
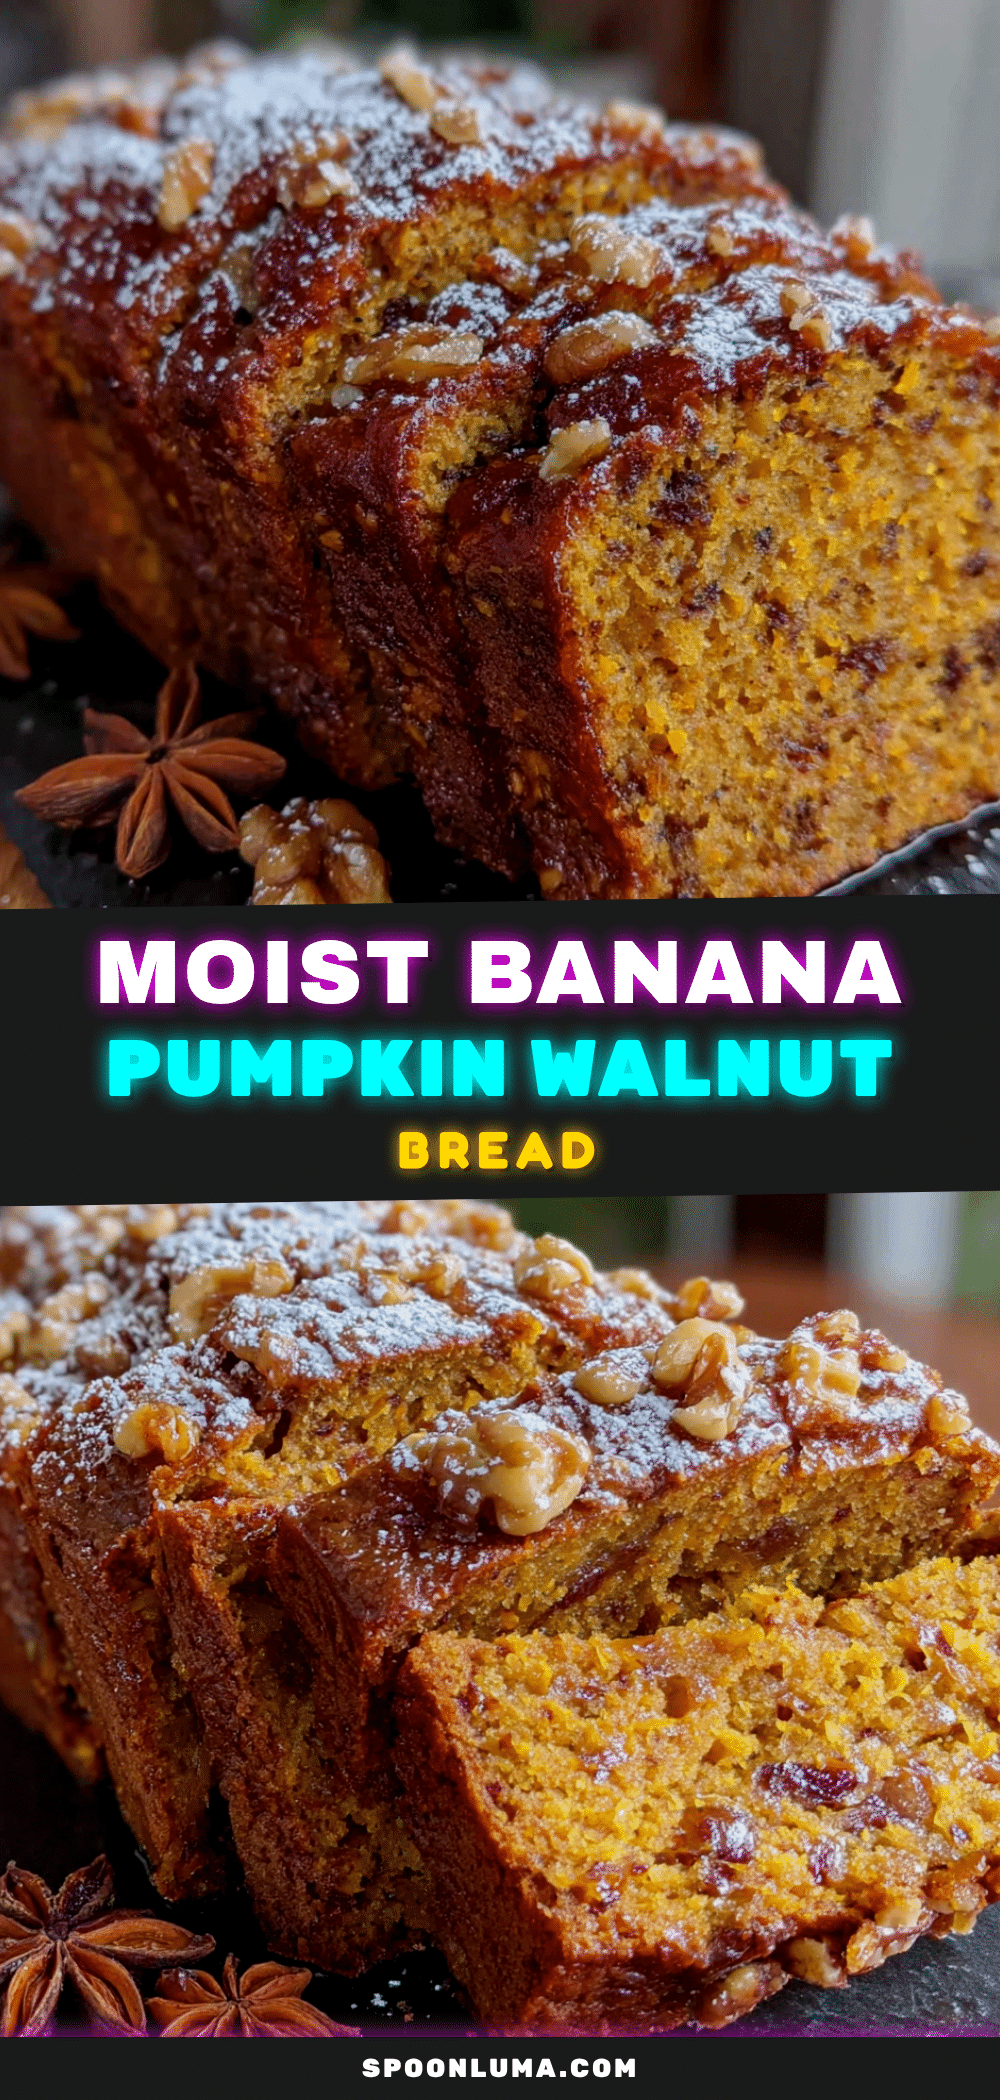
Moist Banana Pumpkin Walnut Bread
A moist and flavorful quick bread combining ripe bananas and pumpkin puree with crunchy walnuts. This easy recipe creates a tender loaf that’s perfect for fall baking or year-round enjoyment.
- Prep Time: 15 minutes
- Cook Time: 55-65 minutes
- Total Time: 1 hour 20 minutes
- Yield: 12 servings 1x
- Category: Quick Bread
- Cuisine: American
Ingredients
- 3 medium ripe bananas (mashed, about 1 ½ cups)
- 1 cup pumpkin puree (240g)
- 2 cups all-purpose flour (250g)
- ¾ cup granulated sugar (150g)
- ¼ cup brown sugar (50g, packed)
- 1 teaspoon baking soda
- ½ teaspoon baking powder
- ½ teaspoon salt
- 2 teaspoons cinnamon
- ½ teaspoon nutmeg (freshly grated if possible)
- ¼ teaspoon cloves
- 2 large eggs (room temperature)
- ½ cup vegetable oil (120ml)
- 2 teaspoons vanilla extract
- 1 cup walnuts (120g, chopped and toasted)
Instructions
- Preheat your oven to 350°F (175°C). Position the rack in the center of the oven. Line a 9×5-inch loaf pan with parchment paper, leaving some overhang on the long sides.
- Toast the walnuts: Spread the chopped walnuts on a baking sheet and toast in the preheating oven for 5-7 minutes until fragrant. Set aside to cool.
- Mash the bananas: In a medium bowl, mash the ripe bananas with a fork until mostly smooth. A few small lumps are fine.
- Mix the wet ingredients: In a large bowl, whisk together the mashed bananas, pumpkin puree, eggs, vegetable oil, and vanilla extract until well combined. Add both sugars and whisk until dissolved, about 1 minute.
- Combine the dry ingredients: In a separate bowl, whisk together the flour, baking soda, baking powder, salt, cinnamon, nutmeg, and cloves.
- Fold everything together: Pour the dry ingredients into the wet ingredients. Use a rubber spatula to fold gently until just combined. Do not overmix.
- Add the walnuts: Gently fold in the toasted walnuts. Reserve a handful to sprinkle on top if desired.
- Pour into the pan: Scrape the batter into the prepared loaf pan and spread evenly. Tap the pan on the counter a few times to release air bubbles. Sprinkle reserved walnuts on top if using.
- Bake for 55-65 minutes. Start checking at 50 minutes. The bread is done when a toothpick inserted into the center comes out clean or with just a few moist crumbs. If the top browns too quickly, tent loosely with aluminum foil after about 40 minutes.
- Cool properly: Let the bread cool in the pan for 15 minutes. Then lift it out using the parchment paper handles and transfer to a wire rack. Cool completely before slicing, at least 1 hour.
Notes
Don’t overmix the batter to avoid tough bread. Use room temperature ingredients for best results. The bread tastes even better on day two as flavors meld. For a prettier presentation, reserve some walnuts to sprinkle on top before baking.
Nutrition
- Serving Size: 1 slice
- Calories: 295
- Sugar: 18
- Fat: 14
- Saturated Fat: 2
- Carbohydrates: 38
- Fiber: 3
- Protein: 6
Keywords: banana bread, pumpkin bread, walnut bread, quick bread, fall baking, moist bread, easy recipe


