That smell — the one that curls up from a hot skillet when butter browns, all nutty and almost caramel-like — still takes me straight to my grandmother’s kitchen on a rainy October afternoon. She wasn’t a fancy baker, not by any stretch. Her measuring cups were worn smooth, her recipe cards splattered with decades of use. But she understood something fundamental about fall baking that I’ve spent years trying to replicate. It wasn’t about precision. It was about feeling.
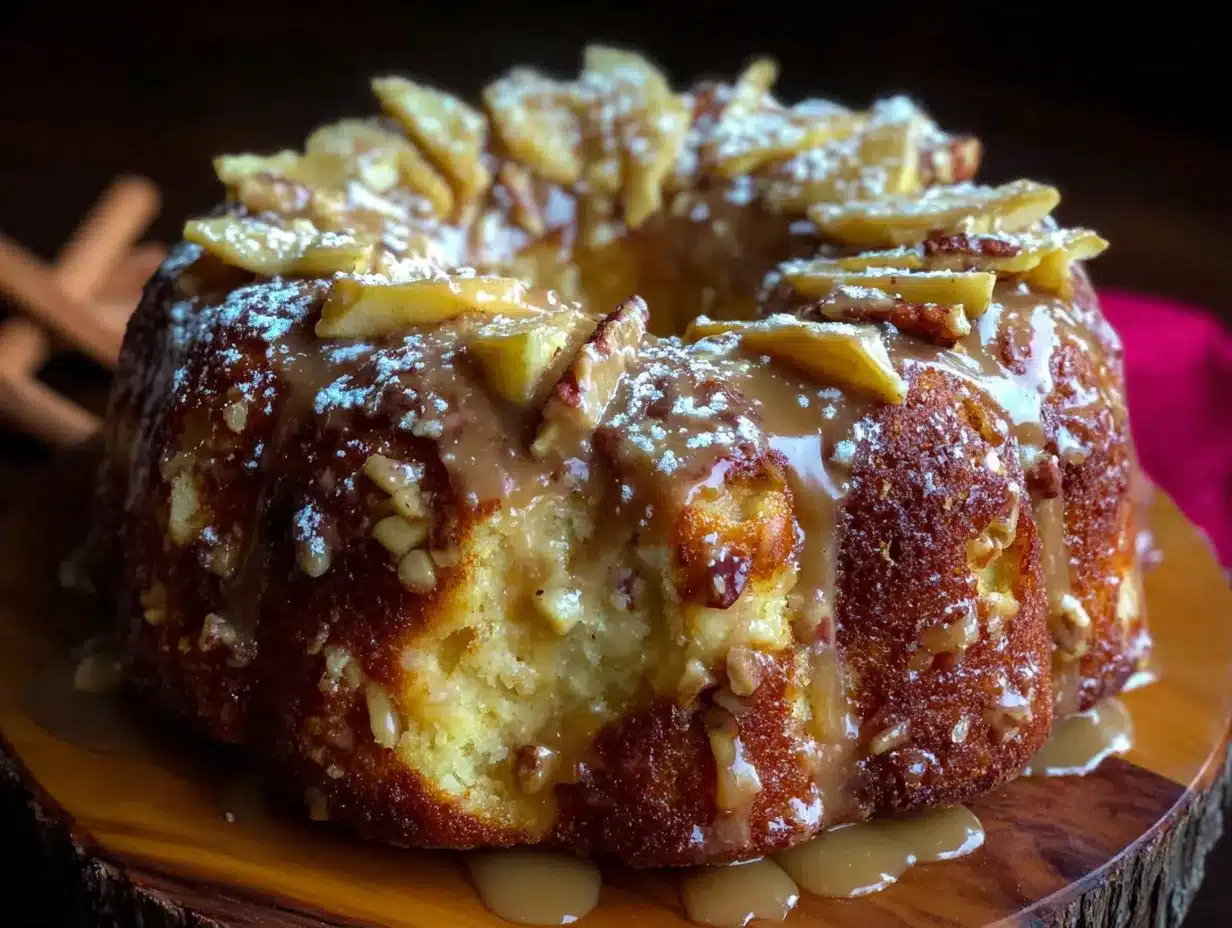
I remember standing on a step stool beside her, watching her swirl butter in a heavy-bottomed pan. She’d tilt it just so, letting the milk solids toast to that perfect amber color. “Listen to it,” she’d say. And I’d lean in, hearing the quiet sizzle, the shift from loud and watery to soft and fragrant. That sound meant something good was coming. This cake was never called “Apple Dapple” in her house — it was just “the apple cake” — but the name fit. The apples dapple the batter with little pockets of sweet, tender fruit, and the brown butter wraps everything in a warmth that feels like a hug.
Honestly, I’ve made a lot of apple cakes in my time. Some were too dry. Some were too dense. Some just… didn’t sing. But this one? This one has never let me down. It’s the kind of cake that fills your kitchen with a smell that makes people wander in asking, “What is that?” It’s the kind of cake you slice while it’s still a little warm, watching the butter glaze soak into the crumb. And it’s the kind of cake that disappears before you’ve even had a chance to save a piece for breakfast. So let’s make it together, shall we?
Why You’ll Love This Recipe
I’ve tested this cake more times than I can count. Seriously — my neighbors have become very familiar with it. And every single time, it delivers. Here’s why it’s become my go-to fall recipe.
- Deep, Nutty Flavor: Brown butter isn’t just a gimmick here. It changes everything. The toasty, almost hazelnut-like notes pair perfectly with sweet apples and warm cinnamon. You’ll taste the difference in every single bite.
- Incredibly Moist Texture: This cake stays moist for days. Like, day-three-it’s-still-perfect moist. The apples release their juices as they bake, and the brown butter keeps the crumb tender without making it greasy.
- Simple Pantry Ingredients: No weird extracts. No specialty flours. You probably have everything you need right now, except maybe the apples. And that’s the kind of recipe I love.
- Perfect for Any Occasion: Coffee date with a friend? Slice of this cake. Thanksgiving dessert table? This cake. Random Tuesday night when you need something cozy? You guessed it.
- Foolproof for Beginner Bakers: If you’ve never browned butter before, don’t worry. I’ll walk you through it. And the batter itself is forgiving — you can’t really overmix it, which is rare for a cake.
What really sets this recipe apart is the brown butter glaze. Most apple cakes get a dusting of powdered sugar or a simple vanilla glaze. This one gets a silky, buttery glaze made with that same browned butter, which means every layer of flavor is intentional. It’s not just sweet — it’s complex. And that’s what makes people close their eyes after the first bite.
I’ve shared this cake with everyone from my picky aunt (who “doesn’t really like fruit in desserts”) to a group of professional chefs at a dinner party. The reaction is always the same. A pause. A second bite. Then, “Can I get the recipe?” That’s when you know you’ve got something special.
What Ingredients You Will Need
This recipe uses simple, honest ingredients to create something that tastes far more complicated than it is. Most of these are pantry staples, which is exactly how I like to bake. Let me walk you through each one and why it matters.
For the Cake
- 1 cup (2 sticks) unsalted butter — This is the star. You’ll be browning it, so skip the salted butter here. The unsalted lets you control the salt level. I use Kerrygold when I want a richer flavor, but any good-quality unsalted butter works.
- 2 cups all-purpose flour — Spoon and level it. Don’t scoop directly from the bag or you’ll end up with too much flour and a dry cake. If you want to get fancy, you can substitute ½ cup with whole wheat pastry flour for a nuttier flavor.
- 1 teaspoon baking soda — Fresh baking soda is key. If yours has been sitting in the pantry for a year, go buy a new box. Trust me on this.
- ½ teaspoon baking powder — This gives a little extra lift alongside the baking soda.
- 1 teaspoon ground cinnamon — I prefer Saigon cinnamon here. It’s stronger and slightly sweeter than regular cinnamon, which means you get more flavor without using more.
- ½ teaspoon ground nutmeg — Freshly grated if you have it. The pre-ground stuff works too, but fresh is noticeably more aromatic.
- ½ teaspoon salt — Don’t skip this. Salt balances the sweetness and makes the brown butter flavor pop.
- 1 cup granulated sugar — Regular white sugar. Nothing fancy.
- ½ cup packed light brown sugar — This adds moisture and a hint of molasses flavor that plays beautifully with the brown butter.
- 2 large eggs — Room temperature. If you forgot to take them out of the fridge, place them in a bowl of warm water for 5 minutes.
- 1 cup buttermilk — Room temperature too. Don’t have buttermilk? Add 1 tablespoon of lemon juice or white vinegar to a cup of regular milk and let it sit for 5 minutes. It works like a charm.
- 1 teaspoon vanilla extract — Pure vanilla, not imitation. The flavor difference is real.
- 2 cups peeled and chopped apples — About 2 medium apples. I love Honeycrisp or Granny Smith. Honeycrisp adds natural sweetness, while Granny Smith gives a nice tart contrast. You can mix them too.
For the Brown Butter Glaze
- ¼ cup (½ stick) unsalted butter — You’ll brown this separately from the cake butter. Yes, it’s worth the extra step.
- 1½ cups powdered sugar — Sifted, if you want a super smooth glaze. I don’t always sift, and it’s still delicious.
- 2-3 tablespoons milk — Whole milk works best, but any kind will do. Add it slowly until you reach your desired consistency.
- ½ teaspoon vanilla extract — Again, pure vanilla.
- Pinch of salt — Just a tiny one. It cuts the sweetness and rounds everything out.
One thing I’ve learned over the years is that ingredient temperature matters more than you think. Cold eggs and cold buttermilk can seize the brown butter when you mix everything together, leaving you with a lumpy batter. So take the time to bring everything to room temperature. Your cake will thank you.
Equipment Needed
You don’t need a professional bakery setup for this cake. Here’s what you’ll need, along with a few tips I’ve picked up along the way.
- 10-inch Bundt pan or 9-inch tube pan — I prefer a Bundt pan because it gives the cake those pretty ridges that catch the glaze. If you only have a tube pan, that works too. Just make sure it’s well-greased.
- Light-colored skillet or saucepan — This is important for browning butter. A dark pan makes it hard to see the color change, and you’ll end up with burnt butter. I use a stainless steel skillet.
- Large mixing bowls — One for dry ingredients, one for wet. Nothing fancy.
- Whisk and rubber spatula — The whisk for combining dry ingredients, the spatula for folding in the apples and scraping every last bit of batter into the pan.
- Electric mixer (hand or stand) — You can do this by hand, but a mixer makes it easier to cream the butter and sugars until light and fluffy. I’ve done both, and the mixer saves about 10 minutes of arm work.
- Cooling rack — Essential for letting the cake cool evenly. If you don’t have one, you can use the inverted lid of a roasting pan. I’ve done that in a pinch.
- Wooden skewer or toothpick — For testing doneness. A cake tester is fancy, but a toothpick works perfectly.
If you’re new to browning butter, use a light-colored pan. It sounds like a small detail, but it makes a huge difference. You need to see the milk solids turn from pale yellow to golden brown, and a dark pan hides that transition. I learned this the hard way after burning three batches of butter in a row.
Preparation Method
Alright, let’s get to it. This might look like a lot of steps, but I promise it’s simpler than it seems. I’ve broken everything down so you know exactly what to look for at each stage.
Step 1: Brown the Butter
Place 1 cup (2 sticks) of unsalted butter in a light-colored skillet or saucepan over medium heat. Let it melt completely, then swirl the pan occasionally. After a few minutes, you’ll hear it start to sizzle and pop — that’s the water evaporating. Keep watching. The butter will foam up, then the foam will subside, and you’ll see little golden specks forming at the bottom. That’s the milk solids toasting. Once the butter smells nutty and the specks are a warm amber color, remove it from the heat immediately. Pour it into a heatproof bowl to stop the cooking process. Let it cool for about 10-15 minutes. It should be warm but not hot when you add it to the batter.
Step 2: Prep Your Pan and Oven
Preheat your oven to 350°F (175°C). Grease your Bundt pan thoroughly with butter or non-stick spray, making sure to get into all the crevices. Then dust it with flour, tapping out the excess. This double-coating is your insurance policy against a stuck cake. I’ve skipped this step before, and I’ve had cakes that refused to come out. Learn from my mistakes.
Step 3: Mix the Dry Ingredients
In a large bowl, whisk together 2 cups all-purpose flour, 1 teaspoon baking soda, ½ teaspoon baking powder, 1 teaspoon cinnamon, ½ teaspoon nutmeg, and ½ teaspoon salt. Set this aside.
Step 4: Cream the Butter and Sugars
In another large bowl, combine the cooled brown butter with 1 cup granulated sugar and ½ cup packed light brown sugar. Beat with an electric mixer on medium speed for 2-3 minutes, until the mixture looks light and fluffy. It won’t get as fluffy as regular butter because the brown butter has less water, but it should still look smooth and well-combined. Scrape down the sides of the bowl with a spatula.
Step 5: Add the Eggs and Vanilla
Add the 2 room-temperature eggs one at a time, beating well after each addition. Then add 1 teaspoon vanilla extract and mix until combined. The batter should look glossy and smooth at this point.
Step 6: Alternate the Dry Ingredients and Buttermilk
With the mixer on low speed, add about one-third of the flour mixture. Mix until just combined. Then add half of the buttermilk. Mix again. Repeat with another third of the flour, the remaining buttermilk, and finally the last third of the flour. Stop mixing as soon as the flour disappears. Overmixing at this stage can make the cake tough.
Step 7: Fold in the Apples
Using a rubber spatula, gently fold in the 2 cups of chopped apples. Make sure they’re evenly distributed throughout the batter. The batter will be thick — that’s normal. Don’t overmix here either. Just fold until the apples are incorporated.
Step 8: Bake the Cake
Pour the batter into your prepared Bundt pan and spread it evenly. Bake for 45-55 minutes, or until a wooden skewer inserted into the center comes out clean or with a few moist crumbs. The top should be golden brown and spring back when you gently press it. Start checking at 45 minutes — every oven runs differently. Mine takes exactly 48 minutes, but yours might be faster or slower.
Step 9: Cool the Cake
Let the cake cool in the pan on a wire rack for 15 minutes. Then invert it onto the rack and let it cool completely. Don’t rush this. If you try to glaze it while it’s still warm, the glaze will just melt and run off. Patience, my friend.
Step 10: Make the Glaze
While the cake cools, make the brown butter glaze. Brown the remaining ¼ cup of butter in the same way you did before. Let it cool slightly, then whisk in 1½ cups powdered sugar, 2-3 tablespoons milk (start with 2), ½ teaspoon vanilla, and a pinch of salt. Whisk until smooth. If it’s too thick, add another splash of milk. If it’s too thin, add a little more powdered sugar. The glaze should be thick enough to drizzle but thin enough to flow slowly off a spoon.
Step 11: Glaze and Serve
Once the cake is completely cool, drizzle the glaze over the top. Let it set for about 10 minutes before slicing. The glaze will harden slightly, creating a beautiful, crackly top layer.
Cooking Tips & Techniques
I’ve made this cake more times than I can count, and I’ve made every mistake in the book. Here’s what I’ve learned so you don’t have to.
Don’t Walk Away from the Butter. Browning butter takes about 5-7 minutes, but it can go from perfect to burnt in about 30 seconds. Stay at the stove. Swirl the pan. Trust your nose — when it smells nutty and toasty, it’s done. I once got distracted by a phone call and ended up with black butter. The kitchen smelled like a campfire for hours.
Room Temperature Ingredients Matter. I know I’ve said this already, but it’s worth repeating. Cold eggs and cold buttermilk can cause the brown butter to seize up, creating a greasy, lumpy batter. Take everything out of the fridge 30 minutes before you start baking. Set a timer if you have to.
Use a Mix of Apple Varieties. I’ve tried this cake with all Granny Smith, all Honeycrisp, and a mix of both. The mix wins every time. The Granny Smith holds its shape and adds tartness, while the Honeycrisp breaks down a little and adds sweetness. If you want to get really fancy, throw in a chopped Fuji or Braeburn.
Check Your Oven Temperature. Ovens lie. I’m serious. My oven runs 25 degrees hot, so I always use an oven thermometer. If your cake is browning too fast on top but still raw in the middle, tent it with aluminum foil for the last 15 minutes of baking.
The Toothpick Test Isn’t Always Right. A few moist crumbs on the toothpick is perfect. A completely clean toothpick means the cake might be overbaked. If the toothpick comes out wet with batter, give it another 5 minutes and check again.
Let the Glaze Set. I know it’s tempting to dig in right away, but letting the glaze set for 10-15 minutes makes a difference. It firms up into a thin, crackly shell that contrasts beautifully with the tender cake underneath. If you slice too soon, the glaze just pools on the plate.
Variations & Adaptations
One of the best things about this cake is how adaptable it is. Here are a few variations I’ve tried and loved.
Gluten-Free Version: Substitute the all-purpose flour with a 1:1 gluten-free baking flour blend. I’ve used Bob’s Red Mill and King Arthur, and both worked well. The texture is slightly more tender, but the flavor is just as good. No one at my dinner party even noticed the difference.
Dairy-Free Version: Use vegan butter for both the cake and the glaze. For the buttermilk, add 1 tablespoon of lemon juice to 1 cup of unsweetened oat milk or almond milk. Let it sit for 5 minutes. The cake won’t be quite as rich, but it’s still delicious.
Add Some Crunch: Fold in ½ cup of toasted pecans or walnuts along with the apples. The nuts add texture and pair beautifully with the brown butter. Toast them first in a dry pan for 3-4 minutes to bring out their flavor.
Spice It Up: Add ¼ teaspoon of ground ginger or cardamom to the flour mixture. Ginger adds a little warmth, while cardamom gives the cake a slightly floral, exotic note. I love the cardamom version for holiday gatherings.
Make It a Layer Cake: Pour the batter into two 9-inch round cake pans and bake for 25-30 minutes. Double the glaze recipe and spread it between the layers and on top. It’s a showstopper for birthdays or special occasions — similar to what you might find in my naked birthday layer cake, but with that cozy apple flavor.
Apple Butter Swirl: Before baking, drop spoonfuls of apple butter on top of the batter and swirl it in with a knife. It adds an extra layer of apple flavor and makes the cake look beautiful when sliced.
Serving & Storage Suggestions
This cake is wonderful on its own, but here are a few ways to make it even better.
Serving Temperature: Room temperature is best. The flavors are more pronounced, and the texture is at its peak. If you’ve stored it in the fridge, let it sit on the counter for 30 minutes before serving.
Perfect Pairings: A cup of hot coffee or a chai latte is my go-to. For something fancier, serve it with a dollop of lightly sweetened whipped cream or a scoop of vanilla ice cream. The cold creaminess against the tender, spiced cake is pure magic.
Storing the Cake: Keep it in an airtight container at room temperature for up to 3 days. If your kitchen is warm, you can refrigerate it, but bring it to room temperature before serving. The cake actually gets better on day two — the flavors meld and deepen.
Freezing Instructions: This cake freezes beautifully. Wrap it tightly in plastic wrap, then in aluminum foil, and freeze for up to 3 months. Thaw overnight in the refrigerator, then bring to room temperature before serving. I often bake two and freeze one for later. It’s a lifesaver during the holiday season.
Reheating: If you want that just-baked warmth, microwave individual slices for 10-15 seconds. Or pop them in a 300°F oven for 5 minutes. The glaze will soften slightly, and the cake will taste like it just came out of the oven.
Nutritional Information & Benefits
Let’s be real — this is a dessert. It’s not health food. But it does have some redeeming qualities, and I think it’s worth knowing what’s in your food.
Estimated Nutritional Values (per slice, based on 12 servings):
- Calories: 380
- Fat: 18g
- Carbohydrates: 52g
- Protein: 4g
- Fiber: 2g
- Sugar: 35g
Health Highlights: The apples provide fiber and vitamin C, and the cinnamon has anti-inflammatory properties. Brown butter, while high in fat, adds a depth of flavor that means you’re satisfied with one slice instead of three. It’s all about balance.
Dietary Considerations: This recipe contains gluten, dairy, and eggs. For gluten-free and dairy-free options, see the variations section above. It’s not suitable for vegans as written, but I’m working on a vegan version that I’ll share soon.
My Personal Take: I believe in enjoying life. If you want a slice of this cake, have a slice. Pair it with a walk outside or a salad for lunch. Food is meant to be enjoyed, and this cake is worth every single bite.
Conclusion
This Perfect Brown Butter Apple Dapple Cake is more than just a recipe — it’s a feeling. It’s the smell of a cozy kitchen on a crisp fall day. It’s the taste of something made with care and intention. It’s the kind of cake that makes people stop what they’re doing and come to the table.
I’ve shared this cake with friends, family, neighbors, and strangers at potlucks, and every single time, someone asks for the recipe. Now you have it. Make it for your next gathering. Make it for a quiet night in. Make it just because.
And when you do, I’d love to hear about it. Leave a comment below and tell me how it turned out. Did you add nuts? Try a different apple variety? Double the glaze? (I won’t judge — I’ve done it.) Share your photos on Pinterest and tag me. This recipe is meant to be shared, adapted, and loved.
Happy baking, my friend. Your kitchen is about to smell incredible.
Frequently Asked Questions
Can I use salted butter instead of unsalted for browning?
You can, but I don’t recommend it. Salted butter has a higher water content and can foam more aggressively, making it harder to see the color change. Plus, you lose control over the salt level in the final cake. Stick with unsalted if you can.
Why did my brown butter turn out bitter?
That means it burned. The milk solids went past golden brown to dark brown or black. Next time, remove the butter from the heat as soon as you see golden specks and smell that nutty aroma. Pour it into a cool bowl immediately to stop the cooking process.
Can I make this cake ahead of time?
Absolutely. The cake actually tastes better on day two. Bake it, cool it completely, and store it in an airtight container. Make the glaze and drizzle it on the day you plan to serve it. If you’re really short on time, you can freeze the unglazed cake for up to 3 months.
What’s the best apple for this cake?
I recommend a mix of Honeycrisp and Granny Smith. Honeycrisp adds sweetness and breaks down slightly, while Granny Smith holds its shape and adds tartness. Fuji, Braeburn, and Pink Lady are also great choices. Avoid Red Delicious — they turn mushy and don’t have much flavor.
My cake stuck to the Bundt pan. What went wrong?
It happens to the best of us. Make sure you grease every nook and cranny of the pan, then dust it with flour. I use a pastry brush to get butter into all the crevices. Let the cake cool for exactly 15 minutes before inverting — too short and it’ll tear, too long and it’ll steam itself into sticking. If all else fails, serve it as a “rustic” cake with extra glaze. No one will complain.
If you love cozy, fruit-forward desserts, you might also enjoy my brown butter banana zucchini bread with cinnamon streusel — it has that same nutty, comforting vibe. And for a healthier breakfast option, this healthy zucchini bread with Greek yogurt is a great way to use up summer produce.
Pin This Recipe!
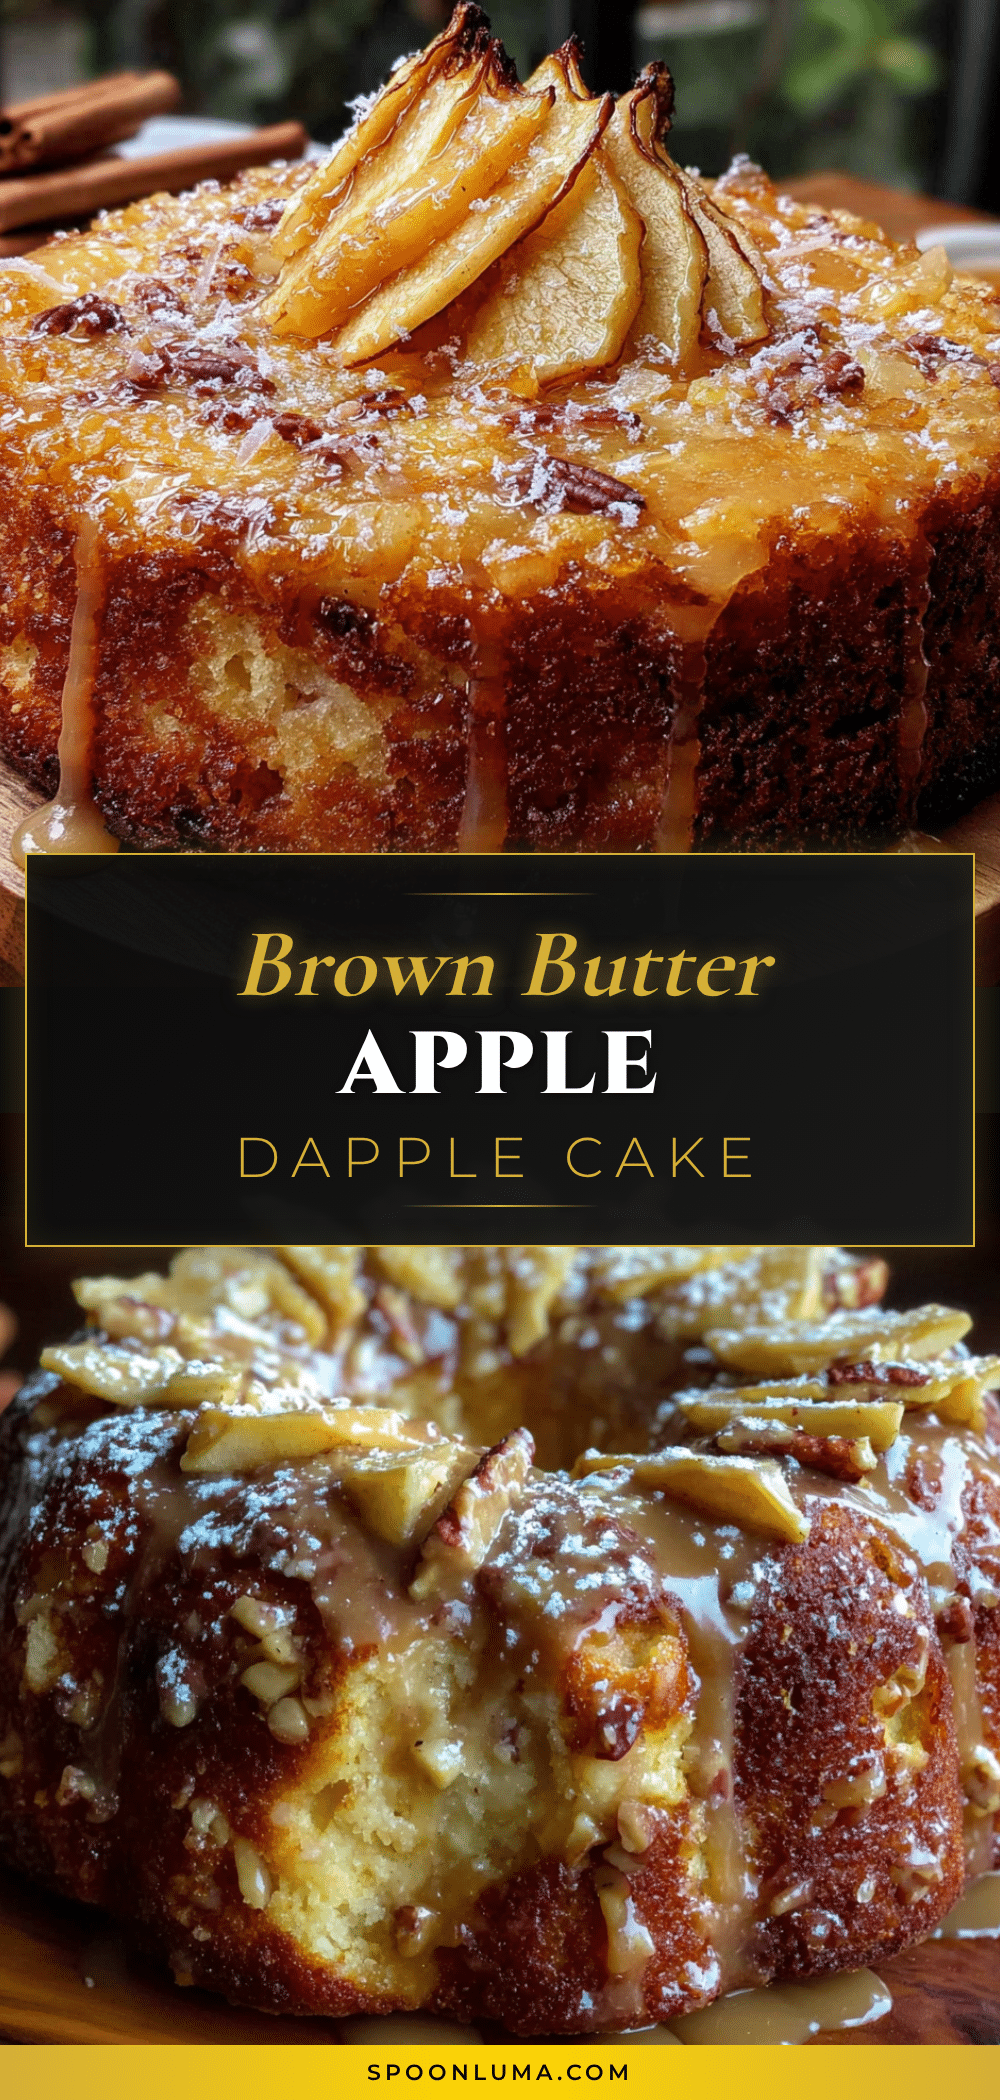
Perfect Brown Butter Apple Dapple Cake Recipe
A moist, tender apple cake made with nutty brown butter and a silky brown butter glaze. This cozy fall dessert is filled with sweet, tender apple pockets and warm cinnamon, perfect for any occasion.
- Prep Time: 20 minutes
- Cook Time: 50 minutes
- Total Time: 1 hour 10 minutes
- Yield: 12 servings 1x
- Category: Dessert
- Cuisine: American
Ingredients
- 1 cup (2 sticks) unsalted butter
- 2 cups all-purpose flour
- 1 teaspoon baking soda
- ½ teaspoon baking powder
- 1 teaspoon ground cinnamon
- ½ teaspoon ground nutmeg
- ½ teaspoon salt
- 1 cup granulated sugar
- ½ cup packed light brown sugar
- 2 large eggs, room temperature
- 1 cup buttermilk, room temperature
- 1 teaspoon vanilla extract
- 2 cups peeled and chopped apples (about 2 medium apples, such as Honeycrisp or Granny Smith)
- ¼ cup (½ stick) unsalted butter (for glaze)
- 1½ cups powdered sugar
- 2–3 tablespoons milk
- ½ teaspoon vanilla extract
- Pinch of salt
Instructions
- Brown the butter: Place 1 cup unsalted butter in a light-colored skillet or saucepan over medium heat. Melt completely, then swirl occasionally. After a few minutes, the butter will sizzle and pop, then foam. When the foam subsides and golden specks form at the bottom and the butter smells nutty, remove from heat immediately. Pour into a heatproof bowl and let cool for 10-15 minutes.
- Preheat oven to 350°F (175°C). Grease a 10-inch Bundt pan thoroughly with butter or non-stick spray, then dust with flour, tapping out excess.
- In a large bowl, whisk together flour, baking soda, baking powder, cinnamon, nutmeg, and salt. Set aside.
- In another large bowl, combine cooled brown butter with granulated sugar and brown sugar. Beat with an electric mixer on medium speed for 2-3 minutes until light and fluffy. Scrape down sides.
- Add eggs one at a time, beating well after each. Add vanilla and mix until combined.
- With mixer on low, add one-third of the flour mixture, mixing until just combined. Add half the buttermilk, mix. Repeat with another third of flour, remaining buttermilk, and last third of flour. Stop mixing when flour disappears.
- Gently fold in chopped apples with a rubber spatula until evenly distributed.
- Pour batter into prepared pan and spread evenly. Bake for 45-55 minutes, until a wooden skewer inserted into center comes out clean or with a few moist crumbs. Cool in pan on wire rack for 15 minutes, then invert onto rack and cool completely.
- Make the glaze: Brown remaining ¼ cup butter in the same way. Let cool slightly, then whisk in powdered sugar, 2-3 tablespoons milk (start with 2), vanilla, and a pinch of salt until smooth. Adjust consistency as needed.
- Once cake is completely cool, drizzle glaze over top. Let set for about 10 minutes before slicing.
Notes
Room temperature ingredients are crucial to prevent the brown butter from seizing. Use a mix of apple varieties like Honeycrisp and Granny Smith for best flavor and texture. Don’t walk away from the butter while browning; it can go from perfect to burnt in seconds. Let the glaze set for 10-15 minutes before slicing for a beautiful crackly top.
Nutrition
- Serving Size: 1 slice
- Calories: 380
- Sugar: 35
- Sodium: 280
- Fat: 18
- Saturated Fat: 11
- Carbohydrates: 52
- Fiber: 2
- Protein: 4
Keywords: brown butter apple cake, apple dapple cake, fall dessert, apple cake recipe, brown butter glaze


