“You have to make something with candy corn,” my sister said, dropping a bag on my counter with a thud. It was early September, and the stores were already screaming fall. I looked at that bag of little orange, yellow, and white triangles and honestly, I wasn’t sold. I mean, candy corn gets a bad rap, right? People either love it or love to hate it. But she had that look on her face, the one that says “I’m not leaving until you agree.” So I grabbed a stick of butter, and I started thinking.
These Perfect Candy Corn Sugar Cookie Bars came out of that moment of mild sibling pressure. I didn’t want to just dump candy corn into a plain cookie and call it a day. That felt lazy. I wanted the bar itself to taste like fall—warm, buttery, a little bit vanilla-forward, with a texture that’s soft and chewy, not cakey. The candy corn on top isn’t just decoration; it gets slightly melty and chewy in the oven, which turns it into something totally different. It’s like a secret little caramelized candy surprise.
I’ll be honest, the first batch was a mess. The candy corn slid off. The bars were too thick. But the second batch? That was the one. The one where the golden edges pulled away from the pan perfectly and the middle stayed soft and pillowy. That’s the recipe I’m sharing with you today. It’s the kind of dessert that makes people stop and say, “Wait, what is that?” in the best way possible.
Why You’ll Love This Recipe
I have tested this recipe about four times now, and I can tell you with confidence that these bars are a winner. They are not your average sugar cookie. They have a personality. Here is why I think you are going to absolutely love making them.
- Quick & Easy: This is a one-bowl situation, people. No stand mixer required, no chilling the dough for hours. From start to finish, you are looking at about 30 minutes of active time. The oven does the rest.
- Simple Ingredients: You probably have everything in your pantry right now. Butter, sugar, flour, eggs, vanilla. The only “special” ingredient is the bag of candy corn, which is basically everywhere in the fall.
- Perfect for Fall Gatherings: Halloween parties, Thanksgiving potlucks, or just a Tuesday night when you need a little seasonal joy. These bars are bright, festive, and they travel really well. I brought a batch to a friend’s house last week and they were gone in ten minutes.
- Crowd-Pleaser: Even the candy corn skeptics love these. I promise. The candy corn melts down just enough to create little pockets of chewy, caramel-like sweetness. It’s not crunchy or waxy. It’s good.
- Unbelievably Delicious: The base of this bar is a classic sugar cookie, but it is a little thicker and a lot softer. It has that perfect crackly top and a tender, buttery crumb. The candy corn adds color and a unique sweetness that pairs perfectly with a cold glass of milk.
What makes this recipe different from the hundreds of other sugar cookie bars out there is the texture. I use a specific ratio of butter to sugar to get that soft, almost cloud-like center, and I add a touch of cornstarch to keep them tender. It is not just another version of a sugar cookie bar; it is the best version for fall. It is the kind of dessert that makes you close your eyes after the first bite because it tastes exactly like the season feels.
What Ingredients You Will Need
This recipe uses simple, pantry-friendly ingredients that work together to create a bar that is rich, soft, and perfectly sweet. Nothing fancy here, just good baking basics and a bag of everyone’s favorite (or least favorite, depending on who you ask) fall candy.
- Unsalted Butter (1 cup, softened): I always use unsalted butter so I can control the salt level. Make sure it is truly softened to room temperature—you want it to be cool to the touch but give easily when you press it. If it is too cold, it won’t cream properly. If it is melted, your bars will spread too thin.
- Granulated Sugar (1 cup): This is the main sweetener. It creeps with the butter to create air pockets, which gives the bars their lift and tender crumb. I do not recommend reducing the sugar in this recipe, as it affects the texture.
- Large Egg (1, room temperature): The egg binds everything together and adds richness. A room-temperature egg mixes into the butter and sugar much more smoothly than a cold one, which helps prevent a curdled-looking batter.
- Vanilla Extract (2 teaspoons): Pure vanilla extract is non-negotiable here. It is the backbone of the flavor. I like to use a good quality one, like Nielsen-Massey or simply organic, because the flavor really shines through. Imitation vanilla will work in a pinch, but it won’t taste as warm and complex.
- All-Purpose Flour (2 cups): Standard all-purpose flour gives the bars the right structure. I spoon it into my measuring cup and level it off with a knife to avoid packing it down, which would make the bars dry and dense.
- Cornstarch (1 tablespoon): This is my secret ingredient for soft, bakery-style sugar cookies. Cornstarch inhibits gluten formation just a little bit, which keeps the bars from turning tough. Do not skip it.
- Baking Powder (1/2 teaspoon): This gives the bars a little lift. Make sure your baking powder is fresh—if it is older than six months, it might not work as well.
- Salt (1/4 teaspoon): Salt balances the sweetness and enhances the buttery flavor. I use fine sea salt for baking.
- Candy Corn (1 cup, plus more for topping): This is the star of the show. You can use classic candy corn or the autumn mix that has the little pumpkins and Indian corn. I use the classic orange, yellow, and white ones because they look so pretty against the golden cookie.
Equipment Needed
You do not need a lot of fancy equipment to make these bars. I am a big believer in using what you have, and this recipe is designed for a simple kitchen setup. Here is what you will need.
- 9×13-inch Baking Pan: This is the standard size for bar cookies. If you use a smaller pan, the bars will be too thick and might not bake through. If you use a larger pan, they will be thin and crispy. I love my metal baking pans for even browning, but a glass dish works too—just note that glass can take a few extra minutes to bake.
- Parchment Paper or Non-Stick Foil: This is a lifesaver for bar cookies. Lining the pan with parchment paper that hangs over the edges creates “handles” that let you lift the entire block of bars out of the pan for easy cutting. Non-stick foil works great too.
- Large Mixing Bowl: A standard large bowl for creaming the butter and sugar and mixing the dough.
- Hand Mixer or Stand Mixer: You can cream the butter and sugar by hand with a wooden spoon, but it takes a lot of elbow grease. A hand mixer makes it quick and easy. If you use a stand mixer, use the paddle attachment.
- Spatula: A rubber spatula is essential for scraping down the sides of the bowl and spreading the dough evenly into the pan.
- Measuring Cups and Spoons: For accurate measurements. I cannot stress this enough—baking is a science, and eyeballing ingredients can lead to disaster.
Preparation Method
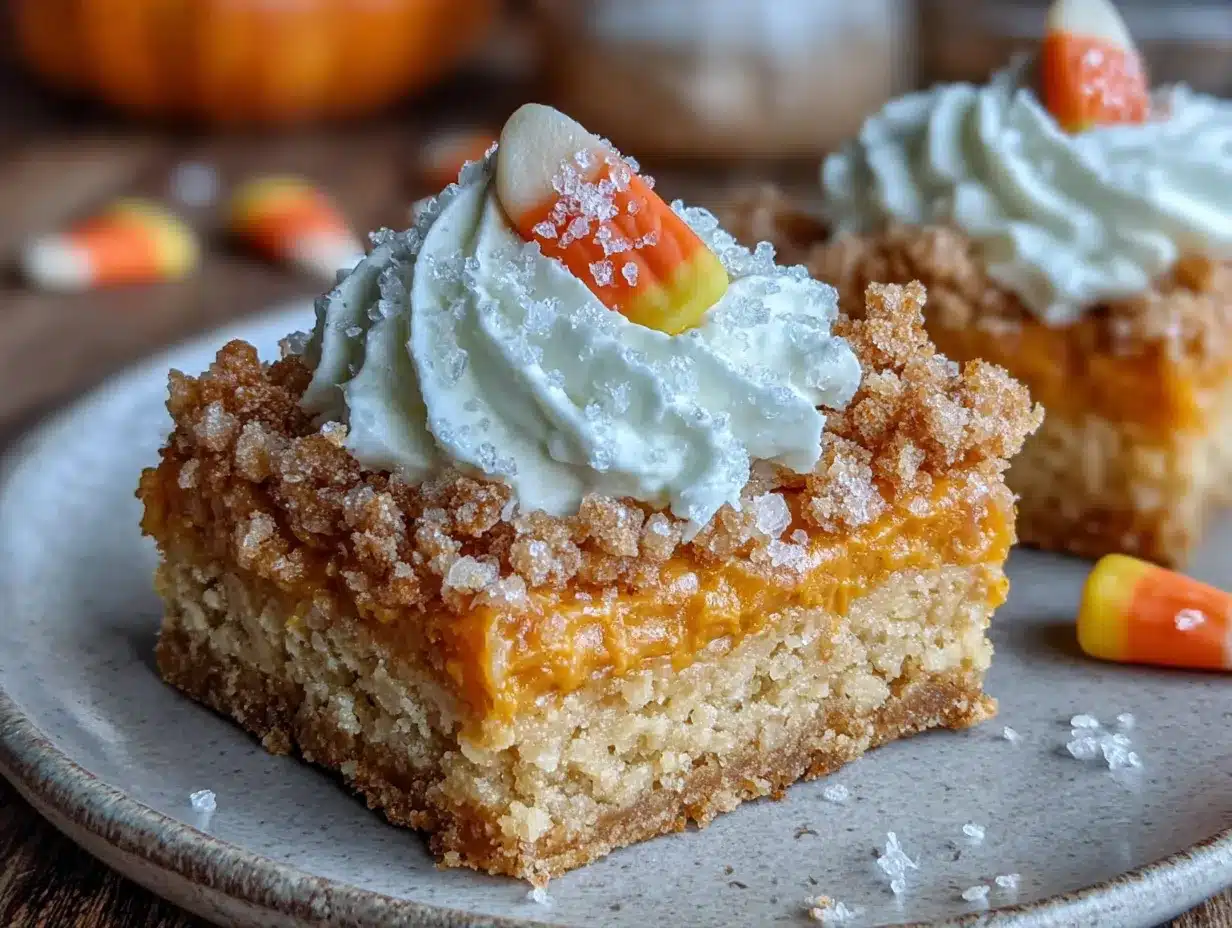
Alright, let’s get to the good part. This method is straightforward, but I have included a few specific tips to make sure your bars turn out perfectly soft and chewy every single time.
- Preheat and Prep: Preheat your oven to 350°F (175°C). Line your 9×13-inch baking pan with parchment paper or non-stick foil, leaving a 2-inch overhang on the long sides. This will be your lifting handle later. Set the pan aside.
- Cream the Butter and Sugar: In your large mixing bowl, combine the 1 cup of softened unsalted butter and 1 cup of granulated sugar. Beat them together with a hand mixer on medium speed for about 2-3 minutes, until the mixture is light, fluffy, and pale in color. You are looking for a texture that looks like wet sand but feels airy. Scrape down the sides of the bowl with your spatula halfway through. Do not rush this step—proper creaming is what gives the bars their tender structure.
- Add the Egg and Vanilla: Crack in the 1 room-temperature egg and add the 2 teaspoons of vanilla extract. Beat on low speed until just combined. The mixture might look a little curdled or separated at this point, and that is totally fine. It will come back together when you add the flour. If it looks really separated, your butter was probably a little too warm, but don’t panic—it will still bake up just fine.
- Mix the Dry Ingredients: In a separate small bowl, whisk together the 2 cups of all-purpose flour, 1 tablespoon of cornstarch, 1/2 teaspoon of baking powder, and 1/4 teaspoon of salt. This ensures the cornstarch and baking powder are evenly distributed so you don’t get pockets of one or the other.
- Combine Wet and Dry: Gradually add the dry ingredients to the wet ingredients, mixing on low speed. I usually add it in three additions, mixing just until the flour disappears after each one. Do not overmix at this stage. Overmixing develops the gluten and makes the bars tough. You want to stop as soon as you see the last streak of flour vanish. The dough will be thick and slightly sticky, like a soft playdough.
- Fold in the Candy Corn: Using your rubber spatula, gently fold in 1 cup of candy corn. Fold just until they are evenly distributed. Be gentle so you don’t crush the candy corn, but make sure they are spread throughout the dough so every bite has some.
- Press into the Pan: Transfer the dough to your prepared baking pan. It will be thick and a little stubborn. Do not pour it—you have to press it. Use your spatula or your clean, lightly greased hands to press the dough evenly into the pan, making sure it reaches all the corners. The layer should be about 1/2-inch thick. If the dough is sticking to your fingers, lightly wet your hands with a little water.
- Top with Extra Candy Corn: Sprinkle the remaining 1/4 to 1/2 cup of candy corn over the top of the dough, pressing them down gently so they stick. This gives the bars that beautiful, festive top layer.
- Bake: Place the pan on the middle rack of your preheated oven. Bake for 18-22 minutes. The edges should be lightly golden brown and the center should look set and puffed. A toothpick inserted into the center should come out with a few moist crumbs, but not wet batter. The candy corn on top will look a little melted and shiny—that is exactly what you want.
- Cool Completely: This is the hardest part, but it is crucial. Let the bars cool in the pan on a wire rack for at least 1 hour. If you try to cut them while they are warm, they will crumble and fall apart. The bars need time to set up and firm up. Once they are completely cool, use the parchment paper handles to lift the entire block out of the pan. Place it on a cutting board.
- Slice and Serve: Using a sharp knife, cut the block into 24 bars (6 rows by 4 rows). For clean slices, wipe the knife clean between cuts. Serve immediately or store for later.
Cooking Tips & Techniques
I have made a lot of mistakes in the kitchen so you don’t have to. Here are a few things I learned the hard way when developing this recipe.
- The Butter Temperature is Everything: I cannot tell you how many times I have tried to cream cold butter. It just doesn’t work. You get chunks of butter in your dough and the bars don’t rise properly. Leave your butter out on the counter for at least an hour before you start. If you are in a rush, cut it into small cubes and let it sit for 20 minutes. Do not microwave it to soften it—that almost always leads to partially melted butter, which will make your bars spread into a flat, greasy puddle.
- Do Not Overbake: This is the most common mistake with sugar cookie bars. You want them to look just barely done in the center. They will continue to cook from the residual heat of the pan as they cool. If you wait until the center looks fully set and dry, they will be overbaked and dry. Trust the toothpick test: a few moist crumbs are perfect.
- Let Them Cool: I know the smell is intoxicating. I know you want to dig in immediately. But warm sugar cookie bars are fragile. The candy corn is molten hot and the structure hasn’t set yet. I once tried to cut a warm pan and ended up with a crumbly, sticky mess. Patience is a virtue, especially in baking.
- Use Parchment Paper: This is not just for easy cleanup. The parchment paper handles let you lift the entire slab of bars out of the pan without scratching your non-stick coating. It makes cutting them so much easier and cleaner.
Variations & Adaptations
One of the best things about this recipe is how easy it is to play with. Here are a few ways I have adapted it for different tastes and occasions.
- Chocolate Lovers Version: Swap out 1/4 cup of the all-purpose flour for 1/4 cup of unsweetened cocoa powder. You will get a rich, chocolatey sugar cookie bar that pairs beautifully with the candy corn. It looks like a little fall-themed brownie. I made this for a Halloween party last year and it was a huge hit.
- Gluten-Free Option: Use a 1-to-1 gluten-free baking flour blend, like the one from Bob’s Red Mill or King Arthur. It works perfectly in this recipe because the cornstarch already helps with tenderness. Just make sure your blend contains xanthan gum for structure. I have tested this and the texture is nearly identical to the original.
- Add Some Spice: For a more autumnal flavor profile, add 1 teaspoon of cinnamon and 1/4 teaspoon of nutmeg to the dry ingredients. It gives the bars a subtle warmth that makes them taste like a snickerdoodle and a candy corn had a baby. It is absolutely delicious with a hot cup of coffee.
- Use Different Candy: Not a fan of candy corn? You can use fall-themed M&Ms, chopped up Reese’s cups, or even butterscotch chips. The base recipe is so good that it works with almost any mix-in you can think of. I have a batch of these with chopped pecans and caramel bits in my kitchen right now, and they are incredible.
If you love baking with seasonal produce, you might also enjoy my cozy brown butter banana zucchini bread with cinnamon streusel topping. It has a similar soft, tender crumb and is perfect for using up those last summer zucchinis.
Serving & Storage Suggestions
These bars are best served at room temperature. That is when the texture is at its peak—soft, chewy, and buttery. I like to cut them into neat squares and arrange them on a cute cake stand or a wooden board for a fall party.
- Serving Temperature: Room temperature is ideal. If you have stored them in the fridge, let them sit out for about 15-20 minutes before serving so they soften up again.
- Pairing Suggestions: A cold glass of milk is the classic pairing, but these bars are also fantastic with a hot apple cider, a pumpkin spice latte, or even a scoop of vanilla ice cream on the side for an extra indulgent dessert.
- Storage Instructions: Store any leftover bars in an airtight container at room temperature for up to 4 days. I usually layer them between sheets of parchment paper to prevent them from sticking to each other. Do not store them in the fridge—the cold air will dry them out and make them hard.
- Freezer Instructions: These bars freeze beautifully. Once they are completely cool and cut, place them in a single layer on a baking sheet and freeze for 1 hour. Then transfer the frozen bars to a freezer-safe bag or container. They will keep for up to 3 months. To thaw, just leave them on the counter for about 30 minutes, or pop them in the microwave for 10-15 seconds.
- How Flavors Develop: Honestly, these bars are even better the next day. The flavors meld together overnight, and the texture becomes even more tender. If you can resist eating them all on day one, you will be rewarded on day two.
Nutritional Information & Benefits
Let’s be real—these are a treat. They are not health food, and they are not pretending to be. But knowing what is in them can help you enjoy them mindfully. Here is a rough estimate for one bar (based on 24 servings).
- Calories: Approximately 180-200 calories per bar.
- Fat: 8-10 grams (mostly from the butter).
- Carbohydrates: 26-30 grams (including sugar from the candy corn).
- Protein: 2-3 grams.
- Dietary Considerations: This recipe contains dairy (butter), eggs, and gluten (flour). It is not suitable for vegans or those with celiac disease without modifications. For a dairy-free option, you can try using a high-quality vegan butter stick, but I have not tested that myself.
- Health Benefits of Key Ingredients: On the bright side, the butter does provide a small amount of Vitamin A, and the eggs offer a bit of protein and choline. But honestly, the main benefit here is the joy it brings. Sometimes you just need a little bit of seasonal happiness, and these bars deliver that in spades.
Conclusion
These Perfect Candy Corn Sugar Cookie Bars are more than just a Halloween treat. They are a little slice of fall nostalgia, baked into a soft, buttery bar that is impossible to resist. Whether you are a lifelong candy corn fan or a skeptic like I was, I think this recipe will win you over. The combination of the tender, vanilla-forward cookie base and the slightly chewy, caramelized candy corn on top is just… perfect.
I love this recipe because it is simple enough for a weeknight bake but impressive enough to bring to a party. It is the kind of recipe that makes people ask for the link, and that is the highest compliment a baker can get. I hope you make these bars and share them with the people you love. And if you do, please come back and let me know how they turned out in the comments below. Did you add any twists? Did you use a different candy? I would love to hear about it.
Happy baking, and happy fall!
Frequently Asked Questions
Can I use salted butter instead of unsalted?
Yes, you can. Just reduce the added salt in the recipe to 1/8 teaspoon, or omit it entirely. Salted butter has varying amounts of salt depending on the brand, so it is always safer to use unsalted and control the salt yourself.
Why did my candy corn melt into a puddle?
This usually happens if the oven is too hot or the bars are baked for too long. Candy corn is mostly sugar, and it will melt if exposed to high heat for an extended period. Make sure your oven temperature is accurate (use an oven thermometer if you have one) and pull the bars out when the edges are just golden and the center is set.
Can I make these bars ahead of time for a party?
Absolutely. You can bake them up to 2 days in advance. Store them in an airtight container at room temperature, and they will be perfectly soft and delicious when you are ready to serve them. You can also freeze them for up to 3 months.
My bars turned out dry. What went wrong?
The most common culprits are overmixing the dough or overbaking the bars. Overmixing develops too much gluten, which makes the bars tough. Overbaking dries them out. Next time, mix the flour in on low speed until it just disappears, and pull the pan out of the oven at the first sign of golden edges.
Can I double this recipe?
Yes, you can easily double the recipe. Use a half-sheet pan (about 13×18 inches) and increase the baking time by 5-7 minutes. Keep an eye on the edges—they should be golden brown and the center should be set. You might need to rotate the pan halfway through baking for even color.
If you are looking for another easy, crowd-pleasing dessert for your next gathering, I highly recommend these easy no-bake Rice Krispie treat stars. They are just as fun and festive, and they come together in no time at all.
Pin This Recipe!
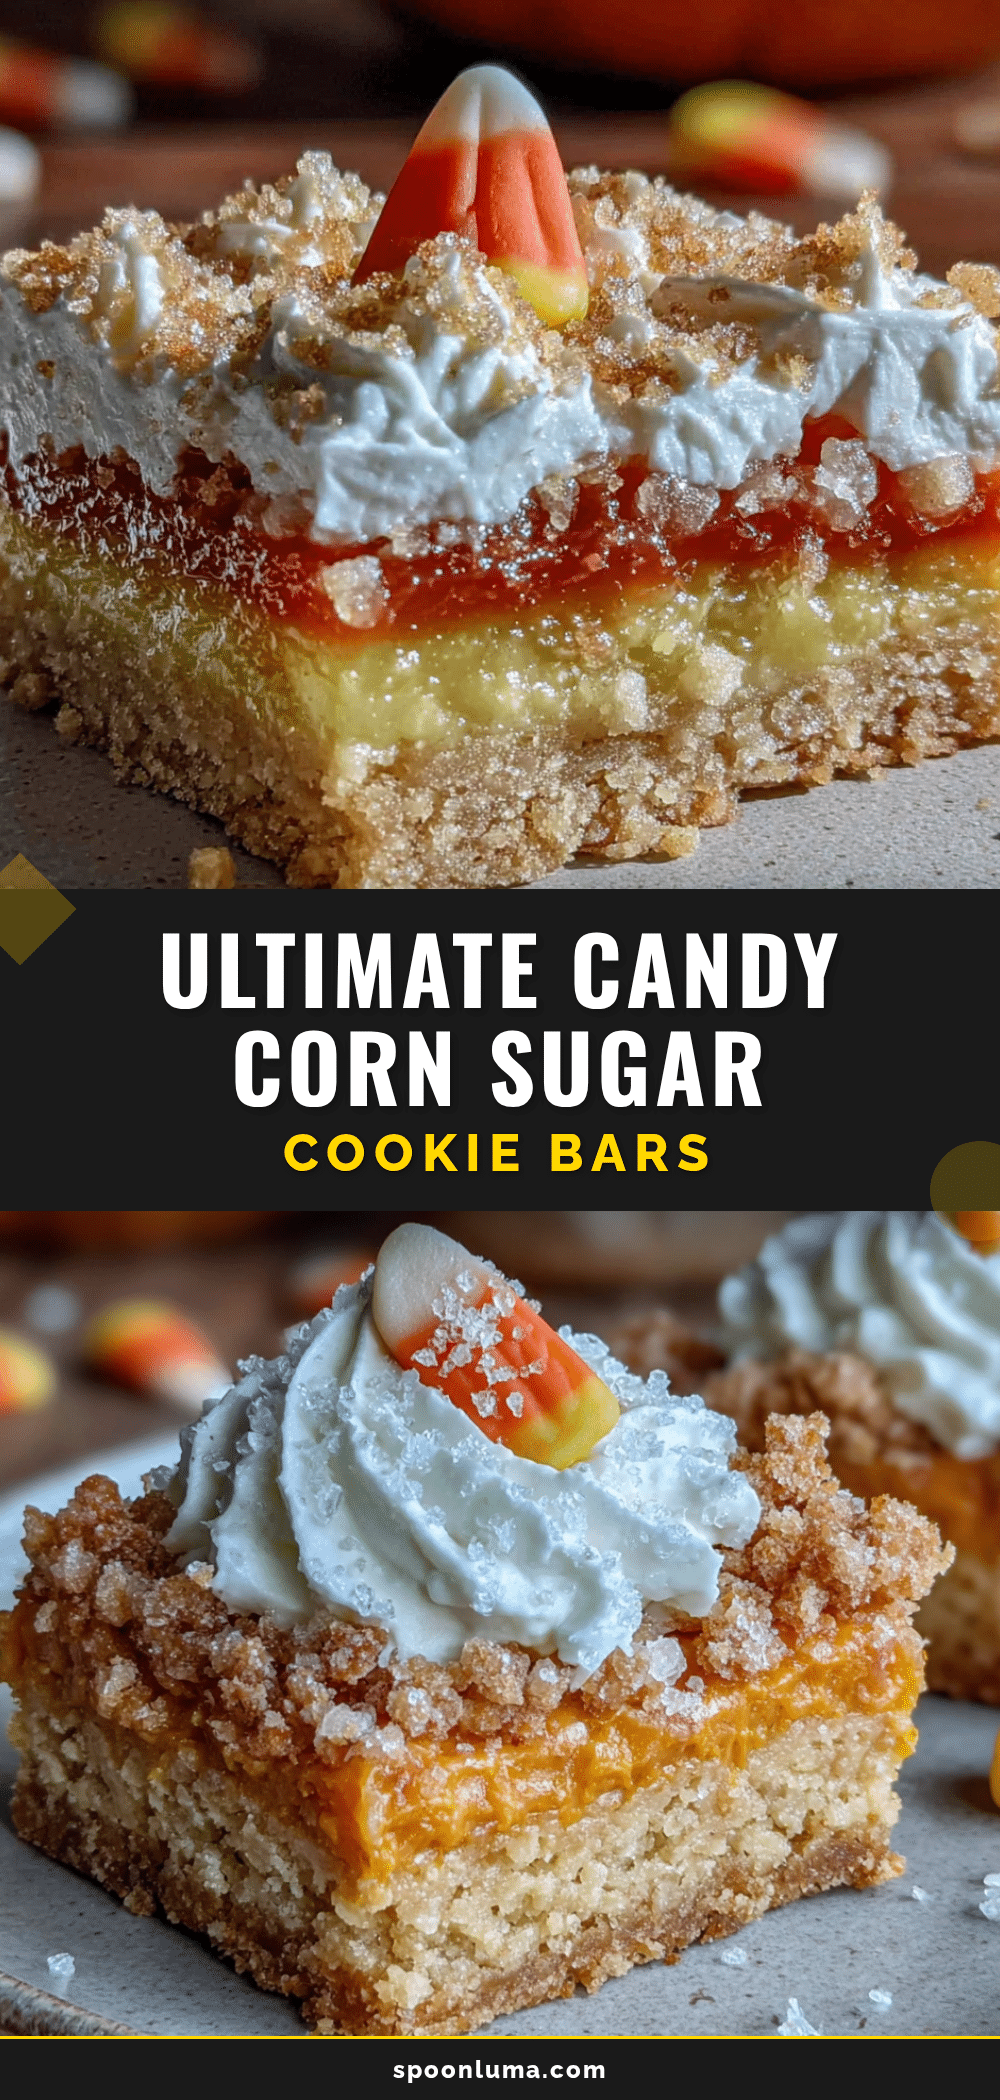
Perfect Candy Corn Sugar Cookie Bars: Easy Fall Dessert Recipe
These Perfect Candy Corn Sugar Cookie Bars are a soft, buttery, and chewy fall dessert topped with slightly caramelized candy corn. They are quick to make with simple ingredients and are perfect for Halloween parties, Thanksgiving potlucks, or any autumn gathering.
- Prep Time: 15 minutes
- Cook Time: 20 minutes
- Total Time: 1 hour 35 minutes (including cooling)
- Yield: 24 bars 1x
- Category: Dessert
- Cuisine: American
Ingredients
- 1 cup unsalted butter, softened
- 1 cup granulated sugar
- 1 large egg, room temperature
- 2 teaspoons vanilla extract
- 2 cups all-purpose flour
- 1 tablespoon cornstarch
- 1/2 teaspoon baking powder
- 1/4 teaspoon salt
- 1 cup candy corn (plus 1/4 to 1/2 cup for topping)
Instructions
- Preheat your oven to 350°F (175°C). Line a 9×13-inch baking pan with parchment paper or non-stick foil, leaving a 2-inch overhang on the long sides.
- In a large mixing bowl, cream together 1 cup softened unsalted butter and 1 cup granulated sugar with a hand mixer on medium speed for 2-3 minutes until light, fluffy, and pale. Scrape down the sides halfway through.
- Add 1 room-temperature egg and 2 teaspoons vanilla extract. Beat on low speed until just combined. The mixture may look slightly curdled; this is fine.
- In a separate small bowl, whisk together 2 cups all-purpose flour, 1 tablespoon cornstarch, 1/2 teaspoon baking powder, and 1/4 teaspoon salt.
- Gradually add the dry ingredients to the wet ingredients in three additions, mixing on low speed until just combined after each. Do not overmix. The dough will be thick and slightly sticky.
- Gently fold in 1 cup of candy corn using a rubber spatula until evenly distributed.
- Transfer the dough to the prepared pan and press it evenly into the pan using a spatula or lightly greased hands. The layer should be about 1/2-inch thick.
- Sprinkle the remaining 1/4 to 1/2 cup of candy corn over the top, pressing them down gently.
- Bake on the middle rack for 18-22 minutes, until the edges are lightly golden and the center is set. A toothpick inserted in the center should come out with a few moist crumbs.
- Cool the bars completely in the pan on a wire rack for at least 1 hour. Once cool, use the parchment paper handles to lift the block out of the pan.
- Cut into 24 bars (6 rows by 4 rows) using a sharp knife, wiping the knife clean between cuts. Serve at room temperature.
Notes
Butter must be at room temperature for proper creaming. Do not overbake; the center should look just set. Cool completely before cutting to prevent crumbling. Bars can be stored in an airtight container at room temperature for up to 4 days or frozen for up to 3 months. For gluten-free, use a 1-to-1 gluten-free baking flour blend. For a chocolate version, replace 1/4 cup flour with unsweetened cocoa powder.
Nutrition
- Serving Size: 1 bar
- Calories: 190
- Sugar: 18
- Sodium: 85
- Fat: 9
- Saturated Fat: 5
- Carbohydrates: 28
- Protein: 2
Keywords: candy corn sugar cookie bars, fall dessert, easy cookie bars, Halloween dessert, Thanksgiving dessert, soft sugar cookie bars


