The flicker of orange streetlights cast long shadows over the cracked pavement as I was walking home last October 29th when the faint scent of cinnamon and cocoa from a nearby bakery hit me — and suddenly I was nine years old, crouched in the corner of Mrs. Jenkins’ kitchen, watching her skillful fingers wrap strips of white icing over little squares of chocolatey brownie. The kitchen smelled like a mix of sugar, spices, and something mysteriously autumnal that I never quite pinned down back then.
I remember how the icing looked like tiny mummy bandages, all haphazard and imperfect, but somehow perfect in their own spooky way. Mrs. Jenkins was the local legend of Halloween treats, and those mummy brownie bites were her signature, a recipe she guarded like a secret spell. I tried to sneak a bite early, but she caught me every time, laughing softly. That cracked ceramic mixing bowl on the counter, chipped from years of use, still feels as familiar as the soft rustle of leaves outside her window.
Honestly, I never thought I’d be able to recreate that feeling — the mix of excitement and a little bit of mischief that comes with Halloween, all wrapped up in a bite-sized treat. But after a few trial runs, flour on my apron, and a kitchen mess that looked like a sugar tornado had passed through, I finally landed on what I call the Perfect Halloween Mummy Brownie Bites for Spooky Parties. Maybe you’ve been there too, trying to catch a magic moment from childhood and make it your own. This recipe isn’t just about brownies; it’s about capturing that crackling energy of October evenings and sharing it with friends, whether they’re little ghosts or just big kids at heart.
Why You’ll Love This Recipe
After countless Halloween celebrations and testing variations in my kitchen (and sometimes in my neighbor’s, when mine was too chaotic), I can say this recipe gets it right in all the best ways. It’s not your average brownie — it’s a party starter, a conversation piece, and a nostalgic treat that somehow feels fresh and fun.
- Quick & Easy: Whips up in under 45 minutes, perfect for last-minute party prep or spontaneous spooky cravings.
- Simple Ingredients: No need for specialty stores; you probably already have these pantry staples on hand.
- Perfect for Halloween Parties: Fun finger food that’s as playful as it is delicious — great for kids and adults alike.
- Crowd-Pleaser: The gooey brownie center with sweet, slightly crispy icing “bandages” makes everyone smile, guaranteed.
- Unbelievably Delicious: The rich chocolate flavor combined with the sweet, creamy frosting is the kind of comfort treat that makes you close your eyes after the first bite.
This recipe stands out because of the unique way the mummy “wrappings” are made — instead of simple drizzles, the icing is piped with a bit of playful imperfection, giving each bite its own character. Plus, the balance of sweetness is spot-on, so it doesn’t feel too heavy or overly sugary. Honestly, these mummy brownie bites have become my go-to for Halloween, the one treat I’m proud to bring to every spooky gathering and the one that gets requested year after year.
What Ingredients You Will Need
This recipe uses straightforward, wholesome ingredients that come together to create a bold flavor and fun texture without any fuss. Most are pantry staples, and substitutions are easy if you want to tweak the recipe.
- For the Brownies:
- unsweetened cocoa powder (1/2 cup or 50g) – I prefer Scharffen Berger for deep chocolate flavor
- all-purpose flour (3/4 cup or 95g) – can substitute with almond flour for gluten-free
- granulated sugar (1 cup or 200g) – regular white sugar works well
- unsalted butter (1/2 cup or 115g), melted and slightly cooled – use quality European butter if possible
- large eggs (2), room temperature
- vanilla extract (1 tsp) – pure vanilla makes a difference here
- salt (1/4 tsp)
- For the Mummy Icing:
- powdered sugar (1 cup or 120g)
- milk (2-3 tbsp or 30-45 ml), add gradually for perfect consistency (use dairy-free milk if needed)
- vanilla extract (1/2 tsp)
- mini chocolate chips or edible candy eyes (about 24) for the mummy’s eyes
Optional: For a seasonal twist, add a pinch of pumpkin pie spice to the brownie batter — it adds a cozy warmth that pairs beautifully with the chocolate. If you want to keep it vegan, swap the butter for coconut oil and use flax eggs (1 tbsp ground flaxseed + 3 tbsp water per egg).
Equipment Needed
- 8×8 inch (20×20 cm) square baking pan – I recommend using a non-stick or glass pan for even baking
- Mixing bowls – one large for batter, one small for icing
- Whisk and rubber spatula – essential for mixing without overworking the batter
- Electric hand mixer or stand mixer (optional) – speeds up icing preparation but hand whisking works fine
- Piping bag or plastic sandwich bag with a tiny corner cut off – for creating the mummy bandages
- Cooling rack – helps brownies cool evenly and prevents sogginess
If you don’t have a piping bag, a zip-top bag with a small snip at the corner does the trick perfectly — I’ve done that many times when my piping bags mysteriously vanished! Also, a serrated knife works best to cut the brownies cleanly, avoiding crumbly edges. Keeping your tools clean and dry, especially for the icing, helps the texture stay just right.
Preparation Method
- Preheat your oven to 350°F (175°C). Grease your 8×8 inch pan with butter or line it with parchment paper for easy removal. This step is crucial to avoid sticking!
- Mix dry ingredients: In a large bowl, whisk together the cocoa powder, flour, sugar, and salt until well combined. This ensures even distribution so every bite has balanced flavor.
- Combine wet ingredients: In a separate bowl, whisk the melted butter, eggs, and vanilla extract. Make sure the butter isn’t too hot or it might cook the eggs — warm but not hot works best.
- Fold wet into dry: Pour the wet ingredients into the dry and gently fold using a spatula. Don’t overmix — you want a smooth batter but a few streaks are okay. Overmixing can make brownies tough.
- Pour batter into pan: Spread it evenly with your spatula, smoothing the top. The batter should be thick but spreadable.
- Bake: Place in the oven and bake for 20-25 minutes. Check doneness by inserting a toothpick into the center — a few moist crumbs are perfect; don’t wait until it’s completely dry.
- Cool completely: Let brownies cool in the pan on a wire rack for at least 30 minutes. This prevents the icing from melting when applied.
- Prepare the mummy icing: In a small bowl, whisk powdered sugar, vanilla, and 2 tablespoons of milk. Add more milk a teaspoon at a time until the icing is thick but pipeable — like toothpaste consistency.
- Cut brownies: Using a serrated knife, slice brownies into 24 bite-sized squares (about 2-inch or 5 cm pieces). Try to keep edges clean for neat mummy bites.
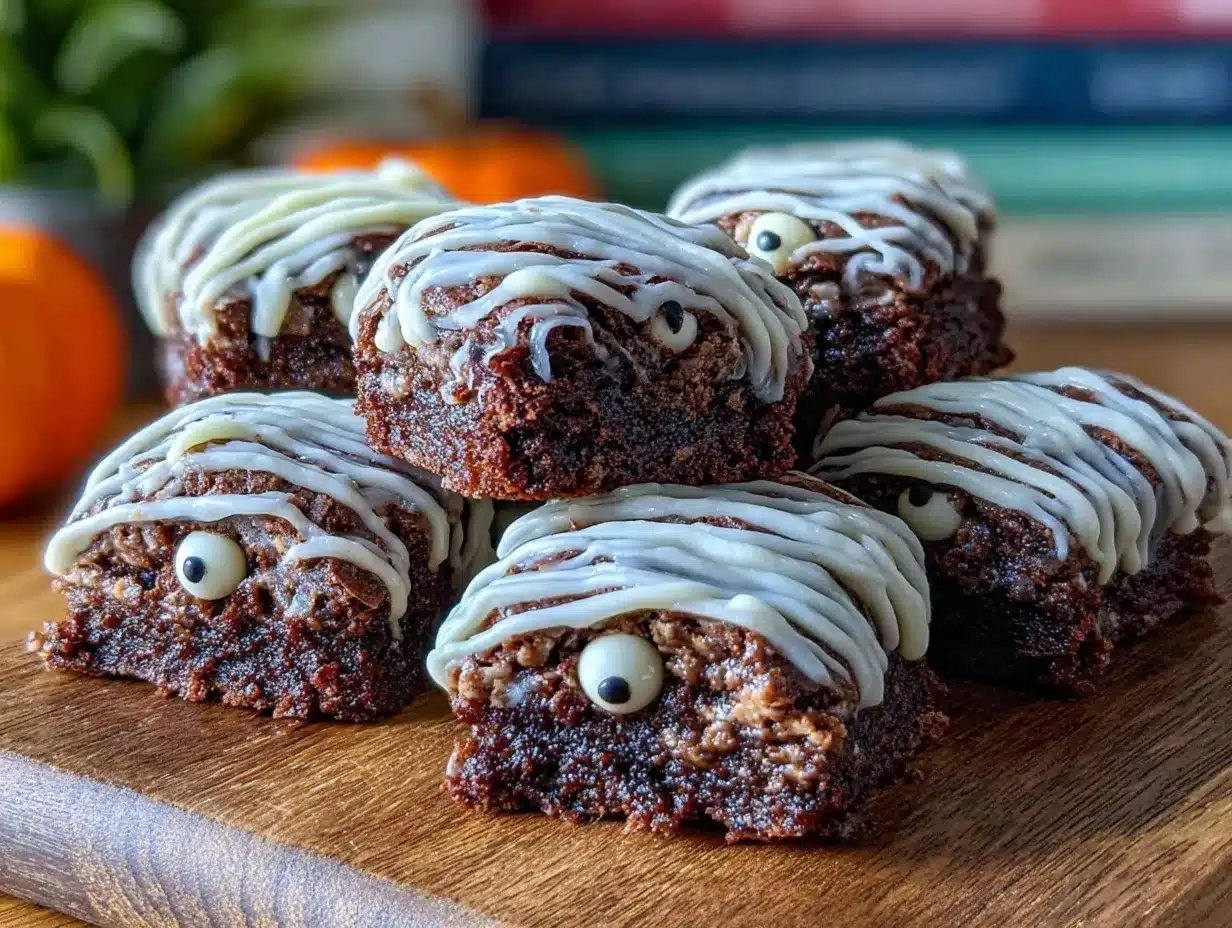
- Pipe the bandages: Transfer icing to your piping bag or plastic bag. Pipe thin, irregular lines across each brownie square, crisscrossing to mimic mummy wrappings. It’s okay if they look a little messy — that’s the charm!
- Add eyes: Immediately press two mini chocolate chips or candy eyes onto each mummy before the icing sets. Position them slightly apart for a spooky stare.
- Let icing set: Allow the mummy brownies to sit at room temperature for 15-20 minutes so the icing hardens slightly, making them easier to handle at your party.
Pro tip: If you notice the icing is too runny, add a little more powdered sugar and chill briefly before piping. Also, if you want to speed cooling, pop the pan in the fridge but check often to avoid drying out the brownies.
Cooking Tips & Techniques
Making these mummy brownie bites is pretty straightforward, but a few kitchen tricks can save you some headaches. For starters, don’t skip letting the brownies cool completely before icing — rushing this step leads to melted messes and sad eyes sliding off the “bandages.”
When mixing the batter, folding gently is key to keeping your brownies fudgy and tender instead of cakey. I learned this the hard way after a batch turned out dry and crumbly simply because I stirred too vigorously.
Another tip is to use a piping bag with a very small round tip or just a tiny cut at the corner of a plastic bag to get those thin, uneven lines that make the mummy effect convincing. Trying to dollop or spread the icing won’t give you that fun wrapped look.
Timing is everything — bake the brownies just enough so they’re cooked but still moist inside. Overbaking will make them dry and less enjoyable, especially since you want that chewy center contrast with the sweet icing.
Lastly, multitask by preparing the icing while the brownies cool. It’s a little race against time, but having the icing ready means you can pipe as soon as the brownies are cool, keeping everything fresh and fun right before the party.
Variations & Adaptations
One of the best things about these mummy brownie bites is how easy they are to customize for your tastes or dietary needs. Here are a few ways I’ve switched things up:
- Flavor twist: Add a teaspoon of espresso powder to the brownie batter for a subtle mocha flavor that deepens the chocolate notes.
- Seasonal adaptation: Use pumpkin puree (about 1/4 cup) in the batter and reduce butter slightly for a fall-inspired pumpkin brownie base.
- Dietary swaps: For gluten-free, try a 1:1 gluten-free baking flour mix. For dairy-free, swap butter with coconut oil and use a non-dairy milk for the icing.
- Alternative “bandages”: Instead of icing, you can melt white chocolate and drizzle it over the brownies for a glossy wrap effect.
One time, I even added crushed peppermint candies on top for a wintery Halloween party — it was unexpectedly delightful! Feel free to experiment with eyes too — candy eyeballs, raisins, or even little dots of melted chocolate work great.
Serving & Storage Suggestions
Serve these mummy brownie bites slightly chilled or at room temperature. I find letting them sit out for about 10 minutes before serving brings out their full flavor and softens the icing just enough for that perfect bite.
They pair wonderfully with a glass of cold milk, hot apple cider, or even a rich, spiced hot chocolate. For a party, arrange them on a platter with some autumn leaves or mini pumpkins to amp up the spooky vibes.
To store, keep them in an airtight container at room temperature for up to 2 days. I usually pop leftovers in the fridge to keep the icing firm, which also helps them last up to 4 days. For longer storage, freeze the brownie bites in a single layer on a baking sheet, then transfer to a freezer bag for up to 2 months — thaw at room temperature before serving.
Reheating isn’t really necessary, but if you want a warm treat, microwave a single bite for 10-15 seconds. Just watch out — the icing can get a little melty!
Nutritional Information & Benefits
Each mummy brownie bite contains approximately 120 calories, 6 grams of fat, 16 grams of carbohydrates, and 1.5 grams of protein. While they’re definitely a treat, using quality cocoa powder and real butter adds some nutritional value compared to more processed alternatives.
The cocoa powder provides antioxidants, and the eggs contribute protein and essential nutrients. Plus, by controlling the sugar amount and using homemade icing, you avoid the excess preservatives often found in store-bought treats.
This recipe can be adapted for gluten-free or dairy-free diets, making it more accessible for guests with allergies. Just keep in mind the mini chocolate chips or candy eyes might contain allergens, so check labels if that’s a concern.
From my experience, these brownies offer a balance of indulgence and simplicity that fits well within a mindful approach to festive snacking — they deliver joy and flavor without going overboard.
Conclusion
The Perfect Halloween Mummy Brownie Bites for Spooky Parties are more than just a dessert; they’re a little piece of childhood magic you get to make and share. Whether you’re a seasoned baker or just someone who loves easy, fun treats, this recipe brings the kind of spooky charm and chocolatey goodness that hits just right.
Feel free to adjust the sweetness or decoration to your liking — the real magic comes from making them your own and watching smiles spread at your Halloween party. Honestly, I keep coming back to this recipe year after year because it brings that perfect mix of nostalgia and new memories.
If you give these a try, I’d love to hear how your mummy brownie bites turned out or any creative twists you added. Share your spooky baking stories, and let’s keep the Halloween spirit alive one delicious bite at a time!
FAQs
- Can I make these mummy brownie bites ahead of time? Yes, you can bake and ice them a day or two in advance. Store in an airtight container in the fridge and bring to room temperature before serving.
- What can I use if I don’t have cocoa powder? You can substitute with melted chocolate (about 4 oz or 115g), but reduce the butter slightly to balance the fat content.
- How do I pipe the mummy bandages without a piping bag? Use a zip-top plastic bag and cut a tiny corner off. It works just as well for thin icing lines.
- Can these be made vegan? Yes! Use coconut oil instead of butter, flax eggs instead of regular eggs, and non-dairy milk for the icing.
- How do I keep the icing from melting on the brownies? Make sure brownies are completely cool before icing. Also, keep the iced brownies in a cool place until serving.
Pin This Recipe!
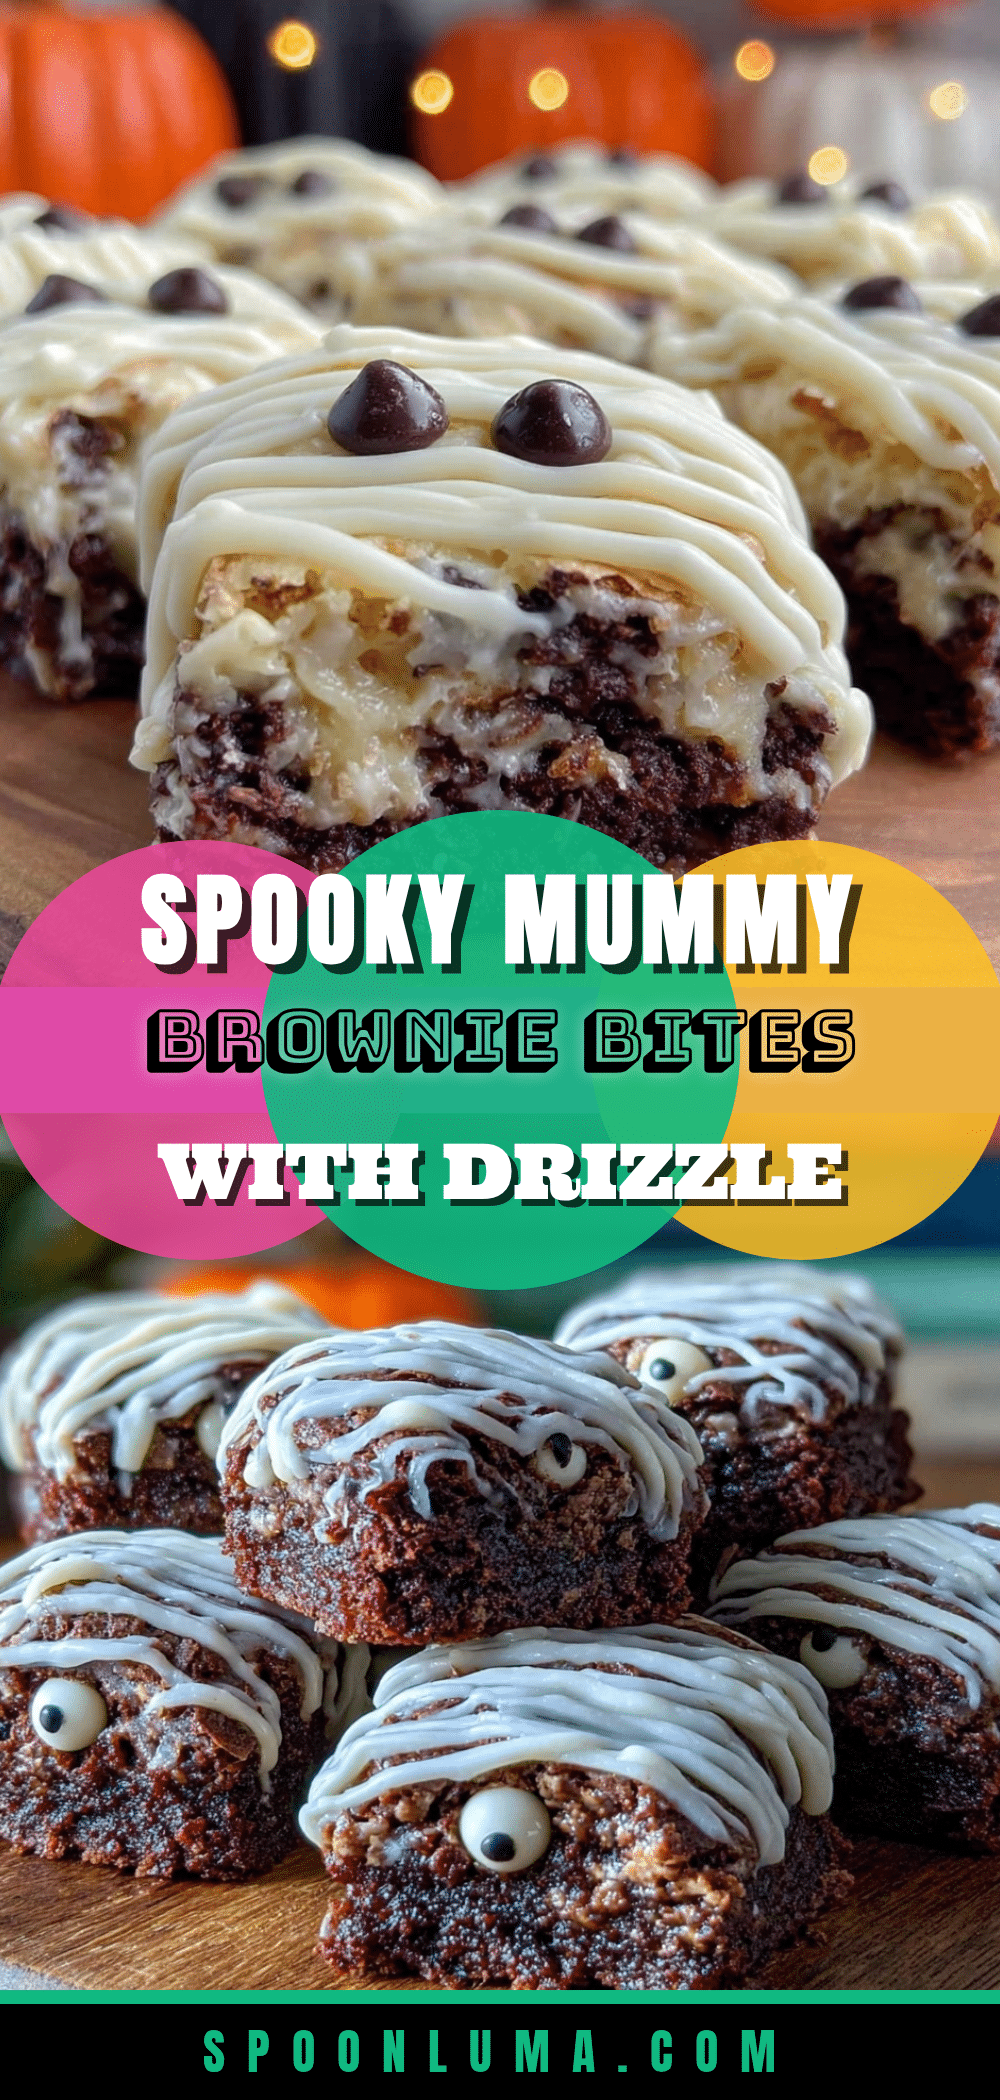
Perfect Halloween Mummy Brownie Bites Easy Spooky Party Recipe
These mummy brownie bites are a fun and nostalgic Halloween treat featuring rich chocolate brownies decorated with sweet, creamy icing bandages and spooky eyes. Perfect for parties, they combine a gooey center with playful decoration.
- Prep Time: 15 minutes
- Cook Time: 25 minutes
- Total Time: 45 minutes
- Yield: 24 bite-sized brownie bites 1x
- Category: Dessert
- Cuisine: American
Ingredients
- 1/2 cup unsweetened cocoa powder (50g)
- 3/4 cup all-purpose flour (95g) (can substitute with almond flour for gluten-free)
- 1 cup granulated sugar (200g)
- 1/2 cup unsalted butter (115g), melted and slightly cooled (use quality European butter if possible)
- 2 large eggs, room temperature
- 1 tsp vanilla extract
- 1/4 tsp salt
- 1 cup powdered sugar (120g) (for icing)
- 2–3 tbsp milk (30–45 ml), add gradually for icing consistency (use dairy-free milk if needed)
- 1/2 tsp vanilla extract (for icing)
- About 24 mini chocolate chips or edible candy eyes (for mummy eyes)
- Optional: pinch of pumpkin pie spice for brownie batter
- Optional vegan substitutions: coconut oil instead of butter, flax eggs (1 tbsp ground flaxseed + 3 tbsp water per egg) instead of eggs
Instructions
- Preheat your oven to 350°F (175°C). Grease an 8×8 inch pan with butter or line with parchment paper.
- In a large bowl, whisk together cocoa powder, flour, sugar, and salt until well combined.
- In a separate bowl, whisk melted butter, eggs, and vanilla extract until combined. Ensure butter is warm but not hot.
- Pour wet ingredients into dry ingredients and gently fold with a spatula until smooth but do not overmix.
- Spread batter evenly in the prepared pan, smoothing the top.
- Bake for 20-25 minutes. Check doneness with a toothpick; a few moist crumbs are perfect.
- Cool brownies completely in the pan on a wire rack for at least 30 minutes.
- Prepare the mummy icing by whisking powdered sugar, vanilla, and 2 tablespoons milk in a small bowl. Add more milk a teaspoon at a time until thick but pipeable.
- Cut brownies into 24 bite-sized squares (about 2-inch pieces) using a serrated knife.
- Transfer icing to a piping bag or plastic sandwich bag with a tiny corner cut off.
- Pipe thin, irregular lines across each brownie square to mimic mummy bandages.
- Press two mini chocolate chips or candy eyes onto each mummy before the icing sets.
- Let the mummy brownies sit at room temperature for 15-20 minutes to allow icing to harden slightly.
Notes
Let brownies cool completely before icing to prevent melting. Use a piping bag with a small tip or a plastic bag with a tiny corner cut for thin, uneven icing lines. If icing is too runny, add more powdered sugar and chill briefly before piping. Store in airtight container at room temperature for up to 2 days or refrigerated for up to 4 days. Freeze for up to 2 months.
Nutrition
- Serving Size: 1 mummy brownie bite
- Calories: 120
- Fat: 6
- Carbohydrates: 16
- Protein: 1.5
Keywords: Halloween, mummy brownies, brownie bites, spooky treats, party snacks, easy brownies, chocolate dessert