This was supposed to be a batch of soft apple cider doughnuts. I had the cider reducing on the stove, the oil heating up, and my favorite doughnut pan greased and ready. Then my three-year-old decided it was the perfect moment to “help” by dumping the entire bag of flour onto the kitchen floor. While I was cleaning up the snowy mess, the cider on the stove boiled down to practically nothing. I was frustrated, the kitchen was a disaster, and dinner was in an hour. I grabbed what was left of the concentrated syrup, tossed it into a bowl with some butter and sugar, and figured I’d make cookies instead. Honestly? I was just trying to salvage the situation. What came out of the oven was nothing like the doughnuts I planned — and better. These quick chewy apple cider cookies with cinnamon glaze have become my go-to fall recipe, and I make them on purpose now. The happy accident taught me that sometimes the best recipes come from the moments when everything goes wrong. You know that feeling when you’re already late and the recipe goes sideways? That was my Tuesday. But these cookies? They saved the day.
Why You’ll Love This Recipe
Let me tell you why these cookies have earned a permanent spot in my weeknight rotation. I’ve tested this recipe more times than I care to admit, tweaking the flour ratio and the baking time until the texture was just right. The result is a cookie that’s chewy in the center with slightly crisp edges, and it comes together in under 30 minutes.
- Quick & Easy: From start to finish, these cookies take about 25 minutes. That’s faster than ordering takeout in some cases. Perfect for those evenings when you need something sweet but don’t have the energy for a project.
- Simple Ingredients: You probably have most of these in your pantry right now. No fancy extracts, no special flours, no trips to three different stores. Just real ingredients that work together beautifully.
- Perfect for Weeknights: These cookies save me on busy school nights when the kids are asking for a treat and I’m running on empty. They’re also great for last-minute potlucks or when company shows up unexpectedly.
- Crowd-Pleaser: I’ve brought these to three different gatherings now, and every single time someone asks for the recipe. Kids love them, adults love them, and they disappear fast.
- Unbelievably Delicious: The apple cider flavor is concentrated and authentic, not artificial or watered down. The cinnamon glaze adds just the right amount of sweetness without overwhelming the cookie itself.
What makes these different from other apple cider cookie recipes is the technique. Most recipes use straight apple cider, which makes the cookies too wet and cakey. I reduce the cider first, concentrating the apple flavor and removing excess water. This gives you a chewy, dense cookie that actually tastes like real apples. It’s comfort food reimagined — faster, simpler, but with the same soul-soothing satisfaction. Perfect for impressing your family on a Tuesday night without breaking a sweat.
What Ingredients You Will Need
This recipe uses simple, wholesome ingredients to deliver bold apple flavor and satisfying texture without the fuss. Most of these are pantry staples you likely already have on hand.
- Apple Cider: 1 cup (240 ml) — use real, unfiltered apple cider for the best flavor. Not apple juice, which is too thin and sweet. I prefer local orchard cider when it’s in season.
- Unsalted Butter: 1/2 cup (113 g), softened to room temperature — this gives the cookies richness and helps them spread just the right amount.
- Granulated Sugar: 1/2 cup (100 g) — adds sweetness and helps create those slightly crisp edges.
- Light Brown Sugar: 1/2 cup (100 g), packed — adds moisture and a hint of molasses flavor that pairs beautifully with apple.
- Large Egg: 1, at room temperature — binds everything together and adds structure.
- Vanilla Extract: 1 teaspoon — enhances the apple flavor. I use pure vanilla extract, not imitation.
- All-Purpose Flour: 2 cups (250 g) — gives the cookies structure. Spoon and level your flour for accurate measuring.
- Baking Soda: 1 teaspoon — helps the cookies spread and become chewy.
- Ground Cinnamon: 1 teaspoon — warm spice that complements the apple cider perfectly.
- Ground Nutmeg: 1/4 teaspoon — just a pinch adds depth without overpowering.
- Salt: 1/2 teaspoon — balances the sweetness and enhances all the flavors.
- Powdered Sugar: 1 cup (120 g) — for the glaze. Sift it if it’s lumpy.
- Milk: 2-3 tablespoons (30-45 ml) — use whole milk for a creamier glaze, or any milk you have on hand.
- Ground Cinnamon (for glaze): 1/2 teaspoon — adds that signature cinnamon kick to the glaze.
Ingredient Tips: I recommend using a brand like Musselman’s or Martinelli’s for the apple cider if you don’t have access to local cider. For the butter, I always use unsalted so I can control the salt level. If you only have salted butter, reduce the added salt to 1/4 teaspoon. The brown sugar should be packed firmly into your measuring cup for accuracy.
Substitution Guidance: You can use coconut oil instead of butter for a dairy-free version, though the cookies will be slightly less tender. For a gluten-free option, substitute the all-purpose flour with a 1:1 gluten-free baking flour blend. I’ve tried this with Bob’s Red Mill and it worked well. The texture will be slightly different, but still delicious.
Equipment Needed
You don’t need fancy equipment for these cookies, which is part of why I love them on busy nights.
- Small Saucepan: For reducing the apple cider. A 1-quart saucepan works perfectly.
- Large Mixing Bowl: For combining the wet and dry ingredients. Any bowl will do, but a wide one makes mixing easier.
- Medium Mixing Bowl: For whisking the dry ingredients together.
- Electric Mixer: Handheld or stand mixer works. You can cream the butter and sugar by hand, but it takes some elbow grease. I’ve done it both ways, and the mixer saves time and energy.
- Baking Sheets: Two large baking sheets. I prefer light-colored aluminum sheets for even baking. Dark sheets can cause the bottoms to brown too quickly.
- Parchment Paper: Or silicone baking mats. Parchment paper makes cleanup a breeze and prevents sticking.
- Cookie Scoop: A 1.5-tablespoon scoop ensures evenly sized cookies. A spoon works fine too, but the scoop is faster and more consistent.
- Cooling Rack: For cooling the cookies before glazing. If you don’t have one, you can cool them on the baking sheet, but they’ll continue to cook slightly from the residual heat.
- Whisk: For making the glaze. A small whisk works best to get a smooth, lump-free consistency.
Budget-Friendly Options: If you don’t have an electric mixer, a wooden spoon and some determination will work. The cookies might be slightly less fluffy, but they’ll still taste amazing. I’ve made these with just a bowl and a fork before, and they turned out great.
Preparation Method
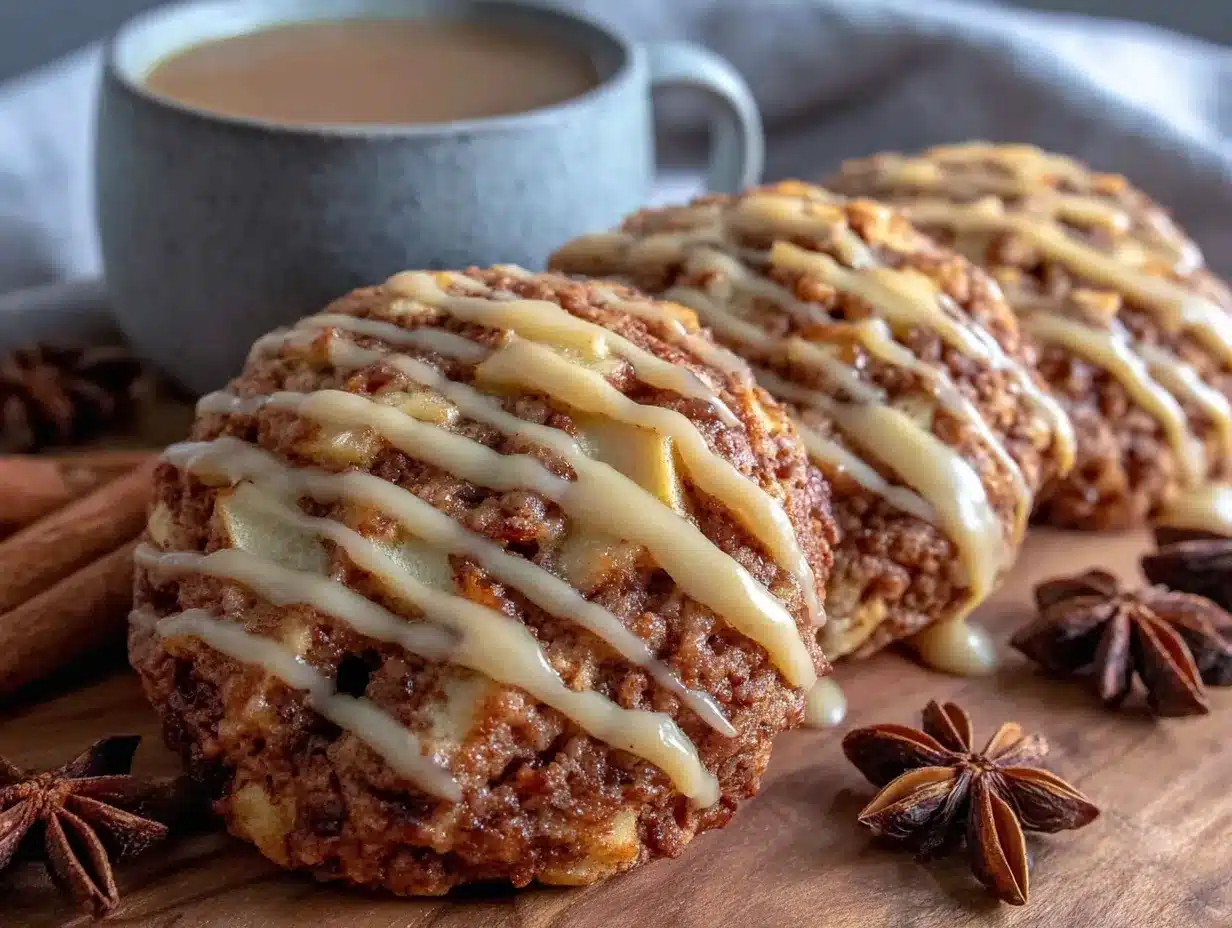
Let me walk you through this step by step. I’ve made these cookies at least a dozen times, so I know exactly where things can go wrong and how to fix them.
- Reduce the Apple Cider: Pour 1 cup of apple cider into a small saucepan. Bring it to a boil over medium-high heat, then reduce the heat to medium-low and let it simmer. Stir occasionally. You want it to reduce down to about 1/4 cup of concentrated syrup. This takes about 12-15 minutes. The cider will look darker and thicker, and it should smell intensely of apples. Watch it carefully toward the end — it can burn quickly. When it’s done, pour it into a small bowl and let it cool completely. I usually set it aside while I prepare the other ingredients.
- Preheat the Oven: Set your oven to 350°F (175°C). Line two baking sheets with parchment paper. Don’t skip the parchment paper — it really does make a difference for even baking and easy cleanup.
- Cream the Butter and Sugars: In a large mixing bowl, beat the softened butter, granulated sugar, and brown sugar together until light and fluffy, about 2-3 minutes. Scrape down the sides of the bowl halfway through. The mixture should look pale and airy. If it looks greasy or separated, your butter might have been too soft. Pop it in the fridge for 5 minutes and try again.
- Add the Egg, Vanilla, and Reduced Cider: Add the egg, vanilla extract, and the cooled, reduced apple cider syrup. Beat on medium speed until well combined, about 1 minute. The mixture might look slightly curdled at this point — that’s totally normal. Don’t panic.
- Combine the Dry Ingredients: In a medium bowl, whisk together the all-purpose flour, baking soda, cinnamon, nutmeg, and salt. Whisking ensures everything is evenly distributed. I learned the hard way that skipping this step leads to pockets of baking soda in your cookies.
- Mix the Wet and Dry Ingredients: Gradually add the dry ingredients to the wet mixture, mixing on low speed or stirring by hand until just combined. Do not overmix! Stop as soon as you don’t see any more streaks of flour. Overmixing develops gluten and makes the cookies tough instead of chewy.
- Chill the Dough (Optional but Recommended): For the chewiest cookies, cover the bowl and refrigerate the dough for 30 minutes. This allows the flavors to meld and prevents the cookies from spreading too much. If you’re in a hurry, you can skip this step, but the cookies will be slightly thinner.
- Scoop and Bake: Using a 1.5-tablespoon cookie scoop, drop rounded balls of dough onto the prepared baking sheets, spacing them about 2 inches apart. Bake for 10-12 minutes, or until the edges are set and lightly golden. The centers will look slightly underdone — that’s what you want for chewy cookies. For softer cookies, bake for 10 minutes. For crispier edges, go for 12 minutes.
- Cool on the Baking Sheet: Let the cookies cool on the baking sheet for 5 minutes before transferring them to a wire cooling rack. This allows them to set properly. If you move them too soon, they’ll fall apart.
- Make the Glaze: While the cookies are cooling, whisk together the powdered sugar, 2 tablespoons of milk, and 1/2 teaspoon of cinnamon in a small bowl. Add more milk, one teaspoon at a time, until the glaze reaches a drizzling consistency. It should be thick enough to coat the back of a spoon but thin enough to drizzle.
- Glaze the Cookies: Once the cookies are completely cool, drizzle the cinnamon glaze over the top using a spoon or a piping bag with a small tip. Let the glaze set for about 15 minutes before serving. The glaze will harden slightly, creating a beautiful crackled finish.
Cooking Tips & Techniques
I’ve made every mistake in the book with these cookies, so let me save you the trouble. First, don’t skip reducing the cider. I tried making these with straight cider once because I was in a hurry, and the cookies turned out flat and soggy. The reduction concentrates the flavor and removes excess moisture, which is the secret to the chewy texture.
Second, measure your flour correctly. Spoon it into your measuring cup and level it off with a knife. Scooping directly from the bag packs the flour down, and you’ll end up with dry, crumbly cookies. I did this the first time I made these, and they were more like scones than cookies.
Third, keep an eye on the baking time. Every oven runs differently. My old oven baked these perfectly at 11 minutes, but my new one needs a full 12 minutes. The cookies are done when the edges are set and lightly golden, but the centers still look soft. They’ll continue to cook on the hot baking sheet after you pull them out.
Fourth, if your glaze is too thick, add milk one teaspoon at a time. If it’s too thin, add more powdered sugar. The consistency should be like thick honey. I once made the glaze too thin and it ran off the cookies completely, pooling on the cooling rack. Still tasted good, but not very pretty.
Finally, let the cookies cool completely before glazing. Warm cookies will melt the glaze into a sticky mess. I know it’s tempting to rush this part, but trust me on this one.
Variations & Adaptations
These cookies are surprisingly adaptable, and I’ve tried several variations over the years.
Dairy-Free Version: Substitute the butter with coconut oil or a plant-based butter stick. Use almond milk or oat milk in the glaze. The texture will be slightly different — a bit more crumbly — but the flavor is still fantastic.
Gluten-Free Version: Use a 1:1 gluten-free baking flour blend. I’ve tested this with Bob’s Red Mill and King Arthur’s gluten-free blends, and both worked well. Add an extra tablespoon of milk to the dough since gluten-free flours tend to absorb more liquid.
Spiced Apple Version: Add 1/4 teaspoon of ground cloves and 1/4 teaspoon of ground ginger to the dry ingredients for a more complex spice profile. This is my favorite variation for holiday baking.
Apple Cider Cookie Sandwiches: Bake the cookies slightly thinner (use a 1-tablespoon scoop) and sandwich them with a cream cheese frosting. It’s decadent and perfect for special occasions.
No-Glaze Version: If you’re short on time or want a less sweet cookie, skip the glaze entirely. The cookies are still delicious on their own, with a concentrated apple flavor that shines through.
Add-In Options: Fold in 1/2 cup of white chocolate chips, dried cranberries, or chopped pecans before baking. I tried white chocolate chips once and it was a game-changer.
Serving & Storage Suggestions
These cookies are best served at room temperature with a cold glass of milk or a hot cup of coffee. The cinnamon glaze should be fully set before stacking or serving, which takes about 15 minutes after drizzling.
For storage, place the cookies in an airtight container at room temperature. They’ll stay fresh for up to 5 days, though they rarely last that long in my house. Layer them with parchment paper between each layer to prevent the glaze from sticking.
You can also freeze these cookies. Freeze them unglazed on a baking sheet until solid, then transfer them to a freezer-safe bag or container. They’ll keep for up to 3 months. When you’re ready to enjoy them, thaw them at room temperature and add the fresh glaze. The glaze doesn’t freeze well, so always add it after thawing.
For reheating, pop a cookie in the microwave for 10-15 seconds. It’ll soften the cookie and make it taste freshly baked. The flavors actually develop and deepen after a day or two, so these cookies taste even better on day two.
Nutritional Information & Benefits
Here’s the approximate nutritional breakdown for one cookie (based on 24 cookies):
- Calories: 145
- Total Fat: 5g
- Saturated Fat: 3g
- Cholesterol: 20mg
- Sodium: 95mg
- Total Carbohydrates: 24g
- Dietary Fiber: 0.5g
- Sugars: 15g
- Protein: 2g
While these cookies are a treat, the apple cider does provide some vitamin C and antioxidants. Cinnamon has anti-inflammatory properties and can help regulate blood sugar levels. I love that these cookies use real ingredients without artificial flavors or preservatives. They’re a homemade indulgence that feels a little more wholesome than store-bought options.
If you’re watching your sugar intake, you can reduce the granulated sugar to 1/3 cup, though the cookies will be slightly less tender. The glaze can also be made with a sugar substitute like powdered monk fruit sweetener.
Conclusion
These quick chewy apple cider cookies with cinnamon glaze started as a kitchen disaster, but they’ve become one of my most-requested recipes. They’re proof that sometimes the best things come from unexpected places. The concentrated apple flavor, the chewy texture, and that simple cinnamon glaze come together to create a cookie that tastes like fall in every bite.
I’d love to hear how these turn out for you. Did you try any variations? Did your kids help you make them? Drop a comment below and let me know. And if you’re looking for more quick weeknight treats, check out our quick weeknight desserts collection for more recipes that come together in under 30 minutes.
Happy baking, and remember — some of the best recipes start with a happy accident.
Frequently Asked Questions
Can I use apple juice instead of apple cider?
I wouldn’t recommend it. Apple juice is thinner and less flavorful than apple cider, so you won’t get the same concentrated apple taste. The cookies will also be less chewy because apple juice has a different sugar composition. Stick with real apple cider for the best results.
Why did my cookies turn out flat?
Flat cookies usually mean the butter was too soft or the dough wasn’t chilled enough. Make sure your butter is softened but still cool to the touch, not melted. Chilling the dough for 30 minutes also helps prevent excessive spreading. If your baking soda is old, it might not provide enough lift, so check the expiration date.
Can I make these cookies ahead of time?
Absolutely! You can make the dough up to 3 days in advance and keep it in the refrigerator. Let it sit at room temperature for 10 minutes before scooping and baking. You can also freeze the baked, unglazed cookies for up to 3 months. Just add the fresh glaze after thawing.
How do I know when the cookies are done baking?
The edges should be set and lightly golden, but the centers will still look slightly soft and underdone. That’s exactly what you want for chewy cookies. If the centers look fully set and firm, you’ve overbaked them. Remember, they’ll continue to cook on the hot baking sheet for a few minutes after you take them out.
Can I double this recipe?
Yes, this recipe doubles beautifully. Just make sure you have enough space in your oven to bake the cookies in batches. You might need to reduce the cider in two batches or use a larger saucepan. The baking time remains the same, but you may need to rotate your baking sheets halfway through for even baking.
PrintQuick Chewy Apple Cider Cookies with Easy Cinnamon Glaze

These quick chewy apple cider cookies with cinnamon glaze started as a kitchen disaster but have become a go-to fall recipe. Concentrated apple cider gives them a chewy texture and authentic apple flavor, while the simple cinnamon glaze adds the perfect finishing touch.
- Prep Time: 15 minutes
- Cook Time: 12 minutes
- Total Time: 27 minutes
- Yield: 24 servings 1x
- Category: Dessert
- Cuisine: American
Ingredients
- 1 cup (240 ml) apple cider
- 1/2 cup (113 g) unsalted butter, softened
- 1/2 cup (100 g) granulated sugar
- 1/2 cup (100 g) light brown sugar, packed
- 1 large egg, at room temperature
- 1 teaspoon vanilla extract
- 2 cups (250 g) all-purpose flour
- 1 teaspoon baking soda
- 1 teaspoon ground cinnamon
- 1/4 teaspoon ground nutmeg
- 1/2 teaspoon salt
- 1 cup (120 g) powdered sugar
- 2–3 tablespoons (30–45 ml) milk
- 1/2 teaspoon ground cinnamon (for glaze)
Instructions
- Reduce the apple cider: Pour 1 cup of apple cider into a small saucepan. Bring to a boil over medium-high heat, then reduce heat to medium-low and simmer, stirring occasionally, until reduced to about 1/4 cup (about 12-15 minutes). Pour into a small bowl and let cool completely.
- Preheat the oven to 350°F (175°C). Line two baking sheets with parchment paper.
- In a large mixing bowl, beat the softened butter, granulated sugar, and brown sugar together until light and fluffy, about 2-3 minutes. Scrape down the sides as needed.
- Add the egg, vanilla extract, and cooled reduced apple cider syrup. Beat on medium speed until well combined, about 1 minute.
- In a medium bowl, whisk together the all-purpose flour, baking soda, cinnamon, nutmeg, and salt.
- Gradually add the dry ingredients to the wet mixture, mixing on low speed or stirring by hand until just combined. Do not overmix.
- For the chewiest cookies, cover the bowl and refrigerate the dough for 30 minutes (optional but recommended).
- Using a 1.5-tablespoon cookie scoop, drop rounded balls of dough onto the prepared baking sheets, spacing them about 2 inches apart.
- Bake for 10-12 minutes, or until the edges are set and lightly golden. The centers will look slightly underdone.
- Let the cookies cool on the baking sheet for 5 minutes, then transfer to a wire cooling rack to cool completely.
- While the cookies are cooling, make the glaze: In a small bowl, whisk together the powdered sugar, 2 tablespoons of milk, and 1/2 teaspoon of cinnamon. Add more milk, one teaspoon at a time, until the glaze reaches a drizzling consistency.
- Once the cookies are completely cool, drizzle the cinnamon glaze over the top. Let the glaze set for about 15 minutes before serving.
Notes
Don’t skip reducing the cider; it concentrates the flavor and removes excess moisture for a chewy texture. Measure flour correctly by spooning it into the measuring cup and leveling off. For the chewiest cookies, chill the dough for 30 minutes. Let cookies cool completely before glazing to prevent the glaze from melting.
Nutrition
- Serving Size: 1 cookie
- Calories: 145
- Sugar: 15
- Sodium: 95
- Fat: 5
- Saturated Fat: 3
- Carbohydrates: 24
- Fiber: 0.5
- Protein: 2
Keywords: apple cider cookies, chewy cookies, cinnamon glaze, fall cookies, quick dessert, weeknight treat