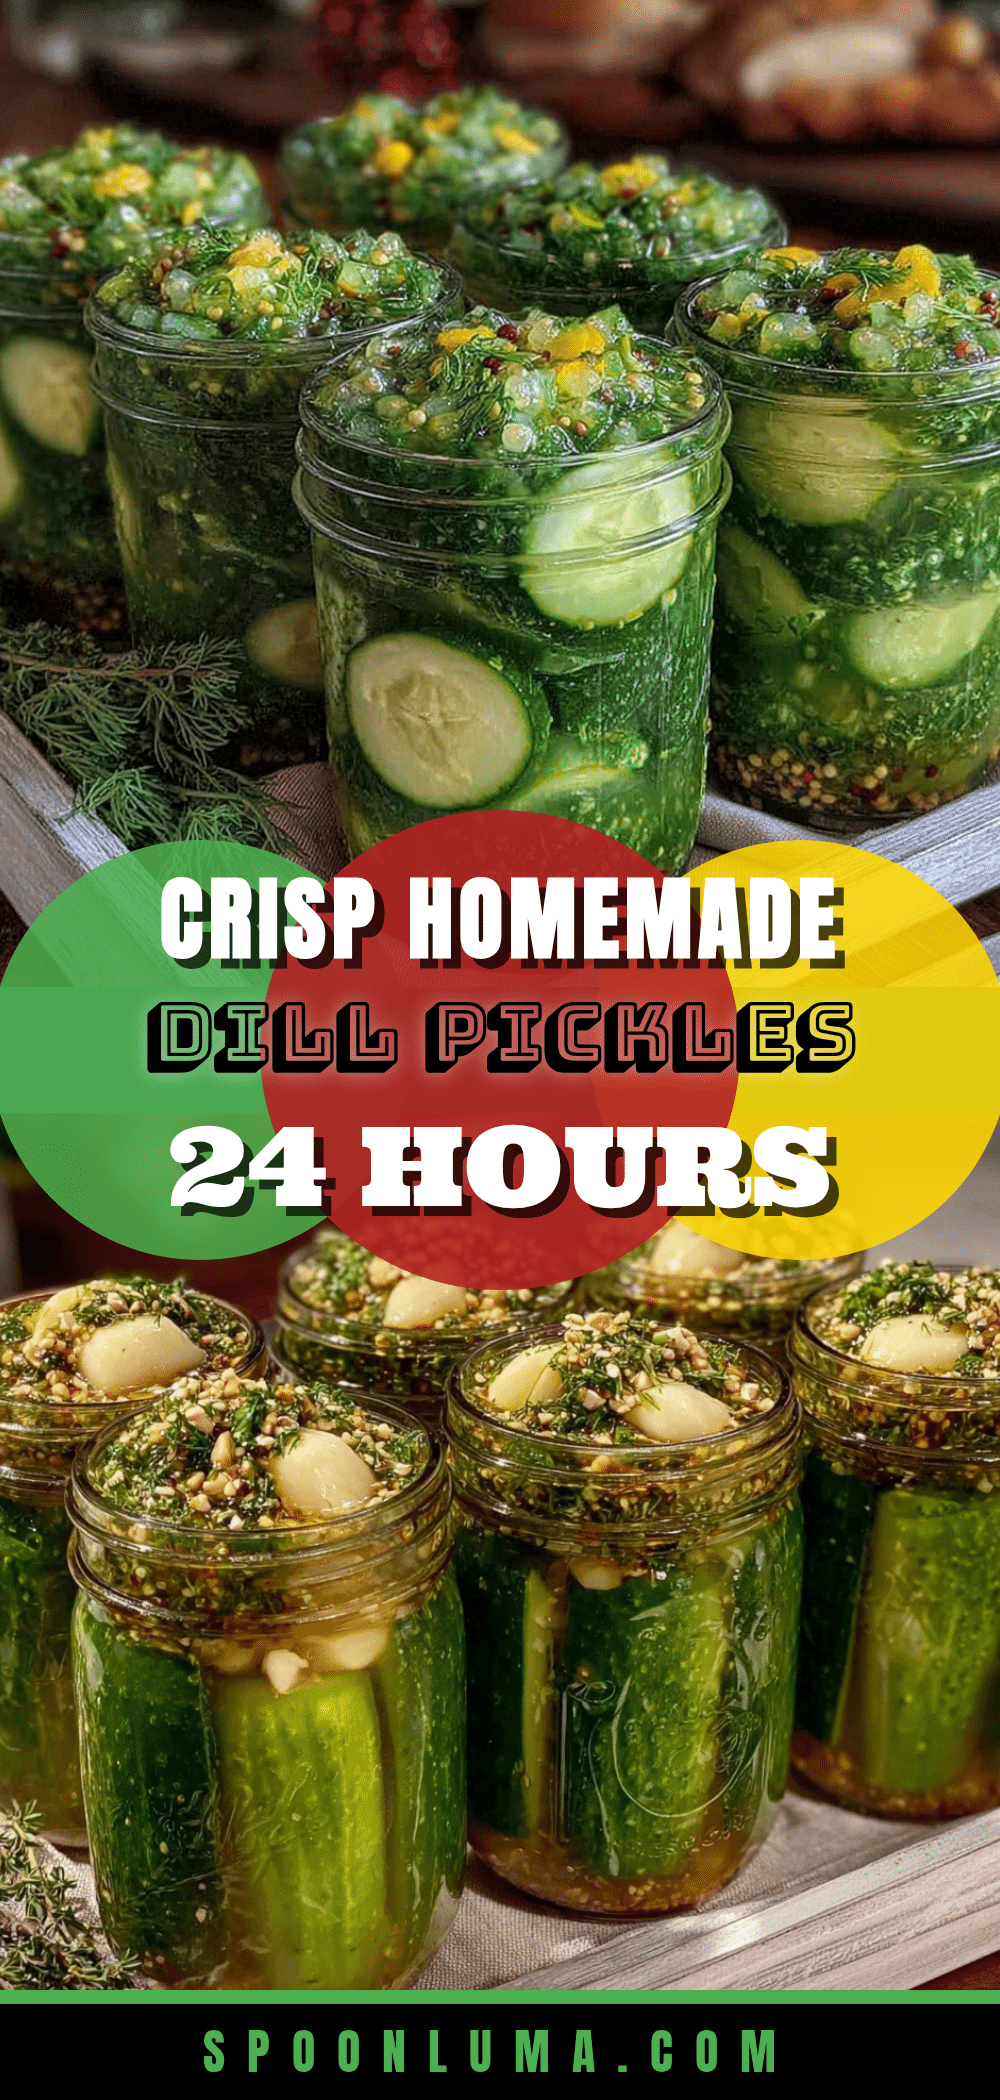
Introduction
“Why can’t we just toss the cucumbers straight into the jar with vinegar and call it pickling?” my friend asked one evening while I was carefully measuring out spices. I started to explain why that wouldn’t work — then stopped. Honestly, it made me pause. I mean, I’ve always been a stickler for traditional pickling methods that take days or weeks, but that night, we gave the quick refrigerator dill pickles a shot. The result? Crisp, flavorful pickles ready in just 24 hours that honestly surprised me more than anyone.
It happened on a hectic Tuesday when I forgot to soak the cucumbers overnight as I usually do. We were running late for a backyard barbecue, and my friend’s suggestion was born out of impatience—but it turned into a happy accident. The pickles weren’t just okay; they were punchy, crunchy, and had that fresh homemade vibe that usually takes forever to nail. Maybe you’ve been there—wanting that satisfying crunch without the long wait. This recipe stuck with me because it proved that sometimes, bending the rules in the kitchen pays off.
Let me tell you, I wasn’t prepared for how simple it would be to get those classic dill flavors in under a day. So, if you want to impress guests or just snack on something tangy and crisp without the commitment of traditional pickling, this quick refrigerator dill pickles recipe might just become your new go-to.
Why You’ll Love This Recipe
Having tested countless pickling techniques over the years, this quick refrigerator dill pickles recipe stands out for several reasons. I’ve found it to be a reliable, no-fuss way to bring homemade crispiness to your kitchen without a long waiting game. Here’s why you’ll love it:
- Quick & Easy: Ready to enjoy in just 24 hours — perfect for last-minute pickle cravings or a spontaneous snack.
- Simple Ingredients: Uses pantry staples and fresh cucumbers, no fancy or hard-to-find items needed.
- Perfect for Summer BBQs: Adds that cool, tangy crunch that pairs beautifully with grilled meats and sandwiches.
- Crowd-Pleaser: My friends and family can’t get enough of these — they’re crunchy, garlicky, and just the right amount of sour.
- Unbelievably Delicious: The balance of dill, garlic, and vinegar hits every note for that classic pickle flavor.
What sets this recipe apart is the method: skipping the traditional canning and fermentation, you still get that authentic dill pickle taste and texture through a quick refrigeration process. Plus, the use of fresh dill and garlic gives it a vibrant aroma and bite. Honestly, it’s the kind of pickle that makes you close your eyes after the first crunch and nod in approval. Whether you’re new to pickling or a seasoned pro, this recipe delivers pickle perfection with minimal effort.
What Ingredients You Will Need
This recipe uses simple, wholesome ingredients to deliver bold flavor and satisfying crunch without fuss or specialty items. Most are pantry staples or easy to find at any grocery store.
- Fresh cucumbers: 4-5 medium Kirby or Persian cucumbers (these varieties are crisp and perfect for pickling)
- Fresh dill: 3-4 sprigs (adds that iconic dill flavor — use more if you like it herbaceous)
- Garlic cloves: 3 cloves, peeled and smashed (for a punch of savory aroma)
- White vinegar: 1 cup (250 ml) (provides the tang and preserves freshness — Heinz is a reliable choice)
- Water: 1 cup (250 ml) (balances the vinegar’s acidity)
- Pickling salt: 1 tablespoon (or kosher salt, but avoid iodized salt which can cloud the brine)
- Granulated sugar: 1 teaspoon (optional, to round out the vinegar’s sharpness)
- Black peppercorns: 1 teaspoon (adds subtle heat and complexity)
- Red pepper flakes: 1/2 teaspoon (optional, for a gentle kick)
If you want to mix it up, swapping white vinegar for apple cider vinegar creates a fruitier tang, and using lemon slices can add brightness. For a gluten-free version, just double-check your vinegar brand to avoid additives. And if you’re allergic to garlic, shallots or green onions can give a subtle allium punch instead. I usually recommend organic cucumbers when possible for the freshest, crunchiest results, but regular ones work just fine.
Equipment Needed
For making these quick refrigerator dill pickles, you don’t need anything fancy. A few basic kitchen tools will do the job nicely:
- Quart-sized glass jar: A clean mason jar or any glass container with a tight-fitting lid works best to hold the pickles and brine.
- Measuring cups and spoons: For precise vinegar, water, salt, and spice measurements.
- Sharp knife and cutting board: To slice the cucumbers evenly — I like to do thin rounds or spears depending on mood.
- Mixing bowl: For combining the brine ingredients before pouring into the jar.
- Small saucepan (optional): If you prefer to warm the brine slightly to dissolve salt and sugar faster, though cold brine works fine too.
Personally, I’ve found that using glass jars helps maintain the crispness better than plastic containers. If you don’t have a mason jar, any clean, food-safe container with a lid will do. For slicing, a mandoline can speed things up, but a steady hand with a knife works just as well. Keeping your cucumbers dry before packing helps prevent sogginess, which is a trick I learned the hard way after a few mushy batches!
Preparation Method
- Wash and Prepare Cucumbers: Rinse 4-5 medium Kirby cucumbers under cold water. Trim off the blossom end (this helps keep pickles crisp). Slice cucumbers into your preferred shape: thin rounds about 1/4 inch (6 mm) thick or spears about 3-4 inches (7.5-10 cm) long. Pat them dry with a clean towel to remove excess moisture. (5 minutes)
- Prepare the Brine: In a mixing bowl, combine 1 cup (250 ml) white vinegar, 1 cup (250 ml) cold water, 1 tablespoon pickling salt, and 1 teaspoon granulated sugar (optional). Stir until salt and sugar dissolve. You can warm the mixture slightly in a small saucepan to speed this up but it’s not necessary. (3-5 minutes)
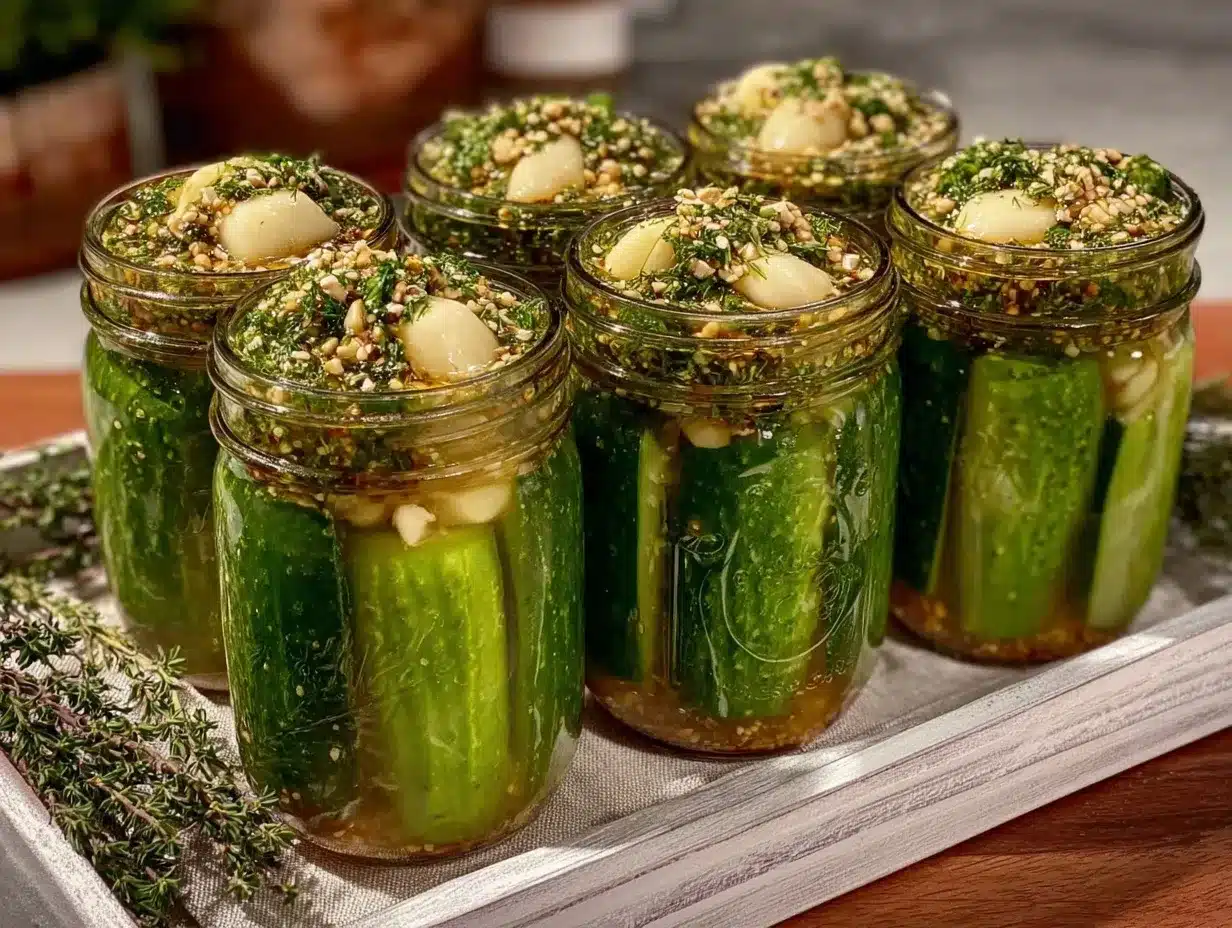
- Pack the Jar: Place 3-4 sprigs of fresh dill, 3 smashed garlic cloves, 1 teaspoon black peppercorns, and 1/2 teaspoon red pepper flakes (if using) into the bottom of a clean quart-sized glass jar.
- Pack the sliced cucumbers snugly into the jar, leaving about 1/2 inch (1.3 cm) of headspace at the top.
- Pour the Brine: Pour the brine over the cucumbers and herbs, fully submerging them. If needed, press down lightly with a clean utensil to release trapped air bubbles. Seal the jar tightly with the lid.
- Refrigerate: Place the jar in the refrigerator for at least 24 hours before tasting. The flavors develop quickly, but for best results, wait a full day. The cucumbers will remain crisp with that characteristic dill tang. (24 hours minimum)
Tips: If your pickles taste too sharp at first, don’t worry — the flavor mellows after a day or two. Also, avoid using cucumbers that are too large or seedy; smaller firm cucumbers make crunchier pickles. If you notice any cloudiness or off smells after a few days, discard the batch (though this is rare when refrigerated properly). This method does not require canning or boiling, so it’s perfect for quick pickling without fuss.
Cooking Tips & Techniques
When making quick refrigerator dill pickles, there are a few tricks I’ve picked up that make all the difference. First, trimming the blossom end of the cucumber is key — it contains enzymes that can cause softening. Don’t skip this step if you want maximum crunch.
Also, press the cucumbers firmly into the jar to avoid air pockets, which can lead to uneven flavor absorption or spoilage. I’ve tossed out a few batches where I didn’t press down enough—lesson learned! Using pickling salt instead of table salt avoids unwanted cloudiness and bitterness.
Warming the brine is optional but helps salt and sugar dissolve faster. I usually mix it cold when in a hurry, and it still turns out great. One common mistake is overfilling the jar without enough headspace; leave room so the brine covers everything and the jar seals well.
Timing-wise, I find 24 hours in the fridge is the sweet spot for crispness and flavor. If you want softer, more sour pickles, leave them longer. Multitasking tip: while your pickles chill, you can prep a quick crispy garlic chicken to turn your snack into a full meal!
Variations & Adaptations
This quick refrigerator dill pickles recipe is super flexible. Here are a few of my favorite twists and tweaks:
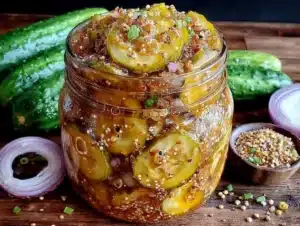
- Spicy Pickles: Add sliced jalapeños or increase red pepper flakes for a fiery kick.
- Sweet Pickles: Increase sugar to 2 tablespoons and add a cinnamon stick for a sweeter, spiced version.
- Herb Variations: Swap dill for fresh tarragon or basil for a different herbal note.
- Low-Sodium: Reduce pickling salt by half and add a splash of lemon juice to keep tanginess.
- Seedless & Allergy-Friendly: Omit garlic and peppercorns and add fresh ginger slices for a milder flavor.
I once tried a smoky version by adding a small pinch of smoked paprika and a bay leaf—totally unexpected but delicious! For different cooking methods, you can also try refrigerator pickling with sliced carrots or green beans for crunchy veggie combos. The key is to keep everything submerged and refrigerated for crisp results.
Serving & Storage Suggestions
Serve these quick refrigerator dill pickles chilled straight from the jar for the best crisp texture. They’re fantastic alongside sandwiches, burgers, or as a tangy snack on their own. Try pairing them with a creamy dip or your favorite charcuterie board for a refreshing contrast.
Store the pickles in the refrigerator, tightly sealed. They keep well for up to 3 weeks, though they’re usually gobbled up much faster in my house. The flavor continues to develop the longer they sit, but the crunch may lessen after about two weeks.
Reheating isn’t necessary, but if you want warm pickles in a recipe like fried pickle chips, pat them dry first to avoid sogginess. The pickles also make a great ingredient in potato salad or deviled eggs, adding a bright punch to classic dishes.
Nutritional Information & Benefits
These quick refrigerator dill pickles are low in calories — about 10-15 calories per serving (roughly 3-4 pickle slices) — making them a guilt-free snack. They’re naturally fat-free and low-carb, suitable for keto or low-calorie diets. The cucumbers provide hydration and a small amount of vitamins K and C, while the garlic contributes antioxidants.
Using fresh dill adds trace minerals and antioxidants, supporting digestion and immunity. The vinegar acts as a natural preservative and may aid blood sugar regulation. If you’re sensitive to sodium, consider adjusting the salt amount, but for most, these pickles offer a flavorful, crunchy way to enjoy veggies with minimal impact on your diet.
Conclusion
This quick refrigerator dill pickles recipe is a game-changer for anyone craving homemade pickles without the long wait. It’s simple, fast, and honestly, delicious enough to make you rethink traditional pickling methods. I love how it fits into busy days and impromptu gatherings, bringing that satisfying crunch and tang in just 24 hours.
Feel free to customize the spices and herbs to suit your taste buds, and don’t be afraid to experiment with different veggies in the same brine. I’d love to hear how your pickles turn out or your favorite variations—drop a comment below or share your photos! Give this recipe a try and enjoy the taste of homemade crispness anytime you want.
Remember, sometimes the best kitchen discoveries come from being open to a little rule-bending—and these crisp quick refrigerator dill pickles are proof of that.
Frequently Asked Questions
How long do refrigerator dill pickles last?
Stored properly in a sealed jar in the fridge, these pickles stay fresh for up to 3 weeks. After two weeks, they may soften slightly but remain tasty.
Can I use regular cucumbers instead of Kirby or Persian?
You can, but larger cucumbers tend to have more seeds and a softer texture, which may lead to less crisp pickles. Smaller, firm cucumbers are best for crunch.
Do I have to use fresh dill?
Fresh dill gives the best flavor and aroma, but dried dill weed can be used in a pinch—use about 1 teaspoon dried instead of sprigs.
Can I make these pickles spicy?
Absolutely! Add sliced jalapeños, extra red pepper flakes, or even a dash of hot sauce to the brine before refrigerating.
Is it necessary to heat the brine?
Heating the brine helps dissolve salt and sugar faster but isn’t required. Cold brine will still produce delicious pickles, just give the salt a good stir to dissolve.
Pin This Recipe!
Quick Refrigerator Dill Pickles Recipe Easy Homemade Crispy Pickles in 24 Hours

A quick and easy recipe for crisp, flavorful dill pickles ready in just 24 hours using a simple refrigerator pickling method without traditional canning.
- Prep Time: 10 minutes
- Cook Time: 0 minutes
- Total Time: 24 hours 10 minutes
- Yield: 4-5 servings 1x
- Category: Condiment
- Cuisine: American
Ingredients
- 4–5 medium Kirby or Persian cucumbers
- 3–4 sprigs fresh dill
- 3 garlic cloves, peeled and smashed
- 1 cup (250 ml) white vinegar
- 1 cup (250 ml) water
- 1 tablespoon pickling salt
- 1 teaspoon granulated sugar (optional)
- 1 teaspoon black peppercorns
- 1/2 teaspoon red pepper flakes (optional)
Instructions
- Wash and prepare cucumbers: rinse 4-5 medium Kirby cucumbers under cold water. Trim off the blossom end. Slice cucumbers into thin rounds about 1/4 inch thick or spears about 3-4 inches long. Pat dry with a clean towel to remove excess moisture.
- Prepare the brine: in a mixing bowl, combine 1 cup white vinegar, 1 cup cold water, 1 tablespoon pickling salt, and 1 teaspoon granulated sugar (optional). Stir until salt and sugar dissolve. Warming the mixture slightly is optional.
- Pack the jar: place 3-4 sprigs of fresh dill, 3 smashed garlic cloves, 1 teaspoon black peppercorns, and 1/2 teaspoon red pepper flakes (if using) into the bottom of a clean quart-sized glass jar.
- Pack the sliced cucumbers snugly into the jar, leaving about 1/2 inch of headspace at the top.
- Pour the brine over the cucumbers and herbs, fully submerging them. Press down lightly with a clean utensil to release trapped air bubbles. Seal the jar tightly with the lid.
- Refrigerate the jar for at least 24 hours before tasting to allow flavors to develop and cucumbers to remain crisp.
Notes
Trim the blossom end of cucumbers to keep pickles crisp. Press cucumbers firmly into the jar to avoid air pockets. Warming the brine is optional but helps dissolve salt and sugar faster. Leave about 1/2 inch headspace in the jar. Store pickles refrigerated up to 3 weeks. Flavor mellows after a day or two. Avoid using large, seedy cucumbers for best crunch.
Nutrition
- Serving Size: Approximately 3-4 pi
- Calories: 12
- Sugar: 1
- Sodium: 400
- Carbohydrates: 3
- Fiber: 0.5
- Protein: 0.3
Keywords: quick pickles, refrigerator pickles, dill pickles, homemade pickles, easy pickling, crispy pickles, no canning pickles