A woman named Rosa watched me staring at the spice aisle in a tiny corner market on a Tuesday afternoon. I was holding a jar of chili powder like it might bite me, completely overwhelmed by the choices. She didn’t say anything at first. Then she reached past me, grabbed a bag of dried ancho chiles, and said, “Forget the powder. This is where the smoke lives.” I laughed and told her I needed dinner on the table in thirty minutes, not a weekend project. She nodded like she understood completely—the kind of nod that says, “I’ve been there, honey.” She walked me through her quick stovetop method right there in the aisle, using her hands to show how she crumbles the meat and lets the paprika bloom. No beans, she insisted. Beans just get in the way when you want that pure, smoky beef flavor. I scribbled her instructions on a receipt with a pen that was running out of ink. Honestly, I forgot half of what she said by the time I got home. But I remembered the important part: keep it simple, keep it fast, and let the meat do the talking. That conversation changed how I make chili forever.
This Quick Smoky No Bean Texas Chili is the recipe I’ve been making ever since. It’s the one I turn to on those nights when I walk through the door at 6 PM with a hungry family and zero energy left to negotiate. You know the feeling—when you need something that tastes like you spent hours stirring and simmering, but really you just want to chop, brown, and be done. This chili delivers exactly that. It’s got that deep, campfire smokiness from the paprika and cumin, the rich texture from ground beef that breaks apart beautifully, and zero beans to argue about. I mean, I like beans just fine, but this is Texas-style chili, and the rules are clear: meat, chiles, and time (or in our case, a smart shortcut).
I’ve tweaked Rosa’s method over the years, adding a splash of Worcestershire for depth and a pinch of cocoa powder that nobody can identify but everyone loves. The first time I made it, I accidentally dumped in way too much cayenne and we drank milk with dinner like it was a fire drill. Learn from my mistake, friend. Go easy on the heat until you know your crowd. This recipe has become my weeknight secret weapon, and I think it’s about to become yours too.
Why You’ll Love This Recipe
Let me tell you why this Quick Smoky No Bean Texas Chili has earned a permanent spot in my weekly rotation. First off, it comes together in about 30 minutes from start to finish. That’s not a typo. You can have a pot of deeply flavored, soul-warming chili on the table faster than you can decide what to order for delivery. For busy weeknights, that’s practically a miracle.
- Quick & Easy: From the moment you pull out the skillet to the moment you’re ladling chili into bowls, you’re looking at about 30 minutes. No soaking, no simmering for hours, no complicated steps. Just honest cooking that respects your time.
- Simple Ingredients: You probably have most of these in your pantry right now. Ground beef, canned tomatoes, chili powder, cumin, paprika—these are not exotic finds. No special trips to a specialty store required. I mean it.
- Perfect for Weeknights: This is the definition of a busy-day dinner. It’s one pot, minimal cleanup, and the kind of meal that fills up hungry people fast. Great for after soccer practice, late meetings, or those days when you just can’t.
- Crowd-Pleaser: I’ve served this to picky kids, spice-averse relatives, and hardcore chili purists. Every single time, the pot comes back empty. There’s something about that smoky, beefy flavor that just works for everybody.
- Unbelievably Delicious: This doesn’t taste like a 30-minute chili. It tastes like something you’ve been tending all afternoon. The secret is in the technique—blooming the spices in the rendered fat, letting the tomato paste caramelize, and using the right balance of smoky and savory.
What makes this recipe different from every other quick chili out there is the attention to those small moments. Most fast chili recipes just dump everything in a pot and hope for the best. Not this one. You take the extra two minutes to toast the spices in the beef fat, and that single step changes everything. The smokiness becomes part of the meat itself, not just a flavor floating on top. Plus, the no-bean approach means the beef stays front and center, giving you that thick, hearty texture that real Texas chili is known for.
Honestly, this is the kind of recipe that makes you close your eyes after the first bite. It’s comfort food reimagined—faster, simpler, but with the same soul-soothing satisfaction. Perfect for impressing guests without stress, or turning a regular Tuesday into something worth looking forward to.
What Ingredients You Will Need
This recipe uses simple, mostly pantry-staple ingredients to deliver that bold, smoky flavor without any fuss. Here’s what you’ll need to grab:
For the Chili Base
- 2 pounds ground beef (80/20 blend works best—the fat adds flavor and keeps the meat tender. I prefer ground chuck for its balance of richness and texture.)
- 1 large yellow onion, diced (about 1 ½ cups. Sweet or yellow onions melt into the chili beautifully. Red onion works in a pinch but gives a sharper flavor.)
- 4 cloves garlic, minced (fresh is non-negotiable here. Jarred garlic just doesn’t bring the same punch.)
- 2 tablespoons tomato paste (this is your flavor bomb. It adds depth and helps thicken the chili. I recommend double-concentrated paste in a tube—it keeps longer and tastes richer.)
- 1 can (14.5 ounces) fire-roasted diced tomatoes (don’t drain them. The liquid is part of the sauce. Fire-roasted adds that extra smoky layer without any extra work.)
- 1 cup beef broth (low-sodium so you can control the salt. Better Than Bouillon roasted beef base is my go-to for the richest flavor.)
The Smoky Spice Blend
- 2 tablespoons chili powder (use a good-quality blend. I like McCormick or a local spice shop blend. Avoid old spices—they lose their punch.)
- 1 tablespoon smoked paprika (this is the star of the show. Regular paprika won’t give you that campfire taste. Get the real smoked stuff.)
- 1 tablespoon ground cumin (toast it briefly in the pan for maximum effect. Cumin and smoked paprika are best friends in this recipe.)
- 1 teaspoon dried oregano (Mexican oregano if you have it—it’s earthier and more floral. Regular oregano works fine too.)
- ½ teaspoon cayenne pepper (adjust to your heat preference. Start with ¼ teaspoon if you’re sensitive, or leave it out entirely for a mild chili.)
- 1 teaspoon kosher salt (plus more to taste. Diamond Crystal is my preference—it’s less salty by volume, so you have more control.)
- ½ teaspoon black pepper (freshly ground, always.)
The Secret Boosters
- 1 teaspoon unsweetened cocoa powder (trust me on this. It doesn’t make the chili taste like chocolate. It adds an earthy depth that rounds out the acidity of the tomatoes. I use Ghirardelli or any good baking cocoa.)
- 1 tablespoon Worcestershire sauce (adds umami and a little tang. Lea & Perrins is the standard for a reason.)
- 1 tablespoon apple cider vinegar (added at the end to brighten everything up. Don’t skip it—it’s the secret to making the flavors pop.)
For Serving (Optional but Recommended)
- Shredded cheddar cheese (sharp cheddar stands up best to the smoky flavors)
- Sour cream or Greek yogurt (for cooling the heat)
- Fresh cilantro, chopped
- Pickled jalapeños (for extra tang and heat)
- Cornbread or tortilla chips (for dipping and scooping)
Substitution Guidance: For a leaner option, use ground turkey or chicken, but add a tablespoon of olive oil to compensate for the missing fat. For a gluten-free version, ensure your Worcestershire sauce is gluten-free (Lea & Perrins original is). If you’re out of fire-roasted tomatoes, regular diced tomatoes plus an extra teaspoon of smoked paprika will get you close. And if you absolutely must have beans, you can stir in a can of drained black beans at the end, but then it’s not Texas chili anymore—it’s just chili. No judgment either way.
Equipment Needed
You don’t need a fancy kitchen to make this Quick Smoky No Bean Texas Chili. Here’s what you’ll actually use:
- Large heavy-bottomed pot or Dutch oven (5 to 6 quarts is ideal. A Dutch oven holds heat evenly and prevents scorching. I use my trusty Lodge enameled cast iron, but a stainless steel stockpot works too.)
- Wooden spoon or spatula (for breaking up the meat and stirring. A flat-edged wooden spoon is perfect for scraping up the browned bits from the bottom.)
- Chef’s knife and cutting board (for dicing the onion and mincing garlic. A sharp knife makes this go so much faster.)
- Measuring spoons (for the spices. Yes, you can eyeball, but measuring ensures consistency the first time.)
- Can opener (basic but essential.)
- Ladle (for serving. A 6-ounce ladle is the perfect size for chili bowls.)
Budget-Friendly Options: If you don’t own a Dutch oven, a deep nonstick skillet with a lid will work. You just might need to watch the heat more carefully to prevent sticking. A cast iron skillet also works beautifully—it holds heat like a dream. For the stirring, any sturdy spoon will do. Don’t let missing equipment stop you from making this tonight.
Personal Note: I’ve made this chili in a cheap aluminum pot while camping, and it still turned out great. The key is patience during the browning step, not the pot itself. So use what you’ve got.
Preparation Method
Let’s get cooking. This whole process takes about 30 minutes, and I’ll walk you through every step so you nail it the first time.
- Preheat your pot over medium-high heat. Let it get hot for a full 2 minutes before adding anything. You want that sizzle when the meat hits the pan. Add the ground beef directly to the dry pot—no oil needed since the 80/20 blend has plenty of fat.
- Brown the beef, breaking it apart as it cooks. Use your wooden spoon to break the meat into small, even crumbles. Let it cook undisturbed for 3-4 minutes to develop a good sear on one side before stirring. You’re looking for deep brown color, not gray. This takes about 6-8 minutes total. Don’t rush this step—it’s where most of the flavor comes from.
- Add the diced onion and cook for 3 minutes. Stir it into the browned meat and let it soften. The onions will start to turn translucent and pick up some of those browned bits from the bottom of the pot. If the pot looks dry, don’t worry—the beef fat will keep everything moving.
- Add the minced garlic and cook for 30 seconds. Garlic burns fast, so keep stirring. You’ll smell it immediately—that’s your cue to move to the next step. Don’t walk away here. Burnt garlic will ruin the whole pot.
- Add the tomato paste and stir for 1 minute. This is a crucial step. Let the tomato paste cook in the fat until it darkens slightly and starts to smell sweet and rich. It should look like it’s caramelizing, not burning. This deepens the flavor enormously.
- Add all the spices: chili powder, smoked paprika, cumin, oregano, cayenne, salt, pepper, and cocoa powder. Stir constantly for 30-60 seconds until the spices are fragrant and coating the meat. This blooming step wakes up the spices and makes them taste toasted and warm instead of raw. Your kitchen will smell incredible right about now.
- Pour in the fire-roasted tomatoes (with their juices) and beef broth. Stir well, scraping the bottom of the pot to release any browned bits. That’s pure flavor right there. Add the Worcestershire sauce and stir again.
- Bring the chili to a boil, then reduce the heat to low. Let it simmer uncovered for 15-20 minutes, stirring occasionally. The chili will thicken as it cooks. If it looks too thick, add a splash more broth. If it looks too thin, let it simmer a few minutes longer. You’re looking for a hearty, spoon-coating consistency.
- Remove from heat and stir in the apple cider vinegar. This brightens all the flavors and balances the richness. Taste and adjust salt and heat levels. Add more cayenne if you want it spicier, more salt if it tastes flat.
- Let the chili rest for 5 minutes before serving. This allows the flavors to settle and meld together. I know it’s hard to wait, but it makes a difference.
Sensory Cues: At step 6, the spices should smell warm and smoky, not acrid. If they smell burnt, your heat is too high. At step 8, the chili should bubble lazily, not furiously. The finished chili should be thick enough that a spoon dragged through it leaves a trail that slowly fills back in. If it’s watery, give it 5 more minutes uncovered.
Troubleshooting: If your chili tastes bitter, you might have burned the garlic or tomato paste. Next time, lower the heat. If it’s too spicy, stir in a tablespoon of sour cream or a splash of milk to mellow it out. If it’s bland, it probably needs more salt or another splash of vinegar. Acidity is often the missing piece.
Cooking Tips & Techniques
I’ve made this Quick Smoky No Bean Texas Chili at least thirty times, and I’ve learned a few things the hard way. Let me save you the trouble.
Don’t skip the browning. I know it’s tempting to just dump everything in and save time, but that deep brown crust on the beef is where the flavor lives. If you crowd the pan or stir too often, the meat steams instead of sears. Give it space and patience. The difference between a good chili and a great one is often just those extra 3 minutes of browning.
Bloom your spices. This is the single most important technique in this recipe. When you add dried spices to hot fat, their essential oils release and their flavors intensify. If you dump them in with the liquid, they stay tasting raw and dusty. That 30-second window after adding the tomato paste is your golden opportunity. I learned this after making a flat, sad chili for years. Now I never skip it.
One time I forgot the cocoa powder. I was rushing, the kids were hungry, and I just left it out. The chili was fine, but it was missing that mysterious depth that makes people say, “What’s in this? It’s so good.” The cocoa doesn’t make it taste like dessert—it just rounds out the edges. Don’t skip it.
Multitasking strategy: While the beef is browning, dice your onion and mince your garlic. While the chili simmers, shred your cheese and chop your cilantro. This way, everything comes together at the same time. I also like to start a batch of cornbread in the oven while the chili simmers—they finish at the same moment. Perfect timing.
For consistency: Use the same measuring spoons every time. Spices settle differently depending on the brand and freshness. If you find a combination you love, write it down on a sticky note and tape it inside your spice cabinet. That’s what I did, and now I never second-guess the amounts.
Variations & Adaptations
This recipe is forgiving, and you can twist it in a dozen different directions. Here are a few variations I’ve tried and loved:
Spicy Smoky Version
Double the cayenne to 1 teaspoon and add 1 diced chipotle pepper in adobo sauce (from a can). That chipotle adds incredible smoky heat that takes the chili to another level. I do this when it’s just for adults or when I’m craving something with real kick. Just warn your family before they take a big bite.
Mild & Kid-Friendly
Skip the cayenne entirely and use sweet paprika instead of smoked if your kids are sensitive to smoky flavors. Add a tablespoon of brown sugar to balance the acidity. My nephew calls this “ketchup chili” and eats three bowls. Whatever works, right?
Slow Cooker Adaptation
Brown the beef and bloom the spices on the stovetop first (don’t skip this—it’s non-negotiable even for the slow cooker). Then transfer everything to a slow cooker and cook on low for 4-6 hours or high for 2-3 hours. Add the apple cider vinegar at the end. The flavor deepens beautifully, and your house will smell amazing all afternoon.
Turkey or Vegetarian Option
Swap the ground beef for ground turkey (add 1 tablespoon oil) or use 2 cans of black beans and 1 cup of textured vegetable protein for a vegetarian version. The texture changes, but the smoky flavor still works. I’ve made the turkey version for a friend who doesn’t eat red meat, and she asked for the recipe.
Extra-Veggie Chili
Add 1 diced bell pepper (any color) and 1 diced zucchini when you add the onion. They’ll soften into the chili and add nutrients without changing the flavor much. My husband didn’t even notice the zucchini the first time I snuck it in. Victory.
Serving & Storage Suggestions
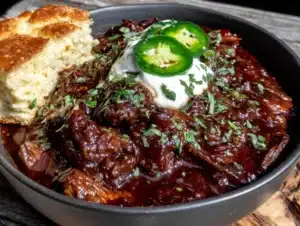
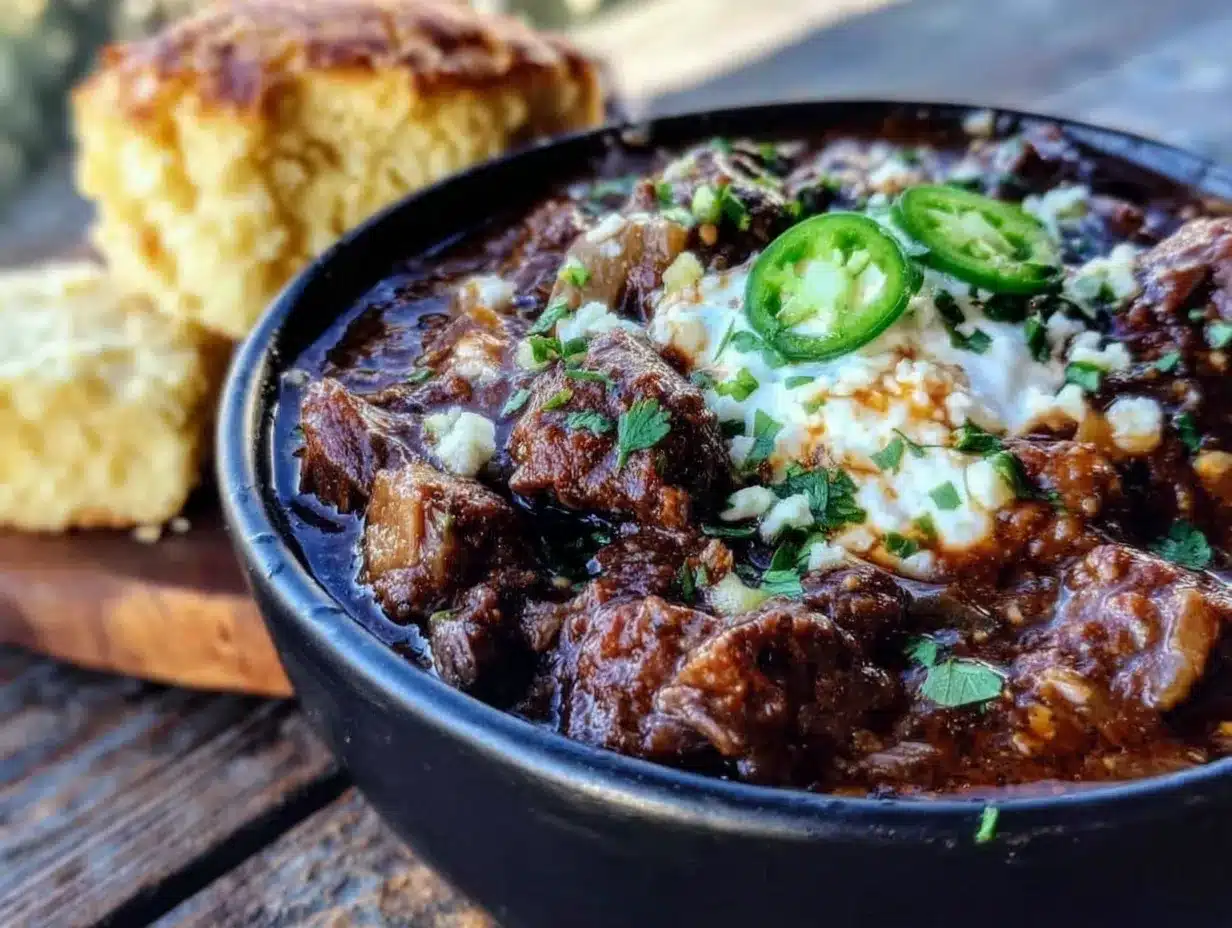
Serving: Ladle the chili into deep bowls while it’s still hot. Top with a generous handful of shredded cheddar cheese, a dollop of sour cream, and a sprinkle of fresh cilantro. The cool sour cream against the warm, smoky chili is a perfect contrast. Serve with warm cornbread, tortilla chips for scooping, or even over a baked potato for a loaded chili experience. I like to set up a little topping bar so everyone can customize their own bowl—it makes dinner feel special without extra work for me.
Storage: This chili keeps beautifully in the refrigerator for up to 5 days. Store it in an airtight container, and the flavors will actually deepen overnight. I often make a double batch on Sunday and eat it for lunches all week. It’s one of those rare recipes that tastes even better the next day.
Freezing: This chili freezes like a dream. Let it cool completely, then transfer to freezer-safe containers or zip-top bags. Leave a little room for expansion. It will keep for up to 3 months. Thaw overnight in the refrigerator, then reheat gently on the stovetop or in the microwave. Add a splash of broth if it’s too thick after thawing.
Reheating: The best way to reheat is on the stovetop over medium-low heat, stirring occasionally. Add a tablespoon of water or broth if it’s too thick. In the microwave, heat in 30-second bursts, stirring between each, until hot. The texture stays surprisingly good either way.
Flavor Development: Like many stews and braises, this chili gets better with time. The spices meld, the acidity mellows, and the flavors become more cohesive. If you can make it a day ahead, do it. But honestly, it’s still fantastic straight from the pot.
Nutritional Information & Benefits
Here’s an approximate nutritional breakdown per serving (based on 6 servings, without toppings):
| Nutrient | Amount per Serving |
|---|---|
| Calories | 385 |
| Protein | 34g |
| Fat | 22g |
| Saturated Fat | 8g |
| Carbohydrates | 12g |
| Fiber | 3g |
| Sugar | 6g |
| Sodium | 780mg |
This chili is high in protein from the beef, which keeps you full and satisfied. The tomatoes provide lycopene, an antioxidant linked to heart health. Smoked paprika and cumin are both rich in anti-inflammatory compounds. The cocoa powder adds flavonoids, which support cardiovascular health. It’s also naturally gluten-free and low-carb, making it suitable for keto and paleo diets (just skip the cornbread).
Dietary Considerations: This recipe contains no dairy, eggs, or nuts in the chili itself. For a lower-sodium version, use no-salt-added tomatoes and low-sodium beef broth, and reduce the added salt. For a lower-fat version, use lean ground beef (90/10) and drain off excess fat after browning.
I don’t pretend this is health food, but it’s a solid, protein-rich meal that fits into a balanced diet. And honestly, the satisfaction factor is high enough that you won’t feel the need to snack an hour later. That’s a win in my book.
Conclusion
This Quick Smoky No Bean Texas Chili is the kind of recipe that earns a permanent place in your rotation. It’s fast enough for a frantic Tuesday, but the flavor is deep enough to impress company. The smokiness, the richness, the way it comes together in one pot with minimal fuss—it’s everything I want in a weeknight dinner.
What I love most about this recipe is how adaptable it is. You can make it spicy or mild, add veggies or keep it pure, serve it with cornbread or over fries. It bends to your mood and your pantry without losing its soul. That’s the mark of a great recipe, if you ask me.
I’d love to hear how yours turns out. Did you add your own twist? Did your family clean their bowls? Leave a comment below and let me know. And if you snap a photo, tag me on Pinterest—I love seeing your creations. This chili deserves to be shared, and I’m pretty sure once you make it, you’ll be passing it along too. Just like Rosa did for me.
Frequently Asked Questions
Can I use ground turkey instead of beef?
Absolutely. Use ground turkey (93/7 or 85/15) and add 1 tablespoon of olive oil to the pot before browning. The flavor will be slightly lighter, but the smoky spices still carry it beautifully. Just don’t skip the browning step—turkey needs that color even more than beef does.
How do I make this chili less spicy?
Skip the cayenne pepper entirely and use sweet paprika instead of smoked if you’re very sensitive. The chili will still have warmth from the chili powder, but it will be mild enough for kids and spice-averse eaters. You can also serve it with extra sour cream to cool things down.
Can I add beans to this recipe?
You can, but then it’s not Texas chili anymore. If you want beans, stir in one can of drained and rinsed black beans or kidney beans during the last 5 minutes of simmering. The texture and flavor will still be great—just don’t tell a Texan.
How long does this chili last in the fridge?
Up to 5 days in an airtight container. The flavors actually improve after a day or two as the spices meld together. It’s one of those rare recipes that’s even better as leftovers. Just reheat gently on the stovetop or in the microwave.
Can I double this recipe?
Yes, and I often do. Double all the ingredients and use a larger pot (at least 8 quarts). The cooking time stays roughly the same, though you may need an extra 5 minutes for the beef to brown in batches. The leftovers freeze beautifully, so a double batch is never wasted.
PrintQuick Smoky No Bean Texas Chili | Best Easy 30-Min Recipe

A quick and easy Texas-style chili made without beans, featuring deep smoky flavor from paprika and cumin, ready in just 30 minutes. Perfect for busy weeknights.
- Prep Time: 10 minutes
- Cook Time: 20 minutes
- Total Time: 30 minutes
- Yield: 6 servings 1x
- Category: Main Course
- Cuisine: Tex-Mex
Ingredients
- 2 pounds ground beef (80/20 blend)
- 1 large yellow onion, diced (about 1 ½ cups)
- 4 cloves garlic, minced
- 2 tablespoons tomato paste
- 1 can (14.5 ounces) fire-roasted diced tomatoes (undrained)
- 1 cup beef broth (low-sodium)
- 2 tablespoons chili powder
- 1 tablespoon smoked paprika
- 1 tablespoon ground cumin
- 1 teaspoon dried oregano (Mexican oregano preferred)
- ½ teaspoon cayenne pepper (adjust to taste)
- 1 teaspoon kosher salt
- ½ teaspoon black pepper (freshly ground)
- 1 teaspoon unsweetened cocoa powder
- 1 tablespoon Worcestershire sauce
- 1 tablespoon apple cider vinegar
- For serving (optional): shredded cheddar cheese, sour cream or Greek yogurt, fresh cilantro, pickled jalapeños, cornbread or tortilla chips
Instructions
- Preheat a large heavy-bottomed pot or Dutch oven over medium-high heat for 2 minutes. Add the ground beef directly to the dry pot and brown, breaking it apart with a wooden spoon, for 6-8 minutes until deep brown.
- Add the diced onion and cook for 3 minutes until translucent.
- Add the minced garlic and cook for 30 seconds, stirring constantly.
- Add the tomato paste and stir for 1 minute until it darkens and smells sweet.
- Add all spices (chili powder, smoked paprika, cumin, oregano, cayenne, salt, pepper, cocoa powder) and stir for 30-60 seconds until fragrant.
- Pour in the fire-roasted tomatoes (with juices) and beef broth. Stir well, scraping the bottom of the pot. Add Worcestershire sauce and stir.
- Bring to a boil, then reduce heat to low and simmer uncovered for 15-20 minutes, stirring occasionally, until thickened.
- Remove from heat and stir in apple cider vinegar. Taste and adjust salt and heat as needed.
- Let the chili rest for 5 minutes before serving. Serve with desired toppings.
Notes
Don’t skip browning the beef or blooming the spices—these steps are key for deep flavor. For a milder chili, omit cayenne. For extra heat, add diced chipotle pepper in adobo. Leftovers keep up to 5 days in the fridge and freeze well for up to 3 months.
Nutrition
- Serving Size: 1 serving (about 1 ½
- Calories: 385
- Sugar: 6
- Sodium: 780
- Fat: 22
- Saturated Fat: 8
- Carbohydrates: 12
- Fiber: 3
- Protein: 34
Keywords: Texas chili, no bean chili, quick chili, smoky chili, 30-minute chili, ground beef chili, weeknight dinner